Categories
Tips

Ways to Work Around Quirky Bathroom Layouts and Features

Ways to Work Around Quirky Bathroom Layouts and Features

Ways to Work Around Quirky Bathroom Layouts and Features

We’ve all been there – you finally move into a new home, excited to put your stamp on the space, only to find that the bathroom is…well, a bit quirky. Maybe it’s an awkwardly angled room, or a strangely placed window that just doesn’t fit the flow you had envisioned. Or perhaps you’re dealing with those odd little nooks and crannies that make styling and storage a real challenge.

Fear not, my friends! As a self-proclaimed bathroom design enthusiast, I’m here to share my top tips and tricks for working around those quirky layouts and features to create a space that’s both functional and fabulous.

Embrace the Angles

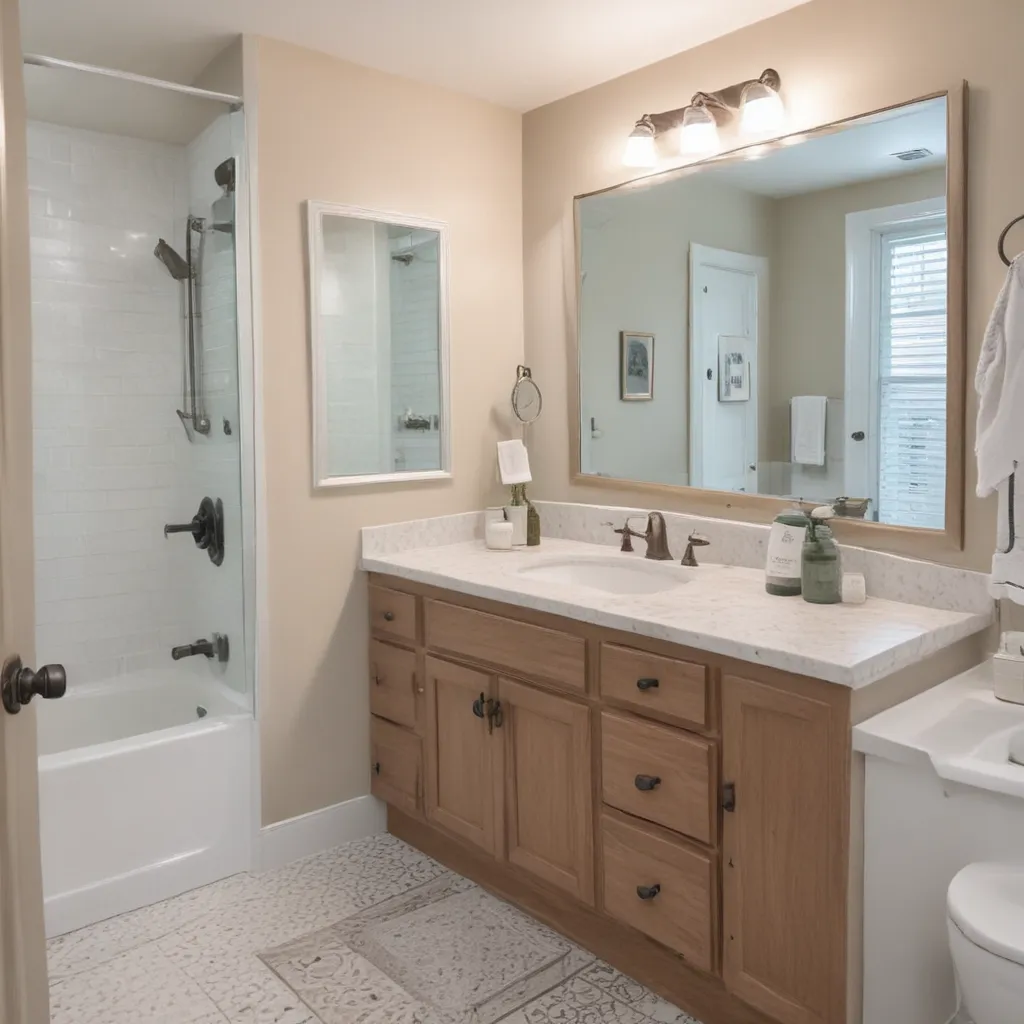
Let’s start with those strangely angled bathrooms. You know the ones – where the walls just don’t line up quite right, or there’s an odd nook that juts out in an unexpected way. Instead of fighting against the architecture, why not lean into it?

One of my favorite ways to do this is by using an accent wall. Now, I know accent walls have gotten a bit of a bad rap in the past – some may see them as the “coward’s approach” to bold color. But hear me out! When done right, an accent wall can be an absolute game-changer in a quirky space.

The key is to use the accent wall to highlight an architectural feature, rather than just slapping a random color on one wall. Maybe you have a beautiful built-in shelving unit that deserves to be the star of the show – paint that sucker a rich, moody hue and let it shine. Or perhaps there’s an interesting angled wall that could benefit from a bold, contrasting color. [1] The goal is to make the accent feel intentional and purposeful, not like an afterthought.

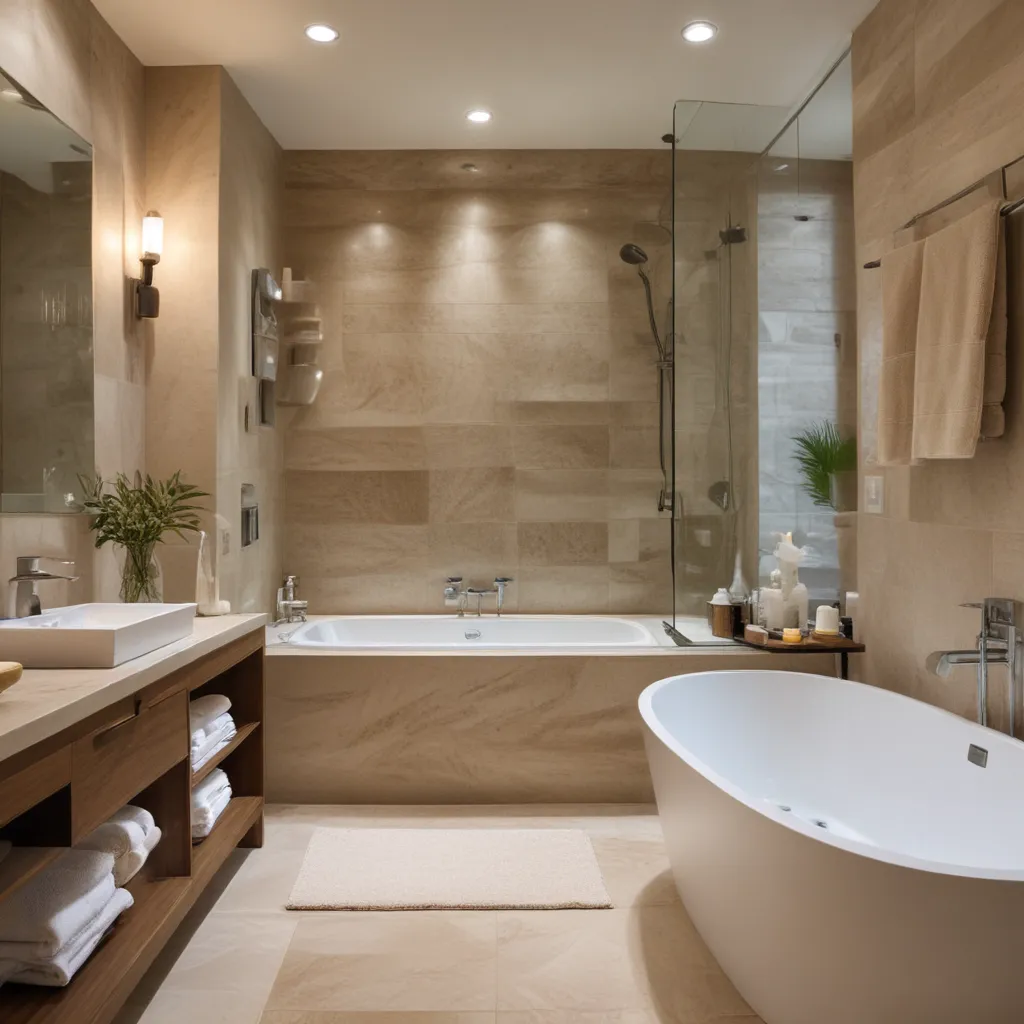
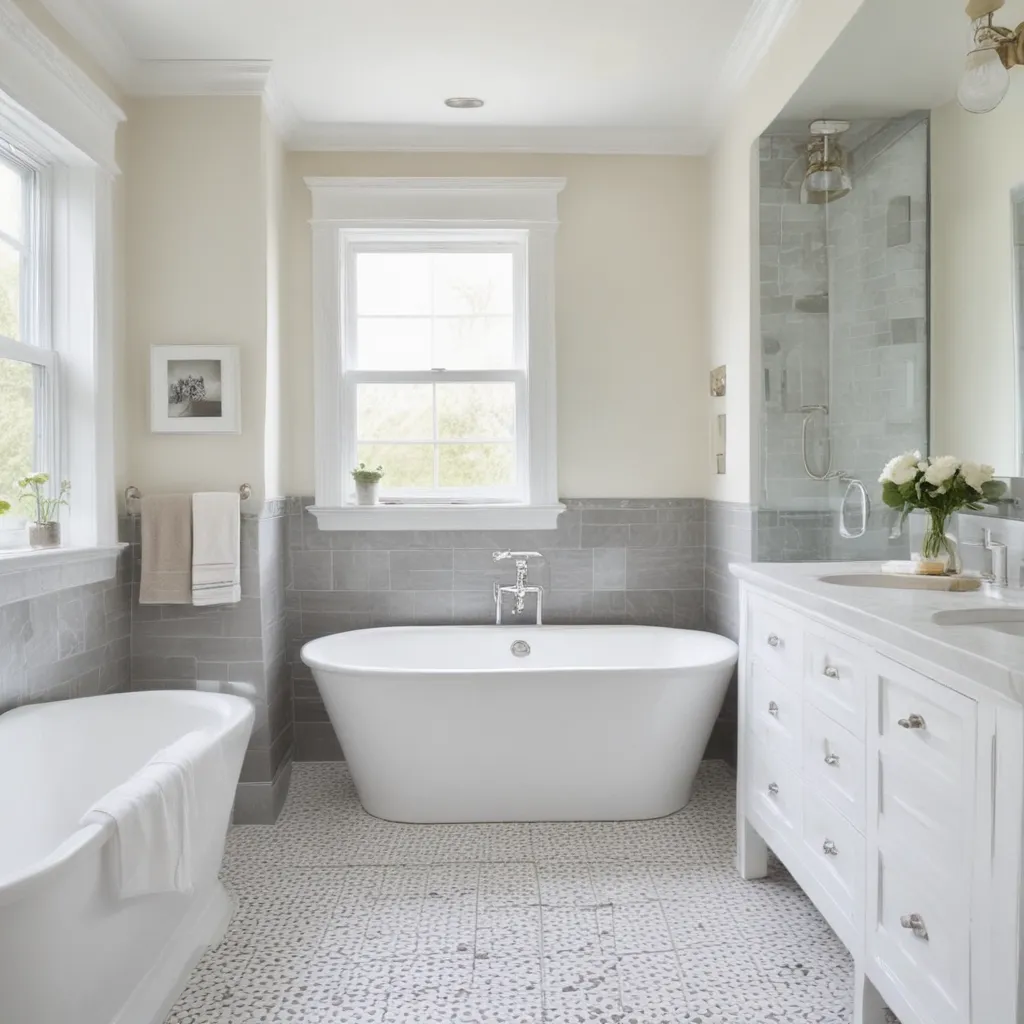
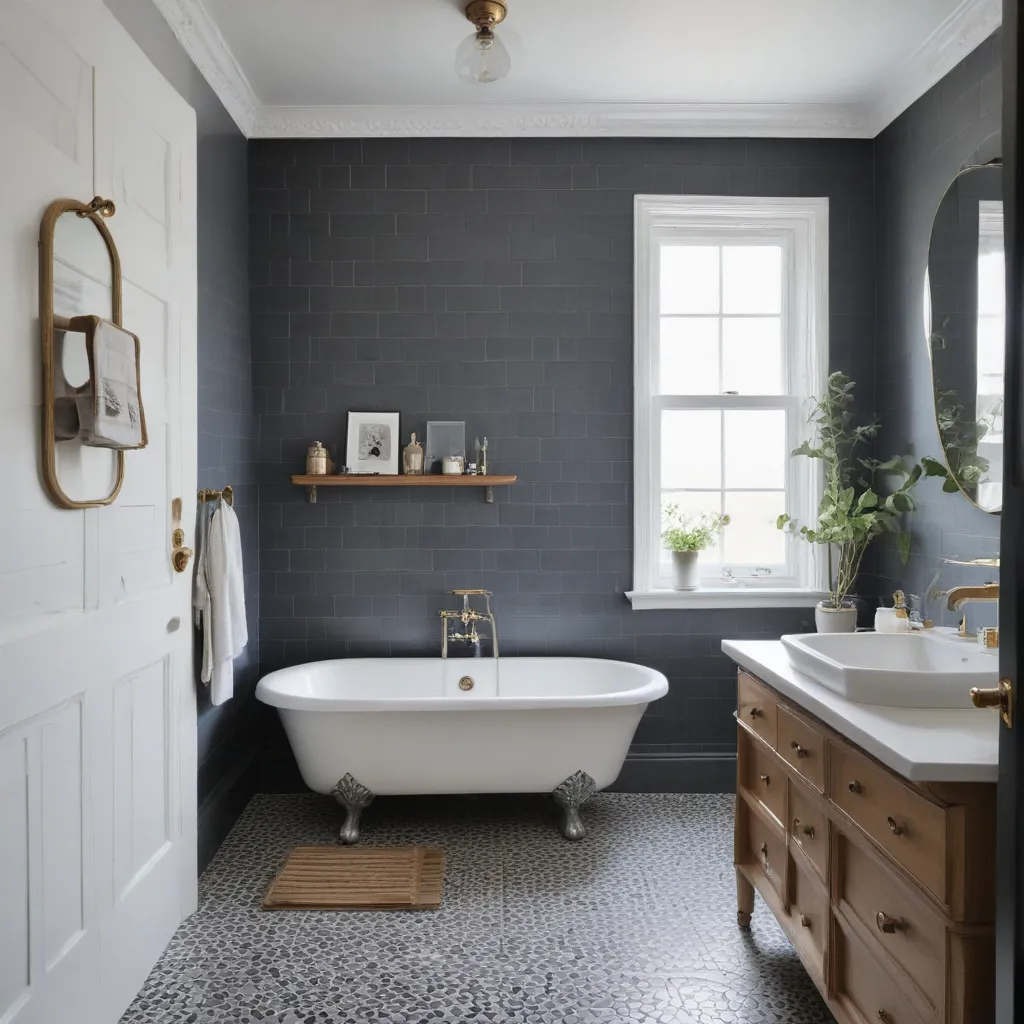
Another way to embrace those angles is to get creative with your shower or tub setup. If you have an awkwardly shaped alcove, consider a custom-fitted shower enclosure or a freestanding tub that plays nicely with the layout. [2] The key is being open to thinking outside the box – don’t just assume a standard rectangular tub or shower will fit seamlessly.

Work with Weird Nooks and Crannies

Those odd little nooks and crannies can be tricky, but with a bit of creativity, you can transform them into functional and stylish features. One of my favorite tricks is to turn them into mini-sanctuaries – cozy little spots for displaying plants, art, or even a small built-in bench for extra seating.

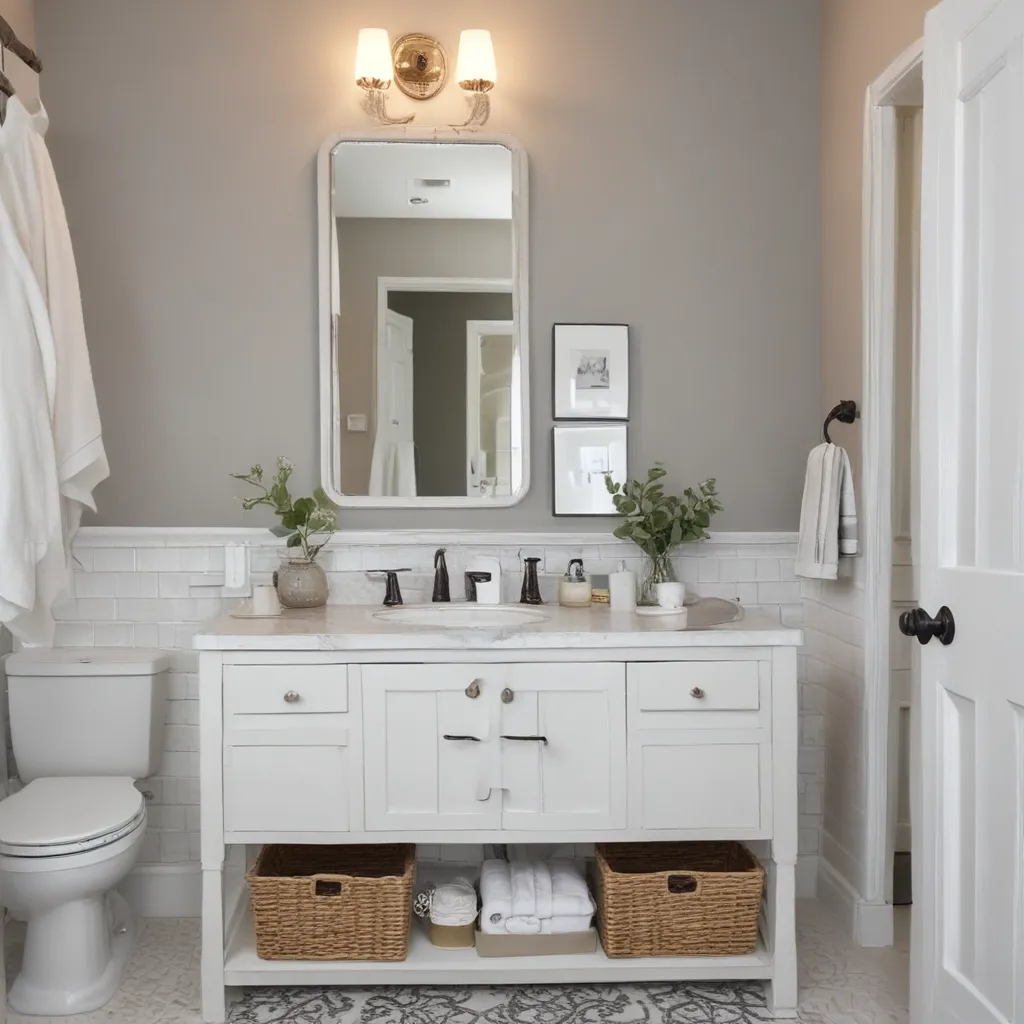
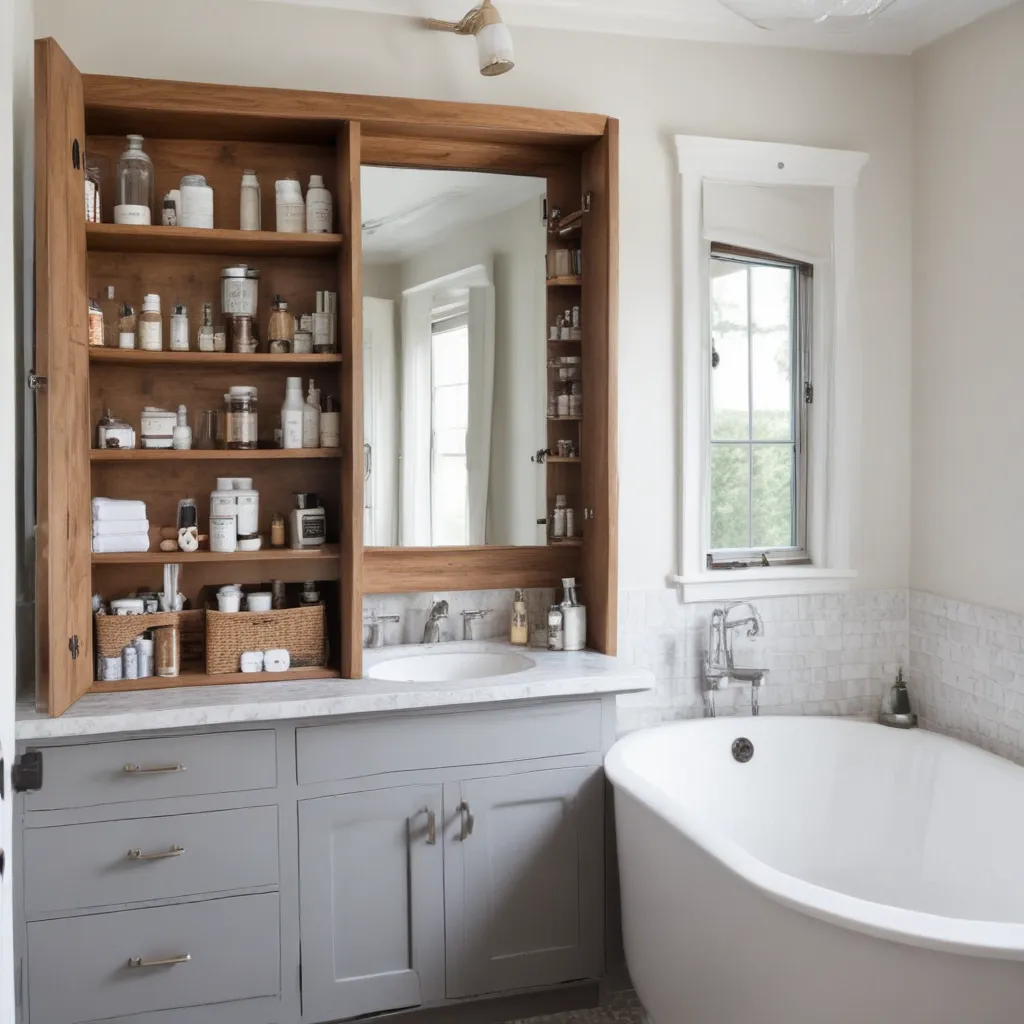
Take that weirdly shaped alcove next to the toilet, for example. Rather than letting it go to waste, you could build out a custom shelving unit to house all your bathroom essentials. [3] Or, if the space allows, add a petite bench or stool for a moment of zen (and extra storage underneath!). The key is to make the most of every square inch, without letting the quirks overwhelm the room.

Similarly, if you have an oddly angled or sloped ceiling, don’t be afraid to play it up. Consider a statement light fixture that draws the eye upward, or even a bold, geometric tile pattern that accentuates the unique architecture. [4] The goal is to embrace the quirkiness, not try to hide it.

Get Creative with Storage

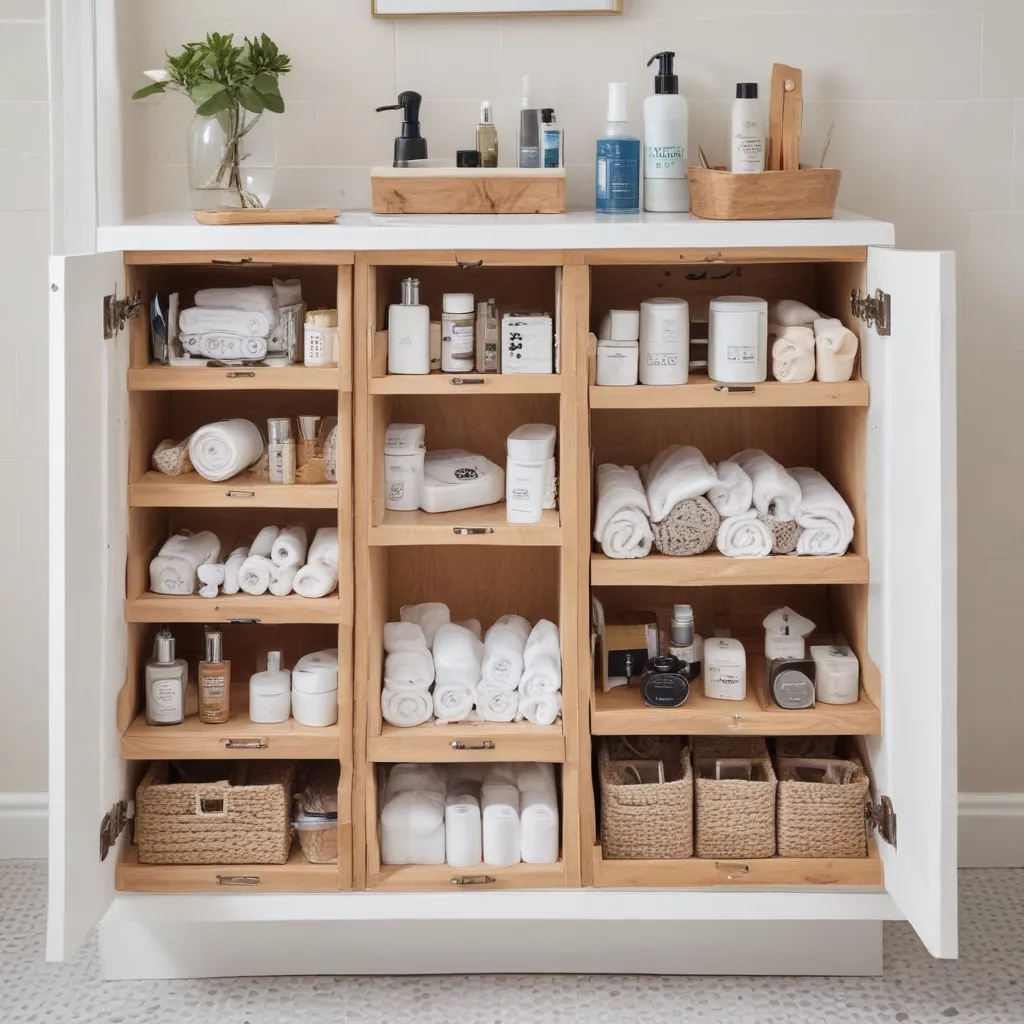
Storage is always a challenge in the bathroom, and those quirky layouts can make it even tougher. But with a little out-of-the-box thinking, you can maximize every inch.

One of my go-to tricks is to utilize the space above the toilet. Now, I know the idea of an “over-the-toilet” storage unit might conjure up images of those bulky, generic cabinets, but hear me out. With the right approach, you can create a custom, built-in shelving unit that not only provides ample storage, but also serves as a beautiful design element.

For example, you could frame out the space above the toilet with a simple DIY shelving unit, painted to match your wall color. [5] This keeps the focus on the shelves themselves, rather than the storage function. Or, if you’re feeling extra bold, you could even wallpaper the back panel for a truly show-stopping look.

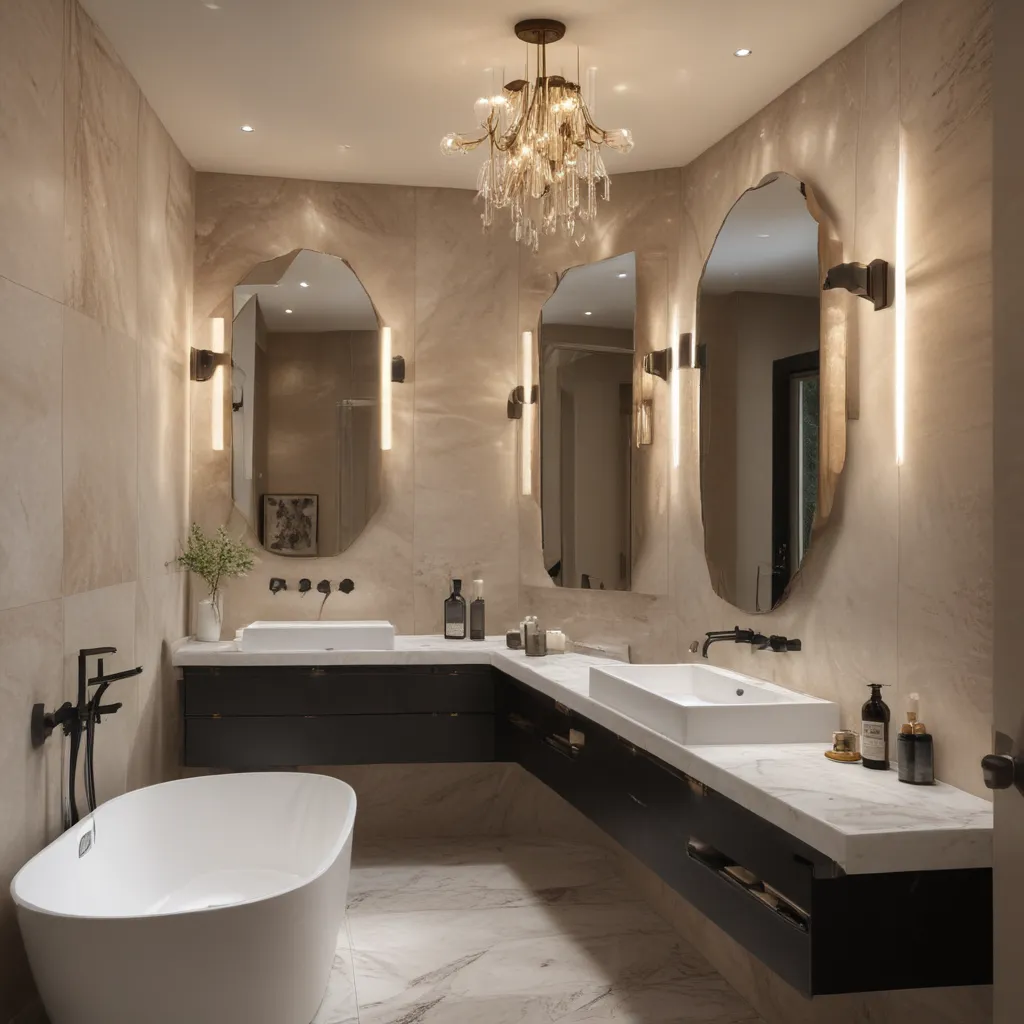
Another clever storage solution for quirky bathrooms? Floating vanities. These wall-mounted beauties not only free up valuable floor space, but they also allow you to customize the dimensions to fit your unique layout. [6] And the best part? The open space underneath creates an illusion of more square footage, making even the most awkwardly shaped bathroom feel airier and more spacious.

Embrace the Unexpected

At the end of the day, the key to working with a quirky bathroom is to embrace the unexpected. Don’t fight against the unique features and layout – instead, celebrate them!

Whether it’s a bold accent wall, a custom-fitted shower, or a one-of-a-kind storage solution, the goal is to make the most of what you’ve got. And who knows? Those quirkiest elements might just end up being the most charming and memorable parts of your new bathroom oasis.

So, fellow design enthusiasts, don’t be afraid to get a little creative. With the right mindset and a dash of inspiration, you can transform even the most unconventional bathroom into a space that’s as functional as it is fabulous. Happy designing!

[1] Knowledge from https://stylebyemilyhenderson.com/blog/how-to-make-accent-walls-work
[2] Knowledge from https://www.chrislovesjulia.com/how-to-mix-wood-tones-like-a-pro/
[3] Knowledge from https://thediyplaybook.com/rookie-mistake-over-the-toilet-storage/
[4] Knowledge from https://www.idealhome.co.uk/bathroom/bathroom-ideas/small-bathroom-ideas-179187
[5] Knowledge from https://www.ada.gov/law-and-regs/design-standards/2010-stds/
[6] Knowledge from https://www.simplehomesimplelife.com/blog/living-happily-with-wood-trim
Categories
Tips

Space-Saving Tricks for Maximizing Storage in a Small Bathroom

Space-Saving Tricks for Maximizing Storage in a Small Bathroom

Space-Saving Tricks for Maximizing Storage in a Small Bathroom

Do you feel like you’re drowning in a sea of bath products and towels every time you step into your tiny bathroom? I’ve been there, my friend. As a self-proclaimed storage ninja, I’ve mastered the art of squeezing every last inch of space out of a compact bathroom. And now, I’m here to share my top tricks with you.

Vertical is the Way to Go

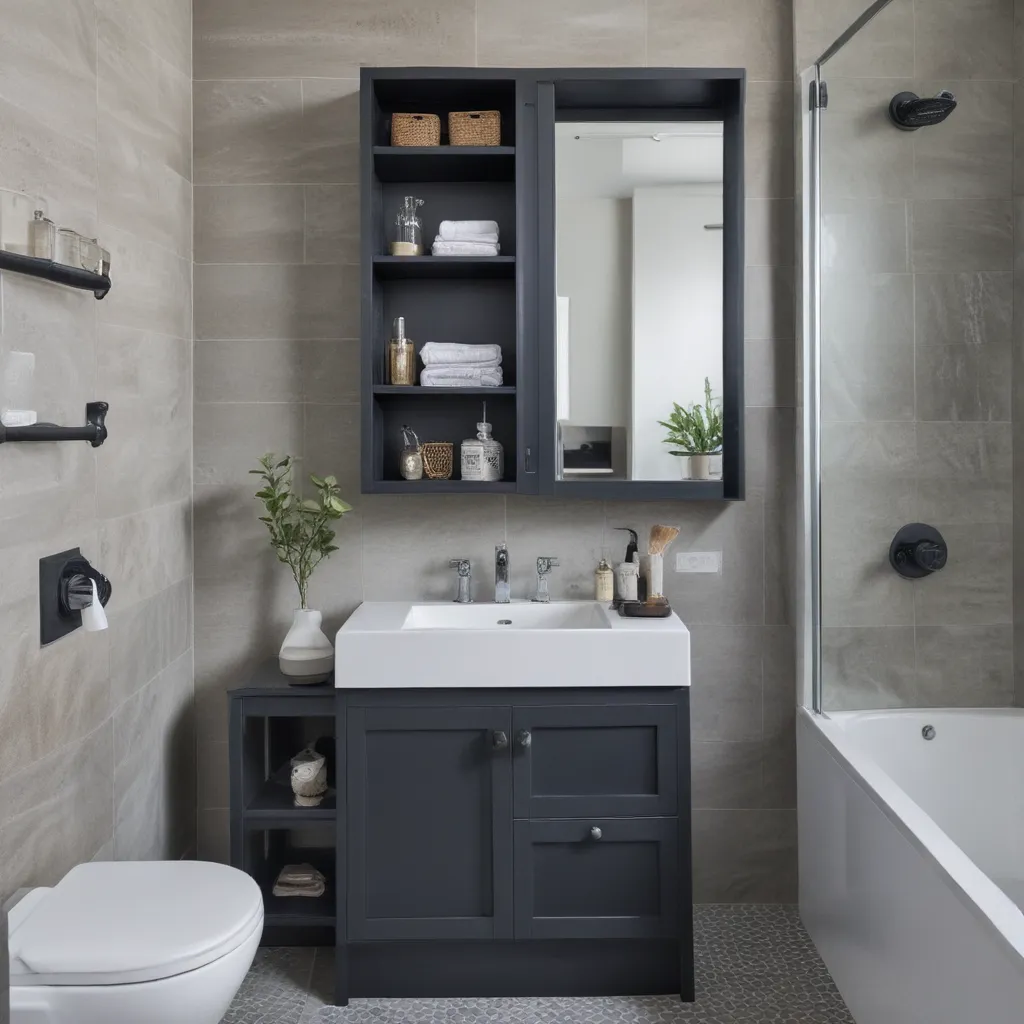
The golden rule for maximizing space in a small bathroom? Use vertical storage, my friend. Slide a slim shelving unit next to the sink or tub, and suddenly, you’ve unlocked a whole new world of storage potential. But don’t stop there – think high and mighty. Mount those shower curtains as high as you can, and watch the room instantly feel airier and more spacious.

It’s all about tricking the eye, you see. When you draw the focus upward, your bathroom will feel like it’s bursting at the seams with space, rather than feeling cramped and claustrophobic. And let’s not forget the power of mirrors – hang a few strategically placed ones, and you’ll create the illusion of depth and width that just wasn’t there before. Heck, go for a mirrored medicine cabinet and you’re killing two birds with one stone!

Declutter, Declutter, Declutter

Now, I know what you’re thinking – “But Jess, where am I supposed to put all my stuff?!” Fear not, my storage-savvy friend. The key is to be ruthless with your decluttering. Do you really need that entire Costco-sized container of cotton swabs? Nope! Decant just a handful into a cute little jar and stash the rest elsewhere.

Organization is the name of the game here, folks. Invest in some drawer organizers, lazy Susans, and over-the-door hooks to make the most of every nook and cranny. Trust me, your sanity (and your bathroom) will thank you. Plus, the more streamlined your space, the bigger it’s going to feel.

Embrace the Unexpected

Sometimes, the secret to maximizing a small bathroom lies in getting a little creative. Why not repurpose that old bar cart as a rolling storage unit? Or transform a vintage ladder into a towel-hanging masterpiece? Heck, I even know someone who turned an unused corner into a tiny makeup station – proof that with a little imagination, you can turn even the most awkward spaces into storage goldmines.

And speaking of corners, don’t forget to utilize those often-neglected nooks and crannies. Floating shelves, corner caddies, and even suction-cup baskets can be game-changers in a compact bathroom. It’s all about thinking outside the (medicine) box, my friends.

The Power of Paint and Lighting

Last but certainly not least, don’t underestimate the transformative power of paint and lighting. Stick to light, airy colors that create the illusion of spaciousness, and avoid anything too dark or busy that’ll make the room feel smaller. And when it comes to lighting, go for recessed fixtures and wall sconces that’ll open up the space, rather than those pesky pendant lights that’ll just drag it down.

Trust me, I know it can feel like an uphill battle trying to maximize storage in a tiny bathroom. But with a little creativity, a dash of decluttering, and a healthy dose of vertical thinking, you can turn even the most cramped of quarters into a spa-worthy sanctuary. So what are you waiting for? Let’s get to work!

References

[1] The Spruce. “Very Small Bathroom Storage Ideas.” https://www.thespruce.com/very-small-bathroom-storage-ideas-5324097
[2] Good Housekeeping. “Clever Small Bathroom Storage Ideas.” https://www.goodhousekeeping.com/home/organizing/tips/g810/small-bathroom-storage/
[3] Reddit. “Any suggestions for maximizing space in a very small bathroom?” https://www.reddit.com/r/HomeImprovement/comments/va84hr/any_suggestions_for_maximizing_space_in_a_very/
[4] Better Homes & Gardens. “Hacks to Make the Most of Your Tiny Bathroom.” https://www.bhg.com/bathroom/storage/storage-solutions/hacks-to-make-the-most-of-your-tiny-bathroom/
[5] MrSteam. “Tiny Bathroom Tips to Maximize Small Space.” https://blog.mrsteam.com/tiny-bathroom-tips-to-maximize-small-space-mrsteam
[6] Southern Living. “How to Make a Small Bathroom Look Bigger.” https://www.southernliving.com/home/bathroom/how-to-make-small-bathroom-look-bigger
[7] Apartment Therapy. “Small Bathroom Ideas & Design.” https://www.apartmenttherapy.com/small-bathroom-ideas-design-storage-256392
[8] Signature Hardware. “Ideas & Design Tips for Maximizing Bathroom Space.” https://www.signaturehardware.com/ideas-design-tip-maximizing-bathroom-space.html

Categories
Tips

Big Impact Upgrades for Your Dated Bathroom

Big Impact Upgrades for Your Dated Bathroom

Breathe New Life into Your Bathroom on a Budget

Ah, the bathroom – that often-overlooked sanctuary of our homes. While we may spend a good chunk of our day in there, it’s all too easy to let this utilitarian space fall into disrepair, stuck in a bygone era of avocado fixtures and linoleum floors. But fear not, my design-savvy friends! With a few strategic upgrades, you can transform your dated bathroom into a stylish oasis without breaking the bank.

Embrace the Power of Paint

One of the quickest and most cost-effective ways to breathe new life into your bathroom is with a fresh coat of paint. [1] Ditch those outdated pastels or dingy neutrals and opt for something bold and vibrant. Consider a soothing shade of blue, a luxurious forest green, or even a daring accent wall in a rich, jewel-toned hue.

Remember, color can have a powerful effect on our mood, so choose wisely. [2] Soft, airy tones can create a serene, spa-like atmosphere, while deeper, moodier shades can lend an air of sophistication. And the best part? A weekend with a paintbrush is all it takes to transform your tired tub into a stunning focal point.

Swap out the Sink and Vanity

If your vanity has seen better days, consider swapping it out for a sleek, modern alternative. [3] Look for options with clean lines, minimalist hardware, and ample storage – because who doesn’t love a little extra space for all those lotions and potions?

Pair your new vanity with a striking vessel sink or a contemporary undermount design, and you’ll instantly elevate the entire room. Don’t be afraid to go for a contrasting finish, like a glossy white vanity with a bold black sink. The juxtaposition will add depth and visual interest to your space.

Upgrade Your Lighting

Lighting can make or break a room, and your bathroom is no exception. [4] Ditch those dated, builder-grade fixtures in favor of something with a bit more personality. Pendant lights, sconces, or even a statement chandelier can instantly transform the mood and ambiance of your space.

When selecting new lighting, consider the size and layout of your bathroom. Opt for fixtures that provide ample illumination, but avoid anything too overpowering. And don’t forget about the importance of task lighting, like vanity lights or recessed cans, to ensure you can see clearly while getting ready.

Accessorize with Intention

Once you’ve tackled the big-ticket items, turn your attention to the smaller details that can truly make your bathroom shine. [5] Swap out those boring towel bars for sleek, modern options, and consider adding a stylish towel ladder or wall-mounted storage for extra visual interest.

Don’t forget about the power of greenery, either. A few well-placed houseplants can instantly infuse your bathroom with a fresh, rejuvenating vibe. Just be mindful of the humidity levels and choose species that will thrive in the steamy environment.

Don’t Forget the Floors

While tearing up your bathroom floor might seem like a daunting task, there are plenty of budget-friendly options that can give your space an instant facelift. [6] Consider peel-and-stick tiles, luxury vinyl planks, or even a stylish area rug to cover up that dated linoleum or cracked tile.

If you’re feeling adventurous, you could even try your hand at a DIY tile installation. Just be sure to do your research and take the necessary precautions to ensure a seamless (and leak-free) finish.

Embrace the Power of Texture

In a world of smooth, minimalist design, adding a touch of texture can be the key to creating a truly unique and visually engaging space. [7] Consider incorporating natural materials like wood, stone, or even exposed brick to add depth and warmth to your bathroom.

A simple shiplap accent wall or a stone-tiled shower surround can instantly elevate the overall aesthetic, while a plush, fluffy bathmat or a woven basket for storage can lend a cozy, lived-in feel.

Bring in the Bling

Finally, don’t be afraid to inject a little bit of glamour into your bathroom renovation. [8] Swap out those dated brass fixtures for something a little more modern and eye-catching, like sleek black hardware or gleaming chrome accents.

And let’s not forget about the power of mirrors. A large, statement-making mirror can instantly make your space feel brighter, more spacious, and infinitely more luxurious.

So, there you have it, my fellow bathroom enthusiasts – a host of budget-friendly upgrades that can transform your dated loo into a sanctuary worthy of a high-end spa. Whether you opt for a fresh coat of paint, a stylish new vanity, or a touch of texture, the possibilities are endless. So, roll up your sleeves, grab your toolbox, and get ready to fall in love with your bathroom all over again.

References

[1] Knowledge from https://www.reddit.com/r/HomeImprovement/comments/ocwv54/what_are_the_smartest_best_roi_home_improvements/

[2] Knowledge from https://www.homelight.com/blog/what-upgrades-increase-home-value/

[3] Knowledge from https://www.reddit.com/r/RealEstate/comments/t9h87u/what_is_the_best_upgrade_youve_done_to_your_house/

[4] Knowledge from https://hanashappyhome.com/diy/beginner-projects/upgrade-home-without-renovations/

[5] Knowledge from https://welshdesignstudio.com/how-to-update-a-dated-home-without-remodeling/

[6] Knowledge from https://thediyplaybook.com/rookie-mistake-over-the-toilet-storage/

[7] Knowledge from https://erinzubotdesign.com/updating-our-90s-home-on-a-budget/

[8] Knowledge from https://www.youtube.com/playlist?list=PLIsusUNNN2JZ5nOWViuChY7-EDUdEzK-7

Categories
Tips

Inspiring Ideas for Turning Your Bathroom into a Spa Retreat

Inspiring Ideas for Turning Your Bathroom into a Spa Retreat

Transforming Your Humble Haven into a Luxurious Oasis

Step aside, ordinary bathroom – it’s time to elevate your porcelain palace into a sanctuary of serenity. As someone who firmly believes that every day should be a spa day, I’m here to share my secrets for turning your humble washroom into a rejuvenating retreat.

You see, I used to think my bathroom was just a functional space – you know, the kind where you rush in, do your business, and rush out. But then I discovered the magic of spa-inspired design, and let me tell you, my outlook on bathing has never been the same.

Soothing Serenity: Mastering the Art of Spa-Worthy Color Palettes

The key to creating a truly calming atmosphere lies in your color choices. Goodbye, bold and bright – hello, serene and soothing! Think about it, when was the last time you walked into a spa and were greeted by a riot of colors? Exactly, it’s all about that zen-inducing vibe.

So, what hues should you be embracing for your bathroom oasis? [1] Soft neutrals like white, beige, and light gray are always a safe bet, instantly evoking a sense of cleanliness and tranquility. But if you’re feeling a little more adventurous, consider earthy tones like taupe, sage, and sand – they’ll bring an organic, grounding element to the space.

And let’s not forget about the power of oceanic blues. [2] From light aqua to deep indigo, these calming shades will have you feeling like you’re floating in a serene pool, even if your tub is a far cry from a luxurious infinity edge. Just imagine sinking into a warm, bubbly soak surrounded by these soothing hues – pure bliss!

Luxurious Fixtures: Elevating Your Everyday Routine

Now, let’s talk about the pièce de résistance of any spa-worthy bathroom – the fixtures. [3] Gone are the days of basic showerheads and standard sinks. In 2023, it’s all about indulgence and opulence.

Start with the crown jewel of your bathroom: the tub. Forget about that standard-issue model and treat yourself to a deep, sumptuous soaking tub. Trust me, there’s nothing quite like sinking into a steaming hot bath and letting all your worries melt away. And if you really want to amp up the luxury, consider adding jetted or heated features – pure decadence!

But the pampering doesn’t stop there. [4] Elevate your everyday showering experience with a rainfall showerhead that will have you feeling like you’re standing beneath a refreshing waterfall. And don’t forget to upgrade your vanity with natural stone surfaces, like sleek marble or earthy quartz, for an undeniably high-end touch.

Ambiance-Enhancing Extras: The Secret to Spa-Like Serenity

Now that you’ve got the foundation of your spa-inspired bathroom in place, it’s time to focus on the little details that will truly transport you to a state of pure relaxation. [5] Soft, dimmable lighting is key – think scented candles, recessed fixtures, and strategic placement of task lighting.

And let’s not forget the power of the senses. [6] Infuse the air with soothing scents, whether it’s the crisp, clean notes of eucalyptus or the calming aroma of lavender. Pair that with the gentle lull of nature-inspired soundscapes, and you’ve created a sensory experience that will have you feeling like you’ve stepped into a serene oasis.

Last but not least, don’t forget to bring the outdoors in. [7] Incorporate lush, low-maintenance plants, natural fiber accents, and wooden elements to cultivate an organic, spa-like ambiance. Trust me, nothing says “relaxation” quite like a little bit of greenery and earthy charm.

A Bathroom Transformation Beyond Your Wildest Dreams

So, there you have it – your roadmap to transforming your humble bathroom into a luxurious spa retreat. [8] From soothing color palettes to indulgent fixtures and ambiance-enhancing extras, the possibilities are endless.

Sure, it might take a bit of planning and a touch of creativity, but I can assure you, the end result will be well worth it. Imagine sinking into a warm, bubbly tub surrounded by the sights, sounds, and scents of a true oasis – it’s the ultimate escape, right in the comfort of your own home.

So, what are you waiting for? Grab your design inspiration and let’s get to work on turning your bathroom into a sanctuary of serenity. Your mind, body, and soul will thank you.

Categories
Tips

Refresh Your Bathrooms Look Quickly with Easy Decor Tweaks

Refresh Your Bathrooms Look Quickly with Easy Decor Tweaks

Giving Your Bathroom a Facelift, One Small Change at a Time

As a self-proclaimed interior design enthusiast, I’ve had the pleasure of helping my sister and brother-in-law revamp their beach house, room by room. From the living room to the dining area, we’ve been working together to breathe new life into their cozy coastal abode. And now, it’s time to turn our attention to one of the most frequently used spaces in the house – the bathroom.

You see, they have two full bathrooms in their home, and the one on the lower level is the go-to spot for guests and party-goers. While the tile, sink, and wall color were already in great shape, the overall decor felt a bit lackluster. So, I knew it was the perfect opportunity to work my design magic and give this bathroom a much-needed refresh.

Mastering the Vanity Mirror

One of the first things I noticed when I walked into the space was the size of the mirror. It was significantly smaller than the vanity, which can make the whole area feel a bit off-kilter. As a general rule of thumb, I find that the mirror should be around the same width as the vanity, or just a few inches narrower. And when it comes to the height, aiming for about three-quarters the distance between the vanity and the light fixture above tends to create the most visually pleasing proportions. [1]

In this case, the existing mirror was only 16 inches long, while the distance from the vanity to the light was a whopping 32.5 inches. To remedy this, I selected a 24-inch mirror, which hits that sweet spot of being three-quarters the height of the light fixture. The difference it makes is truly night and day – the space instantly feels more cohesive and well-thought-out.

Rethinking the Towel Situation

Another area that needed some attention was the towel situation. The existing towel bar was positioned in a rather awkward spot, almost intruding on the main walkway into the bathroom. To open up the flow of the space, I decided to swap out the bar for a simple hand towel ring mounted right next to the sink. This not only clears up the entryway but also creates a more streamlined look.

As for the bath towels, I recommended that they use some wall hooks behind the door to keep them neatly tucked away. This way, they can maintain the clutter-free vibe while still having easy access to their towels.

Bringing in Natural Textures

To add a bit of warmth and character to the space, I knew we needed to incorporate some natural textures. Enter the bamboo Roman shade! Not only does this beautiful window treatment inject an earthy, coastal feel, but it also helps to soften the hard lines of the tile and vanity.

To further the natural theme, I couldn’t resist adding a small Turkish rug to the mix. Since this bathroom has a pretty tight footprint, I opted for a petite version that wouldn’t overwhelm the space. The rich, jewel-toned hues and subtly distressed pattern instantly elevate the entire look, creating a cozy and inviting atmosphere.

Curating the Wall Decor

With the major furniture and fixtures sorted, it was time to turn my attention to the walls. Given the narrow walkway leading into the bathroom, I knew I needed to be strategic about what I placed on the walls.

Rather than going overboard with a gallery wall or elaborate shelving, I decided to keep things simple and streamlined. A few pieces of framed mudcloth fabric, along with a small ceramic wall planter and a simple landscape artwork, are all it takes to add a touch of personality without making the space feel cluttered.

The key here was finding the right balance – enough visual interest to make the room feel intentionally designed, but not so much that it feels overwhelming in the confined quarters.

The Final Reveal

After sourcing all the perfect pieces and putting the plan into action, I have to say – I’m absolutely thrilled with how this bathroom refresh turned out. What was once a somewhat lackluster space has been transformed into a warm, inviting, and cohesive oasis.

The new vanity mirror makes a world of difference, instantly elevating the entire vanity area. The natural textures from the bamboo shade and Turkish rug add depth and character, while the thoughtfully curated wall decor ties the whole look together.

Most importantly, though, this bathroom refresh proves that you don’t need to undertake a full-blown renovation to breathe new life into a space. Sometimes, all it takes are a few strategic decor tweaks to completely change the vibe. And I can’t wait to see the look on my sister and brother-in-law’s faces when they see the final result!

As you can see, the power of small changes should never be underestimated. So, if you’re feeling like your bathroom could use a little refresh, I encourage you to take a step back, assess the space, and start dreaming up how you can breathe new life into it – one easy decor tweak at a time.

References

[1] Meredith Lynn Designs. “Easy Bathroom Makeover: How to Quickly Give Your Bathroom a New Look.” Meredith Lynn Designs, 29 Aug. 2019, www.meredithlynndesigns.com/blog/2019/8/29/easy-bathroom-makeover-how-to-quickly-give-your-bathroom-a-new-look.

Categories
Tips

Make the Most of Your Bathroom Storage with These Organizing Tips

Make the Most of Your Bathroom Storage with These Organizing Tips

Unleash the Potential of Your Bathroom Storage

If you’re anything like me, your bathroom has become a battleground for storage woes. Overflowing cabinets, tangled toiletries, and haphazard towel piles – it’s enough to make even the most zen-like person want to throw in the towel (pun intended). But fear not, my organization-obsessed friends, for I have uncovered a treasure trove of bathroom storage secrets that will transform your space from cluttered chaos to spa-like serenity.

Purge with Purpose

The first step in any successful bathroom organization endeavor is to ruthlessly purge. I know, I know – it’s hard to let go of that half-used bottle of shampoo or that face mask you bought on a whim. But trust me, keeping the old and unused is only perpetuating the problem. Take a deep breath, channel your inner Marie Kondo, and ask yourself: “When was the last time I actually used this?” If the answer is anything more than a few months, it’s time to say goodbye.

I’ll never forget the day I emptied out my vanity and ended up with an entire kitchen trash bag full of products I had been hoarding. It was equal parts satisfying and shameful, but the end result was worth it. Suddenly, I had so much more space to work with, and I could actually see what I had instead of constantly digging through a mess.

Categorize and Contain

Once the purge is complete, it’s time to get strategic about storage. The key is to group like items together and contain them in a way that makes sense for your bathroom’s layout and your personal needs. For me, I landed on three main categories: hair products, nail stuff, and the ever-important “grab and go” items like cotton balls and makeup remover pads.

To keep these categories organized, I scoured the aisles of my local big box store and found some amazing organizers. A tiered spice rack was the perfect solution for my hair products, allowing me to neatly display and access everything from serums to styling creams. And those leftover IKEA bins I had been hoarding? They became the perfect door-mounted storage for my daily essentials, with labels to keep me on track.

Maximize Vertical Space

One of the biggest mistakes I see people make in their bathrooms is neglecting vertical space. We get so caught up in trying to organize the vanity and under-sink areas that we forget about all that glorious wall space just waiting to be utilized.

That’s why I’m a huge advocate for floating shelves, both for style and function. Not only do they allow you to display your favorite decorative items, but they also provide ample storage for things like spare towels, baskets of toiletries, and even the ever-elusive plunger (let’s be real, no one wants that taking up prime real estate).

And if you really want to get fancy, consider built-in shelving that spans the entire wall. It may require a bit more effort, but the payoff in terms of storage capacity is unbeatable. Plus, you can curate the shelves to create a visually stunning display that will have your guests (and your inner neat freak) swooning.

Tame the Tub

No bathroom organization discussion would be complete without addressing the dreaded tub and shower area. It’s so easy for those spaces to become a product graveyard, with bottles and bars of soap scattered haphazardly around the ledge.

Luckily, there are some simple solutions to tame the tub. First, consider installing a shower caddy or shelving unit that attaches directly to the showerhead or wall. This keeps all your essentials within easy reach while freeing up precious counter and ledge space. And if you really want to take it up a notch, try decanting your go-to products into sleek, uniform bottles for a spa-like aesthetic.

But wait, there’s more! Don’t forget about that often-overlooked space above the toilet. With a little creativity, you can transform that area into an organizational oasis, using floating shelves or even a repurposed ladder to stash extra towels, baskets, and any other bathroom must-haves.

The Joy of Labeling

Now, I know what you’re thinking: “Melissa, this all sounds great, but how on earth am I supposed to keep it all straight?” Fear not, my friends, for the secret weapon in any successful bathroom organization scheme is the humble label.

Whether you opt for cute chalkboard tags, sleek vinyl lettering, or even good old-fashioned Sharpie, taking the time to clearly identify the contents of your various storage solutions will pay dividends in the long run. Not only does it help you (and any other bathroom users) quickly locate what you need, but it also serves as a visual cue to put things back where they belong.

And the best part? Labeling doesn’t have to be boring. Get creative with your fonts, colors, and even little icons to infuse your organizational system with personality. After all, a bathroom should be a reflection of your unique style – why shouldn’t your storage be, too?

The Bathroom of Your Dreams Awaits

So there you have it, folks – my top tips for transforming your bathroom from a cluttered conundrum to a veritable storage oasis. With a little bit of purging, categorizing, and creative use of vertical space, you’ll be well on your way to a bathroom that’s not only organized but also a true delight to spend time in.

And who knows, you might even find yourself opening that cabinet door just to admire your handiwork, like I do. After all, there’s nothing quite like the satisfaction of a beautifully organized space, is there? Happy organizing, my fellow bathroom enthusiasts!

References

[1] Good Housekeeping. “Small Bathroom Storage Ideas.” Good Housekeeping, 16 Feb. 2023, www.goodhousekeeping.com/home/organizing/tips/g810/small-bathroom-storage/.

[2] Pastiche. “Organizing Your Bathroom with the KonMari Method.” The Spruce, 13 May 2022, www.thespruce.com/creative-bathroom-organizing-ideas-4586703.

[3] O’Shea-Evans, Kathryn. “31 Bathroom Storage Ideas to Maximize Your Space.” Architectural Digest, 22 Apr. 2021, www.architecturaldigest.com/gallery/bathroom-storage-ideas-to-help-organize-your-space.

[4] Bakkila, Blake. “Quick Tips for Organizing Bathrooms.” HGTV, 24 Feb. 2023, www.hgtv.com/lifestyle/clean-and-organize/quick-tips-for-organizing-bathrooms.

[5] Taylor, Nora. “How to Organize Your Bathroom.” Apartment Therapy, 20 Oct. 2022, www.apartmenttherapy.com/bathroom-organization-ideas-36721482.

[6] Goldberg, Morgan. “Where Do You Keep Cleaning Supplies… Other Than Under the Sink?” Lemon Thistle, 9 Sep. 2021, www.lemonthistle.com/where-do-you-keep-cleaning-supplies/.

Categories
Tips

Clever Ideas for Sneaking More Storage into Your Bathroom

Clever Ideas for Sneaking More Storage into Your Bathroom

Maximize Your Vertical Space

Have you ever looked around your bathroom and thought, “If only I had a little more space to stash my stuff?” Well, my friend, the solution may be as simple as looking up. That’s right – one of the most underutilized areas in bathrooms is the often-forgotten vertical space above the door.

An over-the-door shelf can be a game-changer for cramped quarters. [1] Sure, it may require a step stool to access those higher shelves, but think of it as your own personal storage oasis – a place to stash seldom-used items like extra toilet paper, travel toiletries, or even decorative objects that you want to display but don’t need daily access to. Just be mindful of placement, as [3] an over-the-door shelf that cuts the room in half can make the space feel smaller and the ceiling lower.

In small bathrooms, every inch counts, so why not take advantage of that often-wasted space? [4] One reader suggests using the over-the-door setup for things like spare towels, extra toiletries, or even seasonal decor. The key is to stock it with items you don’t need to grab frequently. And as an added bonus, [3] this type of storage can work wonders in closets, laundry rooms, and other tight spaces around the house.

Rethink Your Vanity

Speaking of maximizing space, let’s talk about your bathroom vanity. This essential piece of furniture often becomes a magnet for clutter, with products, tools, and odds and ends taking over the counter. But with a little creativity, you can turn your vanity into a marvel of storage.

[4] First, consider installing a vanity with drawers instead of just cabinet doors. Drawers allow you to neatly organize your items by category – think haircare, skincare, and makeup – and easily access what you need. Bonus points if you add in drawer dividers to create even more order.

If your vanity is on the smaller side, [4] look for a slim cabinet that can tuck into any unused space, like between the toilet and sink base. This gives you extra storage for things like toilet paper, cleaning supplies, or spare towels without taking up valuable real estate.

And don’t forget about the inside of those cabinet doors! [6] Attach wire baskets or use adhesive hooks to turn the back of the doors into a mini-storage wonderland for items like hair ties, clips, and other small necessities.

Maximize Unused Nooks and Crannies

Once you’ve conquered the vertical space and vanity storage, it’s time to get creative with the rest of your bathroom. After all, there are always little nooks and crannies just begging to be transformed into functional storage.

[4] Take, for example, the space beside your tub. Rather than letting it go to waste, carve out a recessed shelf to house your bath bombs, salts, and other pampering products. It keeps them within reach but neatly tucked away.

Or what about that empty wall space next to the door? [6] Install a sleek, narrow cabinet or shelving unit to stash extra towels, toiletries, or even decor items. It’s an easy way to add storage without encroaching on the rest of the room.

And let’s not forget about the often-overlooked space above the toilet. [4] Whether you opt for a simple over-the-tank shelf or get a bit more adventurous with built-in cabinetry, this spot is prime real estate for housing extra TP, cleaning supplies, or pretty baskets filled with odds and ends.

Get Crafty with DIY Solutions

While there are plenty of clever storage products available, sometimes the most rewarding (and budget-friendly) solutions come from a little DIY elbow grease. And the bathroom is the perfect canvas for showcasing your creativity.

[3] One reader shared her plan to repurpose a bar cart in her bathroom, using it to display extra towels, toilet paper, and even makeup organizers. Talk about a unique and functional way to keep things tidy!

Another idea? [6] Floating wood shelves. Not only do they provide extra storage space, but they also add a touch of rustic charm to your bathroom. Lean into the aesthetic by styling the shelves with decorative objects, plants, and the occasional practical item.

And let’s not forget the power of baskets and bins. [4] Tuck them into corners, arrange them on shelves, or even hang them on the walls to corral everything from hair products to cleaning supplies. The options are endless when you get a little crafty.

A Space for Everything (and Everything in Its Place)

At the end of the day, the key to a well-organized bathroom is having a designated spot for everything. Whether it’s an over-the-door shelf, a clever vanity setup, or a DIY storage solution, the goal is to create a space that’s not only functional but also visually appealing.

[6] Remember, just because you’re short on square footage doesn’t mean you have to sacrifice style. With a little creativity and a lot of determination, you can transform even the tiniest of bathrooms into a clutter-free oasis that sparks joy every time you step inside.

So, what are you waiting for? Grab your toolbox (or your shopping cart) and get ready to unleash your inner storage superhero. Your bathroom – and your sanity – will thank you.

References

[1] Knowledge from https://www.apartmenttherapy.com/sneaky-storage-secrets-of-a-really-really-tiny-apartment-226038
[2] Knowledge from https://www.quora.com/How-do-I-tell-if-somebodys-coming-in-my-room-while-Im-gone
[3] Knowledge from https://www.livesimplybyannie.com/over-the-door-shelving-diy-or-di-why/
[4] Knowledge from https://www.goodhousekeeping.com/home/organizing/tips/g810/small-bathroom-storage/
[5] Knowledge from https://www.theorganisedyou.com/blog/our-renovation-plans
[6] Knowledge from https://www.thehandmadehome.net/hallway-bath-sneak-peek/
[7] Knowledge from https://www.reddit.com/r/Screenwriting/comments/wzgog4/unique_ways_of_hiding_a_body/
[8] Knowledge from https://carlaaston.com/designed/must-see-designer-showhouse-guest-house-sneak-peek

Categories
Tips

Elevate Your Bathroom Style with Stunning Lighting Ideas

Elevate Your Bathroom Style with Stunning Lighting Ideas

The Problem with “Boob Lights”

I feel pretty confident that over half of everyone reading this post has been victim to the “boob light” at some point in their life. You know the one…outdated metal trim, fluted or frosted glass, and of course the nipple (or more appropriately known as a finial). And look, if you love them, that’s great, but I’ve primarily seen them in rentals because they are generally super affordable, thus ideal to buy in bulk. This one is only $16 which I can understand is hard to pass up as a landlord. But if you are a renter or a homeowner that needs a flush mount style light, please know there are other options for you!

Aside from my short stint abroad, I have never not replaced the lighting in my rentals. It not only instantly modernizes a space but also makes it feel more personalized. Exhibit A – Caitlin’s Hallway: I know we’ve said that 100x over so I’ll stop, but as proven above, the results are UNDENIABLE. Now, replacing a builder-grade boob light isn’t the only reason someone might need a flush mount (or semi-flush mount) light. You might live in a building with low ceilings. Someone in your household could be extremely tall so chandeliers end up being a total nuisance (something I myself will never have to endure😉). Maybe you just like them! Whatever your reason may be, I tried my best to show you really solid (and pretty) options with a large range of price points (two are under $35!). Time to shop…

Affordable Lighting Options

Understandably, there’s a lot of debate about whether one should invest in a rental or not. I’m probably not the best example for the latter, but affordable lighting is your friend. Of course, tighter budgets are not exclusive to renters. I mean, owning a house and having a mortgage costs a lot of money, so finding more affordable lighting options is equally as valuable. Here are some of my favorite options:

  1. White Metal Dome Adjustable Semi Flush Mount Ceiling Light: I love the organic modern feel of this one! It’s technically a semi-flush mount but perfect for a directional light look.
  2. Eshe Rattan Semi Flush Mount: A great fixture to add some visual texture and soften a room.
  3. Tapered Flush Mount Ceiling Light: This light is the ideal balance of modern and traditional. Plus, that shade is going to give off a lovely glow.
  4. REGNSKU: I am obsessed with the vintage versions of these! But for $28, how can you beat this one?
  5. Semi Flushmount Ceiling Light: Another modern traditional light but with a bit more drama with that black shade.
  6. Scalloped Semi-Flush Mount Ceiling Light: Mallory bought this for her entry and loved the look of it (it’s pretty freaking cute). She did mention that it doesn’t give off a ton of light, so this is better for a space that doesn’t need to be super well-lit. It’s more of a mood.
  7. Rattan Pendant: So cute! The scalloped bottom is such a nice detail.
  8. Fabric Shade Drum Flushmount: Simple, elegant, and works with a ton of styles.
  9. Drum Jute Flush Mount Light: I love the tone of this drum shade because it feels a little more unique than the standard white. Plus, it’s on clearance for such a great price!

A Slightly Higher Budget

As most things in life go, if you have a bit of a bigger budget, you have some more options stylistically. Also, I tried to have most of these options sizable enough for a bedroom or kitchen, but remember to look at the diameters:

  1. Natural Jute Woven Semi Flush Mount Ceiling Light: Natural, geometric, and pretty. What’s not to love?
  2. Allegra Large Linen Flush Mount Light: I LOVE ceramic light fixtures, and this one looks so beautiful with tons of texture.
  3. Semi Flush Hand Carved Light Fixture: Perfectly vintage-inspired, and I have looked around my home a couple of times to see where it could work.
  4. Stevie Flush Mount: A great California Casual organic look.
  5. Copa Tiered Natural Rattan Flush Mount Light: Natural with a hint of glam. So fun!
  6. Rattan Semi Flush Mount: I love how neutral and subtle it looks at first, but as you get closer, you can see all that beautiful texture.
  7. Nodes Flushmount: Very similar if not identical to the one in the photo above, which proves it’s a perfect splash of understated modern glam.
  8. Small Jake Flush: This one is on the smaller side, but it’s so simple and elegant.
  9. Liz Rattan Flush Mount: For me personally, if I were to get a rattan flush mount, this would be a top contender. The style is right up my alley!

Splurge-Worthy Fixtures

As we up the price, here are three different types of rooms that each have a beautiful flush (and semi-flush) mount light. They truly are great in every room:

  1. Moxie Semi Flush: Another vintage-inspired light that I would happily have in my home. I think it would add an insane amount of style to whatever room it was in.
  2. Tisse Oversized Woven Rattan Flush Mount Light: In the competition of my favorite rattan flush mount, this might be number one. It’s from Athena Calderone’s Crate & Barrel collection, so I shouldn’t be surprised.
  3. Carneros Milk Glass Flush Mount: Industrial yet a little traditional (could easily work with a modern farmhouse style). I think this is such a cool light.
  4. Cruz Flushmount: Now we’re getting a little more midcentury with that sleek, elegant cone shade. But I really love how the bulb drops down from the center! Such a nice little touch.
  5. Sago Rounded Rattan Flush Mount Light: This is the last rattan fixture that really has a hold on my heart. You don’t typically see rattan that shade of brown, and it’s so chic.
  6. Ariel Fluted Marble Flush Mount Light: What’s not to love?! And given it’s 12″ in diameter, it’s a perfect and versatile light for a small space.
  7. Rainier Brass Conical Flush Mount Light: The simplicity of the metal and the tone of the brass is so pretty!
  8. Zara Semi Flush: A wonderful nod to a very Parisian vibe. Simple yet very luxe looking.
  9. Nodes Semi-Flushmount: I’ve had my eye on this one for a while. A bit modern brutalist feel, and I love it.
  10. Tiered Drum Semi-Flush Mount Fixture: This is a newer light from Rejuvenation, and it’s beautiful! Classic, simple, and from the looks of it, gives off a beautiful warm light.
  11. Wally Flush Mount Light: A great trend-forward option!
  12. Conical 16″ Drum Semi-Flush Mount: A very classic and simple piece that still feels very textured.

Choosing the Right Size

There are definitely guidelines for flush mount sizing based on room size. The general rule is to add the width and length of a room together by feet and then convert those feet into inches, giving you your “ideal diameter size.” For example, a bedroom is 12′ x 12′, which equals 24 feet. That would then mean my ceiling light should be around 24 inches.

But of course, you don’t have to follow those rules! As you can see in Birdie’s old nursery on the left, that beautiful flush mount would likely be considered “too small” for that room, but it looks beautiful. Then on the right, Megan Hopp used that same fixture where a recessed light might have gone. Actually, there are at least two of them in the room (you can’t see the other in this photo). Now, for a recessed light replacement, this fixture might be thought of as too big, but look how awesome it looks! So take a look at the rules and then, if you want, throw them out:

  1. Breton Flushmount: A classic style with the prettiest patina.
  2. Astor 12″ Flush Mount: The perforated detail gives it a cool, interesting look.
  3. Blair 10″ Flush Mount: I just love the shape, and it comes in a bunch of other metals.
  4. Turio Oversized Black Flush Mount Light: This is perfect if you want the vibe of a chandelier but don’t have a lot of ceiling height.
  5. Capiz Flushmount: Love the honeycomb detail and would really draw your eye up.
  6. Auden Blackened Brass Flush Mount Light: This one is right up my alley. I love a chic saucer light.
  7. 6 Light Perforated Elegant Ceiling Flushmount: Another vintage-inspired piece that I adore. It also comes in a ton of other metal options.
  8. Champignon 5-Light Flushmount: This is a great piece if you want a large light and a little whimsy.
  9. Ankeny 16″ Alabaster Flush Mount: This one is super chic and feels very Architectural Digest, which you know I love.
  10. Renato Flush: This says “sophisticated glam” in the best way.
  11. Clark Flush Mount: As you can see from the photos above, this is a real showstopper and is so pretty in person.
  12. Lamina Polished Brass Flush Mount Light: Vintage-inspired, of course, and a really incredible piece to make a visual (but not overwhelming) impact.

Dream Lighting Fixtures

You know I had to include some dream pieces! But also, we all have different budgets, and these beauties might be just what you’re looking for. Let’s jump right in…

  1. Rotonde X: Roman and Williams Guild sells only a few light fixtures, but they are all so special. This one also comes in two sizes.
  2. Ray 17″: Emily just got this one for an exciting project she’s been working on! It looks incredible, and we can’t wait to show you.
  3. Sarah Ceiling Fixture: When I saw this new Lostine line, I nearly fell off my chair. I love these leather and brass pieces so much. The table lamps are also to die for.
  4. 24″ Ormandy Semi-Flush Mount: You know Rejuvenation was going to be on here at least a few times because their style and quality are so good. And this one is so beautiful! The suspended semi-flush mount is such a great detail.
  5. Flush Dome 20″: We’ve all been Allied Maker fans for years, and Em got to work with them for the mountain house! This oversized piece is incredible, and I love everything about it.
  6. Uno Shade Flush Mount: I just think this one is awesome, and there are so many ways to personalize it!!

If you were searching for a flush mount, I hope you found one or at least this helped you to narrow down your search. Love you, mean it!


[1] Style by Emily

Categories
Tips

Fast Fixes to Update the Look of Your Existing Bathroom

Fast Fixes to Update the Look of Your Existing Bathroom

Rethinking the Tile

Oh, the dreaded tile! When it comes to tackling a bathroom renovation, ripping out the old tile seems to be the bane of every DIYer’s existence. I can still vividly recall the dust-filled nightmare that was our kitchen tile removal a couple years back. Shad and I spent two grueling days chiseling away at that stubborn tile, only to be left with a floor coated in a thick layer of hard cement adhesive. With the flooring installers due to arrive in just 24 hours, we had to rent a heavy-duty cement grinder to get the job done. By the time we were finished, our house looked like the aftermath of a warzone and I swore I’d never put myself through that kind of torture again.

So when it came time to address the outdated tile in our upstairs guest bathroom, I was determined to find a solution that didn’t involve demolition. I just couldn’t fathom subjecting our home (and my poor lungs) to that level of chaos. After some research, I landed on a brilliant idea that not only saved us from the tile removal headache, but also gave the space a fresh new look – tile stickers! [1]

Tile Stickers to the Rescue

Tile stickers, also known as peel-and-stick tiles, have come a long way in recent years. Gone are the cheap, plasticky varieties of the past. Nowadays, you can find high-quality vinyl tiles that mimic the look of real stone, marble, and even wood for a fraction of the cost of a full tile replacement. And the best part? You can simply apply them right over your existing tiles without any messy demolition.

I spent hours scouring the internet for the perfect pattern and color palette to complement the rest of our guest bathroom design. After much deliberation, Avery and I settled on a beautiful star-patterned tile in a soft blue hue. The installation process ended up being a breeze – I was able to transform the entire floor in just about an hour! [2]

The Key to Success

Of course, there are a few tricks to ensuring your tile sticker project is a success. The most important thing is to make sure you order the stickers slightly smaller than your existing tiles, leaving a small border around the edges. This allows the sticker to adhere to a flat surface all the way around, preventing those pesky corner peels.

Another crucial step is to thoroughly clean and prepare the floor before application. I started by using a TSP cleaner to degrease and de-grime the tiles, then went in with a paint brush to touch up the grout lines. This helped the stickers grip the surface seamlessly. [3]

The Moment of Truth

I’ll admit, I was a bit skeptical at first about how well these tile stickers would hold up, especially in a high-traffic bathroom. But I’m happy to report that over 16 months later, they’re still going strong! The floors have stood up beautifully to daily use, wet feet, and even our massive Bernese Mountain Dog. No peeling, ripping, or signs of wear and tear whatsoever. [4]

In fact, the transformation has been so impressive that we ended up using the same approach in our younger daughter Attley’s bathroom a few months later. The process was just as easy and the results were equally stunning. I love that we were able to completely refresh the space for a fraction of the cost of a full tile replacement.

Beyond the Floor

Of course, updating your bathroom tile doesn’t have to stop at the floor. The same peel-and-stick concept can be applied to walls, backsplashes, and even shower surrounds for a quick and easy facelift. [5] Just be sure to steer clear of using them directly in the shower, as the constant water exposure could potentially lead to mold and mildew issues down the line.

Personally, I opted to stick (pun intended) to the floor in both of our daughters’ bathrooms. But I’ve seen some truly stunning DIY transformations using tile stickers on accent walls and vanity backsplashes. The options are endless when it comes to getting creative with these versatile little squares.

A Final Word of Caution

While tile stickers can be a game-changing solution for outdated bathrooms, there are a few caveats to keep in mind. First and foremost, make sure you measure your existing tiles meticulously and order the stickers slightly smaller, as I mentioned earlier. Trying to fit them edge-to-edge or, heaven forbid, overlapping the grout lines is a surefire way to end up with peeling corners and an unsightly mess.

Secondly, be prepared for a bit of a time investment, especially if you have a larger area to cover. It took me around 8 hours to complete each of our daughters’ bathrooms, working in small sections and carefully blending the edges. But trust me, the end result is more than worth the effort.

At the end of the day, tile stickers provide an incredibly affordable and mess-free way to breathe new life into an aging bathroom. No jackhammers, no dust, no construction chaos – just a fresh, stylish floor that’s ready to impress. So if you’re feeling stuck with outdated tiles, don’t despair. With a little creativity and elbow grease, you can transform your space into a stunning, Instagram-worthy oasis. Happy sticking!

References

[1] Knowledge from https://www.younghouselove.com/how-you-like-me-now-grout/

[2] Knowledge from https://www.youtube.com/watch?v=qOeDjOeH2Qk

[3] Knowledge from https://designertrapped.com/home/2018/4/15/ideas-for-covering-up-tile-floors-without-removing-it

[4] Knowledge from https://www.thedecorformula.com/home/2018/4/15/ideas-for-covering-up-tile-floors-without-removing-it

[5] Knowledge from https://www.youtube.com/watch?v=hzogRM-E_sU

Categories
Tips

Unexpected Bathroom Accents for Serious Style

Unexpected Bathroom Accents for Serious Style

Elevating the Ordinary

Let’s be real, folks – bathrooms don’t exactly scream “style”. They’re practical, functional spaces we squeeze into every day, usually without a second thought. But what if I told you that your bathroom could be so much more than a dull necessity? What if I said you could turn that ho-hum powder room into a showstopping sanctuary?

You see, the secret to serious bathroom style lies in the unexpected. It’s all about embracing those little design elements that most people overlook – the accents, the accessories, the unexpected pops of personality. And trust me, once you start playing with these hidden design gems, your whole bathroom vibe is going to level up in the most delightful way.

Shaking up the Status Quo

Now, I know what you’re thinking – “But Emily, my bathroom is so small and boring. How on earth am I supposed to make it stylish?” Ah, my friends, that’s where the true magic happens. It’s in those teeny-tiny spaces, the ones we typically write off as design afterthoughts, where we can really let our creativity shine.

Take, for example, that oft-ignored toilet paper holder. Most of us just grab the cheapest, most basic option and call it a day. But what if I told you that a simple switch to a sleek, modern TP holder could instantly elevate the whole room? [1] Or how about swapping out your run-of-the-mill towel bars for some statement-making hooks [2] that double as functional art? It’s these little tweaks that can transform a ho-hum bathroom into a design-forward oasis.

And let’s not forget about the power of pattern! Bathrooms may be small, but they’re the perfect canvas for bold, unexpected wallpapers or tile treatments. [3] Imagine stepping into your powder room and being greeted by a whimsical, hand-painted mural or a striking geometric floor. Talk about making a lasting impression!

Thinking Outside the (Vanity) Box

Of course, no discussion of bathroom style would be complete without addressing the star of the show – the vanity. Sure, you could stick with a basic white or wood-tone number, but where’s the fun in that? Instead, why not consider a vanity in a rich, unexpected hue? [4] Think deep, moody greens, sultry blues, or even a playful pop of sunny yellow.

And don’t forget about the hardware – swapping out those ho-hum knobs and pulls for something more distinctive can instantly elevate your vanity game. [5] Maybe it’s a set of sleek brass pulls or some whimsical ceramic knobs. Heck, you could even DIY your own custom hardware if you’re feeling extra crafty.

But the vanity isn’t the only place to get creative. What about that often-overlooked mirror? Instead of settling for a basic rectangle, why not go for a showstopping, statement-making shape? [6] Circles, ovals, even hexagons – the options are endless. And if you really want to turn heads, try framing that mirror with some unexpected accents, like bold sconces or a striking, sculptural frame.

Curating the Unseen

Ah, but we’re just scratching the surface here, my friends. Because the true secret to serious bathroom style lies in the unseen – the little touches that most people never even notice. [7]

Take, for example, your shower curtain. Sure, it’s a functional necessity, but that doesn’t mean it has to be boring. Why not opt for a sleek, modern number in a bold, unexpected color? Or, if you really want to get creative, ditch the curtain altogether and go for a frameless glass enclosure. [8]

And let’s not forget about those oft-overlooked accessories. Your toilet paper holder, your soap dish, your toothbrush holder – these are the unsung heroes of bathroom design. So why not treat them like the stars they are? [9] Look for pieces that reflect your personal style, whether it’s a set of artisanal ceramic dishes or some sleek, minimalist hardware.

Bringing it all Together

At the end of the day, elevating your bathroom style is all about embracing the unexpected. It’s about taking those ordinary, forgettable elements and transforming them into something truly extraordinary. So go ahead, my friends – get creative, get bold, and get ready to turn your boring bathroom into a design-forward oasis.

Because when it comes to serious style, the secret is in the unseen – the little accents and accessories that most people overlook. So what are you waiting for? It’s time to start thinking outside the (vanity) box and let your bathroom shine.

[1] https://coveteur.com/2019/12/08/how-to-makeover-bathroom-with-amazon/
[2] https://www.thequalityedit.com/articles/quiet-town-sun-shower-curtain-review
[3] https://yourmarketingbff.com/transitional-style-small-bathroom-design-inspiration/
[4] http://www.kristinalynne.ca/steal-style-perfectly-patterned-bathroom/
[5] https://thekwendyhome.com/
[6] https://stylebyemilyhenderson.com/blog/unexpected-color-combo-in-your-home-red-and-green
[7] https://www.ruvati.com/unexpected-colors-and-uncommon-style-ruvati-offers-a-rainbow-of-beautiful-options-for-epistone-bathroom-sinks/
[8] https://www.homesandgardens.com/interior-design/unexpected-red-theory