Categories
Tips

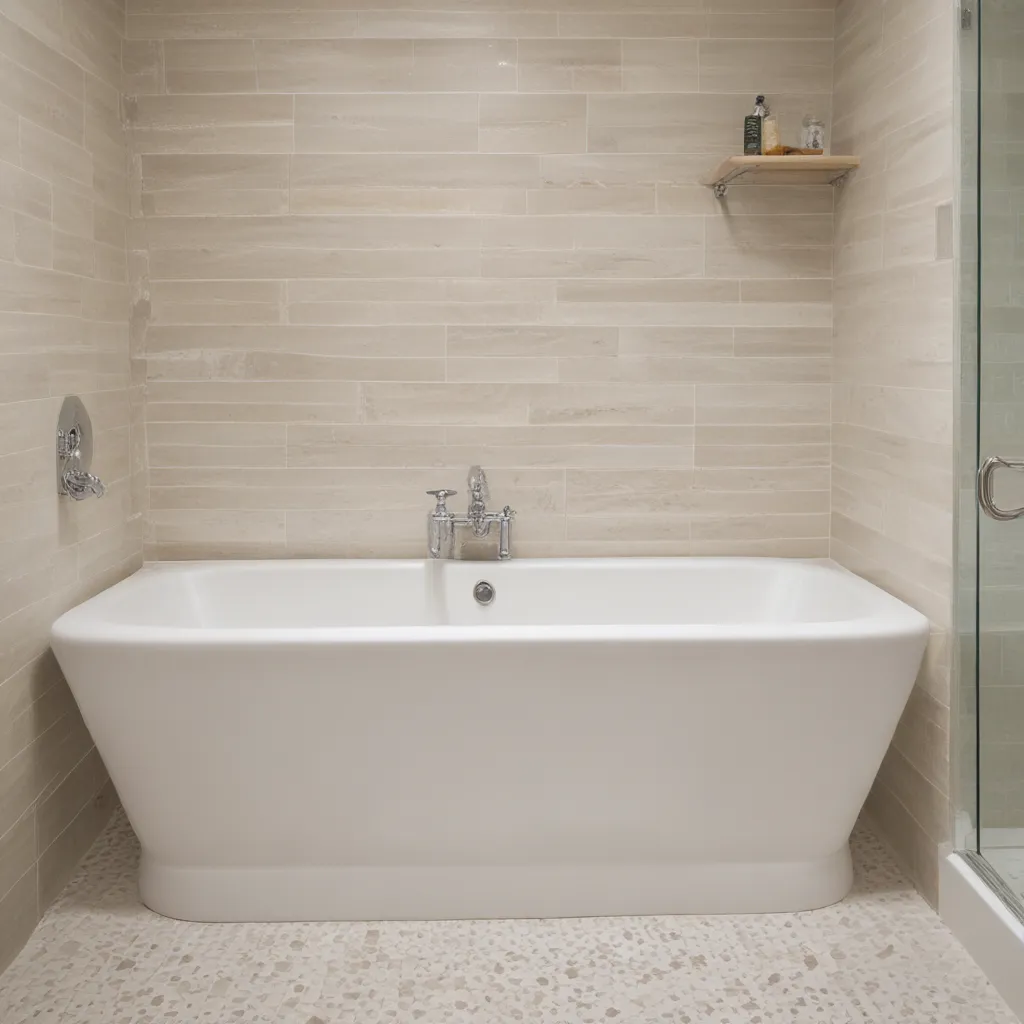
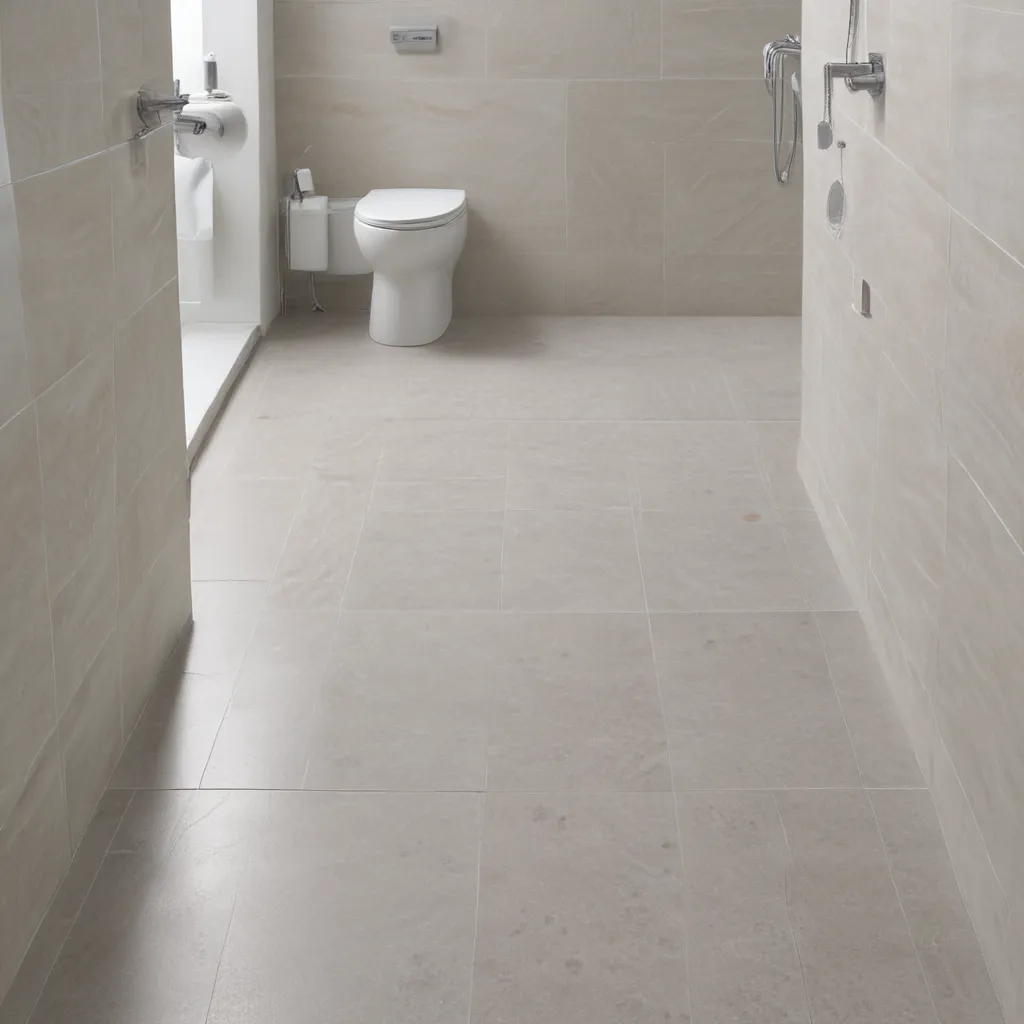
Stay Safe With Anti-Slip Bathroom Flooring

Stay Safe With Anti-Slip Bathroom Flooring

Stay Safe With Anti-Slip Bathroom Flooring

Have you ever had that heart-stopping moment when you step out of the shower or tub, only to feel your feet slip out from under you? I know I have, and let me tell you, it’s not an experience I’d wish on my worst enemy. Bathroom floors can be treacherous, especially when they’re slick with water, soap, or other slippery substances. That’s why investing in the right anti-slip flooring solutions is so important – not just for your safety, but for the peace of mind of everyone who uses your bathroom.

As someone who’s had my fair share of bathroom mishaps, I can tell you that a good set of anti-slip tiles or coatings can make all the difference. It’s like having a trusty sidekick to hold your hand (or feet, in this case) and keep you steady, even when things get a little slippery. And let’s be real, who doesn’t want to feel like a superhero when they’re just trying to, you know, take a relaxing soak?

But it’s not just about the thrill of avoiding a potentially painful fall. Anti-slip bathroom flooring is a must-have for anyone who values their wellbeing, especially those with mobility issues or young children who might be more prone to accidents. Imagine the relief of knowing that your bathroom is a safe haven, a place where you can move around with confidence instead of constantly worrying about taking a tumble.

Now, I know what you’re thinking – “But won’t anti-slip tiles ruin the aesthetic of my bathroom?” Fear not, my friend! The days of boring, utilitarian-looking anti-slip surfaces are long gone. Nowadays, you can find a wide range of stylish and sophisticated options that will have your bathroom looking like it belongs in a magazine, all while keeping you safe and secure.

From sleek, textured porcelain tiles to elegant natural stone, the possibilities are endless. And let’s not forget about the fun stuff, like patterned vinyl or even custom-designed mosaic tiles. Your bathroom can be a veritable work of art, with the added bonus of being slip-resistant. It’s like having your cake and eating it too, but without the risk of accidentally face-planting into it.

So, if you’re tired of tiptoeing around your bathroom, always on the lookout for potential hazards, it’s time to take action. Invest in some top-notch anti-slip flooring solutions, and say goodbye to those nerve-wracking moments. Your safety, and the safety of your loved ones, is worth far more than any aesthetic concerns. Plus, think of all the money you’ll save on hospital bills and physical therapy (not to mention the embarrassment of having to explain how you ended up with a broken tailbone).

Ready to take the plunge? Let’s dive in and explore the world of anti-slip bathroom flooring. Together, we’ll find the perfect solution to keep you safe, stylish, and sane. After all, who needs the adrenaline rush of a bathroom acrobatics routine when you can have the peace of mind that comes with a secure, slip-resistant surface?

The Slippery Slope of Bathroom Floors

Bathrooms are notorious for being slippery, and it’s not hard to see why. Between the constant presence of water, soap, and other bathroom products, the floor can quickly turn into a treacherous skating rink, just waiting to trip you up. And let’s not forget about the added factor of condensation, which can turn even the most innocuous-looking tiles into a veritable ice rink.

I’ll never forget the time I stepped out of the shower, feeling like I was on cloud nine after a relaxing soak, only to suddenly find myself airborne, headed for a painful rendezvous with the floor. It was like someone had greased the tiles while I wasn’t looking, and I was the unsuspecting victim of their cruel prank. Luckily, I managed to catch myself before any major damage was done, but the memory of that heart-stopping moment still haunts me to this day.

And it’s not just me, either. Thousands of people every year find themselves in similar predicaments, with many suffering from serious injuries like broken bones, head trauma, or even life-altering consequences. It’s a sobering thought, but it’s the reality we’re facing when it comes to the dangers of slippery bathroom floors.

But here’s the thing – it doesn’t have to be this way. With the right anti-slip solutions, we can turn our bathrooms into sanctuaries of safety, where the only thing we have to worry about is how to best enjoy our soak or shower. It’s all about finding the perfect balance between style and practicality, and that’s where the magic of anti-slip flooring really shines.

Choosing the Right Anti-Slip Flooring

Now, when it comes to anti-slip bathroom flooring, the options can be a bit overwhelming. Do you go with ceramic tiles? Porcelain? Natural stone? Vinyl? The choices seem endless, and it can be tough to know where to start. But fear not, my friends, I’m here to guide you through the process and help you find the perfect solution for your bathroom.

One of the key factors to consider is the slip resistance rating, or the Coefficient of Friction (COF) [1]. This is a measure of how much traction the surface provides, and it’s crucial when it comes to bathroom floors. Ideally, you want to look for tiles with a COF of 0.6 or higher, as this will provide the necessary grip to keep you firmly planted, even when things get a little wet and slippery.

But it’s not just about the COF – the texture of the tiles also plays a big role. Tiles with a more pronounced texture, such as those with raised patterns or embossed designs, tend to offer better traction than smooth, glossy surfaces. [2] It’s like having a built-in anti-slip feature, right at your feet.

And let’s not forget about durability. Bathrooms are high-moisture environments, so you’ll want to make sure your chosen tiles can withstand the constant exposure to water without losing their integrity. [2] Trust me, the last thing you want is to have your fancy new anti-slip tiles start to crumble and crack, leaving you back at square one.

Of course, aesthetics are important too. After all, you want your bathroom to look and feel like a luxurious oasis, not a sterile hospital ward. Luckily, there’s no shortage of stylish, slip-resistant options out there, from classic natural stone to bold, patterned ceramics. [3] It’s all about finding the perfect balance between function and fashion.

Installation and Maintenance

Okay, so you’ve done your research and found the perfect anti-slip tiles for your bathroom. Now comes the fun part – installation! Now, I know what you’re thinking – “But I’m no DIY expert. How am I supposed to tackle this project without ending up with a disaster on my hands?”

Fear not, my friends, because with the right guidance, even the most novice of handypeople can tackle this task with confidence. It all starts with proper preparation – making sure the surface is clean, dry, and free of any debris or imperfections. [4] From there, it’s just a matter of carefully applying the adhesive, laying the tiles, and finishing up with a grouting and sealing process.

And let’s not forget about the maintenance aspect. After all, the best anti-slip tiles in the world won’t do you much good if you don’t keep them in tip-top shape. [5] That means regular sweeping, gentle cleaning, and prompt attention to any spills or buildup. It’s like keeping your car in pristine condition – a little bit of TLC goes a long way.

But don’t worry, it’s not as daunting as it sounds. A few simple steps, like using a soft-bristle brush and avoiding harsh chemicals, can go a long way in preserving the slip-resistant properties of your tiles. [5] And trust me, the peace of mind you’ll feel knowing that your bathroom is a safe haven is more than worth the small investment of time and effort.

Affordable and Accessible Solutions

Now, I know what you’re thinking – “All of this anti-slip flooring sounds great, but it’s probably going to cost me an arm and a leg, right?” Well, my friends, I’m here to tell you that there are plenty of affordable and accessible options out there, no matter your budget or DIY skill level.

For starters, let’s talk about the cost of anti-slip tiles. While the price tag can vary depending on the material, size, and design, you can easily find high-quality options that won’t break the bank. [6] And with a little bit of savvy shopping, you might even be able to score some killer deals at your local home improvement store or online retailer.

But what if you’re not quite ready to tackle a full bathroom renovation? No problem! There are plenty of other anti-slip solutions that you can implement without breaking the bank. [7] From specialized coatings and treatments to non-slip mats and rugs, the options are endless, and they can make a world of difference in terms of keeping your bathroom safe and secure.

And let’s not forget about the accessibility factor. Anti-slip flooring isn’t just about looking good – it’s about ensuring that everyone, regardless of age or ability, can move around your bathroom with confidence and ease. [8] Whether you’re caring for an elderly loved one or have a little one who’s just learning to navigate the world, these safety-focused solutions can be a true game-changer.

So, don’t let the cost or complexity of anti-slip flooring deter you. There are plenty of affordable and user-friendly options out there, just waiting to transform your bathroom into a veritable oasis of safety and style. It’s time to take that first step towards a slip-free future, and trust me, your future self will thank you for it.

Conclusion

As I sit here, reflecting on the importance of anti-slip bathroom flooring, I can’t help but feel a deep sense of gratitude for the innovative solutions that are out there, waiting to keep us safe and secure. Gone are the days of slipping and sliding our way through our daily ablutions, wondering when the other shoe (or, in this case, the entire body) is going to drop.

With the right anti-slip tiles, coatings, and accessories, we can reclaim our bathrooms as the sanctuaries of relaxation and rejuvenation that they were always meant to be. No more white-knuckle moments as we step out of the shower, no more frantic scrambling to regain our balance. Instead, we can move with confidence, knowing that our floors have our backs (and our feet) every step of the way.

So, what are you waiting for? It’s time to take the plunge and invest in some top-notch anti-slip flooring solutions. Your safety, and the safety of your loved ones, is worth far more than any aesthetic concerns or budgetary constraints. Trust me, the peace of mind you’ll gain will be worth its weight in gold (or, in this case, slip-resistant tiles).

Happy (and safe) bathing, my friends! May your floors be as solid as your footing, and may your bathroom adventures be free from the threat of unexpected acrobatics. Here’s to a future filled with worry-free soaks, secure showers, and the knowledge that you’ve taken the necessary steps to keep yourself and your family safe. Cheers to that!

[1] https://slipdoctors.com/collections/anti-slip-coatings-for-floors
[2] https://slipnomore.com/non-slip-floor-tiles-for-bathroom/
[3] https://www.thehandmadehome.net/bathroom-flooring-inspiration/
[4] https://www.justanswer.com/home-improvement/hemim-type-floor-mat-rug-best-lvp-flooring.html
[5] https://www.pinterest.com/ideas/non-slip-bath-mat/927135205990/
[6] https://www.agingcare.com/questions/safe-alternative-for-bath-mats-478901.htm
[7] https://epilepsyfoundation.org.au/managing-epilepsy/health-and-wellbeing/safety-at-home/bathroom/
[8] https://www.affordablewalkinshower.com/blog/non-slip-shower-and-bathroom-floor-options
Categories
Tips

Refresh Tired Bathroom Wall Tile Without Replacing It

Refresh Tired Bathroom Wall Tile Without Replacing It

Reviving Drab Tiles: A Tile-Over-Tile Transformation

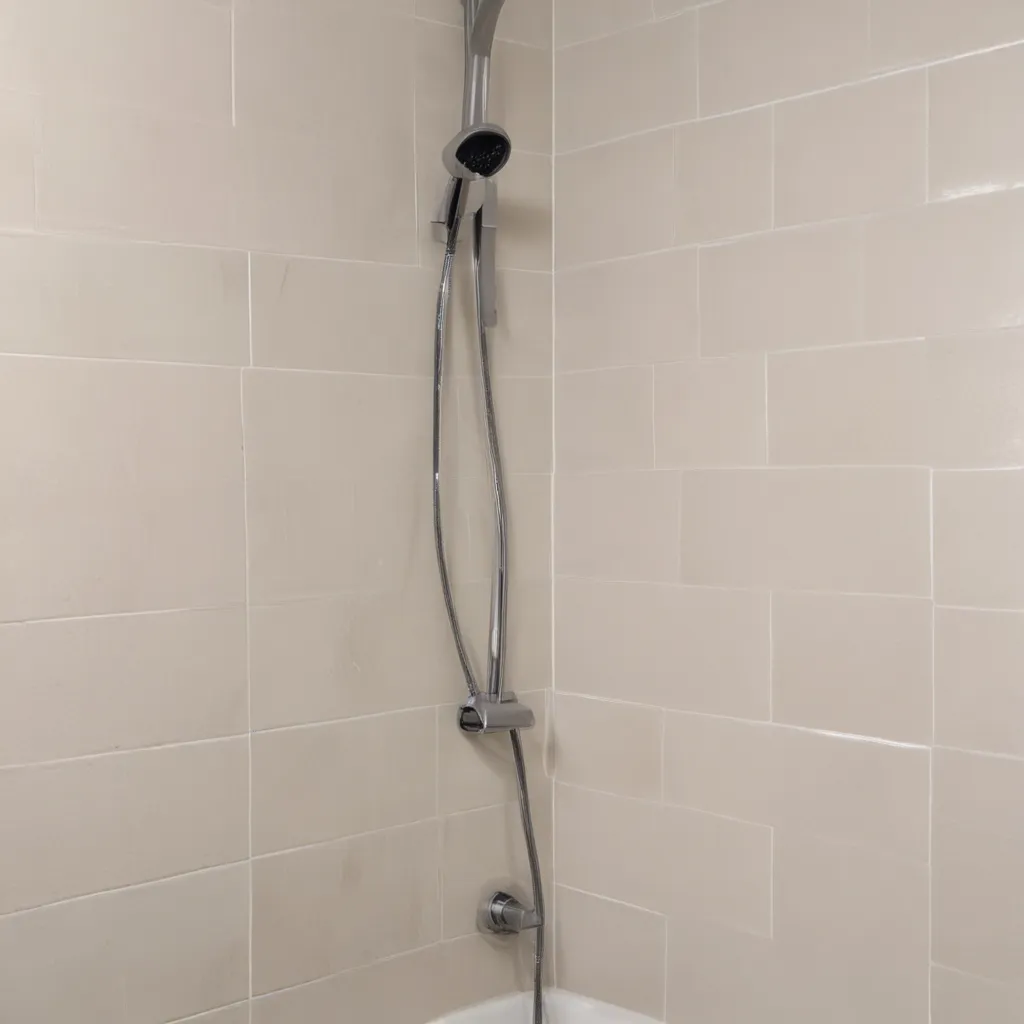
As a design enthusiast, I can confidently say that there’s nothing quite as satisfying as refreshing a tired, outdated space. And when it comes to bathrooms, the wall tiles are often the first thing that catch your eye – for better or for worse. If your bathroom is plagued by drab, uninspiring tiles, the thought of ripping them all out and starting from scratch can be overwhelming. But fear not, my fellow tile-weary warriors, for there is a simpler solution that can breathe new life into your bathroom without the hassle and expense of a full-blown renovation.

Tiling Over Tile: A Clever Hack

Believe it or not, you can actually tile right over your existing tiles, saving you the backbreaking (and wallet-emptying) task of demolition. Now, I know what you’re thinking – “Tiling over tile? Isn’t that just asking for trouble?” Well, my friends, it’s not as crazy as it might sound. In fact, with the right preparation and products, it can be a game-changer for your dated bathroom.

Mastering the Tile-Over-Tile Technique

The key to successful tile-over-tile is ensuring that your existing tiles are in good condition and free of any cracks or instability. After all, you don’t want your new tiles to start popping off like popcorn kernels, now do you? [1] Once you’ve verified the integrity of your current tiles, it’s time to get to work.

First up, you’ll need to thoroughly clean the tiles with a degreasing agent like TSP (trisodium phosphate) to remove any grime or residue that could interfere with the new tile adhesion. Next, it’s time to apply a bonding primer, like ECO Prim Grip, to create a rough, gritty surface that’ll help the new mortar and tiles stick like glue. [1]

With the primer dried, you can start laying your new tiles, working from the corners toward the edges. And don’t forget to install a sturdy edge trim, like a Schluter 1/2-inch profile, to provide a clean, finished look. [1] After you’ve grouted and caulked everything, your once-tired bathroom will be transformed into a shiny, refreshed oasis.

Tile-Over-Tile: The Pros and Cons

Now, I know what you’re thinking – it all sounds too good to be true. And you’re not wrong to be a little skeptical. Tiling over tile does come with its own set of pros and cons that you’ll want to weigh before diving in.

On the plus side, it’s a relatively quick and cost-effective way to update your bathroom without the hassle and mess of a full-blown tile removal. And if you happen to change your mind down the line, the new tiles can be easily removed, leaving the original tiles intact. [2]

However, there are a few potential drawbacks to consider. If your existing tiles aren’t perfectly level or stable, the new tiles may not adhere properly, leading to cracking or loosening over time. And the added thickness of the new tiles can also cause issues with door clearances and transitions to adjoining rooms. [1]

Tile-Over-Tile Success Story

But don’t let those potential pitfalls scare you off. I’ve seen firsthand how a tile-over-tile transformation can breathe new life into a tired bathroom. Take my daughter’s tub/shower combo, for example. Almost two years ago, we decided to tackle the outdated tiles, and the results have been nothing short of amazing.

We followed the same process I outlined earlier – thoroughly cleaning the existing tiles, applying the bonding primer, and carefully installing the new penny tiles. And let me tell you, the difference is night and day. The once-drab space is now a bright, modern oasis that puts a smile on my face every time I see it. [1]

Embracing the Tile-Over-Tile Opportunity

So, if you’re staring at your bathroom walls, wishing you could wave a magic wand and make those dated tiles disappear, don’t despair. Tiling over tile might just be the solution you’ve been searching for. Sure, it’s not a perfect fix-all, but with the right preparation and a bit of elbow grease, you can transform your tired bathroom into a space you’re proud to call your own.

And who knows, maybe this tile-over-tile adventure will even unleash your inner rebel – after all, what’s life without a little bathroom tile chaos, am I right? So, what are you waiting for? Grab your roller, your trowel, and let’s get to work on giving your bathroom a much-deserved refresh!

References

[1] Kaleidoscope Living. “Tiling Over Existing Tile: What You NEED To Know.” Accessed April 21, 2023. https://designertrapped.com/tile-over-tile/.

[2] The Decor Formula. “Ideas for Covering Up Tile Floors Without Removing It.” Accessed April 21, 2023. https://www.thedecorformula.com/home/2018/4/15/ideas-for-covering-up-tile-floors-without-removing-it.

[3] Killam, Maria. “How to Fix a Dated Bathroom.” Accessed April 21, 2023. https://mariakillam.com/how-to-fix-dated-bathroom/.

[4] Multipanel. “How to Renovate Bathrooms Without Removing Tiles.” Accessed April 21, 2023. https://www.multipanel.co.uk/inspiration/bathroom-inspiration/how-to-renovate-bathrooms-without-removing-tiles/.

[5] Shiplapandshells. “Laundry Room Refresh.” Accessed April 21, 2023. https://shiplapandshells.com/laundry-room-refresh/.

[6] Gulin Cabinets. “How to Update Kitchen Tiles Without Removing Them.” Accessed April 21, 2023. https://guilincabinets.com/how-to-update-kitchen-tiles-without-removing-them.

[7] Showers To You. “How to Revive Bathroom Tiles.” Accessed April 21, 2023. https://www.showerstoyou.co.uk/latest/2020/09/how-to-revive-bathroom-tiles/.

[8] Centsational Style. “Powder Room Refresh.” Accessed April 21, 2023. https://centsationalstyle.com/2017/09/powder-room-refresh/.

Categories
Tips

Tips for Properly Caulking Your Bathtub and Shower

Tips for Properly Caulking Your Bathtub and Shower

The Ugly Truth About Caulk

Few features can make a bathroom look more dated and unkempt than the caulk around your bathtub. According to the experts at This Old House, when caulk starts to look hard, cracked, and discolored, it’s time to rip it out and start fresh [1]. And let me tell you, that’s not a pretty sight. I learned this the hard way after ignoring the problem in my own bathroom for way too long.

You see, I’m the kind of person who likes to put off home maintenance tasks until they can no longer be ignored. So when I started noticing mildew, residue, and dark spots creeping into the caulk around my tub, I just shrugged it off. “It’s fine, it’s fine,” I told myself. “I’ll get to it eventually.” Big mistake.

Eventually, that “fine” caulk turned into a crusty, peeling mess that made my whole bathroom look like it belonged in a haunted house. Guests would come over and I could see them staring at it, trying to be polite but clearly thinking, “Yikes, when was the last time they updated that?” It was embarrassing, to say the least.

Caulking 101: The Supplies You’ll Need

Once I finally swallowed my pride and tackled the caulk situation, I realized it wasn’t as daunting as I had built it up to be in my head. In fact, with the right tools and a little elbow grease, it’s a pretty straightforward DIY project.

The most important thing is to make sure you have the right kind of caulk. According to the experts, you’ll want to use a caulk that’s specifically formulated for bathrooms or kitchens, as these are designed to withstand moisture and hold up better over time [2]. Acrylic latex or silicone caulks are typically the best options.

In addition to the caulk itself, you’ll also need:

  • A caulking gun
  • Soft cloths
  • A scrub brush
  • Baking soda or bathroom cleaner
  • A scraping tool with a razor blade
  • Painter’s tape

And of course, you’ll need to set aside enough time for the caulk to properly dry and cure, which can take 30 minutes to 24 hours depending on the product [3].

Getting the Area Ready

Before you even think about squeezing that trigger on your caulk gun, you’ll need to do some serious prep work. And I mean serious. This is not the time to cut corners, my friend.

First up, you’ll want to thoroughly clean the area where the tub meets the tile. Scrub and rinse that seam to get rid of any grime, residue, or leftover caulk [4]. If you’re really concerned about mold or mildew, you can even give it a wipe-down with some bleach or white vinegar [5].

Once that area is sparkling clean, you’ll need to remove all the old caulk. This is where that scraping tool with the razor blade comes in handy. Be very careful not to scratch up your tub in the process – you want to slice the caulk out in one continuous motion rather than digging it out [7].

After the old caulk is gone, you may notice a residual film left behind. No problem – just grab a damp cloth and some baking soda and gently scrub it away. Wipe it clean with a fresh, damp cloth and let the area dry completely before moving on [6].

Laying it On Thick (But Not Too Thick)

Alright, now for the fun part – time to start caulking! But before you get trigger-happy, take a moment to think about the caulking gun you’re using. According to the experts at Bob Vila, not all caulking guns are created equal. You’ll want one with a smooth rod, sturdy plunger, and a revolving frame to make those inside corners a breeze [8].

Once you’ve got your gun locked and loaded, it’s time to start squeezing. But be careful not to get overzealous – you want just enough caulk to fill the gap, not a big goopy mess. Smooth it out with a wet finger or a damp cloth as you go, and use painter’s tape to create clean, crisp lines if needed.

And remember, patience is key. That caulk needs time to fully dry and cure, so don’t go splashing water on it right away. Give it at least 30 minutes to set up, and ideally a full 24 hours before you start using the tub or shower again [3].

Caulking Pros and Cons: A Side-by-Side Comparison

Now, as I mentioned earlier, there are a few different caulk options to choose from – acrylic latex and silicone being the two most common. Each has its own set of pros and cons, so let’s take a closer look:

Feature Acrylic Latex Silicone
Durability Less durable, needs to be replaced more often More durable, lasts longer
Application Easier to apply and requires less cleanup More difficult to apply and smooth out
Adhesion Adheres well to a variety of surfaces Picky about what it will stick to
Cleanup Easier to clean up spills and mistakes Messier and more difficult to clean up

As you can see, there’s no clear-cut winner here. It really comes down to your personal preferences and the specific needs of your project. Silicone may be the more long-lasting option, but acrylic latex is definitely the easier choice for DIYers. Weigh the pros and cons, and go with whichever caulk type you feel most comfortable working with.

Caulking with Confidence

I’ll admit, when I first tackled this project in my own bathroom, I was a nervous wreck. But once I got all the prep work done and started squeezing that trigger, it was smooth sailing. Well, mostly smooth – there were a few…ahem…rough patches where I got a little overzealous with the caulk. But with a little cleanup and a lot of patience, I was able to get that tub looking brand new again.

And let me tell you, the sense of pride I felt when I stood back and admired my handiwork was unreal. No more embarrassing, crumbling caulk – just a crisp, clean, and dare I say, professional-looking bathroom. It was a huge boost to my DIY confidence, and I’m sure it’ll be the same for you.

So don’t let that pesky caulk intimidate you. With the right tools, a little elbow grease, and a healthy dose of patience, you can transform your bathroom from dated and dingy to bright and beautiful. Trust me, your guests (and your own sense of pride) will thank you.

References

[1] This Old House. (n.d.). How to Caulk Around a Bathtub. Retrieved from https://www.thisoldhouse.com/bathrooms/21016395/how-to-caulk-around-a-bathtub

[2] House Digest. (2021, August 5). Genius Tips for Caulking the Bathtub. Retrieved from https://www.housedigest.com/655937/genius-tips-for-caulking-the-bathtub/

[3] YouTube. (2020, September 18). How to Caulk a Bathtub – The Right Way. Retrieved from https://www.youtube.com/watch?v=0a92Jz0djGU

[4] Reddit. (2016, February 29). Tips for Caulking a Bathroom. Retrieved from https://www.reddit.com/r/HomeImprovement/comments/498fxw/tips_for_caulking_a_bathroom/

[5] Apartment Therapy. (2021, June 17). The Secret to Caulking Your Bathtub Like a Pro. Retrieved from https://www.apartmenttherapy.com/how-to-caulk-a-bathtub-like-a-pro-36905806

[6] This Old House. (n.d.). How to Remove Caulk from Bathtubs. Retrieved from https://www.thisoldhouse.com/bathrooms/21016415/how-to-remove-caulk-from-bathtubs

[7] YouTube. (2021, August 6). How to Remove Old Caulk. Retrieved from https://www.youtube.com/watch?v=eEsy7luzUTI

[8] Bob Vila. (2021, January 28). How to Caulk a Shower. Retrieved from https://www.bobvila.com/articles/how-to-caulk-a-shower/

Categories
Tips

Keep Your Shower Grout Looking Fresh

Keep Your Shower Grout Looking Fresh

Keep Your Shower Grout Looking Fresh

Oh, the eternal battle with grout! That pesky stuff that lines our tiles, destined to become a breeding ground for mold, mildew, and general grossness. But fear not, my bathroom-beautifying friends, for I have uncovered the secrets to keeping your shower grout looking spotless and shower-ready all year round.

Scrubbing, Scrubbing, and More Scrubbing

When I first moved into our fixer-upper of a home, the previous owners had left behind a real grout nightmare in the bathrooms. I’m talking about that dingy, discolored, downright depressing grout that makes you just want to rip out the entire tile setup and start fresh. Well, I tried the good old-fashioned elbow grease approach, scrubbing and scrubbing until my fingers were raw. I went through every cleaning product under the sun, from harsh chemicals to natural DIY concoctions. But no matter how hard I scrubbed, that grout just wouldn’t budge. [1]

It was a truly soul-crushing experience – I felt like I was waging an endless war against the grime. Just when I thought I was making progress, the dang grout would revert back to its dingy, stained state. I was ready to throw in the towel and resign myself to a lifetime of unsightly shower walls.

The Grout Renew Revelation

But then, a stroke of luck! I stumbled upon a product called Polyblend Grout Renew, and let me tell you, it was a game-changer. [2] At just $12 from the Home Depot, this stuff is a total miracle worker. I’m talking about a complete 180-degree transformation. The once-grungy grout lines were now sparkling clean and bright white, like something out of a magazine.

Now, I’ll admit, applying the Grout Renew was a bit of a tedious process. It took me several hours, spread out over a few days, to get the job done. But let me tell you, it was so worth it. I ended up having to do a bit of scrubbing beforehand to get the surface clean, but after that, it was just a matter of carefully painting on the Grout Renew with a small craft brush. [3]

Maintenance Made Easy

The best part? The Grout Renew isn’t just a temporary fix. According to the reviews I’ve read, it can actually hold up for years without needing to be reapplied. [4] All you have to do is give it a good 24-hour drying period, and then you’re good to go. No more constant scrubbing or worrying about mold and mildew taking over.

Of course, regular cleaning is still essential to keeping your shower grout looking its best. I like to use a marble-specific cleaner, which keeps things fresh and prevents any new stains or discoloration. And a quick squeegee after each shower helps prevent water buildup, which can lead to that dreaded grime creeping back in. [5]

A Grout Transformation Made in Heaven

Believe me, I know the thought of spending hours hunched over your bathroom floor, meticulously painting grout lines, doesn’t exactly sound like a good time. But trust me, the results are so worth it. Walking into my freshly renovated bathroom now, I practically do a little dance every time I see that sparkling white grout. It’s like a whole new space, and I can’t believe I ever had to stare at that dingy, depressing mess.

So if you’re struggling with the same grout woes I was, don’t give up hope. Grab yourself a bottle of Grout Renew, put on your best podcast, and get to work. Your future self (and your guests) will thank you. Here’s to a future of gleaming, grime-free grout lines, my friends!

[1] https://www.younghouselove.com/how-you-like-me-now-grout/
[2] https://www.reddit.com/r/HomeImprovement/comments/pguo16/how_to_make_shower_grout_look_new_again_without/
[3] https://thediyplaybook.com/renew-dirty-bathroom-grout/
[4] https://erinkestenbaum.com/2019/08/27/do-we-regret-using-marble-tile-in-our-shower/
[5] https://sweetteal.com/2020/01/how-to-make-old-grout-look-like-new/

Categories
Tips

Things to Consider When Remodeling Your Bathroom

Things to Consider When Remodeling Your Bathroom

Planning for the Perfect Bathroom Oasis

Before I start any project, there is a whole lot of planning behind the scenes. It usually starts with a Pinterest board of my dreams and it ends with a very detailed spreadsheet! Today, I’ve put together a bathroom remodel checklist as a guide to help you plan your ultimate bathroom renovation! [1]

We have been building and renovating homes our whole lives, and my husband is a general contractor, so we have a good idea of what is required now before we get into any project. We could probably throw together a ballpark list pretty quickly at this point, but I never do that. I think the planning phase of any remodeling project is the most important part.

We are working up to our large ensuite renovation. This is the third (and final) bathroom we will be renovating in this house, and because it’s the largest, it’s also going to be the most luxe and involved. The first bathroom we did was the kid’s bathroom, and the second one was the guest bathroom. [1]

Evaluating the Existing Layout

The first thing you should consider when planning is to evaluate the bathroom layout. Is the room large enough? What are the pain points in the room? Do you wish you had a walk-in shower instead of a tub? Does the door swing into the back of the toilet? Is there enough storage space? [1]

At this point, I think it’s great to just make a list of things you would like to have in the renovated space (in a perfect world). Once you have that list, look at your existing bathroom and try to see what might be done to make improvements to meet your wish list. If a large shower is important to you but you don’t have much space, would you sacrifice a bathtub in order to have a luxurious shower? If you would like a double vanity, do you have enough room to fit that into the size of the space as it is? Is there a closet or any wasted space in an adjacent room that you can carve out a bit of new space to add to your bathroom? [1]

If you have trouble envisioning changes beyond what is currently there, your best bet might be to hire an interior designer or architect to give you some space planning options. A bathroom designer might give you ideas you haven’t even considered! [1]

Navigating Layout Obstacles

In our bathroom, for the most part, is a very large room but the room is quite square and it has some significant obstacles that we had to work around. We have a large skylight in the ceiling and a large window on one wall, which makes the placement of any new walls or the location of the vanity or shower, which ultimately you probably don’t want in front of a window, more difficult. [1]

We decided early on that we really really wanted a separate toilet room and a larger shower but those obstacles I talked about above really made it difficult to figure out. In the end, we figured out how to squeeze in the things we wanted to the existing layout without making too many drastic changes to the plumbing. You can see in the before and after floor plan below what we are planning! [1]

Prioritizing Natural Lighting

Don’t forget to consider natural light. If your bathroom doesn’t have a lot of it, would it be worth it to you for the additional cost to add a window or a skylight? Can you add enough artificial light to make the space functional enough? Good lighting is so important to any bathroom design. [1]

In my guest bathroom, I installed two fairly low-light sconces and it ended up being too dim for that space, so it’s not something I want to do again in the next bathroom makeover. [1]

Defining Your Aesthetic

Once you have determined the layout, it’s time for the dreaming! I generally keep Pinterest boards and saved Instagram images in folders separated by room types, so all I have to do to see what kind of room I love is open up my “Bathrooms” Pinterest board. [1]

I think it is a great idea when you are gearing up for any renovation to really try to nail down what you like. You may not be able to incorporate everything from your dream bathroom, but you will be able to bring in small design touches here and there to make even a small bathroom feel like the bathroom of your dreams. [1]

Make a mood board of your finishes to make sure you are happy with how it all works together. At this point, I think it’s helpful to make a list of things you would really like to have. Just some general items like “marble tile,” “nickel sconces,” or “statement mirror”. You don’t have to splurge on each of those items but it might help you decide what to splurge on, and also what is the most important to you if budget cuts need to happen! [1]

Finalizing the Plan

Now that you have a layout and an idea of the design, it’s time to put together a list of everything you need to complete your renovation. I’ve included a printable list at the end of this post so that you can print this off and fill it out, as you need it. This is also a good time to either speak with a general contractor (if you are using one) or an electrician and a plumber and obtain some quotes. [1]

When talking with an electrician, think about not only where you might want lighting fixtures, but also plug-ins and switches. Let your electrician know all of the changes you will need. Some special considerations might be adding a plug-in inside your vanity for hair tools, a plug near the toilet for a fancy toilet seat, or overhead for wall lighting changes. [2]

When speaking with the plumber, it is helpful if you have all of your fixtures picked out and can communicate any layout changes as well as changes in things like valves behind the wall that might be more intrusive to replace. [2]

What I like to do when I’m sticking with a budget (because who doesn’t have a budget!) is start out this list with some generic ballpark allowances for each item. If I don’t know off the top of my head what something might cost, I do a little google-research to get a rough cost and try to include a little cushion. Then as I make final choices and the quotes start rolling in, I refine the numbers. [1]

Ordering and Scheduling

Once you add it all up, if it’s not within your budget, go back a few steps and look at where you can save. Less expensive finishes, maybe reworking your existing vanity instead of buying a new vanity, or reworking some of the layout changes. [1]

Once you are happy with the budget and the layout, it’s time to start ordering! Some items can have long lead times and it’s best to get everything on site before you even lift a sledgehammer. Some special order items might take 6 – 8 weeks after you order before they arrive, or even longer. [1]

There are some things you can ultimately do a bit later, but if you are hiring someone especially you are going to want to make sure they have everything they need to get things done without a delay. A reputable contractor will likely insist on this because coming back over and over to do little bits of the project as pieces come in is not very efficient. Once Contractors move on to another project it can be very hard for them to try to come back! [1]

Navigating Plumbing and Waterproofing

Bathroom Fixture Rough-ins – Ordering bathroom fixtures is actually quite complicated and if you are not confident, have your plumber look over your selections to make sure you have all the bits and pieces you need. For example, for whatever shower control you choose you will need the corresponding valve that goes behind the wall. Each plumbing brand has its own valves so this is really important that you get the one that corresponds to your fixtures. Also, when you order a lot of faucets and shower controls they are often sold without the handles. This is because there are sometimes different handle options for the same fixtures. So make sure you are ordering all the pieces you need! [1]

Waterproofing – figuring out your tile is one thing but the most important part of any tile system is the waterproofing. You want to make sure that your shower at a minimum is properly waterproofed. There are several different systems for waterproofing so it is a good idea to look into that and determine how you are going to do it. I went over how I waterproofed our kid’s shower walls in our kid’s bathtub surround in this post, and I will likely use this system again for our ensuite. You may also want to consider waterproofing the floor, which might add a bit of thickness to your floor system, too. [3]

Vanities and Custom Stone Counters

Custom vanities will require more lead time so get an estimate for delivery from your supplier. Also, if you are going the custom vanity route you will likely be working with a separate company to install the countertop. If it is stone, they will need to template it after the vanity goes in and then fabricate it, so be aware of that lead time when planning your schedule. In my area it’s 3 – 4 weeks between countertop templating and countertop installation, so it’s super important to try to get the vanity in as soon as possible! [1]

Bringing It All Together

Once everything has been ordered, you can make yourself a project timeline based on when supplies will arrive. To be safe, you can wait until you have everything on site, or at the very least a solid delivery date for key items. Here is a general order of things I use when planning my schedule. Some things can be moved around a little bit too but this is a guideline! [1]

If you are DIY’ing it like we do, we look at our personal schedule and try to realistically think of how long it will take us to do something and schedule it in to our weekends. Then we line up any trades based on that! [1]

Bathrooms are one of the smallest rooms in the house but they can cost so much money! It is very important to know what you are getting into with your bath remodel. There are a lot of moving parts to a big project like this but if you are organized you can avoid unexpected costs (to some degree) and your bathroom renovation has a much better chance of running smoothly. [1]

I’ve been behind the scenes working on the planning of my bathroom for quite a long time and I’m so excited that demo day is almost here! Follow along with me on Instagram or here on the blog as we tackle this huge project, DIY style! [1]

[1] Knowledge from https://erinzubotdesign.com/bathroom-remodel-checklist-and-guide/
[2] Knowledge from https://www.thisoldhouse.com/bathrooms/21019042/11-things-to-consider-before-you-remodel-your-bathroom
[3] Knowledge from https://www.remodelista.com/posts/what-to-know-bathroom-remodel-tips-cost/
[4] Knowledge from https://www.hogandesignandconstruction.com/checklist-19-things-to-think-about-when-remodeling-your-bathroom
[5] Knowledge from https://www.reddit.com/r/HomeImprovement/comments/s40sqm/im_about_to_start_an_entire_bathroom_remodel_any/
[6] Knowledge from https://www.houzz.com/magazine/15-design-tips-to-know-before-remodeling-your-bathroom-stsetivw-vs~42379490
[7] Knowledge from https://www.joanbissdorf.com/blog/2023/2/18/how-to-remodel-a-bathroom-a-step-by-step-to-bathroom-gut-renovation
[8] Knowledge from https://www.hgtv.com/design/remodel/bathroom-remodel/bath-remodeling-what-to-consider

Categories
Tips

Replace or Regrout? Tips for Your Bathroom Tile

Replace or Regrout? Tips for Your Bathroom Tile

Tile Troubles? Time for a Tactical Makeover!

Ah, the bathroom tile conundrum – a classic homeowner’s headache. Do you replace the whole thing or simply regrout? It’s a decision that can send even the most seasoned DIYer into a tailspin. But fear not, my tiled friends, I’m here to guide you through this porcelain predicament with a little humor, a lot of know-how, and some handy tips straight from the pros.

You see, I’ve been there, done that, and let me tell you – regrouting can work wonders. As Lee from The Spruce [5] puts it, “When tile looks old and dingy, consider regrouting the tile instead of replacing it. Full tile replacement is messy and difficult. As long as the tile is in good shape, regrouting the tile can work wonders by making the entire installation look brand-new.”

Regrouting Rundown: A Step-by-Step Guide

Now, let’s dive into the nitty-gritty of regrouting. It’s a two-step process, and with the right tools and a little elbow grease, you can transform your tired tiles into a sparkling sanctuary.

First up, the grout removal. Grab your trusty oscillating tool, fitted with a diamond-tipped grout removal blade [5], and get to work. This nifty gadget will quickly pulverize that hardened grout, leaving you with a clean slate. Just be careful not to let the blade nick or chip your precious tiles.

Once you’ve cleared out the old grout, it’s time to mix up a fresh batch. [5] The key is to get the consistency just right – smooth, paste-like, and just barely pourable. Scoop it up with a rubber grout float and press it firmly into those freshly cleaned seams, working in alternating directions to ensure complete coverage.

Now, the fun part – sponging away the excess. Use a barely damp sponge and a gentle touch to remove any hazy residue. Voila! Your tiles are looking brand spankin’ new.

Regrouting vs. Retiling: The Big Bathroom Showdown

But wait, there’s more! What if your tile woes run deeper than a little grout grime? That’s where the big decision comes in – do you regrout or do you retile?

According to the pros, [5] regrouting is generally the more cost-effective and less labor-intensive option, as long as your tiles are in good shape. But if you’ve got cracked, missing, or otherwise damaged tiles, it might be time to go for a full-blown retile.

To help you weigh your options, let’s take a look at the pros and cons of each:

Regrouting Retiling
Pros: Pros:
– Significantly cheaper than retiling – Addresses deeper tile issues
– Less messy and disruptive – Allows for a complete design overhaul
– Can make old tiles look brand new – Provides a fresh, updated look
Cons: Cons:
– Doesn’t address cracked or missing tiles – More expensive and labor-intensive
– Requires careful prep work – Highly disruptive to your bathroom routine
– Results may not last as long as retiling – Can be tricky for DIYers

So, there you have it, folks – the great bathroom tile debate in a nutshell. Whether you choose to regrout or retile, just remember to weigh the pros and cons, gather the right tools, and embrace the process. Who knows, you might even have a little fun along the way!

The Ultimate Tile Toolkit: Tools of the Trade

Now, let’s talk tools. [5] As I mentioned, the oscillating tool with a grout removal blade is the real MVP here. But you’ll also want to have a manual grout removal tool, a margin trowel for mixing, a rubber grout float, and a moistened sponge on hand.

The total cost for these regrouting essentials can range from $80 to $200 or more, depending on the quality of the tools. But if you don’t already have them, many home improvement stores offer tool rentals, so you can save a few bucks.

Tile Transformation: Inspiration and Ideas

Ready to get started on your bathroom tile makeover? Before you dive in, take a moment to explore some inspiration. Whether you’re leaning towards a sleek, modern look or a retro, mid-century vibe, [6] [7] there’s endless bathroom tile eye candy out there to spark your creativity.

And remember, even if regrouting is your path forward, don’t be afraid to get a little adventurous with your grout color choices. [8] Who says bathroom tile has to be boring? Mix it up, have fun, and let your personality shine through.

So, there you have it, my fellow tile enthusiasts – everything you need to know to tackle that bathroom tile dilemma. Whether you choose to regrout or retile, just remember to approach it with a healthy dose of humor, a pinch of creativity, and a whole lot of determination. Your bathroom deserves a little TLC, and you’ve got this!

References

[1] https://www.youtube.com/watch?v=XFvrV4sFA7k
[2] https://www.johnbridge.com/vbulletin/showthread.php?t=824
[3] https://www.youtube.com/watch?v=a1dL5bKB90c
[4] https://www.thespruce.com/how-to-regrout-bathroom-tile-1822629
[5] https://www.thespruce.com/how-to-regrout-bathroom-tile-1822629
[6] https://www.reddit.com/r/midcenturymodern/comments/ya7yr6/mid_century_bathroom_advice_please_likely_need_to/
[7] https://www.youtube.com/watch?v=4uyn5RmLzyc
[8] https://www.reddit.com/r/HomeImprovement/comments/3s93kl/advice_sought_do_i_need_to_regrout_my_whole_shower/

Categories
Tips

Picking Paint Colors for a Small Bathroom

Picking Paint Colors for a Small Bathroom

Navigating the Tricky Terrain of Tiny Tubs

As a design enthusiast, I’ve had my fair share of experience tackling the challenge of small bathrooms. Most recently, I took on the task of revamping my dad’s windowless guest bathroom, and let me tell you, choosing the perfect paint color was no easy feat.

But fear not, my bathroom-beautifying friends! I’m here to share my hard-earned wisdom and guide you through the process of picking the perfect hue for your petite powder room.

Embracing the Darkness: Why Bright White Isn’t Always the Answer

Contrary to popular belief, bright white isn’t always the best choice for a small, windowless bathroom. In fact, it can sometimes make the space feel cold and dingy. I learned this the hard way when my dad’s bathroom initially felt a bit lifeless, despite the fancy fixtures and marble floors.

Instead, I opted for a warmer, mid-tone or dark color to create a cozy and inviting atmosphere. Dark paint colors have the magical ability to absorb light rather than reflect it, which can completely transform the feel of a room. Think of it as wrapping yourself in a cozy, color-drenched embrace.

Complementary Colors: Pairing Your Bathroom Palette

When it came to choosing the perfect paint color for my dad’s bathroom, I knew I wanted it to complement the “Boothbay Gray” shade I had selected for the adjoining guest room. After all, you don’t want your bathroom to feel like a completely separate and disconnected space.

I started by exploring the colors on the same paint swatch as “Boothbay Gray” and quickly fell in love with “Night Train,” a deep, moody blue-gray that I felt would be the perfect fit. But the options didn’t stop there. I also considered “Brewster Gray” and “Puritan Gray” before ultimately settling on “Brewster Gray” as the winner.

Lighting, Lighting, Lighting!

One important factor I had to consider when choosing the paint color was the lack of natural light in the bathroom. Without any windows to bathe the space in that beautiful, mood-setting glow, I knew I needed to compensate with ample artificial lighting.

My solution? Incorporating a gold sconce over the mirror, which not only added a touch of warmth and elegance but also helped to brighten up the room. And just like that, the once-dingy bathroom was transformed into a cozy, inviting oasis.

Mixing Metals for Maximum Impact

As a self-proclaimed design enthusiast, I’ve learned that mixing metals is the key to creating a truly dynamic and visually interesting space. And my dad’s bathroom was no exception.

While the existing fixtures were all sleek, silver chrome, I knew a little touch of gold would go a long way in warming up the overall aesthetic. So, in addition to the gold sconce, I opted for a gold towel ring, gold knobs on the vanity, and a smattering of other golden accents throughout the room.

Textural Touches: Elevating the Everyday

With the paint color and lighting sorted, it was time to turn my attention to the finer details – the textural elements that would really bring the space to life.

First up, a cozy, patterned rug to anchor the space and add a touch of warmth to those cold, marble floors. Next, a wooden towel rack to fill the empty wall space and introduce some natural, earthy vibes. And to top it off, a curved wooden shelf over the toilet, complete with rattan accents, for a touch of bohemian charm.

The Finishing Touches: Personalized Perfection

No bathroom transformation is complete without the finishing touches – the art, the accessories, the little details that make the space truly your own.

For my dad’s bathroom, I carefully curated a collection of artwork, ranging from abstract prints to vintage-inspired botanical sketches. I also incorporated a quirky, patterned wastebasket and a selection of luxurious, plush towels to elevate the overall aesthetic.

The Reveal: A Cozy, Sophisticated Sanctuary

And there you have it, folks – the transformation of my dad’s once-bland, windowless bathroom into a cozy, sophisticated sanctuary. Gone are the stark white walls, replaced by the warm, enveloping embrace of “Brewster Gray.” The metallic accents and textural elements add depth and character, while the carefully curated art and accessories bring a personal touch to the space.

The best part? This small-but-mighty bathroom now feels like a true retreat, a place where you can escape the stresses of the day and indulge in a little self-care. And that, my friends, is the power of paint and design.

So, the next time you’re tackling a tiny tub, remember: don’t be afraid to embrace the dark side, mix your metals, and let your personality shine through. With a little creativity and a whole lot of inspiration, you can turn even the smallest of bathrooms into a sanctuary worth savoring.

References

[1] The DIY Playbook. (n.d.). Paint color for bathroom with no windows. https://thediyplaybook.com/paint-color-for-bathroom-with-no-windows/

[2] Reddit. (2022). Tips for picking a color for a small windowless bathroom. https://www.reddit.com/r/InteriorDesign/comments/11uxfr1/tips_for_picking_a_color_for_a_small_windowless/

[3] Martha Stewart. (n.d.). Best paint colors for small bathrooms. https://www.marthastewart.com/8093262/best-paint-colors-small-bathroom

[4] Better Homes & Gardens. (n.d.). Small bathroom paint colors. https://www.bhg.com/small-bathroom-paint-colors-7556441

[5] The Spruce. (n.d.). Paint color ideas for small bathrooms. https://www.thespruce.com/paint-color-ideas-for-small-bathroom-797912

[6] Room for Tuesday. (n.d.). How to make a small bathroom look larger. https://roomfortuesday.com/how-to-make-a-small-bathroom-look-larger/

[7] Hana’s Happy Home. (n.d.). Choosing paint colors for a budget bathroom makeover. https://hanashappyhome.com/diy/paint-colors/choosing-paint-colors-for-a-budget-bathroom-makeover/

[8] The Grit and Polish. (n.d.). I used Rita Konig’s advice for picking a paint color. https://www.thegritandpolish.com/blog/i-used-rita-konigs-advice-for-picking-a-paint-color

Categories
Tips

The Best Flooring Options for Bathrooms

The Best Flooring Options for Bathrooms

Navigating the World of Bathroom Flooring

Ah, the bathroom – that sacred sanctuary where we begin and end each day. But when it comes to renovating this oh-so-important room, one crucial decision looms large: the flooring. After all, this is the surface that will bear the brunt of wet feet, spilled shampoo, and the occasional rubber ducky mishap. Fear not, my friends, for I have traversed the realm of bathroom flooring and emerged with a treasure trove of insights to share.

Let’s start with the oft-touted tile option. Ceramic and porcelain tiles are practically indestructible, waterproof, and come in a dazzling array of colors and patterns. [1] Sure, they may feel a tad “cold” underfoot, but pair them with a cozy bath mat and you’ve got a winning combination. Just be mindful of that slippery slope – literally – and opt for tiles with a textured surface to prevent any unfortunate “wipeouts.”

But tiles aren’t the only game in town. Natural stone, such as granite or marble, can also make for a stunning bathroom floor. [2] These materials exude an undeniable air of luxury, and with the right sealant, they can be just as waterproof as their ceramic counterparts. The downside? Stone can be a bit of a diva, requiring regular maintenance and sealing to keep it looking its best. And let’s not forget the price tag – natural stone is often the pricier option on the menu.

Now, if you’re looking to balance style and practicality, may I introduce the rising star of bathroom flooring: luxury vinyl plank (LVP)? [3] This synthetic material mimics the look of wood or stone without the high-maintenance headaches. LVP is waterproof, durable, and oh-so-easy to install, even for the DIY-inclined. Plus, it’s a fraction of the cost of natural materials. Just be mindful of those seams, as water can seep through if not properly sealed.

But what about the old standby, sheet vinyl? [4] While it may not have the same glamour as tile or stone, this budget-friendly option is a workhorse in the bathroom. It’s waterproof, easy to clean, and can even be DIY-installed. The catch? Sheet vinyl is susceptible to tears and dents, so it may not be the best choice for high-traffic areas or households with, shall we say, “active” little ones.

And let’s not forget about the humble concrete option. [5] Sure, it may not be the first thing that springs to mind when you envision your dream bathroom, but this versatile material can be stained, polished, and transformed into a surprisingly stylish surface. The key? Ensuring a smooth, slip-resistant finish to keep those tootsies safe and sound.

Ultimately, the “best” bathroom flooring comes down to your personal preferences, budget, and lifestyle. Do you crave the timeless elegance of natural stone? The low-maintenance allure of LVP? Or the wallet-friendly appeal of sheet vinyl? The choice is yours, my friends. Just remember to weigh the pros and cons, consult with your friendly neighborhood flooring experts, and don’t be afraid to get a little creative. After all, your bathroom deserves a floor that’s as unique as you are.

Tile: The Classic Choice

When it comes to bathroom flooring, tile is the undisputed heavyweight champion. Ceramic and porcelain tiles are practically indestructible, waterproof, and come in a dizzying array of colors, patterns, and textures. [1] These hard-wearing surfaces can withstand the constant barrage of wet feet, spills, and the occasional rubber ducky mishap with ease.

One of the biggest draws of tile is its timeless appeal. Whether you opt for sleek, minimalist subway tiles or striking, decorative mosaics, tile has a way of elevating even the most humble of bathrooms. And with so many options to choose from, the design possibilities are truly endless. Just be mindful of that slippery slope – literally – and choose tiles with a textured surface to prevent any unfortunate “wipeouts.”

Of course, tile flooring is not without its drawbacks. The cold, hard surface can be a bit jarring on bare feet, especially in the colder months. But fear not, my friends – a cozy bath mat can easily solve that problem. And while tile is practically indestructible, the grout lines can be a bit of a pain to maintain, requiring regular scrubbing to keep them looking their best.

Still, for those seeking a durable, waterproof, and downright gorgeous bathroom floor, tile remains the gold standard. And with the right installation and a little TLC, your tile floors can last for decades, providing a timeless backdrop for all your bathroom adventures.

Natural Stone: The Luxe Option

If you’re looking to elevate your bathroom to the heights of pure opulence, why not consider the timeless allure of natural stone flooring? From the regal elegance of granite to the swirling, ethereal beauty of marble, these materials offer an undeniable air of luxury that can transform even the most modest of bathrooms into a true sanctuary. [2]

But natural stone is more than just a pretty face – it’s also an incredibly durable and waterproof option, making it a practical choice for those high-moisture environments. With the right sealant, these floors can shrug off spills and splashes with ease, ensuring your bathroom stays pristine and slip-free.

Of course, the path to stone flooring perfection is not without its challenges. These natural materials can be notoriously finicky, requiring regular maintenance and sealing to keep them looking their best. And let’s not forget the price tag – natural stone is often the pricier option on the menu, making it a bit of a luxury for some homeowners.

But for those willing to put in the extra effort (and dip a little deeper into their pocketbooks), the rewards of natural stone flooring are truly unparalleled. Imagine stepping onto the cool, smooth surface of a sleek, granite tile, or the warm, organic feel of a tumbled limestone – it’s a sensory experience that simply can’t be replicated by any other material.

So, if you’re ready to take your bathroom to the next level of elegance and sophistication, why not consider the timeless allure of natural stone? Just be prepared to lavish it with a bit of extra TLC – after all, true beauty requires a little bit of work.

Luxury Vinyl Plank: The Practical Superstar

In the ever-evolving world of bathroom flooring, one material has been quietly stealing the spotlight: luxury vinyl plank (LVP). [3] This synthetic superstar offers the best of both worlds – the stunning aesthetic of hardwood or stone, combined with the practical, waterproof properties that make it the perfect choice for those high-moisture environments.

One of the biggest draws of LVP is its unparalleled durability. This resilient material can shrug off the constant barrage of wet feet, spills, and the occasional rubber ducky mishap, all while maintaining its pristine appearance. And the best part? It’s a breeze to install, making it a popular choice for DIY-inclined homeowners.

But the real magic of LVP lies in its versatility. With a wide range of colors, patterns, and textures to choose from, this flooring option can be tailored to suit any bathroom aesthetic, from the rustic charm of weathered wood to the sleek sophistication of polished stone. And let’s not forget the price tag – LVP is typically much more wallet-friendly than its natural counterparts, making it a practical choice for those on a budget.

Of course, no flooring option is without its drawbacks, and LVP is no exception. While it may be waterproof, those pesky seams can still be susceptible to the occasional water infiltration if not properly sealed. And for those looking to create a truly seamless, high-end look, the visible seams of LVP may not be the perfect solution.

But for homeowners seeking a durable, stylish, and budget-friendly option for their bathroom floors, luxury vinyl plank is undoubtedly a star player. With its easy installation, low maintenance requirements, and endless design possibilities, it’s no wonder LVP has become the darling of the bathroom renovation world.

Sheet Vinyl: The Unsung Hero

In the world of bathroom flooring, sheet vinyl may not be the most glamorous option, but it’s certainly one of the most practical. [4] This budget-friendly material offers a waterproof, easy-to-clean surface that can withstand the constant onslaught of wet feet, spills, and the occasional rubber ducky mishap.

One of the biggest advantages of sheet vinyl is its versatility. Available in a wide range of colors and patterns, this flooring option can be tailored to suit any bathroom aesthetic, from the clean, minimalist look of a solid color to the striking visuals of a bold, decorative design. And for those DIY-inclined homeowners, sheet vinyl is a breeze to install, making it a popular choice for those looking to save a few bucks on their renovation projects.

But the true secret to sheet vinyl’s success lies in its durability. Unlike some of its more delicate counterparts, this hardy material is practically impervious to water damage, meaning you can rest easy knowing your floors will withstand even the most enthusiastic of bathing sessions. And with a soft, cushioned surface, sheet vinyl can provide a bit of welcome comfort underfoot – a boon for those long, leisurely soaks.

Of course, no flooring option is perfect, and sheet vinyl is no exception. While it may be waterproof, this material is susceptible to tearing and denting, especially in high-traffic areas or households with little ones. And let’s not forget the inevitable maintenance required to keep those seams looking their best – a task that can be a bit of a chore for even the most diligent of homeowners.

But for those seeking a practical, budget-friendly option for their bathroom floors, sheet vinyl is undoubtedly an unsung hero. With its waterproof properties, easy-care surface, and endless design possibilities, this trusty material can provide a solid foundation for all your bathing adventures, without breaking the bank.

Concrete: The Unexpected Superstar

When it comes to bathroom flooring, the humble concrete option might not be the first thing that springs to mind. But don’t be fooled by its unassuming exterior – this versatile material can be transformed into a surprisingly stylish and practical surface for your sanctuary. [5]

One of the biggest advantages of concrete flooring is its durability. This hardy material can withstand the constant barrage of wet feet, spills, and the occasional rubber ducky mishap with ease, making it a smart choice for high-moisture environments like bathrooms. And with the right stain or polish, concrete can be elevated from its utilitarian roots to a sleek, sophisticated surface that can rival even the most high-end tile or natural stone options.

But the real beauty of concrete lies in its customizability. This material can be tinted, stamped, or polished to achieve a truly unique look that reflects your personal style. Imagine a warm, earthy tone that evokes the natural appeal of stone, or a sleek, polished finish that exudes modern elegance – the design possibilities are truly endless.

Of course, concrete flooring is not without its challenges. Ensuring a smooth, slip-resistant finish is crucial to keeping those tootsies safe and sound, and the material can be susceptible to cracks and chips as a home settles. But with the right preparation and maintenance, these potential pitfalls can be easily overcome, paving the way for a bathroom floor that’s as durable as it is visually stunning.

And let’s not forget the cost-saving appeal of concrete. Compared to the pricier options like tile or natural stone, this material can be a budget-friendly solution for those looking to stretch their renovation dollars. Just be prepared to get a little creative – after all, with concrete, the design possibilities are truly limited only by your imagination.

So, if you’re feeling adventurous and ready to think outside the (tile) box, why not consider the unexpected allure of concrete flooring for your bathroom? With its unparalleled durability, customizability, and budget-friendly appeal, this material might just be the unexpected superstar your sanctuary has been waiting for.

Conclusion: Choosing the Right Flooring for Your Bathroom

Navigating the world of bathroom flooring can feel like a daunting task, with so many options to choose from and a seemingly endless array of factors to consider. But fear not, my friends – with a little bit of research, a dash of creativity, and the guidance of your friendly neighborhood flooring experts, you can find the perfect flooring solution for your sanctuary.

Whether you’re drawn to the timeless elegance of natural stone, the practical allure of luxury vinyl plank, or the budget-friendly charm of sheet vinyl, there’s a floor out there that’s just waiting to be the foundation of your dream bathroom. And don’t be afraid to get a little unconventional – who knows, that unexpected concrete option might just be the showstopper you never knew you needed.

Ultimately, the “best” bathroom flooring comes down to your personal preferences, lifestyle, and budget. But with a little bit of planning, a healthy dose of creativity, and a whole lot of excitement, you can transform your bathroom into a true oasis – one that reflects your unique style and provides a sturdy, waterproof surface for all your bathing adventures.

So, what are you waiting for? It’s time to dive headfirst into the world of bathroom flooring and find the perfect match for your sanctuary. Let the journey begin!

[1] Knowledge from https://www.bhg.com/bathroom/flooring/best-bathroom-flooring-options/
[2] Knowledge from https://goodguyflooring.com/blogs/home-improvement-blog/what-is-the-best-flooring-for-bathrooms
[3] Knowledge from https://www.flooringinc.com/buyers-guide/vinyl/bathroom-flooring.html
[4] Knowledge from https://www.thespruce.com/best-flooring-for-bathroom-1821353
[5] Knowledge from https://home.tarkett.com/en_EU/node/what-best-flooring-bathroom-9169

Categories
Tips

Give Your Bathroom a Mini Makeover

Give Your Bathroom a Mini Makeover

Unlocking the Potential of Your Powder Room

Ah, the bathroom – that humble little sanctuary where we start and end our days. But let’s be honest, sometimes it can feel more like a dreary afterthought than a space that sparks joy.

If your bathroom is giving you the builder-beige blues, fear not! With a few strategic moves, you can transform it into a mini oasis without breaking the bank. As a self-proclaimed “master procrastinator,” I recently put my skills to the test and pulled off a quick bathroom refresh that has me feeling like a design superhero. And let me tell you, if I can do it, so can you!

The Blank Canvas

When I first laid eyes on my guest bathroom upstairs, I’ll admit, I cringed a little. The walls were a drab, builder-grade beige, the shower curtain was as nondescript as they come, and the towels looked like they belonged in a college dorm room. It was the epitome of blah. [1] But I wasn’t about to let that stop me.

You see, I’ve learned a thing or two about the power of a fresh coat of paint and some strategically placed accessories. I may not have the budget for a full-blown renovation, but I do have an eye for finding hidden gems at places like Marshalls, TJ Maxx, and HomeGoods. Armed with my trusty paint swatch and a can-do attitude, I was ready to work my magic.

A Coat of Fresh Paint

As someone who’s a self-proclaimed color fanatic, I knew the first step had to be addressing those boring beige walls. Now, I’m not one to shy away from bold hues, but for a small bathroom, I decided to play it safe with a warm, inviting gray. Specifically, I went with Agreeable Gray by Sherwin-Williams – a color that’s just the right blend of cozy and contemporary. [1]

The transformation was almost instant. Gone were the harsh, cool tones that made the space feel a bit clinical. Instead, the warm gray created a serene, spa-like vibe that instantly set the tone for the rest of my mini makeover.

Accessorizing with Flair

With a fresh canvas to work with, it was time to start accessorizing. Now, I’ll admit, this is my favorite part. There’s just something about finding the perfect pieces to tie a room together that gets my creative juices flowing.

First up, the shower curtain. I scoured Marshalls and found the perfect one – a simple gray and teal striped number that complemented the wall color flawlessly. [1] Next, I turned my attention to the towels, opting for a set of basic gray ones with pops of teal to add a little personality.

But I didn’t stop there. No, I had to get a little crafty. Remembering some leftover frames I had stashed away, I decided to put them to good use. With a little DIY magic, I whipped up some simple, beach-inspired artwork to hang on the walls. [1] It may not have been the most elaborate project, but it added the perfect finishing touch to my mini makeover.

Budgeting for Success

Now, I know what you’re thinking – “How much did all of this cost?” Well, my friend, I’m here to tell you that you can achieve a big impact without breaking the bank.

When I tallied up the total, I came in just over $100: $39.98 for the paint, $19.95 for the shower curtain, and $50 for the towels. [1] Sure, I may have gone a little overboard on the towels, but hey, a girl’s gotta treat herself sometimes, right?

The key is being strategic with your spending and not getting too caught up in the latest trends. Focus on timeless pieces that you know will stand the test of time, and don’t be afraid to get creative with DIY projects. Trust me, it’s the little touches that can really make a big difference.

Lessons Learned and Final Thoughts

As I stand back and admire my mini bathroom makeover, I can’t help but feel a sense of pride. Sure, it may not be a complete gut renovation, but it’s a transformation that’s truly made the space feel like my own.

And you know what? I learned a few valuable lessons along the way. First and foremost, don’t be afraid to get a little bit scrappy. Just because you’re working with a small budget doesn’t mean you can’t achieve big results. [2,3,4,5,6,7]

Secondly, don’t underestimate the power of lighting. A few well-placed sconces or a dimmer switch can work wonders in making a space feel more inviting and spa-like. [1] And finally, don’t be afraid to get a little bit creative. Whether it’s a DIY art project or a unique storage solution, sometimes the most unexpected touches can make all the difference.

So, what are you waiting for? Grab your paint swatch, your wallet, and your creative spirit, and let’s get to work on giving your bathroom a mini makeover that’ll have you feeling like a design superstar. After all, a little bit of elbow grease and a whole lot of style can go a long way. [8]

References

[1] Knowledge from https://goodlifewife.com/quick-bathroom-refresh/
[2] Knowledge from https://www.itallstartedwithpaint.com/small-bathroom-organization/
[3] Knowledge from https://www.thespruce.com/small-bathroom-makeovers-5072520
[4] Knowledge from https://dearlilliestudio.com/our-inexpensive-mini-makeover-on-our/
[5] Knowledge from https://evolutionofstyleblog.com/mini-bathroom-makeovers/
[6] Knowledge from https://www.bhg.com/bathroom/small/budget-small-baths/
[7] Knowledge from https://managedmoms.com/2012/10/our-powder-room-mini-makeover/
[8] Knowledge from https://www.pinterest.com/pin/38562140538469031/

Categories
Tips

Clever Ways to Add More Storage to Your Bathroom

Clever Ways to Add More Storage to Your Bathroom

Squeeze Every Inch of Space

I’ll be the first to admit – my bathroom is tiny. It’s barely big enough to swing a loofa, let alone store all my essential toiletries and towels. But over the years, I’ve learned a thing or two about maximizing even the most limited bathroom square footage. The key? Squeezing every last inch of available space for all it’s worth.

Take that awkward space above the toilet, for example. It’s often overlooked, but it’s prime real estate for adding storage – you just have to get a little creative. I snagged an over-the-toilet shelving unit from Wayfair and transformed it into a chic, rustic display for my favorite bath salts, scented candles, and even a few potted succulents. Now, not only is it super functional, but it also adds a touch of spa-like ambiance to my tiny powder room. [1]

And don’t forget about your walls! Hanging wall-mounted organizers, floating shelves, or even a sleek ladder for towel storage can make a world of difference. I especially love the industrial-chic vibe of those black steel ladders – they add a modern edge while still offering tons of practical storage space. [2]

Get Clever with Vanity Storage

When it comes to bathroom storage, your vanity is the MVP. But let’s be real, most standard vanities are essentially just a black hole of empty space. That’s why I’m all about utilizing every nook and cranny, from the drawers to the cabinet space beneath the sink.

I recently stumbled upon these ingenious under-sink organizers that have completely revolutionized my routine. They’re stackable, adjustable, and help me keep all my go-to products neat and tidy – no more rummaging around for that elusive travel-size toothpaste. [3] And for the drawers, I swear by those expandable dividers. They let me customize the space and ensure everything has its own designated spot, from makeup brushes to hair ties.

Maximize Vertical Space

If there’s one thing I’ve learned about small space living, it’s that you’ve gotta look up. Vertical storage is where it’s at, my friends. I’m talking shelves, racks, and cabinets that stretch from floor to ceiling, making the most of that often-wasted wall space.

Take my linen closet, for example. I ditched the dated wire shelves and installed a sleek, custom built-in system with adjustable shelves. Now I can neatly stack towels, face cloths, and extra toilet paper without things getting jumbled and chaotic. And for an extra touch of style, I like to style the shelves with cute baskets, jars, and other decorative accents. [4]

But it’s not just the linen closet – I’ve found ways to incorporate vertical storage throughout the entire bathroom. A tall, narrow cabinet next to the vanity holds all my hair tools and products, while a few floating shelves above the toilet provide the perfect spot for displaying my favorite bath bombs and essential oils. It may take a bit of planning, but trust me, maximizing that vertical real estate is a total game-changer. [5]

Get Creative with Unconventional Storage

When you’re working with limited square footage, you’ve gotta get a little…well, unconventional. And let me tell you, some of my most genius bathroom storage ideas have come from thinking outside the box.

Take that random corner of wasted space behind the door, for example. I snagged a sleek, slim shelving unit and turned it into a secret storage oasis for all my cleaning supplies and extra TP. No more unsightly plastic bins cluttering up the floor! [6]

Or how about repurposing a bar cart as a rolling bathroom caddy? I’ve got one that I use to corral all my go-to beauty products, hair tools, and even a few extra towels. It’s on wheels, so I can easily move it around as needed, and the open shelves make everything super accessible. [7]

And let’s not forget about the often-overlooked space behind the toilet. I hung a simple pegboard back there and use it to neatly organize my collection of brushes, combs, and other grooming essentials. It keeps everything off the counter and out of the way, but still within easy reach. [8]

The moral of the story? When it comes to small bathroom storage, think creatively and don’t be afraid to think outside the vanity!

Ditch the Clutter

At the end of the day, no matter how many clever storage solutions you implement, if you’re still hanging onto a bunch of unused items, your bathroom is going to feel cluttered and chaotic. That’s why the first step in any small-space storage overhaul is a good old-fashioned purge.

I’ll be honest, letting go of some of my beloved beauty products and rarely-used towels was tough. But once I took a hard look at what I was actually using on a daily basis, it became clear that I was holding onto way more than I needed. So I rolled up my sleeves, sorted through everything, and donated or recycled the items I knew I wouldn’t miss.

Now, my bathroom feels so much more streamlined and zen. I can actually find what I need without digging through piles of unused stuff, and that extra cleared-out space has allowed me to get creative with my storage solutions. It’s a total game-changer, and I wish I had done it sooner!

So if you’re feeling overwhelmed by bathroom clutter, don’t be afraid to let go. Trust me, once you’ve pared down to the essentials, you’ll be amazed at how much more functional and organized your space can be.

Conclusion

At the end of the day, maximizing bathroom storage in a small space is all about getting a little creative and thinking outside the box. From utilizing every inch of vertical space to repurposing unconventional furniture, the possibilities are endless.

And the best part? These clever storage hacks don’t have to break the bank. With a little DIY elbow grease and some savvy shopping, you can transform your cramped bathroom into an oasis of organization – no expensive renovation required.

So what are you waiting for? Grab your measuring tape, declutter those cabinets, and get ready to add some serious storage magic to your bathroom. Trust me, your future self (and your neatly folded towels) will thank you.

References

[1] “Hacks to Make the Most of Your Tiny Bathroom.” Better Homes & Gardens, www.bhg.com/bathroom/storage/storage-solutions/hacks-to-make-the-most-of-your-tiny-bathroom/.

[2] “12 Clever Bathroom Storage Ideas.” HGTV, www.hgtv.com/design/rooms/bathrooms/12-clever-bathroom-storage-ideas-pictures.

[3] “Clever Bathroom Storage Ideas to Maximize a Small Space.” The Spruce, www.thespruce.com/clever-bathroom-storage-ideas-5204096.

[4] “31 Bathroom Storage Ideas to Declutter Your Space.” Architectural Digest, www.architecturaldigest.com/gallery/bathroom-storage-ideas-to-help-organize-your-space.

[5] “Small Bathroom Ideas & Design: Storage & Organization Tips.” Apartment Therapy, www.apartmenttherapy.com/small-bathroom-ideas-design-storage-256392.

[6] “Bathroom Storage Ideas to Make the Most of Your Space.” House Beautiful, www.housebeautiful.com/lifestyle/organizing-tips/g25138857/bathroom-storage-ideas/.

[7] “Creative Bathroom Storage Ideas That Will Maximize Your Space.” Pinterest, www.pinterest.com/pin/3940718413854734/.

[8] “Small Bathroom Storage Ideas to Maximize Your Space.” Good Housekeeping, www.goodhousekeeping.com/home/organizing/tips/g810/small-bathroom-storage/.