Categories
Tips

Get The Spa Experience At Home On A Budget

Get The Spa Experience At Home On A Budget

Recreate the Luxury of a Spa Day, Without the Hefty Price Tag

Are you craving that sublime, post-massage bliss but dread the sticker shock of a real spa visit? Girl, I feel you. I’m a self-proclaimed spa aficionado, and even I wince at the thought of dropping a Benjamin or two just for a facial and some quality time in the steam room. But what if I told you that you could transform your humble abode into an oasis of relaxation – complete with all the pampering perks – without breaking the bank?

Now, I know what you’re thinking: “But AnnMarie, how on earth can I recreate a professional spa experience at home?” Well, my friends, with a little creativity and some wallet-friendly ingredients, it’s totally doable. And I’m going to show you how.

Spa-Worthy Skincare on a Shoestring

Let’s start with the foundation of any great spa day: skincare. Those luxurious treatments don’t come cheap, but the good news is, you can whip up some equally indulgent DIY versions right in your own kitchen. For example, did you know that a simple egg or avocado hair mask can work wonders for your locks, leaving them silky-smooth and nourished? [1] And those pricey Korean sheet masks? You can find them at the dollar store for a fraction of the cost. [1]

Another one of my go-to spa-inspired recipes is a lemon-sugar scrub for baby-soft hands and feet. All you need is some sugar, coconut oil, and a few drops of lemon juice – mix it up, and voila! [1] You can even use those leftover coffee grounds to make a cellulite-busting body scrub. [1] The best part? Most of these DIY treatments cost just a few dollars, yet they’ll leave your skin feeling refreshed and rejuvenated, just like a professional facial.

Transforming Your Bathroom into an Oasis

Now that you’ve got the skincare sorted, it’s time to set the stage for your at-home spa experience. The key is to create an environment that’s as calming and indulgent as the real deal. Start by decluttering your bathroom – clear away any unnecessary toiletries or knick-knacks so you’re left with a serene, spa-like ambiance. [2] Then, add some simple, yet luxurious touches, like fluffy towels, a soft bathrobe, and soothing candles. [1]

If you really want to go all out, invest in a few inexpensive accessories that’ll amp up the relaxation factor. A bathtub overflow drain cover, for instance, will allow you to fill the tub extra deep for a truly decadent soak. [1] And don’t forget the aromatherapy! A few sprigs of fresh eucalyptus or a diffuser with calming essential oils can transport you straight to your own private oasis. [1]

Pampering from Head to Toe

With the stage set, it’s time to indulge in some serious pampering. Start by slathering on a rejuvenating face mask – whether it’s a creamy avocado concoction or a bubbly charcoal number, these DIY treatments will have your skin glowing. [1] While you let the mask work its magic, treat yourself to a relaxing foot soak and scrub. [1]

Once you’re sufficiently relaxed, move on to the rest of your body. Massage in a moisturizing body oil or whip up a divine-smelling sugar scrub to exfoliate from head to toe. [1] And don’t forget about those hard-working hands and feet – a nourishing lemon-sugar scrub will leave them silky-smooth. [1]

To really capture that spa feeling, don’t forget the finishing touches. Slip into a plush robe, light some candles, and queue up a soothing Spotify playlist. [1] Pour yourself a refreshing glass of cucumber-infused water, and you’ll be feeling like a million bucks – for a fraction of the cost.

Extending the Spa Experience

Now, the key to making your at-home spa day truly luxurious and long-lasting is to think beyond just the pampering session itself. Once you’ve indulged in all the rejuvenating treatments, keep that serene, spa-like ambiance going by treating yourself to some spa-worthy self-care.

For example, consider splurging on a high-quality face oil or serum to incorporate into your daily routine. [6] Or invest in a calming sound machine to lull you to sleep each night. [7] And don’t forget the little details, like stocking up on plush, hotel-worthy towels or a chic, reusable water bottle to keep you hydrated. [1]

The beauty of creating your own spa day at home is that you can customize it to suit your unique needs and preferences. Whether you’re craving a relaxing soak, a indulgent facial, or a pampering mani-pedi, the possibilities are endless – and the price tag will be a fraction of what you’d pay at a traditional spa.

So, what are you waiting for? Grab your DIY face mask, light some candles, and get ready to experience the ultimate luxury of a spa day, all from the comfort of your own humble abode. Your mind, body, and wallet will thank you.

References

[1] Knowledge from https://www.thepennyhoarder.com/save-money/diy-spa-day-for-cheap/
[2] Knowledge from https://www.reddit.com/r/beauty/comments/ellhh4/i_would_like_to_create_an_at_home_spa_experience/
[3] Knowledge from https://plandisney.disney.go.com/question/long-expect-whole-experience-grand-floridian-spa-book-565470/
[4] Knowledge from https://www.reddit.com/r/beauty/comments/jvdvwy/spa_day_at_home_how_can_i_make_my_girlfriends_26f/
[5] Knowledge from https://www.buzzfeed.com/hbraga/luxurious-but-cheap-products-for-an-at-home-spa-night
[6] Knowledge from https://www.naturalspafactory.com/blogs/news/diy-spa-day-at-home-recreate-professional-treatments-on-a-budget
[7] Knowledge from https://www.bhg.com/bathroom/decorating/ways-to-create-a-calming-bath-281474979502776/
Categories
Tips

Clever Hacks For Storing Bath Essentials

Clever Hacks For Storing Bath Essentials

Declutter Your Bathroom Like a Pro

Ahh, the bathroom – a sanctuary where we start and end our days, but also a space that can quickly become a cluttered mess if we’re not careful. I don’t know about you, but I’ve definitely been there – staring at my vanity overflowing with half-used lotions, old makeup, and who knows what else. It’s enough to make anyone feel overwhelmed.

But fear not, my friends! I’m here to share some of my top decluttering and organization hacks that will have your bathroom looking spa-worthy in no time. Because let’s be real, a tidy and serene bathroom just makes the whole day feel a little bit better, am I right?

Identify What You Really Need

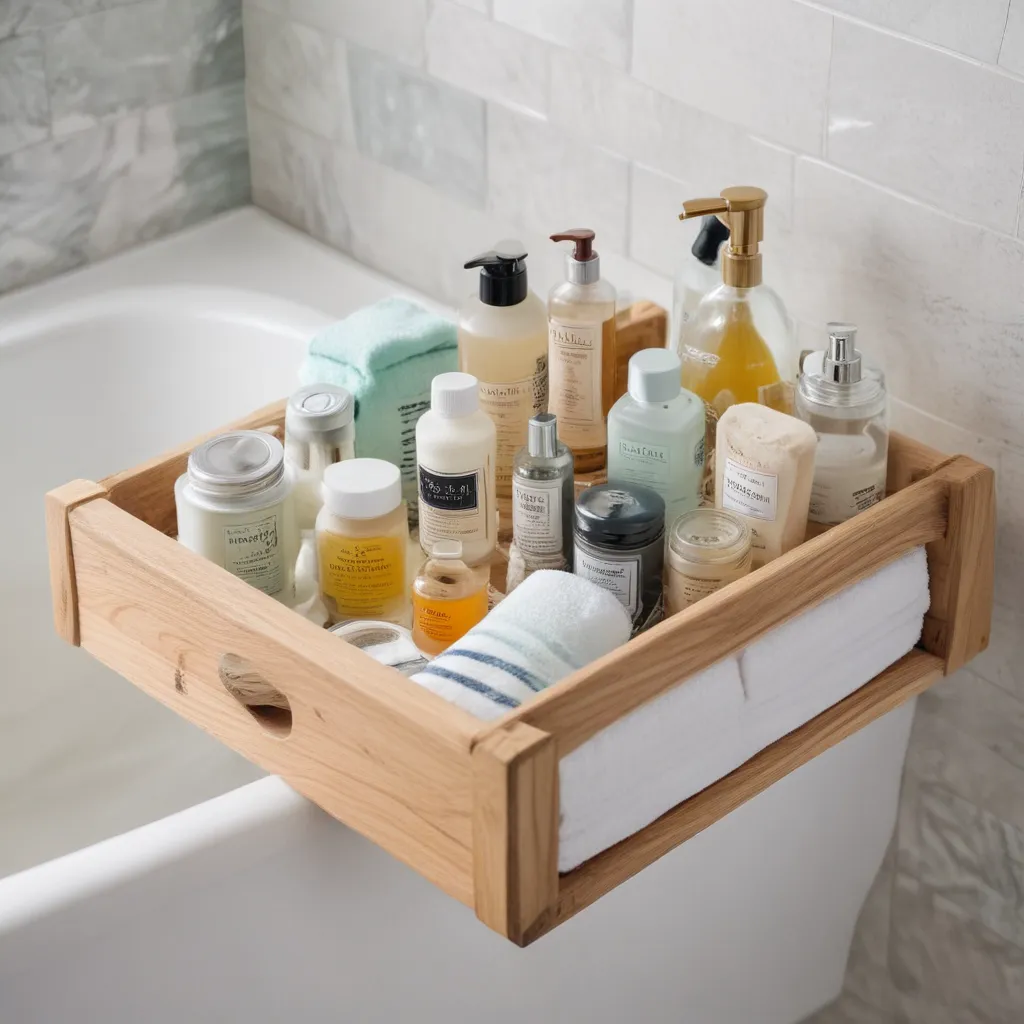
The first step in any successful decluttering mission is to take a good, hard look at what’s actually taking up space in your bathroom. Grab a few boxes or baskets and start sorting everything into four categories: keep, toss, relocate, and donate.

Be ruthless, my friends! Expired sunscreen? Toss it. That face mask you tried once and hated? Donate it. Medications that belong in the kitchen cabinet? Relocate them pronto. Only keep the essentials that you use on a daily basis.

Once you’ve whittled things down to the necessities, it’s time to get creative with your storage solutions. After all, just because you’ve decluttered doesn’t mean you have endless amounts of cabinet and counter space. That’s where the real fun begins!

Maximize Vertical Space

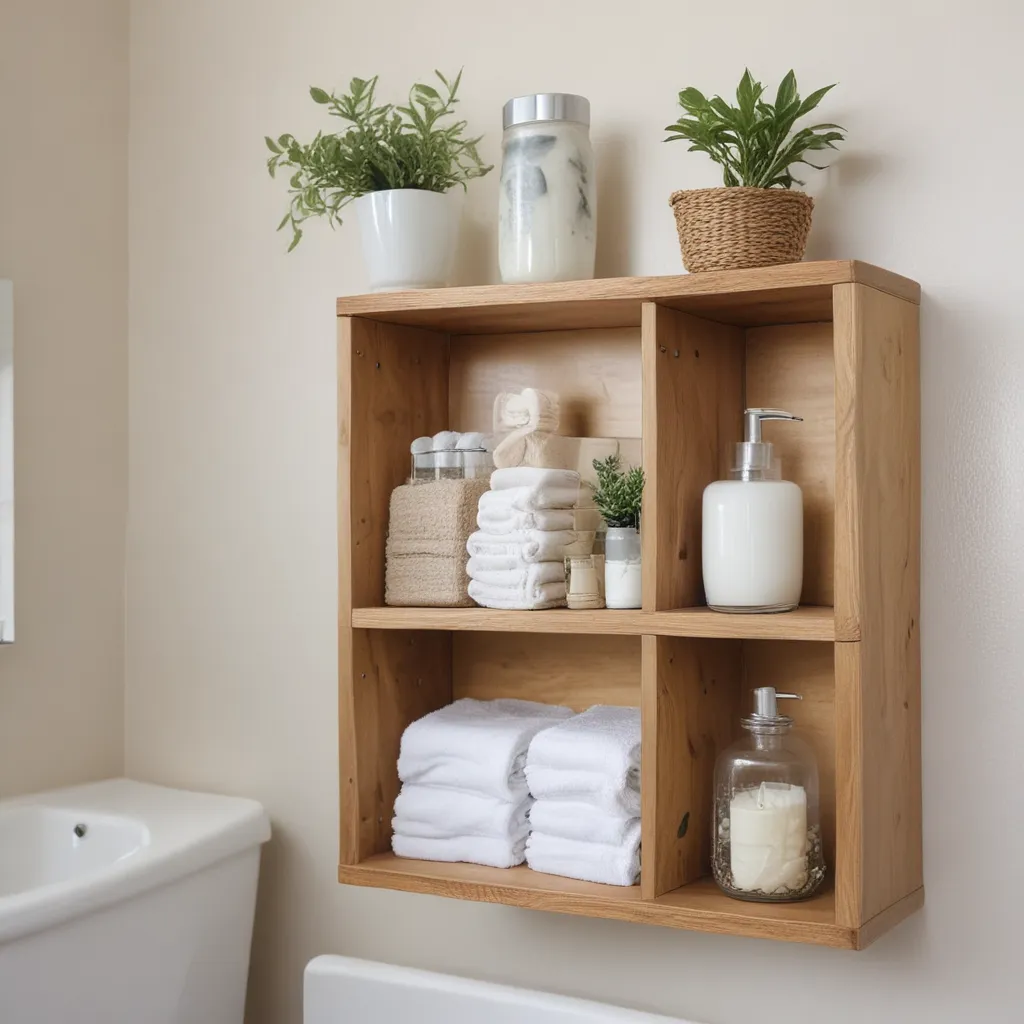
When it comes to small bathrooms (and let’s be honest, who has a huge bathroom these days?), making the most of your vertical space is key. Instead of letting those bare walls go to waste, install some floating shelves or wall-mounted cabinets.

Not only do these types of storage solutions free up valuable real estate on your vanity and floor, but they also allow you to display your favorite decorative items or neatly tuck away extra towels, toiletries, and bathroom essentials. Win-win!

And don’t forget about over-the-door hooks and racks – they’re a game-changer for keeping towels, robes, and even hair tools organized and accessible. Tiered organizers for your cabinets and countertops can also be a lifesaver when it comes to corralling all those little bottles and jars.

Get Creative with Hidden Storage

If your bathroom is really short on space, it’s time to get a little crafty. Transform that boring old door into a storage powerhouse by installing some over-the-door organizers. Suddenly, you’ve got a brand new home for your hair tools, cleaning supplies, and more.

And let’s not forget about that often-neglected space under the sink. Sure, it’s easy for that area to become a black hole of random items, but with some strategic planning, you can turn it into a well-organized oasis. Stackable bins, tension rods, and clever hook placement can work wonders in this tricky zone.

Make It Your Own

At the end of the day, the true key to a clutter-free bathroom is finding storage solutions that not only work for your space but also reflect your personal style. Don’t be afraid to DIY some custom organizers or repurpose everyday items in creative ways.

Maybe that’s transforming an old bar cart into a stylish vanity caddy or upcycling a vintage ladder into a towel-hanging masterpiece. The possibilities are truly endless when you let your inner designer shine.

And let’s not forget the power of a good ol’ fashion label maker. Slapping a few well-placed labels on your storage bins and baskets can take your bathroom organization to the next level, making it easy to find what you need in a pinch.

Maintain That Zen Oasis

Alright, you’ve done the hard work of decluttering and optimizing your bathroom storage – now it’s time to keep that zen oasis sparkling. Set aside a few minutes each week to do a quick tidy-up, wiping down surfaces, restocking essentials, and addressing any pesky plumbing issues before they become bigger problems.

And don’t forget to treat yourself! Light a fancy candle, run a bubble bath, and bask in the glory of your freshly organized bathroom. After all, you deserve it.

So there you have it, my friends – a foolproof plan for turning your bathroom into a serene and clutter-free sanctuary. Now go forth and conquer those overflowing cabinets and vanities, one clever hack at a time!

Sources

[1] Knowledge from https://www.youtube.com/playlist?list=PLLFZWs9eFKMdsycbjbkqSFkVrwzO_DL4L
[2] Knowledge from https://stylebyemilyhenderson.com/blog/clever-organization-hacks-a-linen-guest-closet-and-the-smartest-vanity-org-products
[3] Knowledge from https://www.goodhousekeeping.com/home/organizing/tips/g810/small-bathroom-storage/
[4] Knowledge from https://www.bhg.com/bathroom/storage/storage-solutions/hacks-to-make-the-most-of-your-tiny-bathroom/
[5] Knowledge from https://www.bathfitter.com/ca-en/blog/bathroom-storage-organization-hacks/
[6] Knowledge from https://www.sastorage.com/blog/bathroom-storage-organization-hacks/
[7] Knowledge from https://www.pinterest.com/pin/29-genius-organization-ideas-for-every-room-at-home–1688918603563114/
[8] Knowledge from https://www.housebeautiful.com/lifestyle/organizing-tips/g25138857/bathroom-storage-ideas/

Categories
Tips

Creative Touches For A Rental Bathroom

Creative Touches For A Rental Bathroom

As a seasoned military spouse and constant creator, I’ve made it my personal mission to transform each and every rental space we’ve lived in over the years into a place I truly love. And you better believe that includes our rental bathrooms!

Embrace Bold Colors

Let’s be real – rental bathrooms are often pretty drab and dreary, aren’t they? When we first moved into our current condo, the bathroom was nothing to write home about. Dingy white walls, a dated brown vanity, and boring beige tile. It was a total snooze-fest.

But I knew I could work my magic and turn this blah bathroom into a beautiful, spa-like oasis. The first thing I did was take a bold leap and paint the walls in a rich, vibrant shade of blue. [4] After polling my friends on the current state of the space (they used words like “dull,” “bland,” and even “depressing” to describe it!), I knew I needed to make a major change.

I decided to go with “Something Blue” from the HGTV HOME™ by Sherwin-Williams Future Thinker Color Collection, and let me tell you – it made all the difference. The room instantly felt so much more alive and energetic. My friends’ reactions were priceless – their eyes lit up, they were smiling, and they described the space as “calm,” “happy,” and “inviting.”

Hardware Update on a Budget

Rather than shelling out for all-new hardware, I gave the existing light fixture and accessories a quick refresh with another color from the same palette. I chose a soft, modern black called “Domino” which complemented the blue walls beautifully. [4] It was an easy and affordable way to give the space a cohesive, high-end look.

Stylish Storage Solutions

One of the biggest challenges with rental bathrooms is the lack of storage and organization. When we first moved in, we added some basic wall shelves and hooks, but they just ended up looking cluttered and messy no matter how hard I tried to keep them tidy.

That’s when I got the idea to swap out all those unsightly product bottles for a set of gorgeous glass jars and dispensers. [3] Not only does this create a super chic, curated look, but it also makes it easy to see when I’m running low on something. I paired the jars with some other acrylic organizers like a toothbrush holder and cotton swab tray for a truly elevated aesthetic.

Practical Meets Pretty

Of course, a bathroom refresh isn’t just about looks – it’s also about function. I wanted to make sure this space worked hard for us, while still looking fabulous.

One of the best decisions I made was resurfacing the dated countertop with a lighter, brighter marble-look material. [3] It was a bit of a pain, but the end result was so worth it – the entire room felt instantly more modern and fresh.

I also got creative with the under-sink storage, using a mix of baskets and canisters to keep everything organized and easy to access. [3] No more rummaging through a jumbled mess every time I need something!

Cozy Accents

To really drive home that tranquil, spa-like vibe I was going for, I added some plush, textured towels and a cozy bath mat. [4] The contrast of the soft, neutral tones with the bold blue walls is simply divine.

A few final touches, like a decorative clock, some artwork, and a flickering LED candle, and this rental bathroom transformation was complete. [4] The end result is a space that feels elevated, intentional, and – most importantly – like a true reflection of my personal style.

Sure, I may not own this condo, but that doesn’t mean I can’t make it feel like a luxurious retreat. With a little creativity and some budget-friendly DIY know-how, I was able to turn a drab rental bathroom into a serene oasis that brings me joy every single time I step inside.

Embracing the Rental Life

I know not everyone has the luxury of a blank canvas when it comes to their rental bathrooms. Heck, my last place had the most god-awful brown tiles from floor to ceiling! [5] But that doesn’t mean you have to settle for a subpar space.

Whether it’s peel-and-stick wallpaper, a funky shower curtain, or some strategically placed baskets and bins, there are so many ways to add personality and function to a rental bathroom without making any permanent changes. [8] It just takes a little bit of elbow grease and a whole lot of creativity.

And you better believe I’m not done yet. There are still a few more things I have up my sleeve to really take this space to the next level. A bold, patterned wallpaper might be in the cards, or maybe some sleek new lighting fixtures. [7] The possibilities are endless when you’re willing to think outside the box!

So if you’re feeling frustrated with the state of your rental bathroom, take heart. With a little imagination and the right tools, you can transform even the most uninspiring space into a beautiful, functional oasis. Who knows – you might even end up loving it more than your own home one day!

[1] The Homes I Have Made
[2] Albie Knows Design
[3] Advice from a Twentysomething
[4] Pinterest
[5] I Spy DIY
[6] Polished Habitat
[7] Style by Emily Henderson
[8] Essential’s Fix

Categories
Tips

Creative Ways To Display Bathroom Towels

Creative Ways To Display Bathroom Towels

Transforming Towels into Functional Decor

As a stay-at-home mom of two, I’ve learned that when space is limited, creativity is key. Our tiny one-bathroom abode is a prime example, where I’ve had to get inventive with how we store and display our towels. And let me tell you, it’s been a journey – but one that’s led to some truly unique and stylish solutions.

You see, I recently received a beautifully wrapped set of luxurious bath towels, hand towels, and washcloths from Boll & Branch, and that inspired me to share my favorite ways to showcase these plush linens. Whether you have a sprawling master bath or a cozy powder room, there are plenty of creative opportunities to turn your everyday towels into functional decor.

Baskets: Textural Towel Displays

[1] One of my go-to towel storage ideas is using baskets. Not only do they provide convenient, close-at-hand access, but they also add a lovely textural element to the space. I was able to fit several of the Boll & Branch bath towels, along with an assortment of their hand towels and washcloths, into a few hanging baskets.

The best part? Baskets are incredibly versatile. You can tuck them away in a cabinet, hang them on the wall, or even place them on the countertop for a chic, spa-inspired look. And when it comes to filling them, I find that rolling the towels tightly is the way to go – it maximizes the storage while creating a neat, visually appealing display.

Draped and Hung Towels: Elegant and Functional

[2] Another clever way to showcase your towels is by simply draping or hanging them. I love the effortless, sophisticated vibe it brings to the bathroom. I hung a Boll & Branch hand towel layered with one of their plush washcloths, and the result is both practical and visually striking.

Hooks mounted above the door or along the walls are perfect for displaying your larger bath sheets and towels. And if you don’t have any hooks handy, don’t be afraid to just drape them over the sink or counter. The generous size of the Boll & Branch towels means they’ll hang beautifully without looking too bulky or overwhelming the space.

Folded Towels: Clean and Coordinated

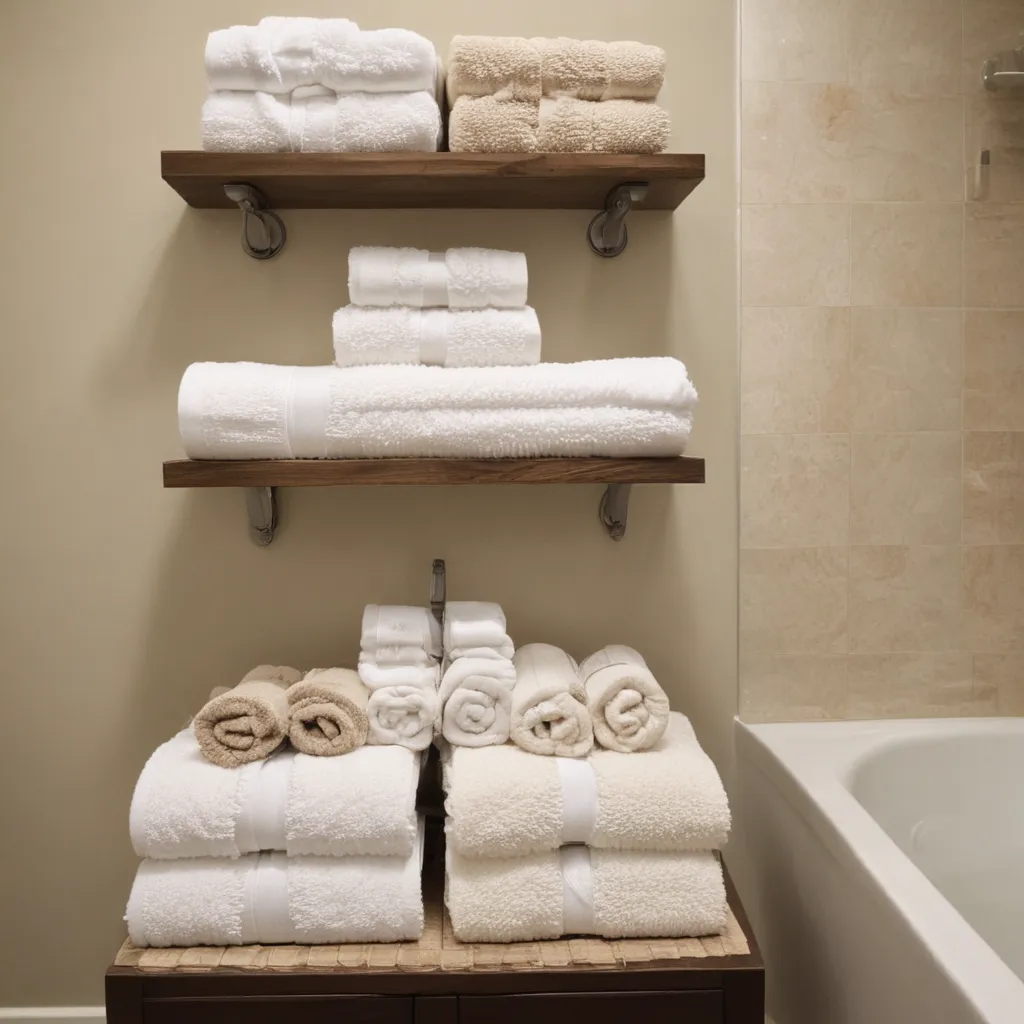
[3] Of course, the classic towel display method is the good old-fashioned fold. There’s something so satisfying about a neatly stacked pile of fluffy, fresh towels. I like to fold mine in thirds, then thirds again, to achieve that crisp, hotel-worthy look.

These folded towels can then be placed on open shelves, tucked into cabinet spaces, or even displayed on the countertop. It’s a simple yet effective way to keep your bathroom linens organized and visually appealing. And with the Boll & Branch towels’ plush, high-quality feel, I don’t mind leaving them out on display for all to admire.

Mixing It Up: The Ultimate Towel Display

[4] When it comes to showcasing your bathroom towels, there’s no need to stick to just one method. In fact, I often find myself utilizing a combination of baskets, hanging, and folding to create the perfect display.

The key is to play with textures, heights, and arrangements to keep the look fresh and visually interesting. Tuck some rolled towels into a woven basket, drape a hand towel over a hook, and neatly stack the larger bath sheets on a shelf. The varied display will add depth and personality to your bathroom, all while keeping your towels organized and accessible.

The Finishing Touches

[5] Of course, no towel display is complete without the right accents. I love incorporating small decorative touches, like a ceramic soap dish or a set of chic bathroom brushes, to really elevate the look. And don’t be afraid to get creative with your towel placement – experiment with layering, mixing patterns, or even color-coordinating your linens for a cohesive, designer-worthy vibe.

At the end of the day, the beauty of these Boll & Branch towels lies not only in their superior quality but also in their ability to transform a simple bathroom into a relaxing, spa-like oasis. By getting a little inventive with how I display them, I’ve been able to turn a functional necessity into a stylish, welcoming element of our home.

So whether you’re working with a sprawling master bath or a cozy powder room, I hope these towel display ideas have inspired you to get creative and make the most of your bathroom linens. After all, there’s no reason why practical can’t also be beautiful.

References

[1] Knowledge from https://www.zevyjoy.com/uncategorized/simple-ways-store-display-bathroom-towels/

[2] Knowledge from https://www.zevyjoy.com/uncategorized/simple-ways-store-display-bathroom-towels/

[3] Knowledge from https://www.zevyjoy.com/uncategorized/simple-ways-store-display-bathroom-towels/

[4] Knowledge from https://www.pinterest.com/bmorejohnson/bathroom-towel-display/

[5] Knowledge from https://www.bhg.com/bathroom/storage/storage-solutions/bathroom-towel-display-ideas/

Categories
Tips

Curbless Shower Design Tips And Ideas

Curbless Shower Design Tips And Ideas

Goodbye to the Curb: Embracing the Joys of Curbless Showers

As a self-proclaimed bathroom design enthusiast, I’ve always been fascinated by the evolution of shower styles. Gone are the days of the traditional walk-in shower with its sturdy curb – the curbless shower has emerged as the new darling of the bathroom design world. And let me tell you, the benefits of this sleek, modern masterpiece are enough to make even the most die-hard curb-lover reconsider their stance.

The Perks of a Curbless Shower

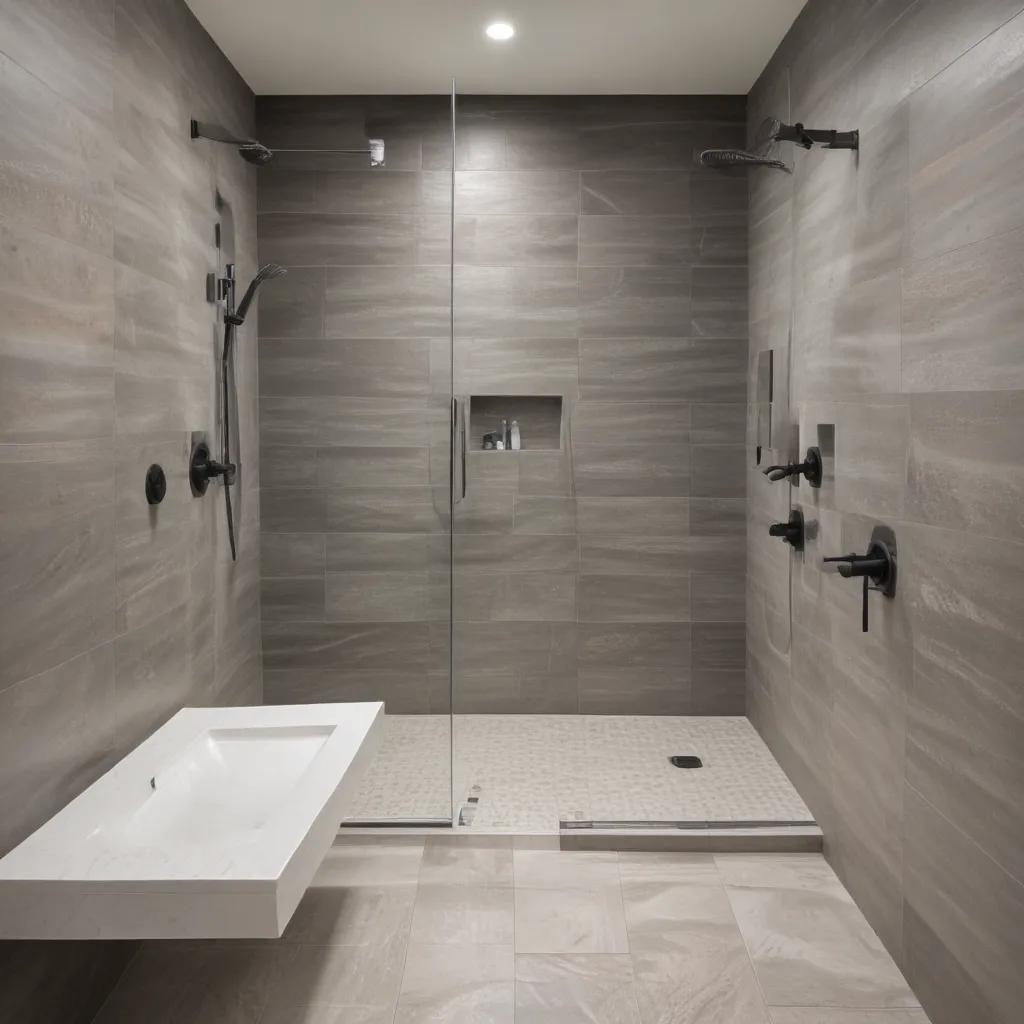
Picture this: you step into your bathroom, ready to start your day with a refreshing shower, but instead of having to hoist yourself over a pesky curb, you glide effortlessly into a seamless, spa-like oasis. That, my friends, is the magic of a curbless shower. [1] These design marvels not only look stunning, but they also offer a host of practical benefits that can truly transform your bathroom experience.

For starters, the lack of a curb makes these showers incredibly accessible, making them a game-changer for families with young children or individuals with mobility challenges. [2] No more awkward, high-stepping maneuvers – just a smooth, level transition from the bathroom floor to the shower floor. And let’s not forget the aesthetic appeal; without that raised barrier, the entire space feels open, airy, and visually cohesive. [3]

But the perks don’t stop there. Curbless showers also tend to be easier to clean, with fewer nooks and crannies for grime and mildew to accumulate. [2] And let’s be real, who doesn’t love the idea of spending less time scrubbing and more time enjoying their spa-like sanctuary? Plus, the versatility of these showers allows for the incorporation of luxurious features like heated floors, built-in benches, and even rainfall showerheads, elevating the entire bathing experience. [2]

Navigating the Curbless Shower Conundrum

Of course, with any design choice, there are a few considerations to keep in mind. While curbless showers offer numerous benefits, they do require careful planning and execution to ensure proper water drainage and prevent any unwanted flooding. [4] As one Reddit user aptly put it, “If designed and installed correctly, water shouldn’t be a problem. But it is easy to splash and spill water throughout the bathroom with a doorless, curbless shower. Be mindful to prevent clogs and slips.” [5]

Another potential drawback is the loss of heat retention, as the open design can allow warm air to escape more easily. [2] But fear not, savvy homeowners have found ways to combat this, such as incorporating glass barriers or doors to maintain that cozy, spa-like ambiance. [5]

Designing the Perfect Curbless Shower

When it comes to creating your dream curbless shower, the design possibilities are endless. Do you envision a sleek, minimalist oasis with crisp, white tiles and a seamless glass enclosure? Or perhaps a more rustic, spa-inspired retreat with natural stone accents and a wooden bench? [6] The key is to work closely with your contractor or interior designer to ensure that the layout, drainage, and overall functionality are perfectly tailored to your bathroom’s unique dimensions and your personal preferences. [2]

One crucial factor to consider is the placement and type of drain. Curbless showers can feature either a center drain or a linear drain, each with its own advantages. [2] Center drains require the floor to slope towards the center, while linear drains are positioned along the shower entrance or wall, with the floor sloping towards them. The decision ultimately depends on your plumbing setup and the overall layout of your bathroom.

Another design element to ponder is the choice of wall material. While classic tile is a perennial favorite, innovative options like glass or even opaque panels can offer a modern twist and enhance the sense of openness. [7] And don’t forget about the finishing touches, such as sleek fixtures, a luxurious showerhead, and strategic lighting to create the perfect ambiance. [2]

Embracing the Curbless Revolution

As I reflect on my own bathroom remodel journey, I can’t help but marvel at the transformative power of the curbless shower. What was once a practical necessity has now evolved into a design-forward statement piece that truly elevates the entire bathroom experience. [8] So if you’re considering a bathroom renovation, I urge you to explore the wonders of the curbless shower. Trust me, once you experience the freedom and elegance of this design marvel, you’ll never look back.

[1] https://www.youtube.com/watch?v=MoOvJrwHhS0
[2] https://www.bhg.com/what-is-a-curbless-shower-6835532
[3] https://www.youtube.com/watch?v=qgyDWJrxLpg
[4] https://www.reddit.com/r/HomeImprovement/comments/lfqqq3/curbless_shower_good_idea_or_bad_idea/
[5] https://www.reddit.com/r/HomeImprovement/comments/lfqqq3/curbless_shower_good_idea_or_bad_idea/
[6] https://www.thespruce.com/showers-without-doors-ideas-4137742
[7] https://www.youtube.com/watch?v=41rmUonZqb8
[8] https://www.reddit.com/r/Carpentry/comments/10j0n0h/customer_insisted_on_curbless_shower_design_on/

Categories
Tips

DIY Projects For Custom Bathroom Storage

DIY Projects For Custom Bathroom Storage

Crafting Custom Bathroom Shelves with Rustic Charm

As a self-proclaimed DIY enthusiast, I’ve always been on the lookout for creative projects to spruce up my home. And when it came to revamping our bathroom, I knew I had to get my hands dirty to achieve the perfect blend of functionality and style. Enter: the DIY rustic bathroom shelves.

It all started when my handy husband, Joe, channeled his inner lumberjack and got to work crafting these beautifully chunky wood shelves for the little nook above our toilet. [1] I have to admit, I was a bit skeptical at first, but the moment I laid eyes on the final product, I was smitten. These shelves were exactly what our bathroom needed – a touch of rustic charm that seamlessly complemented the space.

As Joe was busy transforming ordinary firewood into a work of art, I couldn’t help but feel inspired. I knew I had to document the process and share it with the world, or at least the dedicated readers of this bathroom design service blog. After all, who doesn’t love a good DIY project that adds both character and storage to a room?

Sourcing the Materials: Upcycling at Its Finest

One of the best parts about this DIY project was that we were able to repurpose materials we already had on hand. [1] Joe had been helping his friend Tim clear some brush after a big storm, and he managed to salvage some nice-sized logs that were just begging to be turned into something extraordinary.

With our raw materials in hand, the next step was to transform these unfinished pieces of wood into sleek, functional shelves. [1] Joe used his trusty chainsaw to slice the logs into thick, chunky slabs, leaving the natural bark intact for an added touch of rustic flair. I have to admit, watching him work his magic was quite the sight – no trees were harmed in the making of these shelves, I assure you.

Sealing and Securing the Shelves

Once the shelves were cut to size, it was time to seal them and prepare them for installation. [1] I set up a dedicated workspace and got to work with an old paintbrush and some satin polyurethane we had lying around. This step was crucial to ensure the shelves wouldn’t rot or collect moisture from the bathroom’s steam.

After the shelves had dried, the real challenge began: how to securely mount these beefy, rustic beauties to the wall. [1] We tossed around a few ideas, from ornate brackets to floating shelves, but ultimately landed on a clean, modern, and industrial solution – simple L-brackets from the hardware store.

To tie the brackets in with the bathroom’s existing hardware, I decided to give them a makeover with some hammered bronze spray paint. [1] Joe insisted that I sand the metal first to ensure the paint adhered properly, and I have to say, the end result was a seamless match.

Bringing It All Together

With the shelves sealed, the brackets painted, and the hardware secured, it was time to hang our custom creation. [1] I have to admit, I was a bit nervous about the weight of these chunky shelves, but Joe assured me that the L-brackets were more than up to the task.

As we carefully lifted the shelves into place, I couldn’t help but feel a sense of pride and accomplishment. These weren’t just ordinary bathroom shelves – they were a testament to our DIY skills and a reflection of our unique style. [2]

The final touch was styling the shelves with a few of our favorite bathroom essentials, from plush towels to decorative accents. [1] The raw, unfinished look of the wood perfectly complemented the rest of our bathroom’s industrial-chic aesthetic, tying the entire space together seamlessly.

Unleash Your Inner DIY Genius

If you’re anything like me, the prospect of tackling a DIY project for your bathroom might seem a bit daunting. But trust me, the end result is so worth it. [3-8] By channeling your inner creative genius and upcycling materials you already have on hand, you can transform your bathroom into a truly one-of-a-kind oasis.

Whether you choose to follow in our footsteps and craft your own rustic bathroom shelves or explore alternative DIY storage solutions, the key is to let your personality shine through. Don’t be afraid to get a little messy, experiment with different materials, and embrace the unexpected – that’s where the magic happens.

So, what are you waiting for? Grab your tools, channel your inner lumberjack (or lumberjill), and get ready to create something truly unique for your bathroom. Trust me, the sense of accomplishment you’ll feel when you step back and admire your handiwork will be well worth the effort.

References

[1] Leah and Joe. “DIY Rustic Bathroom Shelves.” Leah and Joe, 31 July 2016, https://leahandjoe.com/2016/07/31/diy-rustic-bathroom-shelves/.

[2] “Chunky Bathroom Shelf Inspiration.” Home Staging Bloomington IL, 20 July 2017, https://homestagingbloomingtonil.wordpress.com/tag/adding-bathroom-storage/.

[3] The DIY Playbook. “How to Create Custom Built-Ins with IKEA.” The DIY Playbook, 22 June 2016, https://www.thriftydecorchick.com/2016/06/how-to-create-custom-built-ins-with.html.

[4] “Built-In Linen Cabinet.” The DIY Playbook, 15 January 2021, https://thediyplaybook.com/built-in-linen-cabinet/.

[5] Silber, Stefana. “Paint a Bathroom Vanity.” Stefana Silber, 24 March 2023, https://stefanasilber.com/paint-a-bathroom-vanity/.

[6] “DIY Pull-Out Under the Bathroom Sink Storage.” Hamilton Park Home, 31 October 2023, https://hamiltonparkhome.com/2023/10/diy-pull-out-under-the-bathroom-sink-storage/.

[7] Angela Marie Made. “DIY Built-In Bathroom Shelves and Cabinet.” Angela Marie Made, 13 April 2022, https://angelamariemade.com/diy-built-in-bathroom-shelves-and-cabinet/.

[8] Lolly Jane. “DIY Mason Jar Bathroom Storage.” Lolly Jane, 12 June 2021, https://lollyjane.com/diy-mason-jar-bathroom-storage/.

Categories
Tips

Pro Tips For Cleaning Grout And Tile

Pro Tips For Cleaning Grout And Tile

Unleashing the Power of Grout and Tile Rejuvenation

Are you tired of staring at your bathroom’s dingy grout lines and dull tile surfaces? Fear not, my friends! I’m here to share my top pro tips for cleaning grout and tile, and restoring them to their former glory.

You see, I used to have the same problem in my oh-so-lovely primary bathroom. The grout was like a time capsule, harboring memories of the previous tenants’ less-than-stellar cleaning habits. It was a battleground of dirt, grime, and discoloration – a veritable assault on the senses.

But I didn’t let that deter me. Nope, I dove headfirst into the world of grout and tile cleaning, testing out every method under the sun, from bottled cleaners to homemade concoctions. And let me tell you, I’ve learned a thing or two along the way.

The Grout Cleaning Toolkit

Before we dive into the nitty-gritty of grout and tile cleaning, it’s important to have the right tools for the job. First and foremost, you’ll need a good pair of chemical-resistant rubber gloves [1] to protect your hands from potential irritation. And don’t forget about eye protection, like these no-fog goggles [1], to shield your peepers from any splashes or fumes.

Next up, you’ll need a reliable grout brush. My personal favorite is this Rubbermaid spin brush [1] – it’s battery-operated, making the hard work a breeze. The spinning action does all the heavy lifting, and it even comes with a grout scrubber head for those stubborn lines.

Now that you’ve got your cleaning arsenal assembled, let’s get to work!

Bottled Grout Cleaners: The Heavy Hitters

When it comes to tackling tough grout stains, sometimes you need a little extra firepower. That’s where the big guns come in – the bottled grout cleaners. After scouring online reviews and tapping into the wisdom of my Driven by Decor Instagram followers, I put the top-rated products to the test.

The clear winner? Zep Grout Cleaner & Brightener [2]. This stuff is a powerhouse, able to remove stains without the need for excessive scrubbing. Simply apply it to the grout lines, let it work its magic for 2-3 minutes, and then scrub and rinse. It left my dingy grout looking as white as the driven snow – a true transformation!

The downside? Zep is an acidic cleaner, so it’s not something you’d want to use for regular maintenance. But for a deep, restorative clean, it’s hard to beat.

Homemade Grout Cleaning Wonders

If you’re looking for a more natural approach, fear not – your kitchen pantry holds the key to grout-cleaning excellence. I’ve experimented with a few different homemade concoctions, and the clear winner is a baking soda-based paste.

Here’s the formula: two parts baking soda, one part hydrogen peroxide, and just a touch of mild dish soap. Mix it up into a thick, spreadable paste, apply it to the grout lines, let it sit for about five minutes, and then scrub away the grime. [3]

I was absolutely blown away by how well this simple mixture performed. It cleaned and brightened my grout just as effectively as the Zep cleaner, with the added benefit of being a more natural, chemical-free solution. Plus, the toothpaste-like consistency made it easy to work into the grout lines.

Tackling Natural Stone Tile with Care

Now, if you happen to have natural stone tile in your bathroom, like marble, you’ll need to approach the cleaning process with a bit more caution. Acidic cleaners and abrasives can wreak havoc on delicate stone surfaces, so it’s important to use a product specifically formulated for the job.

After testing a few options, the standout winner in my book is Granite Gold Grout Cleaner Spray [4]. It’s pH-balanced and non-abrasive, making it safe for use around marble, granite, and other natural stone tiles. A quick spritz and a light scrub, and your grout will be sparkling clean without any risk of damage.

The Steamy Side of Grout Cleaning

But wait, there’s more! Another weapon in my grout-cleaning arsenal is the trusty steam cleaner. I put my Bissell steam cleaner [5] to the test, equipped with a special grout brush attachment, and was thoroughly impressed.

The steam power effortlessly lifted away dirt and grime, requiring minimal effort on my part. And the best part? It’s a completely chemical-free cleaning method, making it a great eco-friendly option for those who prefer to steer clear of harsh chemicals.

While it didn’t quite match the results of the Zep or baking soda paste, the steam cleaner was incredibly efficient, allowing me to tackle large areas of tile in a short amount of time. Plus, you can use that Bissell SteamShot to clean all sorts of things around the house – it’s a true multi-purpose workhorse!

Restoring and Protecting Your Grout

Now, let’s say you’ve given your grout a thorough cleaning, and it’s looking better than ever. But what if it’s just not quite back to its original pristine condition? Fear not, my friends – grout colorant to the rescue!

Products like this grout refresh colorant [6] or this grout restorer pen [6] allow you to paint over your grout, giving it a fresh, vibrant new look. Just grab a toothbrush or a handy grout pen and get to work – it’s a quick and easy way to revive that tired-looking grout.

But the work doesn’t stop there. To keep your grout looking its best, it’s essential to seal it with a protective barrier. [7] I’ve always used this impregnator sealer [7], as it’s a breathable solution that penetrates deep into the grout to prevent staining and discoloration.

So there you have it – my top pro tips for cleaning grout and tile, restoring them to their former glory, and protecting them for the long haul. From bottled cleaners to homemade wonders, steam power to colorants, I’ve put them all to the test, and I’m here to share my hard-won wisdom with you.

Now, go forth and conquer those grout lines! Your bathroom’s sparkling new look awaits.

References

[1] Kris Jarrett. “How to Clean Floor Tile Grout.” Driven by Decor, 21 Dec. 2023, https://www.drivenbydecor.com/how-to-clean-floor-tile-grout/.

[2] “Zep Grout Cleaner & Brightener.” Amazon, https://www.amazon.com/Zep-Grout-Cleaner-Brightener-32-Ounce/dp/B000HBNRMM.

[3] “How Do I Get Grout Clean Again? Previous Tenants Used Harsh Chemicals.” Reddit, 20 Aug. 2021, https://www.reddit.com/r/CleaningTips/comments/p400tv/how_do_i_get_grout_clean_again_previous_tenants/.

[4] “Granite Gold Grout Cleaner Spray.” Amazon, https://www.amazon.com/Granite-Gold-Grout-Cleaner-Spray/dp/B00028490Q.

[5] “Bissell Steam Cleaner with Grout Brush Attachment.” Amazon, https://www.amazon.com/Bissell-Multifunction-Steam-Cleaner-2075A/dp/B07TLTYVMN.

[6] “Grout Refresh Colorant” and “Grout Restorer Pen.” Amazon, https://www.amazon.com/s?k=grout+colorant.

[7] “511 Impregnator Sealer.” Amazon, https://www.amazon.com/511-IMPREGNATOR-SEALER-PENETRATING-PROTECTOR/dp/B00LVWL2VW.

Categories
Tips

Modernize Your Bathroom On A Budget

Modernize Your Bathroom On A Budget

Modernize Your Bathroom On A Budget

Are you tired of staring at that outdated, dingy bathroom every morning? I hear you – I’ve been there too! When our guest house bathroom was stuck in the 90s with its knotty pine and pink countertops, I knew it was time for a change. But with a tight budget, I was worried a full-blown renovation was out of reach.

That is, until I discovered the magic of budget-friendly bathroom updates. By getting a little creative and rolling up my sleeves, I was able to transform that tired space into a bright, modern oasis – all for under $300! And let me tell you, the results were nothing short of jaw-dropping.

So if you’re ready to ditch the dated vibes and create a bathroom that feels fresh and fabulous, buckle up. I’m about to share my top tips and tricks for modernizing your bathroom on a shoestring budget. Get ready to be amazed!

Embrace the Power of Paint

The simplest and most affordable way to breathe new life into your bathroom? A fresh coat of paint, my friends. And I’m not just talking about the walls – oh no, we’re going big here.

When I tackled our guest house bathroom, the first thing I did was have our painter spray the walls in a crisp, airy white. Let me tell you, that alone made a world of difference, instantly brightening up the once-dreary space. But I didn’t stop there.

I also painted the dated vanity a beautiful sage green color called Old Celadon. You know what they say – paint fixes everything! That simple update completely transformed the look and feel of the vanity, adding a touch of warmth and sophistication without overwhelming the small room.

And the best part? A few cans of sample-sized paint cost me a grand total of $7. That’s it! Talk about a budget-friendly way to make a major impact.

Refresh the “Jewelry”

Now that the backdrop was set, it was time to update the “jewelry” of the bathroom – the faucets, mirrors, hardware, and lighting. These small details might seem insignificant, but trust me, they make all the difference in elevating the overall look and feel of the space.

For the faucets, I opted for a sleek, modern brass design that instantly elevated the vanity. And speaking of the vanity, I swapped out the dated mirror for two chic oval mirrors that opened up the room and added a touch of elegance.

The hardware was another quick and easy win. I went with simple, clean-lined drawer pulls and cabinet knobs that perfectly complemented the new faucets and mirrors. And for the lighting? I gave the existing fixture a facelift by removing the globes, taking off the finials, and giving it a fresh coat of brass spray paint. Voila – instant update!

In total, these “jewelry” updates cost me around $150, but the transformation was nothing short of stunning. It’s amazing what a difference a few strategic swaps can make!

Get Creative with Accents

Now that the big-ticket items were taken care of, it was time to have some fun with the finishing touches. And let me tell you, this is where the real magic happens when it comes to budget-friendly bathroom updates.

One of my favorite accents was the DIY countertop makeover. I know, I know – that sounds a little crazy, but hear me out. The existing countertops were a garish shade of pink that I just couldn’t stand, but replacing them wasn’t in the budget. So instead, I tried my hand at using an appliance epoxy spray, and the results were nothing short of incredible!

For just $4, I was able to transform those dated countertops into a sleek, modern surface that looks just like stone. And it’s held up surprisingly well, even with regular use. Talk about a game-changer!

I also got creative with the textiles, swapping out the old towels and shower curtain for more modern, coordinating options. And don’t forget about those little touches, like the vintage-inspired glass jars I used to corral my bathroom essentials. It’s all about finding those hidden gems that add personality and charm without breaking the bank.

The Wow Factor

When all was said and done, I stepped back and just marveled at the transformation. What was once a drab, outdated bathroom had been completely rejuvenated into a bright, modern oasis – and for a fraction of the cost of a full renovation.

The best part? The whole project came in at under $300. Can you believe it? From the fresh coat of paint to the “jewelry” updates to the creative accents, I was able to totally modernize the space without blowing my budget.

And the results speak for themselves. The once-dreary bathroom is now a true showstopper, with a cohesive, sophisticated vibe that makes me smile every time I walk in. It just goes to show that you don’t need to spend a fortune to create a bathroom you love.

So what are you waiting for? It’s time to ditch the dated decor and transform your bathroom into the modern oasis of your dreams – all on a shoestring budget. Trust me, the wow factor is totally worth it.

References:
[1] https://www.bhg.com/bathroom/remodeling/projects/quick-bathroom-updates/
[2] https://graceinmyspace.com/budget-small-bathroom-remodel-for-300/
[3] https://www.forbes.com/home-improvement/bathroom/cheap-bathroom-remodel-ideas/
[4] https://blog.dixiebellepaint.com/update-your-bathroom-on-a-budget/
[5] https://www.kylieminteriors.ca/affordable-ideas-to-update-your-outdated-1990s-bathroom/
[6] https://mixandmatchdesign.com/new-blog/2017/1/24/modern-and-playful-budget-bathroom-makeover
[7] https://www.kylieminteriors.ca/3-case-studies-modernize-your-outdated-1990s-bathroom/
[8] https://www.thisoldhouse.com/bathrooms/21110824/25-thrifty-ways-to-redesign-your-bathroom-on-a-dime

Categories
Tips

Easy Bathroom Upgrades For Renters

Easy Bathroom Upgrades For Renters

Unlocking the Rental Bathroom’s Potential: A Renter’s Cheat Sheet

As a seasoned renter, I know the struggle of making a rental property feel like a true home. The bathroom is often the trickiest space – you want to put your stamp on it, but you’re limited by landlord restrictions and the dread of having to undo all your hard work when it’s time to move out. Well, my fellow renters, I’m here to let you in on a little secret: there are tons of easy, affordable, and reversible bathroom upgrades that can transform your space without jeopardizing your security deposit.

Peel-and-Stick Solutions for a Fresh Floor

Let’s start with the foundation – the floors. If your rental bathroom’s flooring is looking a little worse for wear, peel-and-stick tiles are a game-changer [1]. These babies come in a variety of styles, from sleek subway tiles to funky patterns, and they’re a cinch to install. Just make sure your existing floors are level and smooth, then start peeling and sticking. Best part? When it’s time to move out, you can simply peel them up and leave the original floors pristine. No mess, no fuss.

Wallpaper Wonders: Peel-and-Stick Style

Speaking of peeling and sticking, peel-and-stick wallpaper is another renter-friendly bathroom renovation superstar [1]. With endless design options, from bold botanicals to minimalist geometrics, you can infuse your personality into the space without committing to anything permanent. Just be mindful of the humidity levels in your bathroom – the paper may start to peel around the edges in high-moisture areas, so it might be better suited for powder rooms.

Lighting Up the Space

Outdated lighting can really drag down the entire look and feel of a bathroom, but swapping out fixtures is a breeze, even for the DIY-averse [1]. Take note of the existing setup – is it a pendant light, a vanity bar, or something else? Then pick up a replacement with the same electrical hookup. If you’re not comfortable doing the swap yourself, the average electrician charge is around $75 per fixture. Easy peasy!

Mirror, Mirror on the Wall

The mirror is often the focal point of a bathroom, so why not make it a real showstopper? If the existing mirror is removable, consider replacing it with something more eye-catching [1]. And if you’re stuck with a basic, builder-grade mirror, you can elevate it with a custom frame. Get crafty and build a wood frame yourself, or keep it simple and budget-friendly by framing it with accent tape or vanity mirror lights.

Painting the Walls: Landlord-Approved Style

Painting the walls can be a total game-changer, and it’s usually an easy landlord-approved upgrade as long as you agree to repaint the original color before moving out [1]. You can even ask if you can update the color of the existing painted cabinets for an extra pop of personality. Just be sure to get that approval in writing before you start wielding the paint rollers.

Decor Delights: Big Impact, Small Budget

Don’t underestimate the power of strategic decor to transform your rental bathroom [1]. Sure, it may be a small space, but that means you can have fun with oversized, bold wall art that makes a serious statement. Or if your vibe is more understated, get creative with luxurious touches like a fancy soap dispenser, some lush greenery, and a deliciously scented candle.

The Rental Bathroom of Your Dreams Awaits

With a little creativity and these renter-friendly upgrades, you can say goodbye to that bland, builder-basic bathroom and hello to a space that truly reflects your unique style. So roll up your sleeves, grab your peel-and-stick supplies, and get ready to transform your rental into a bathroom oasis – no security deposit required!

[1] Forbes Home Editorial Team. “Renter-Friendly Bathroom Ideas.” Forbes, Forbes Magazine, https://www.forbes.com/home-improvement/bathroom/renter-friendly-bathroom-ideas/.

Categories
Tips

Tips For A Kid-Friendly Bathroom Design

Tips For A Kid-Friendly Bathroom Design

Designing a Splash Zone They’ll Love

Ah, bathtime – that eternal battle between parents and pint-sized water warriors. As an interior designer, I’ve seen my fair share of bathrooms that make me want to cry more than the kids during a post-bubble bath meltdown. But I’m here to tell you, it doesn’t have to be that way! With a little creativity and the right design know-how, you can transform even the dullest of washrooms into a kid-friendly oasis that’ll have them actually getting excited for those daily rinses.

Embrace the Mess (Within Reason)

Let’s face it, kids and cleanliness don’t exactly go hand-in-hand. Those adorable little rascals have a knack for turning even the most pristine powder room into a wet and wild wonderland. But instead of constantly wiping down the walls and mopping up puddles, why not embrace a little mess and design a space that can handle their splashy antics?

[1] One surefire way to make cleanup a breeze? Opt for water-resistant materials like glazed tile or quartz countertops that’ll shrug off any spills or soap scum. And don’t be afraid to lean into bold, colorful palettes – those vibrant hues will help camouflage any wayward toothpaste smudges or crayon marks. Sure, your design may not win any awards for minimalist perfection, but your sanity will thank you when you’re not scrubbing grout lines for hours on end.

Customize for Little Hands

When it comes to designing a kid-friendly bathroom, function should be the name of the game. After all, what good is a Pinterest-worthy vanity if your pint-sized users can’t even reach the sink? [2] That’s why I always recommend incorporating adjustable features, like a step stool that can tuck neatly away when not in use, or a hand-held showerhead that makes rinsing those long locks a breeze. And let’s talk storage – think baskets, bins, and shelves positioned at the perfect grab-and-go height, so they can easily stash their favorite rubber duckies and tub toys.

Make it Multifunctional

Just because it’s a kids’ bathroom doesn’t mean it has to be a one-trick pony. In fact, some of the best family-friendly designs I’ve seen are the ones that seamlessly blend form and function, creating a space that works for both the little ones and the grown-ups. [3] Take the idea of a trough sink, for example – not only does it provide ample elbow room for simultaneous teeth-brushing sessions, but it also has a stylish, modern edge that’ll impress even your most design-savvy guests.

And don’t be afraid to get a little creative with the layout, either. I once worked on a Jack-and-Jill setup that had a private “get ready” area for the kiddos, complete with all their essentials, while the adults enjoyed their own oasis just beyond. Talk about a parenting win-win!

Infuse a Sense of Whimsy

Sure, practicality is key when it comes to a kid-friendly bathroom, but that doesn’t mean you have to sacrifice style in the process. In fact, I’d argue that a little playfulness is exactly what these spaces need to truly shine. [4] Whether it’s a gallery wall showcasing your little ones’ masterpieces or a vibrant, eye-catching tile pattern that makes bathtime feel like an adventure, incorporating those whimsical touches can transform even the most utilitarian of lavatories into a space they’ll actually want to spend time in.

And don’t be afraid to get a little kooky with the accessories, either. Quirky towel hooks in the shape of their favorite animals? Yes, please! Colorful, pom-pom-trimmed shower curtains? Sign me up! The possibilities are endless when you let your inner child run free.

Grow With Them

One final piece of advice? Keep the long game in mind. [5] Sure, those teeny-tiny toilets and kiddie-sized vanities might be adorable now, but what happens when your little ones hit their growth spurts? Instead, focus on design elements that can evolve alongside your family, like adjustable fixtures and versatile storage solutions. That way, you won’t find yourself stuck with a bathroom that feels outdated before they even graduate from elementary school.

At the end of the day, creating a kid-friendly bathroom is all about striking the perfect balance between form and function. It’s about crafting a space that’s equal parts practical and playful – one that not only makes your littles ones’ lives easier but also sparks their imagination and sense of wonder. So, what are you waiting for? Let’s get splashing!

References

[1] Knowledge from https://www.housebeautiful.com/room-decorating/bathrooms/g42714216/kids-bathroom-ideas/

[2] Knowledge from https://thediyplaybook.com/kids-bathroom-design-plan/

[3] Knowledge from https://seiconstructioninc.com/kids-bathroom/

[4] Knowledge from https://www.hgtv.com/design/rooms/bathrooms/12-stylish-bathroom-designs-for-kids-pictures

[5] Knowledge from https://thathomebirdlife.com/designing-functional-kid-friendly-bathroom/