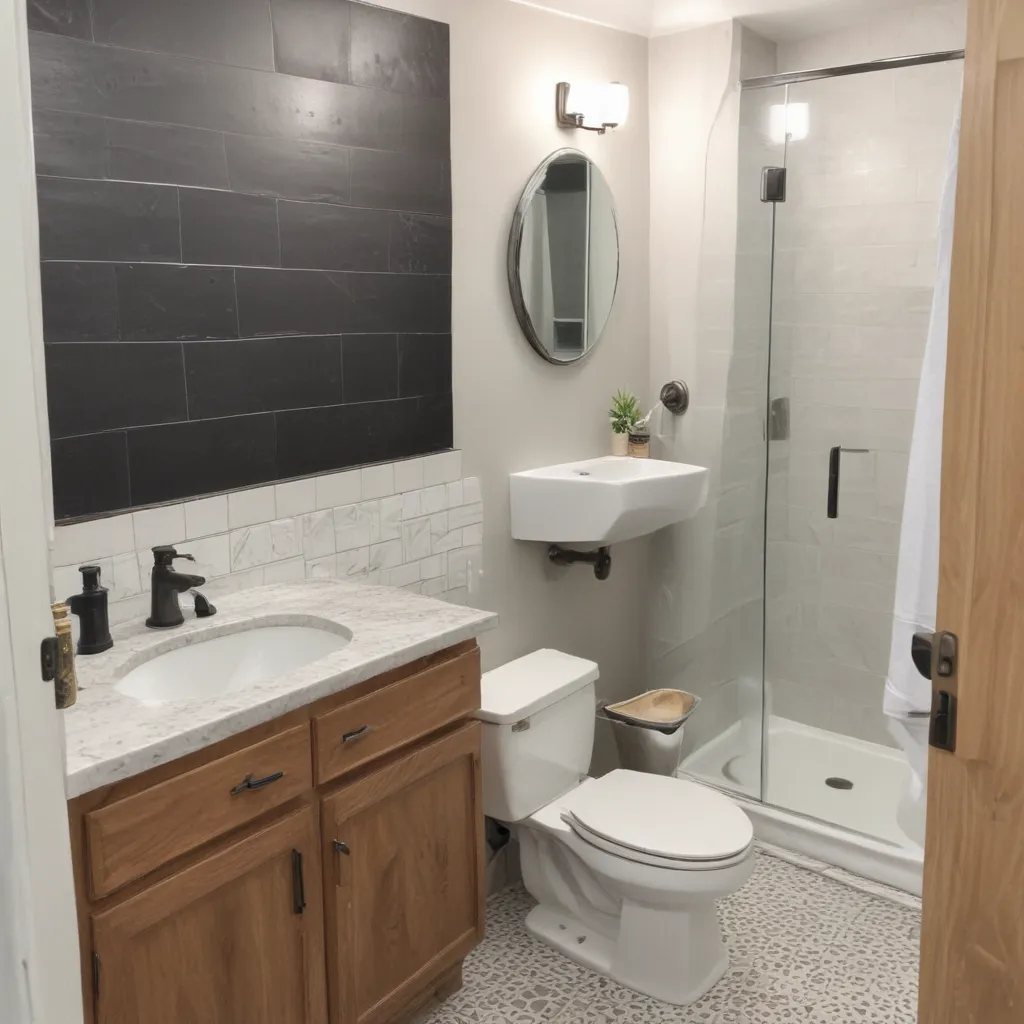
Categories
Tips

How to Regrout a Shower

How to Regrout a Shower

Tackling the Tile Trench

Ah, the bathroom – the sacred sanctuary where we indulge in our daily rituals, from steamy showers to leisurely soaks. But what happens when that pristine tiled oasis starts to show its age? When the grout between the tiles becomes discolored, cracked, or just plain unsightly? It’s time to embark on a tiling transformation – a regrout journey that will have your shower sparkling like new.

As someone who’s been down this tiled path before, let me tell you, regroutin’ ain’t no walk in the park. But with the right know-how and a little elbow grease, you can conquer this tile-saving mission like a true bathroom warrior. So, grab your trusty grout saw, don your best pair of gloves, and let’s dive into the world of regrout restoration.

Prepping the Porcelain Battlefield

Now, before you can start slatherin’ on that fresh grout, you’ve gotta do a bit of prep work. [1] First things first, make sure to remove that pesky tub spout, faucet handles, and any other trim pieces that might be in your way. Trust me, you don’t want to be knocking elbows with those while you’re trying to work your magic.

Next up, it’s time to get scrubbin’ – and I don’t mean your morning shower routine. Grab that trusty grout saw and start etching away at the old, cracked grout. [2] Be careful not to scratch your precious tiles, though – you want them looking their best for the big reveal. Once you’ve cleared out the damaged grout, use that shop vac to suck up all the dust and debris, making a clean slate for your new grout to adhere to.

The Grout-eous Process

Alright, now that the stage is set, it’s time to start the real show – mixing up that perfect batch of grout. [3] Now, let me tell you, this ain’t your mama’s baking soda and vinegar volcano. You gotta get the consistency just right, not too thick and not too runny. Think of it like that Goldilocks porridge – just right.

Once you’ve got your grout mix all ready to go, it’s time to start the application process. Grab that trusty rubber float and start spreadin’ that stuff around like you’re painting a masterpiece. [4] Be sure to press it into all the nooks and crannies, workin’ it in good and proper. And don’t forget to clear off any excess – you want a nice, smooth finish, not a chunky mess.

The Wiping Well-done

Alright, now that the grout is in place, it’s time for the most satisfying part – the wiping. [5] Grab a damp sponge and start gently wiping away that grout haze. You’ll want to do this a few times, rinsing and wringing that sponge out as you go. Just be careful not to wipe too hard – you don’t want to pull the grout out of the joints.

And don’t forget about that tub-tile joint! [6] That’s where the real magic happens. Using a caulk gun, fill that sucker up with some flexible caulk. That way, when Aunt Mildred comes over for her weekly soak and causes a tidal wave, your tiles won’t be left high and dry.

The Seal of Approval

Alright, now that the hard work is done, it’s time to add the finishing touch – the grout sealer. [7] Think of it like a clear coat for your tile masterpiece. Not only will it make your grout look shiny and new, but it’ll also help protect it from the inevitable onslaught of moisture, mildew, and hard water stains. [8]

Just be careful when applying that sealer, though – it’s as slippery as a bar of soap on a wet shower floor. Use an old toothbrush to gently brush it on, and be sure to wipe up any spills immediately. And there you have it, folks – your very own regrout revival, complete with a tile-saving seal of approval.

Now, I know what you’re thinking – “But [your name], this sounds like a ton of work!” And you’d be right. Regroutin’ ain’t for the faint of heart. But trust me, when you step back and admire your handiwork, that feeling of accomplishment will be worth every bead of sweat. So, what are you waitin’ for? Grab your tools, crank up the tunes, and let’s get that shower lookin’ its best!

References:
[1] https://www.youtube.com/watch?v=XFvrV4sFA7k
[2] https://www.truevalue.com/diy-projects/maintenance-and-repair/regrout-bathroom-tile/
[3] https://www.youtube.com/watch?v=eK6_BzsO0cw
[4] https://www.reddit.com/r/HomeImprovement/comments/mb7ibk/regrouting_shower_do_myself_or_hire_a_contractor/
[5] https://www.youtube.com/watch?v=0qIAOxOUzAE
[6] https://www.bigbathroomshop.co.uk/info/blog/how-to-regrout-a-shower-wall/
[7] https://www.youtube.com/watch?v=Nf-zAMUMC1Y
[8] https://www.angi.com/articles/how-to-regrout-shower-tile.htm

Categories
Tips

How to Hang a Bathroom Mirror

How to Hang a Bathroom Mirror

Mirroring Perfection: A Reflective Journey

As a self-proclaimed DIY enthusiast, I’ve tackled my fair share of home projects. But when it came to hanging a bathroom mirror, I’ll admit, I was a bit apprehensive. After all, this wasn’t just any old piece of decor – it was the centerpiece of the room, the star of the show. The mirror, the window to my freshly primped face, deserved nothing less than a flawless installation.

Choosing the Perfect Mirror

Before I could even think about hanging the darn thing, I had to find the perfect mirror. I scoured the internet, browsing through endless options, from sleek and modern to vintage and ornate. It was like trying to pick a life partner – I had to get it just right.

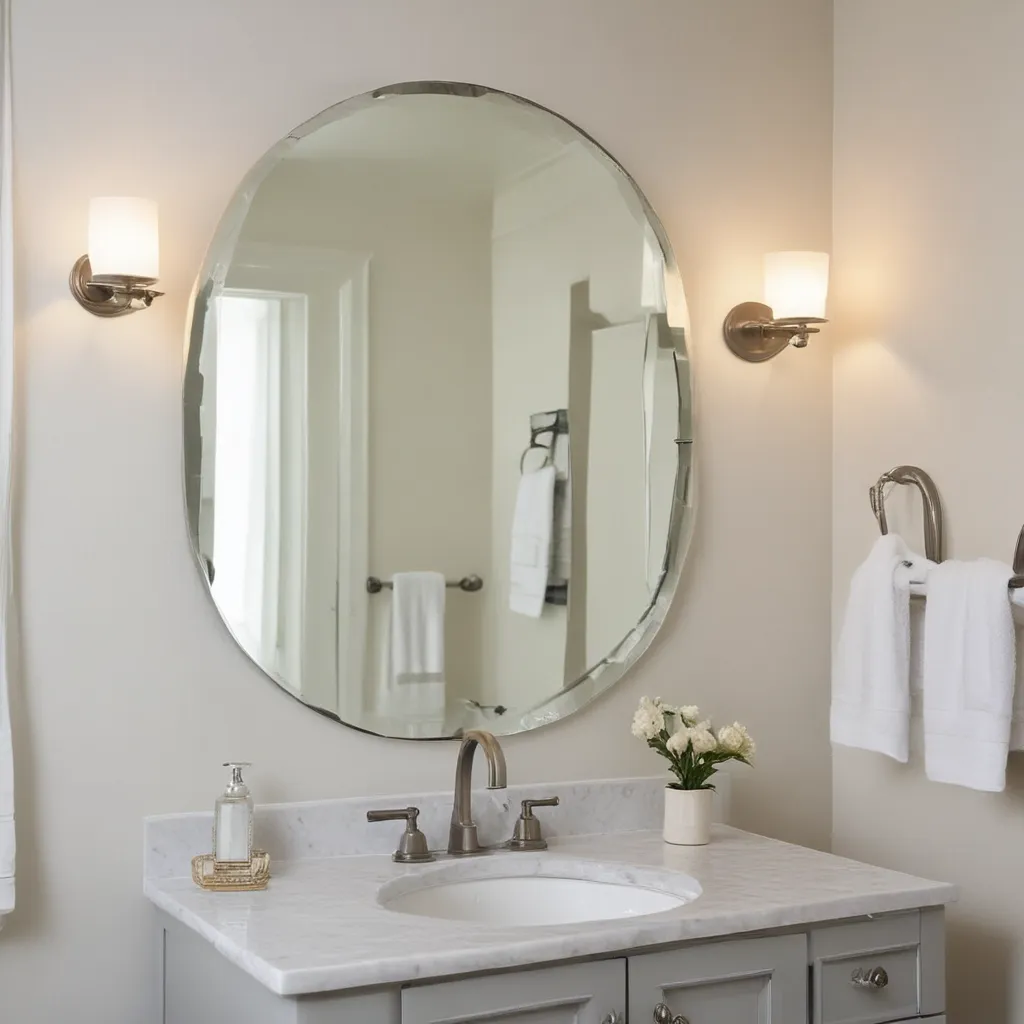
After much deliberation, I landed on a gorgeous gold-rimmed mirror that I spotted on the Lowe’s website. [2] The price was right, and I loved how the warm tones would complement the black and white tiles in my newly renovated bathroom. Plus, the round shape would help break up all the straight lines in the space.

Mastering the Mounting Technique

With my mirror chosen, it was time to tackle the installation. Now, I’ll be the first to admit, hanging a bathroom mirror can be a bit tricky. There’s the whole “how do I get this thing level?” and “where exactly should I place it?” conundrum. But after some research and a few YouTube tutorials, [1][3][5] I felt confident I could pull it off.

One of the biggest challenges I faced was that my mirror had a single mounting bracket on the back. No need for complex measurements and calculations here – I simply needed to find a stud and secure the mirror with a single anchor and screw. [2] Easy peasy, right? Well, almost.

Putting it all Together

As I stood there, level in hand, carefully aligning the mirror, I felt a surge of excitement. This was it, the moment of truth! With a deep breath, I gently pressed the mirror against the wall and heard the satisfying click of the anchor locking into place.

But wait, there’s more! To add a little extra stability and ensure my mirror stayed put, I decided to use a piece of painter’s tape to connect the two mounting brackets on the back. [2] Then, I simply transferred that taped line to the wall, drilled in two holes, and voila – a perfectly level, securely mounted mirror.

The Finishing Touches

With the mirror in place, I took a step back to admire my handiwork. It was like magic – the warm, golden tones of the frame seemed to instantly brighten up the entire space. And the round shape, well, it just felt so much more inviting than the boxy vanity and straight-laced subway tiles.

To really make the mirror shine, I decided to add a few extra touches. A wood shelf above it would bring in some natural warmth, while some textured accessories like a woven basket or a potted plant would add a touch of life. [2] The possibilities were endless, and I couldn’t wait to see how the final result would come together.

Reflections on a Job Well Done

As I stood there, gazing into the mirror, I couldn’t help but feel a sense of pride. This wasn’t just any old DIY project – it was a testament to my skills, my attention to detail, and my ability to turn a simple task into a true work of art.

Sure, there were a few hiccups along the way, like that tricky tile backsplash and the need to get creative with the mounting hardware. [7] But in the end, I conquered it all, and the result was nothing short of perfection.

So, if you’re looking to upgrade your bathroom with a stunning new mirror, take it from me – with a little bit of research, a few handy tools, and a whole lot of determination, you can make it happen. Just remember to have fun, embrace the challenges, and always keep your eye on the prize – a beautifully reflected you.

References

[1] Knowledge from https://www.youtube.com/watch?v=sUZX57Wv_co
[2] Knowledge from https://thediyplaybook.com/how-to-hang-a-bathroom-mirror/
[3] Knowledge from https://www.youtube.com/watch?v=6WyKV8b32j4
[4] Knowledge from https://www.thegrumble.com/threads/options-for-hanging-frame-mirror-in-bathrooom.62517/
[5] Knowledge from https://www.youtube.com/watch?v=IorzY3m9x_U
[6] Knowledge from https://www.homedepot.com/c/ah/how-to-install-a-bathroom-mirror/9ba683603be9fa5395fab90157f7b92
[7] Knowledge from https://mimzyandcompany.com/how-to-hang-a-bathroom-mirror-over-tile-wainscoting/
[8] Knowledge from https://www.taskrabbit.com/blog/bathroom-guide/hang-bathroom-mirror

Categories
Tips

How to Clean a Shower Curtain

How to Clean a Shower Curtain

The Dirty Truth About Shower Curtains

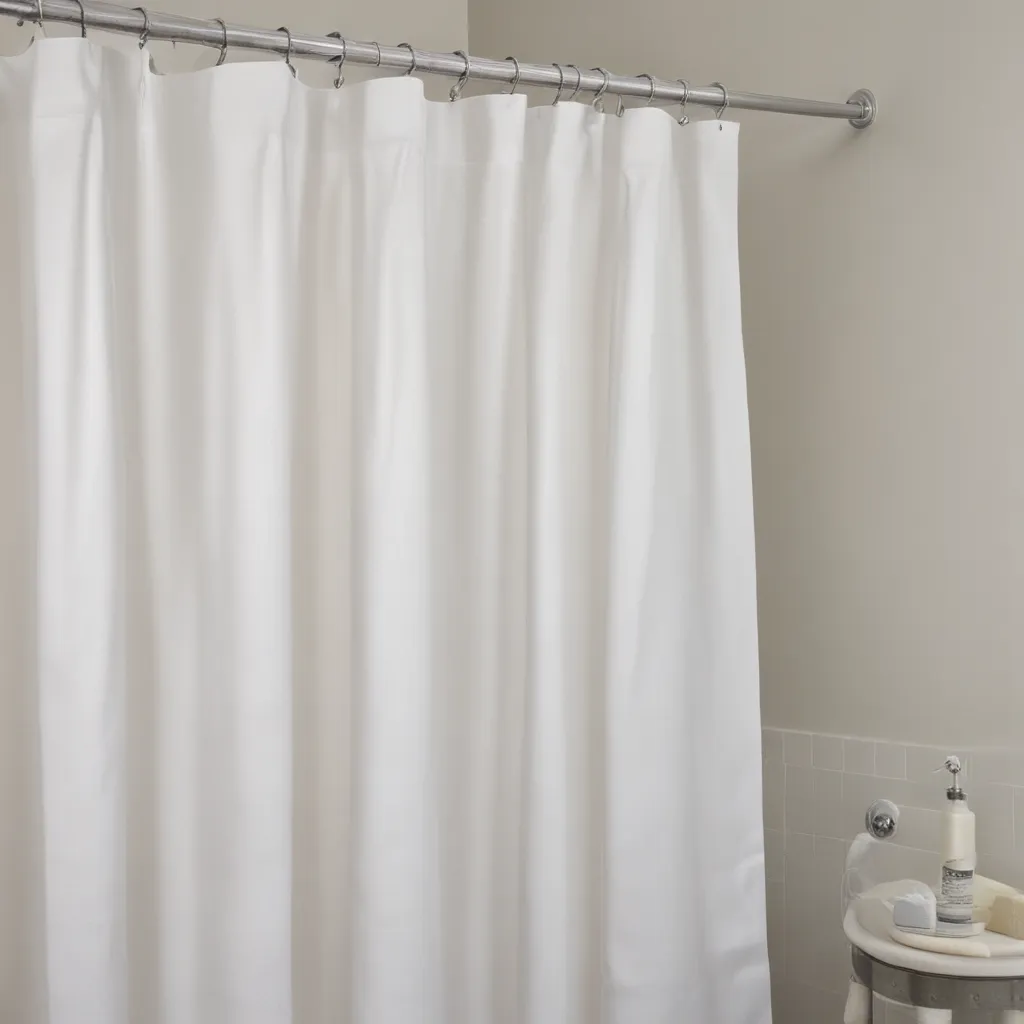
Confession time: I used to be one of those people who would just toss my plastic shower curtain liner whenever it started looking a little rough around the edges. I mean, who has time to deal with all that soap scum and mildew buildup, right? Just buy a new one and call it a day.

Well, let me tell you, that habit was really starting to add up – both financially and environmentally. So, I decided to figure out the best way to clean a shower curtain and give that trusty liner a new lease on life. And let me tell you, it’s way easier than you might think. [1]

Cleaning the Liner

The first step is to tackle that plastic shower curtain liner. These tend to be the dirtiest part of the whole ensemble, what with all the direct exposure to soap, water, and humidity. But no need to replace them – they can definitely be salvaged with a little elbow grease.

The easiest way to clean a plastic shower curtain liner is to just toss it in the washing machine. Yep, that’s right – no hand-scrubbing required! Just remove it from the rod, give it a quick shake to dislodge any loose debris, and pop it in the wash. [2]

I like to add a couple of old towels to the load as well. They’ll help agitate the liner and scrub off any stubborn soap scum. And for an extra disinfecting boost, you can throw in a half-cup of bleach or color-safe bleach. Just be sure to check the care label first and adjust the water temperature accordingly. [3]

Once the cycle is done, all you have to do is hang that liner back up and let it air dry. Easy peasy! If you notice any lingering spots, you can always give it a quick hand-wash in the tub with some warm water and a mild detergent. [4]

Tackling the Fabric Curtain

Now, the fabric shower curtain itself is a bit more delicate, but still totally washable. The key is to use a gentle cycle and avoid the dryer.

Start by taking the whole thing down from the rod and removing any rings or hooks. Then, just toss it in the washing machine with a small amount of gentle detergent. I like to add a couple of old towels to the load to help keep everything balanced. [2]

When the cycle is done, shake out the curtain and hang it back up to air dry. Some fabric curtains can go in the dryer on low heat, but I always play it safe and let mine air dry. The last thing you want is for that pretty pattern to get all wonky and misshapen. [5]

Pro tip: If your fabric curtain is particularly grimy, you can try giving it a quick pre-soak in the bathtub with some warm water and a bit of laundry detergent or dish soap. Just let it soak for 30 minutes or so before tossing it in the wash. [6]

Maintaining Cleanliness

Okay, so you’ve gotten your shower curtain and liner all sparkly clean – now what? The key is to stay on top of it and do a quick refresh every month or so. [7]

For the liner, I like to give it a quick spray-down with a vinegar and water solution after every shower. The vinegar helps break down any lingering soap scum and mildew. Just spritz it on, give it a quick rinse, and you’re good to go. [1]

As for the fabric curtain, a monthly wash should do the trick to keep it looking fresh. But in between, you can give it a quick wipe-down with a damp cloth to remove any dust or grime that’s built up. [5]

And don’t forget about those shower curtain rings! They can get pretty gunky too. Give them a soak in some hot soapy water every now and then to keep them looking their best. [2]

The Bottom Line

Keeping your shower curtain and liner clean doesn’t have to be a chore. With a little bit of regular maintenance, you can keep them looking (and smelling) fresh for years to come. No more tossing and replacing – just a quick wash here and there, and you’re good to go.

So, the next time you notice that dreaded soap scum creeping up the sides, don’t panic. Grab your cleaning supplies, roll up your sleeves, and get to work. Trust me, your wallet and the environment will thank you.

References

[1] Knowledge from https://www.reddit.com/r/CleaningTips/comments/rdf2mz/any_tips_on_the_best_way_to_clean_a_plastic/

[2] Knowledge from https://www.marthastewart.com/8102520/how-clean-shower-curtain-liner

[3] Knowledge from https://www.rd.com/article/how-to-wash-shower-curtains/

[4] Knowledge from https://www.reddit.com/r/CleaningTips/comments/123nn6r/how_do_i_get_my_shower_curtain_white_again/

[5] Knowledge from https://www.bhg.com/homekeeping/house-cleaning/tips/how-to-clean-shower-curtain/

[6] Knowledge from https://www.queenofthehousehold.com/how-to-clean-a-plastic-shower-curtain/

[7] Knowledge from https://www.whirlpool.com/blog/washers-and-dryers/how-to-wash-shower-curtains.html

[8] Knowledge from https://www.quora.com/Do-you-wash-your-shower-curtains-or-do-you-buy-new-ones

Categories
Tips

Grey Bathroom Design Inspiration

Grey Bathroom Design Inspiration

Stepping Into the Grey Zone: Unlocking the Secrets of Stylish Grey Bathrooms

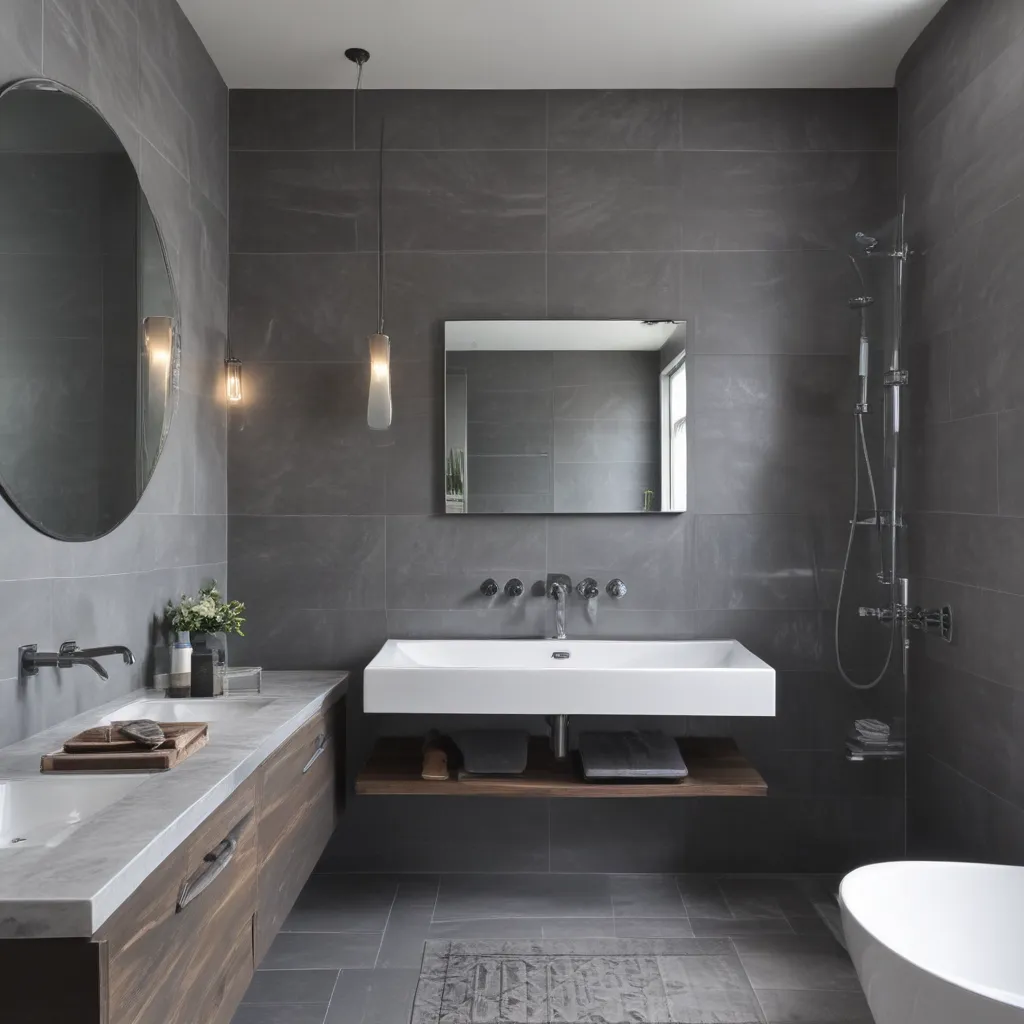
As I stepped into the freshly renovated bathroom, I couldn’t help but be captivated by the stunning grey palette that adorned the walls and fixtures. Gone were the days of predictable white tiles and generic chrome fittings – this space oozed sophistication and personality.

You see, I’ve always been a bit of a design enthusiast, and when it comes to bathrooms, grey has become my new obsession. It’s a color that somehow manages to be both calming and chic, providing the perfect canvas for creating a truly unique and inviting space. And trust me, I’ve seen my fair share of grey bathroom inspiration – from sleek, minimalist sanctuaries to cozy, rustic retreats.

So, whether you’re planning a full-scale renovation or just want to spruce up your existing space, let me share with you the secrets to designing a grey bathroom that will have your friends and family green (or should I say, grey) with envy. [1]

Embrace the Shades of Grey

When it comes to grey bathrooms, the options are truly endless. From soft, airy dove greys to bold, moody charcoals, the color spectrum offers a world of possibilities. [2] And the best part? Grey is incredibly versatile, allowing you to create a look that perfectly aligns with your personal style.

For a contemporary, Scandi-inspired vibe, opt for light, almost white-washed greys paired with natural wood accents and clean-lined fixtures. [3] Or, if you’re feeling a little more adventurous, why not experiment with a mix of different grey tones, like pairing slate-hued tiles with a graphite vanity? [4] The contrast will add depth and visual interest to your space.

But don’t be afraid to go bold, either. A moody, inky grey can transform your bathroom into a cozy, spa-like retreat, especially when combined with warm brass hardware and luxurious textures like plush towels and lush greenery. [5] Just remember, the key is to strike the right balance – you don’t want your space to feel too cold or overwhelmed by the grey.

Mixing Materials and Textures

One of the things I love most about grey bathrooms is the opportunity to play with a variety of materials and textures. [6] After all, who says a grey bathroom has to be all about sleek, minimalist surfaces?

Imagine stepping into a space where the cool, smooth feel of concrete walls is juxtaposed with the warm, organic touch of a wooden vanity. Or how about a bathroom where the grey subway tiles on the walls are complemented by a stunning, oversized mirror with a hammered metal frame? [7] The possibilities are truly endless.

And let’s not forget about the importance of incorporating texture. A grey bathroom with a mix of matte and glossy finishes, like a textured penny tile floor and a high-shine freestanding tub, can create a sense of depth and visual interest that will leave your guests in awe. [8]

Bring in the Greenery

One of my favorite ways to breathe life into a grey bathroom is by adding a touch of greenery. Whether it’s a lush, trailing plant cascading from a shelf or a simple potted succulent perched on the vanity, the contrast of the verdant foliage against the cool, calming grey tones can be truly breathtaking.

Not only do these pops of nature add a fresh, rejuvenating element to the space, but they also help to soften the sometimes stark and industrial feel that can come with a grey palette. [6] It’s a simple yet effective way to turn your bathroom into a true oasis of relaxation and serenity.

And the best part? Caring for these leafy friends can be just as therapeutic as soaking in the tub. So, go ahead and embrace your inner plant parent – your grey bathroom will thank you.

Conclusion: Embrace the Grey and Let Your Creativity Shine

As I step back and admire the stunning grey bathroom I’ve created, I can’t help but feel a sense of pride and accomplishment. What was once a plain, uninspiring space has been transformed into a true sanctuary of style and sophistication.

So, if you’re ready to ditch the boring white tiles and chrome fixtures, and embrace the soothing, stylish world of grey bathrooms, I say go for it! With a little creativity, a dash of experimentation, and a whole lot of confidence, you can create a space that not only looks amazing but also reflects your unique personal style.

Remember, the key is to have fun with it. After all, designing your dream bathroom should be an enjoyable and rewarding process. So, go ahead and dive into the grey zone – I promise, you won’t be disappointed.

References

[1] https://www.pinterest.co.uk/pebblegrey/grey-bathrooms/
[2] https://www.pinterest.com/pin/98164466864998147/
[3] https://www.pinterest.co.uk/victorianplumb/grey-bathrooms/
[4] https://www.pinterest.com/squarefrank/gray-bathrooms/
[5] https://www.houzz.com/photos/gray-bathroom-ideas-and-designs-phbr1-bp~t_712~a_88-8
[6] https://www.digsdigs.com/grey-bathroom-designs/
[7] https://www.houzz.com/photos/modern-gray-bathroom-ideas-phbr2-bp~t_712~s_2105~a_88-8
[8] https://za.pinterest.com/sabrinakennedy/grey-bathroom-decor/

Categories
Tips

Bathroom Storage Ideas for Small Spaces

Bathroom Storage Ideas for Small Spaces

Turning Your Tiny Bathroom into an Oasis of Organization

Living in a small space can sometimes feel like a constant battle against clutter. And when it comes to the bathroom, the struggle is real. Between towels, toiletries, and that endless collection of half-used beauty products, it’s easy for things to spiral out of control.

But fear not, my fellow space-challenged friends! I’m here to share my top bathroom storage ideas that will have your tiny tiled oasis feeling like a palace of pristine organization. No matter how minuscule your square footage may be, there are clever tricks to maximize every inch.

Vertical Visions

The key to storage in small bathrooms? Look up! Utilizing your vertical space is clutch. [1] Instead of letting your walls go to waste, install some sleek wall-mounted shelves or a cabinet that stretches all the way to the ceiling. This creates the illusion of a larger space while giving you ample room to stash all your essentials.

And don’t forget about that often-neglected area above the toilet – it’s prime real estate for a hanging storage unit or a simple floating shelf. [2] Just be mindful of placement so you don’t end up knocking things into the bowl when reaching up.

Another genius vertical hack? Repurpose a ladder as a towel rack. Lean it against the wall and voila – instant storage and style. [3] It’s a quirky touch that’ll have your guests wondering how you managed to squeeze so much function into such a petite space.

Corner Cubbies

When floor space is at a premium, getting crafty with corners is a must. [4] Tuck a slim shelving unit or cabinet into that awkward empty space beside the sink or toilet. You can use it to stash extra toilet paper, cleaning supplies, or even display some decorative accents.

And speaking of corners, don’t overlook that often-wasted zone beneath the sink. [5] Install a U-shaped drawer that hugs the plumbing – it’s the perfect spot to corral lotions, cotton balls, and other small items.

Mirror, Mirror on the Wall

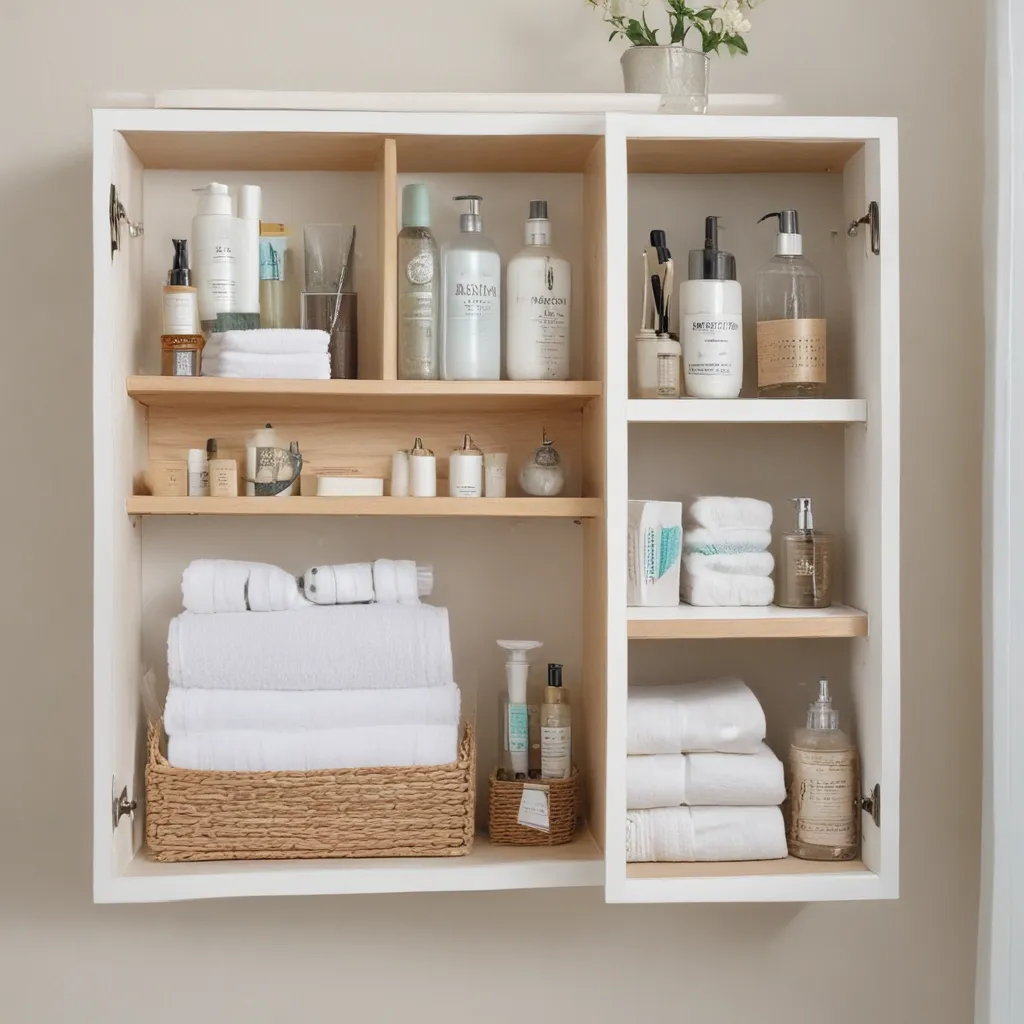
Mirrors are a small bathroom’s best friend, not just for their reflective powers but for their hidden storage potential. [6] Opt for a mirrored medicine cabinet that lets you tuck away everyday essentials behind closed doors. Or go for a vintage-inspired mirror with a built-in shelf – it’s a chic way to keep things like cotton swabs and hair ties close at hand.

And if you really want to get crafty, consider mounting a magnetic strip inside your mirror cabinet. [7] It’s a genius way to organize all those tiny loose items like bobby pins and tweezers that tend to get lost in the shuffle.

Shower Surprises

Don’t neglect the shower when it comes to maximizing your bathroom storage. [8] Install a wall-mounted organizer or caddy to keep your shampoos, conditioners, and loofahs within easy reach. And if you have a window sill or ledge in the shower, use it to stash your favorite bath products for a luxurious, spa-like feel.

For an extra special touch, consider repurposing a vintage crate or basket as a shower caddy. [9] Not only does it add a rustic-chic vibe, but the open slats provide great drainage and airflow to keep your products fresh.

Rolling with the Punches

If your bathroom is truly teeny-tiny, get creative with movable storage solutions. [10] A slim rolling cart or trolley is perfect for tucking into tight spaces, giving you an instant boost of extra space for towels, hair tools, or even a mini vanity.

And let’s not forget the trusty bar cart. [11] Repurpose one in your bathroom to corral all your lotions, potions, and beauty supplies. It’s a stylish way to keep everything organized and within arm’s reach.

Baskets and Bins, Oh My!

Fabric storage bins and woven baskets are absolute lifesavers in small bathrooms. [12] Tuck them into open shelving, hang them on the wall, or even stash them beneath the sink. They’re perfect for concealing unsightly items like toilet paper, extra towels, and cleaning products.

And don’t limit yourself to the usual suspects. Get creative with unique storage vessels like vintage crates, mason jars, or even a decorative pitcher. [13] The options are endless, and each piece adds its own special touch of style.

The Importance of Decluttering

Now, I know what you’re thinking – with all these amazing storage ideas, won’t my bathroom just end up looking like a cluttered mess? Not to worry, my friend. The key to making it all work is to first take stock of what you truly need and use on a daily basis. [14]

Start by doing a thorough declutter session. Toss anything that’s expired, damaged, or just plain unnecessary. Then, group like items together and assign them designated homes within your newly optimized storage solutions. The result? A serene, zen-like sanctuary that feels miles away from the cramped quarters you started with.

So there you have it – your roadmap to transforming your tiny bathroom into a masterpiece of organization. With a little creativity and strategic thinking, you can wave goodbye to the days of counter chaos and vanquish that constant clutter for good. Happy organizing!

[1] Knowledge from https://www.thespruce.com/very-small-bathroom-storage-ideas-5324097
[2] Knowledge from https://www.goodhousekeeping.com/home/organizing/tips/g810/small-bathroom-storage/
[3] Knowledge from https://www.bhg.com/bathroom/small/small-bathroom-storage/
[4] Knowledge from https://www.ikea.com/us/en/rooms/bathroom/how-to/5-small-bathroom-storage-ideas-to-maximise-your-space-pub11b4a990
[5] Knowledge from https://www.bhg.com/bathroom/small/small-bathroom-storage/
[6] Knowledge from https://www.apartmenttherapy.com/bathroom-organization-ideas-36721482
[7] Knowledge from https://www.apartmenttherapy.com/storage-solution-ideas-from-a-tiny-new-york-bathroom-241153
[8] Knowledge from https://www.cutertudor.com/homedecordesign/bathroom-storage-ideas-for-small-spaces/
[9] Knowledge from https://www.cutertudor.com/homedecordesign/bathroom-storage-ideas-for-small-spaces/
[10] Knowledge from https://www.bhg.com/bathroom/small/small-bathroom-storage/
[11] Knowledge from https://www.bhg.com/bathroom/small/small-bathroom-storage/
[12] Knowledge from https://www.cutertudor.com/homedecordesign/bathroom-storage-ideas-for-small-spaces/
[13] Knowledge from https://www.cutertudor.com/homedecordesign/bathroom-storage-ideas-for-small-spaces/
[14] Knowledge from https://www.thespruce.com/very-small-bathroom-storage-ideas-5324097

Categories
Tips

Bathroom Ventilation Guide

Bathroom Ventilation Guide

The Dreaded Damp Dilemma

As I stepped into my brand-new bathroom, I couldn’t help but feel a sense of excitement and pride. The sleek tiles, the shiny fixtures, and the luxurious rainfall showerhead – it was like stepping into a spa oasis. But little did I know, a hidden enemy was lurking, ready to wreak havoc on my beautiful sanctuary.

It all started after my first hot, steamy shower. As I stepped out, I noticed the mirror was completely fogged up, and a thin layer of condensation clung to the walls. “No problem,” I thought, “I’ll just open a window and let it air out.” But the next day, the same story – fog, condensation, and a growing sense of unease.

It wasn’t until I started noticing small patches of mold around the bathroom vents that I realized the true extent of the problem. Excess moisture had taken up residence, and it was time to take action. That’s when I learned about the crucial role of bathroom ventilation, and how it could have saved me from this damp dilemma.

The Importance of Proper Bathroom Ventilation

Bathroom ventilation is not just a luxury – it’s a necessity. During a hot shower or a relaxing soak in the tub, the humidity levels in the bathroom can skyrocket, creating the perfect breeding ground for mold, mildew, and other microorganisms that can compromise your health and the integrity of your home [1].

Without proper ventilation, that excess moisture can seep into the walls, ceilings, and even the framing, leading to costly repairs down the line. We’re talking warped doors, peeling paint, and even structural damage – not exactly the spa-like experience I had envisioned.

But it’s not just about protecting your home – good bathroom ventilation is also crucial for maintaining good indoor air quality. In today’s energy-efficient, airtight homes, mechanical ventilation is essential for removing stale, polluted air and replacing it with fresh, clean air [1]. Trust me, you don’t want to be breathing in that humid, stale air day in and day out.

Choosing the Right Bathroom Exhaust Fan

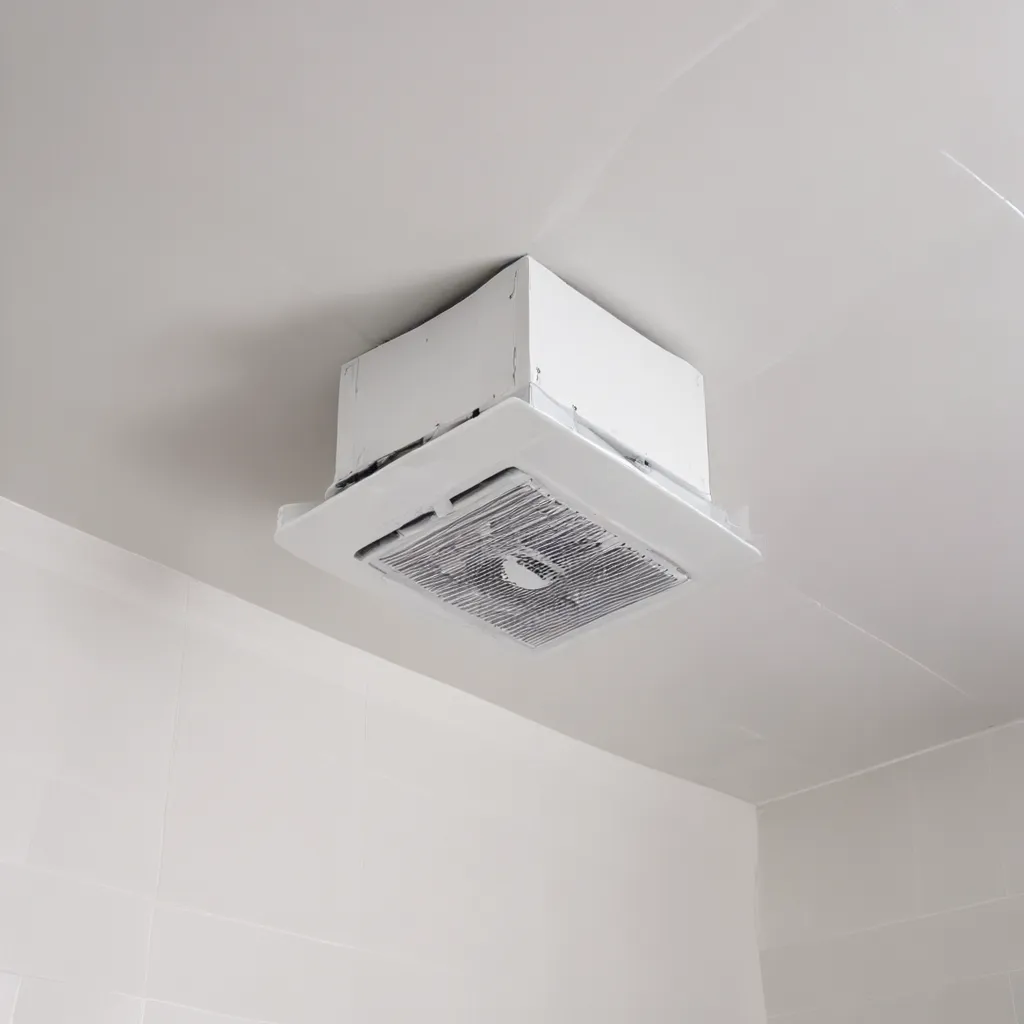
So, how do you ensure your bathroom is properly ventilated? The answer lies in the humble bathroom exhaust fan. These unsung heroes of the home work tirelessly to draw out that excess moisture and humidity, leaving you with a dry, fresh, and mold-free sanctuary.

When it comes to selecting the right bathroom exhaust fan, there are a few key factors to consider. First and foremost, you’ll want to ensure you choose a fan with the right CFM (cubic feet per minute) rating [2]. This measurement tells you how much air the fan can move, and it’s crucial to match the fan’s capacity to the size of your bathroom.

As a general rule of thumb, you’ll want a fan that can provide at least 1 CFM per square foot of bathroom space [4]. So, if your bathroom is 7′ x 10′ (70 square feet), you’ll need a fan with a minimum of 70 CFM. Anything less, and you’ll be left with a damp, muggy mess.

But CFM isn’t the only factor to consider. Noise level is also an important consideration, especially if your bathroom is adjacent to a bedroom or living area. Look for a fan with a low sone rating – the lower the number, the quieter the fan will be [4]. Anything under 1 sone is considered whisper-quiet, perfect for creating a peaceful, spa-like ambiance.

Ventilation Upgrades and Maintenance

Once you’ve selected the perfect bathroom exhaust fan, the work isn’t done. You’ll also need to ensure proper installation and ongoing maintenance to keep your ventilation system running at peak performance.

The ductwork that carries the humid air outside is just as crucial as the fan itself. Make sure the duct is the right size (typically 4-6 inches in diameter) and as short and straight as possible to maximize airflow [4]. And don’t forget to regularly clean the fan and vent cover to prevent buildup of dust and debris.

But what if your bathroom is on the larger side or has multiple fixtures, like a shower and a jetted tub? In those cases, a single exhaust fan might not be enough. Consider installing multiple fans or upgrading to a more powerful, high-CFM model to ensure complete coverage [4].

And if you really want to take your bathroom ventilation to the next level, look into installing a smart, connected fan with features like timers, humidity sensors, and even smartphone control [3]. These high-tech options not only provide optimal airflow, but they also make it easier than ever to maintain a healthy, mold-free bathroom environment.

Ventilation Victory: Keeping Your Sanctuary Dry and Fresh

As I look back on my initial bathroom woes, I can’t help but chuckle. Who knew that a seemingly simple thing like proper ventilation could make such a big difference? But now, with my new, high-powered exhaust fan humming away, I can enjoy my morning showers and relaxing baths without a trace of fog or condensation in sight.

No more mold, no more musty odors, and no more worrying about the long-term damage to my beautiful bathroom. Instead, I have a dry, fresh, and healthy sanctuary – the perfect oasis to start and end my day.

So, if you’re facing a similar damp dilemma, or if you’re planning a bathroom renovation, don’t forget the importance of proper ventilation. It might not be the most glamorous aspect of your project, but it’s an investment that will pay off in the long run, keeping your home and your health in tip-top shape.

References

[1] “Bathroom Exhaust Fans,” Home Ventilating Institute, https://www.hvi.org/resources/publications/bathroom-exhaust-fans/

[2] “Bathroom Exhaust Fan Buying Guide,” The Home Depot, https://www.homedepot.com/c/ab/bathroom-exhaust-fan-buying-guide/9ba683603be9fa5395fab90ab995103

[3] “Bathroom Fan Buying Guide,” Lowe’s, https://www.lowes.com/n/buying-guide/bathroom-fan-buying-guide

[4] “How to Size a Bathroom Exhaust Fan,” The Spruce, https://www.thespruce.com/how-to-size-a-bathroom-exhaust-fan-1152773

Categories
Tips

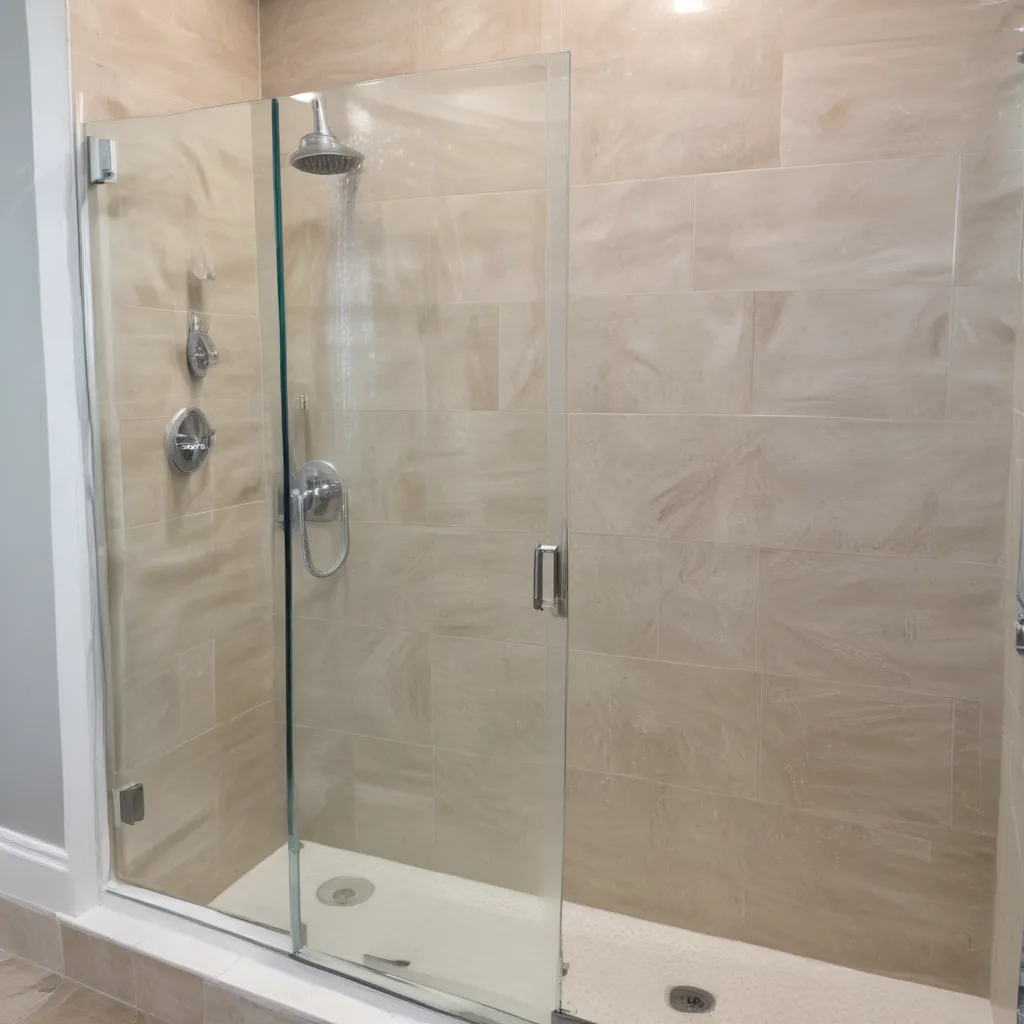
How to Clean Soap Scum from Glass Shower Doors

How to Clean Soap Scum from Glass Shower Doors

Unleash the Sparkle: A Journey to Crystal-Clear Shower Doors

Have you ever stepped into your shower, only to be greeted by a disheartening sight – the once-gleaming glass doors now caked in a thick layer of unsightly soap scum? Fear not, my fellow cleaning warriors, for I have the ultimate battle plan to restore your shower’s pristine glory.

As someone who has waged this war on soap scum more times than I can count, I’ve learned a few tricks that’ll have your glass doors sparkling like new. Grab your trusty cleaning supplies and let’s dive in!

Breaking Down the Buildup: Understanding Soap Scum

Before we can launch our full-scale assault on this stubborn foe, it’s crucial to understand the nature of our enemy. Soap scum, that pesky residue that clings to our shower doors, is a combination of hardened soap, body oils, and minerals from the water [1]. Over time, this concoction forms a stubborn, hazy layer that can be a real pain to remove.

Imagine it like that last glob of peanut butter stuck to the side of the jar – no matter how much you scrape and scrub, it just refuses to budge. That’s the power of soap scum, my friends. But fear not, for we have the tools and the tenacity to take it down.

Gather Your Arsenal: The Essential Cleaning Supplies

To wage this war on soap scum, you’ll need to assemble the right cleaning supplies. Here’s what I recommend having in your cleaning arsenal:

  • Vinegar: This kitchen staple is a powerhouse when it comes to cutting through soap scum. The acetic acid in vinegar helps break down the grime [2].
  • Baking Soda: A gentle abrasive, baking soda can help scrub away stubborn buildup without scratching the glass [3].
  • Microfiber Cloths: These soft, lint-free cloths are perfect for wiping down and polishing the glass, leaving it streak-free [4].
  • Scrub Brush: A sturdy, non-abrasive scrub brush can help agitate the soap scum and loosen its grip on the glass [5].
  • Razor Blade or Plastic Scraper: For those really stubborn spots, a razor blade or plastic scraper can help lift off the toughest grime [6].

With these essential tools at the ready, you’re well on your way to conquering the soap scum and restoring your shower doors to their former glory.

The Soap Scum Slayer: Step-by-Step Cleaning Process

Ready to put your cleaning skills to the test? Let’s get started on the ultimate soap scum elimination plan.

Step 1: Prepare the Battleground

Begin by thoroughly wetting the shower doors with warm water. This will help soften the soap scum and make it more receptive to our cleaning agents.

Step 2: Apply the Vinegar Solution

In a spray bottle, mix equal parts white vinegar and water. Generously spray this solution onto the affected areas of the glass doors, making sure to cover every inch of the soap scum buildup [2].

Step 3: Let It Soak

Allow the vinegar solution to work its magic for at least 15 minutes. This will give the acetic acid time to break down the soap scum, making it easier to remove.

Step 4: Scrub Away the Grime

Armed with your scrub brush, start scrubbing the doors in circular motions. Apply a little elbow grease to really work the solution into the stubborn spots [5].

Step 5: Rinse and Repeat

Once you’ve thoroughly scrubbed the doors, rinse them with clean water to remove any remaining vinegar solution and loosened soap scum.

Step 6: Tackle Stubborn Spots

If there are still persistent areas of soap scum, grab your trusty razor blade or plastic scraper and gently scrape away the residue. Be careful not to apply too much pressure, as you don’t want to scratch the glass [6].

Step 7: Buff to a Shine

Grab your microfiber cloths and give the doors a final wipe-down. This will help remove any streaks or water spots, leaving your shower doors sparkling clean and crystal clear [4].

The Soap Scum Showdown: Troubleshooting Tips

Now, I know what you’re thinking – “This all sounds great, but what if the soap scum is just too stubborn?” Well, fear not, my cleaning-savvy friends, I’ve got a few more tricks up my sleeve.

If the vinegar and scrubbing just aren’t cutting it, you can try using a baking soda paste. Simply mix a few tablespoons of baking soda with just enough water to create a thick, spreadable paste. Apply it directly to the soap scum, let it sit for 15 minutes, and then scrub away [3].

Another option is to try a commercial bathroom cleaner specifically formulated for tackling soap scum. Look for products containing ingredients like citric acid or hydrogen peroxide, which can help dissolve the stubborn buildup [7].

And if all else fails, don’t be afraid to reach for the big guns – a steam cleaner. The high-heat steam can help loosen and lift even the most tenacious soap scum without the need for harsh chemicals [8].

Maintaining that Pristine Shine: Preventing Future Soap Scum

Now that you’ve put in the hard work to restore your shower doors to their former glory, the key is to keep them that way. Here are a few tips to help prevent future soap scum buildup:

  • Wipe Down After Each Use: Make it a habit to give the doors a quick wipe-down with a microfiber cloth after each shower. This will help prevent soap scum from taking hold [4].
  • Use a Squeegee: Investing in a good quality squeegee and using it after each shower can help eliminate water spots and keep the glass clear [1].
  • Consider a Water Softener: If your home has hard water, installing a water softener can help reduce the mineral buildup that contributes to soap scum [2].

By following these simple maintenance tips, you can keep your shower doors looking their best for years to come. No more unsightly soap scum to ruin your daily bathing bliss!

Conclusion: Reclaim the Sparkle, Conquer the Scum

Conquering the soap scum battle may seem daunting, but with the right tools, techniques, and a little elbow grease, you can restore your shower doors to their former glory. Take pride in your hard work and bask in the glory of that crystal-clear, sparkling clean glass.

So, the next time you step into your shower and are greeted by that dreaded soap scum, remember – you’ve got this. Grab your vinegar, baking soda, and microfiber cloths, and let the cleaning crusade begin. Your bathroom oasis awaits, free from the clutches of that pesky soap scum!

References

[1] How to Clean Soap Scum off Shower Doors
[2] How to Clean Soap Scum off Shower Glass
[3] Best Way to Remove Soap Scum from Glass Shower Doors
[4] How to Clean Soap Scum Off Shower Doors
[5] The Best Way to Get Soap Scum Off of Glass Shower Doors
[6] Best Way to Get Soap Scum Off of Glass Shower Door
[7] What’s the Best Method to Remove Soap Scum from a Glass Shower Door
[8] How Can I Remove Heavy Soap Scum on a Glass Shower Door

Categories
Tips

Tips for Installing Bathroom Grab Bars

Tips for Installing Bathroom Grab Bars

Grab Bars: The Unsung Heroes of Bathroom Safety

As I stood in the aisle of my local hardware store, staring at the bewildering array of grab bars, I couldn’t help but feel a tinge of apprehension. “How hard could it be?” I thought to myself. Little did I know, installing these seemingly simple devices would become a quest filled with surprises, challenges, and ultimately, a deep appreciation for their importance.

My elderly mother was coming to visit, and I knew that bathroom safety would be a top priority. I had heard the horror stories – the slips, the falls, the injuries that could forever change someone’s life. I was determined to make her stay comfortable and, most importantly, secure.

Navigating the Grab Bar Maze

I started my research by scouring the internet, watching tutorial videos, and reaching out to experts. The information I found was both enlightening and overwhelming. [1] One video emphasized the importance of properly securing the bars into the wall studs, while another cautioned against the use of suction-cup style grab bars, which can be unreliable. [2] Then, I stumbled upon a statistic that really drove home the significance of this task: the average cost of a grab bar installation can range from $450 to $600 for just three bars! [3]

Gulp. I knew I had to get this right, both for my mother’s safety and my wallet.

Measuring Up to the Challenge

As I stood in my bathroom, tape measure in hand, I felt like a detective trying to solve a mystery. Where were the elusive wall studs hiding? [4] I scanned the tiles, hoping for some telltale sign, but the walls seemed to mock my efforts. Fortunately, a handy “stud finder” tool came to my rescue, and I was able to locate the support beams behind the tile. [6]

With my newfound knowledge, I set out to plan the perfect placement for the grab bars. [4] I decided on a horizontal bar near the toilet to assist with sitting and standing, and a vertical bar in the shower to help my mother steady herself. But, as I soon discovered, the placement wasn’t as straightforward as it seemed.

The Art of Grab Bar Positioning

The height and angle of the grab bars needed to be just right, tailored to my mother’s needs and preferences. [4] I spent countless hours researching, measuring, and re-measuring, trying to envision her every move. Should the bars be higher or lower? Angled or straight? The possibilities seemed endless, and I wanted to get it perfect.

In the end, I opted for a combination of horizontal and vertical bars, strategically placed to provide maximum support and stability. [4] The vertical bar in the shower would be within easy reach, while the horizontal bar near the toilet would offer a sturdy handhold for sitting down and standing up.

Overcoming Fiberglass Challenges

Just when I thought I had it all figured out, a new challenge arose: the shower walls were made of fiberglass, not the typical tile or drywall. [8] Conventional wisdom suggested that grab bars needed to be secured into wall studs, but how could I accomplish that with a material that was less than sturdy?

After scouring forums and reaching out to experts, I discovered a solution: I could use specialized anchors and a backing system to reinforce the fiberglass and create a secure foundation for the grab bars. [8] It would take a bit more time and effort, but I was determined to make it work.

The Reveal and a Sigh of Relief

With my plan in place and the necessary supplies gathered, I set to work. The installation process was meticulous, but I took my time, triple-checking each step. [6] When the final screw was tightened, I stepped back and admired my handiwork, feeling a sense of pride and relief.

As my mother arrived and I guided her through the bathroom, I watched her eyes light up with gratitude. She ran her hands along the bars, testing their stability, and I knew I had made the right choice. [4] The peace of mind it brought both of us was priceless.

Lessons Learned and a Call to Action

Looking back on this experience, I realize that installing bathroom grab bars is not just a practical task, but a testament to our commitment to making our loved ones feel safe and secure. [4] It’s a subtle yet powerful way to show that we care, that we’re willing to go the extra mile to ensure their well-being.

If you’re facing a similar challenge, take heart. With a little research, planning, and determination, you can make a real difference in the life of someone you love. [4] The investment of time and effort is well worth it, for the peace of mind it brings and the reassurance that your loved one can navigate their own home with confidence and dignity.

So, the next time you find yourself staring at a wall of grab bars, remember: you’re not just installing a piece of hardware – you’re building a bridge of safety and support. And that, my friends, is priceless.

[1] https://www.youtube.com/watch?v=WyiLsgbXzEQ
[2] https://www.agingcare.com/questions/companies-that-install-grab-bars-429994.htm
[3] https://www.youtube.com/watch?v=vgaVOXIWrHE
[4] https://www.getsafe.com/how-where-to-install-bathroom-safety-rails-grab-bars/
[5] https://www.youtube.com/watch?v=Ofx8k6PXLkU
[6] https://www.homedepot.com/c/ah/how-to-install-grab-bars/9ba683603be9fa5395fab901dbd10401
[7] https://www.youtube.com/watch?v=m1WXNZFw11k
[8] https://diy.stackexchange.com/questions/268383/installing-a-grab-bar-on-a-fiberglass-shower-wall

Categories
Tips

Tips for Styling Bathroom Shelves and Medicine Cabinets

Tips for Styling Bathroom Shelves and Medicine Cabinets

The Controversial World of Medicine Cabinets

Like most cultural and political debates in our country, the choice of whether to have a medicine cabinet or not reigns both controversial and contentious amongst designers and homeowners alike. To actively choose NOT to have the most convenient storage for the daily annoyances of teeth brushing and face washing seems outright absurd, and yet I have never in my life opted for this convenience.

You see, the mountain house was my big opportunity. It was more modern (which I think works better for something streamlined and inset) so it could have handled it, whereas our 100-year-old Tudor might have looked a bit, well, clunky in a design sense. So today, I’m going to dive into the internal (and external) debate to have or not have the ultimate convenience of a medicine cabinet. If you just fell asleep, I suggest you stand up, walk to your medicine cabinet (or not), slap yourself in the face to stay awake. Perhaps drink a 5-Hour Energy because you don’t get to nap while the rest of us are trying to change the minds and world on this subject.

You can’t pretend it’s not a problem. It is. It’s real. We need to know why someone like myself and even my friend Nate Berkus (and a few other designer friends like Amber Lewis) have historically hated the medicine cabinet. Let’s start with some basic photos of inset medicine cabinets and why they get a bad rap.

The Medicine Cabinet Debate

I don’t like medicine cabinets for the following reasons:

  1. They are often clunky and take up too much visual real estate, overshadowing the vanity and faucet.
  2. The mirrors are typically low-quality and can look dated or builder-grade.
  3. They disrupt the flow and symmetry of a bathroom design, especially in a vintage or traditional space.
  4. The shelves are small and shallow, making it difficult to neatly organize products.

But mostly I don’t use medicine cabinets because I love a BEAUTIFUL mirror. Mirrors are the artwork of the bathroom, so of course, I’m going to opt for that over something that provides boring “storage solutions.” I know the idea of going with form over function is infuriating to most of you, but designing a beautiful space is important as, you know, a designer.

Now before you all say “it’s also your job to design a functional space,” there are other options (I’ll talk about more below). Typically, in a master bathroom, vanity space will have be sufficient that you don’t NEED the dinky shelves on a medicine cabinet, but I couldn’t help but think…Was I alone? Do other designers feel this way? I asked a few friend/experts in this field:

What the Experts Say

Nate Berkus: “I’ve always avoided them but now the trade-off for storage has me slowly converting…I wish someone would invent one that universally works with a vintage mirror.”

Amber Lewis: “I am not a fan or a heavy user of the Medicine Cabinet.”

Orlando Soria: “I am fully on Team Medicine Cabinet. I know they can be a bummer for some designers who would rather have a pretty decorative mirror above a sink, but there’s just stuff you can store in one that doesn’t make sense anywhere else. And they provide storage at the most convenient height to access while you are standing getting ready in the morning. They also do something that I like in that they provide dual functions: they are storage AND a mirror. Ideally, you’d be insetting them, but even surface wall mounted can look great (I like to frame them out in wood trim to make them look more integrated if they can’t be fully sunken into the wall)…”

Sherry Petersik of Young House Love: “Personally, we’ve never added a medicine cabinet during a bathroom reno, and always find the storage in the vanity to be just fine, and then we can use a pretty mirror over the sink. I especially love a round one to break up the squareness of most vanities (which isn’t exactly readily available in medicine-cabinet-form). So yeah, I don’t hate them or anything, I just don’t generally find myself adding them ever…and I’m still alive without one.”

Maxwell Ryan of Apartment Therapy: “He didn’t even think of them for his Scandinavian style country house because he didn’t want anything that they could put any clutter in and stylistically they would have been wrong. And yet he and his daughter recently moved into a new apartment in New York which had them already installed and well, it’s his daughter’s favorite thing in the home. He wouldn’t have chosen them but he’s pretty psyched he has them now. His general thought is this: it’s found space, previously unused, and you should use it if you need it, but stylistically he understands why designers, stylists and editors don’t opt for them.”

Finding the Right Balance

Now, I want to add a caveat that they can ABSOLUTELY work, and if you truly need storage solutions then it can be done. This is a good example of an inset medicine cabinet in a modern space that works. It’s sleek, goes wall-to-wall (and floor-to-ceiling) so it’s relatively seamless, plus that vanity is epic so it’s not the focus. But for the record, that one is custom (I think you push the glass to pop it out) and was likely thousands of dollars.

My pickiness is just so specific and it’s hard to explain. All the circumstances have to be there to pull it off and that’s just hard. And yet it can be permanent which is terrifying. So what do I prefer? Why do I consider mirrors the art of the bathroom?

The Pursuit of the Perfect Mirror

Exhibit A (and beyond): Why must something tear apart my insides as the medicine cabinet has?? They are the recliners of the bathroom. The microwave of the kitchen. I long to reach out my arm and easily pull a hidden toothbrush out of a medicine cabinet, and yet I have never opted for this joy.

I thought that surely there could be an in-between, a happy medium: storage without the contemporary facade. We tried for the mountain house but first went through some storage alternatives:

Storage Alternatives to Medicine Cabinets

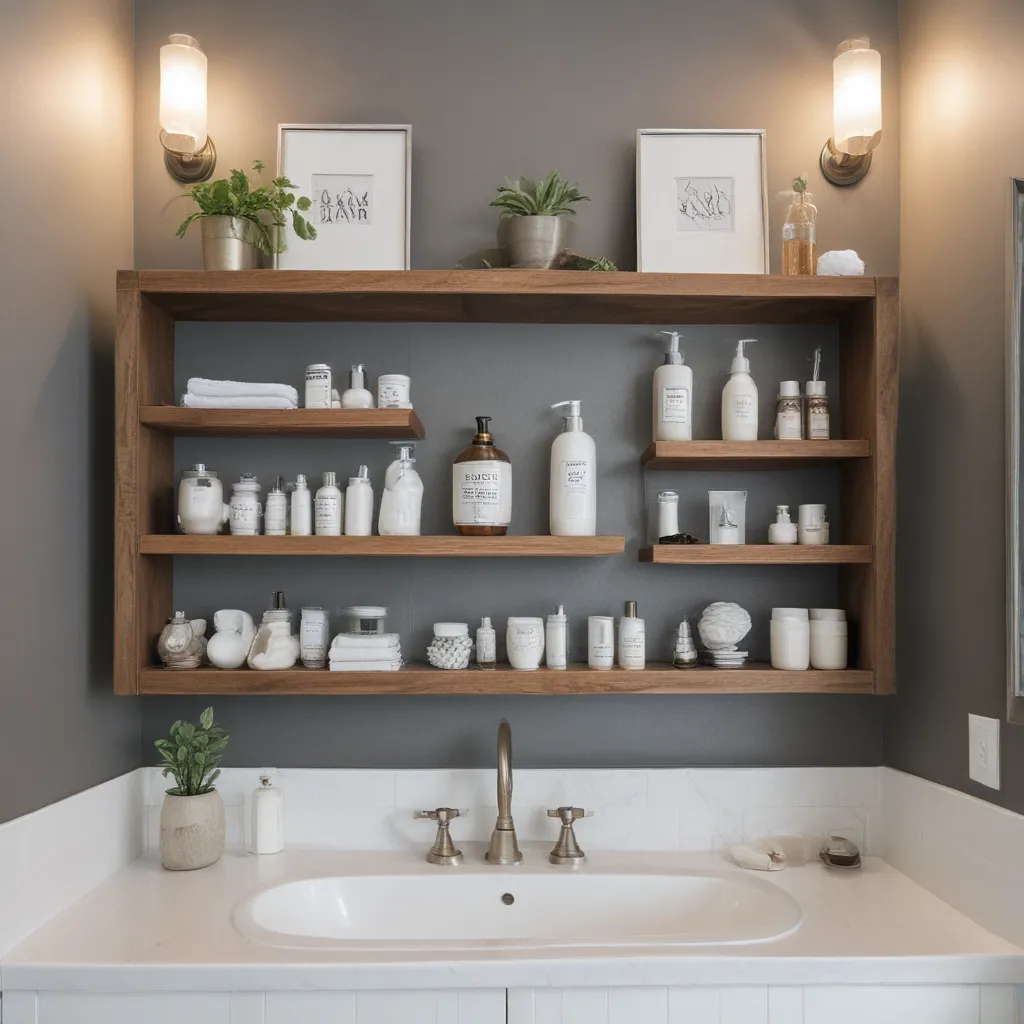
Open Shelving: This is certainly a cute opportunity for, say, displaying your most beautiful product and as a stylist I know I can make this look pretty, but is this an actual storage solution? It’s a stretch. While it does provide more surface area, you can’t really display your necessities unless you are president of the lifestyle mafia and have like $250 face cream decanted into blown glass vessels. And let’s face it, we aren’t.

Shelving On the Mirror: While certainly cute, where on earth do these people store ANYTHING but their toothbrush? The vanity surely, but I guess pretty glass lidded jars for cotton balls and whatnot would go here…

Side Cabinets: I think this is a good solution, but unless there is a door it’s not hidden and your gross vitamins and crest strips will junk it up pretty fast. But if you want a massive mirror (that likely can’t never be hinged) then I think this is a good alternative.

Barn Doors: For the master bathroom of the mountain house, we wanted a huge mirror to reflect light/trees (or at least no frames between mirrors) and for a hot (and possibly feverish) second, I thought that maybe something like this could work. Now, I know that people have beef with barn doors, I do too, but I do think that if done right in the right house (modern farm/industrial) this could be a solution.

The Perfect Solution

The custom or readymade mirror over hidden shelving on hinges. Sounds complicated. Keep reading. YES. It’s hard not to get behind this but it’s clearly custom and likely more expensive (I’d bet around $1,200, not including construction). But BOY am I glad there is a solution out there.

So did we do that in the mountain house? Well, I’ll be honest and say that we don’t need the storage at the mountain house like we do in LA because we have so much less stuff, PLUS our vanities have GREAT storage. In the master, we wanted a huge mirror to reflect light and trees from the opposite windows. In the powder, we didn’t see the need for more storage since it’s a powder room. And the guest bathrooms, well, they are just for temporary guests and they have tons of vanity storage so we opted out.

If you don’t need storage (ha, who are you?), then don’t suffer through the pain of figuring out how to integrate it in a stylish way. Full stop. I did, however, want to show you guys a genius storage solution for editorial reasons so we came up with this plan for the kids bathroom. I figured of all bathrooms, the kids could use somewhere to put their disgusting toothbrushes that they chew on like Jolly Ranchers daily.

A Custom Shelving Solution

During construction phase, our plan was to dig into the wall and build shallow shelves between the studs in the wall above the vanity and then place two pretty hinged mirrors overtop. YAY. A SOLUTION. Now, our plan wasn’t communicated well enough to our contractor (we were moving fast and two hours away so not on site as often as we wanted) and then all of a sudden the whole wall was tiled with no shelves (isn’t it funny how some things take forever and you are like “what’s the holdup?” and other things happen faster than they were supposed to before you could give proper direction? so hilarious).

Having them rip out the tile and find the space between the studs to build shallow shelves seemed totally unnecessary so we didn’t, but that was our plan. I didn’t have any reference photos at the time, but I just found this and it’s PERFECT. GENIUS. Dabito from Old Brand New took a pretty readymade mirror and dug out shelves behind it and put it on piano hinges. HALLELUJAH. DO THIS. IT’S THE PERFECT SOLUTION TO YOUR MEDICINE CABINET WOES.

Wall-Mounted Medicine Cabinets

While it does require some research and I’m sure there are some restrictions (frame size and width)—and yes, it also requires skills by you or your contractor—it is the best solution in my eyes if you need the storage space, want a pretty mirror AND don’t want to spend thousands on a custom-built solution.

Now, does that mean that there aren’t good ones on the market? Of course not. There are some and I want to stress this again: IF YOU LIVE IN A RENTAL OR HAVE A SMALL BATHROOM IN NEED OF STORAGE AND YOU DON’T WANT TO DO ANYTHING EXPENSIVE OR TOO CUSTOM, WALL MOUNTED MEDICINE CABINETS ARE GREAT, AND CAN BE ATTRACTIVE AND STYLISH.

To prove it, we rounded up some that we really like and many that I considered during the “medicine cabinet journey of 2018.” Here are a few of my favorites:

Product Description
1. Seamless Medicine Cabinet A sleek, frameless medicine cabinet with adjustable shelves.
2. Elanora Mirror Cabinet A recessed medicine cabinet with LED lighting for a high-end look.
3. Cubiko Storage Mirror A compact, cube-shaped cabinet with a mirrored door.
4. Robern Single Door Medicine Cabinet A high-quality, custom-looking option from a trusted brand.
5. Benchwright Wall-mount Medicine Cabinet A rustic, wood-framed cabinet with mirrored doors.
6. Jacuzzi Single Door Medicine Cabinet A budget-friendly, no-frills surface mount option.
7. Infinity Brass Medicine Cabinet A modern, brass-finished cabinet with an integrated outlet.

Embracing Function Over Form

So there you go. It’s complicated. And I really need you all to be reasonable about this. If you need the storage badly, choose the function of the medicine cabinet. My journey was more about grappling with the convenience of one, while ultimately valuing style over storage. There I said it. Yes, sometimes I value style over storage and that’s okay. I’m a stylist, not a professional organizer.

WHAT SAY YOU???? Have you any medicine cabinet woes? Do you regret not putting one in or do you wish you had this custom hinged solution earlier like I do??
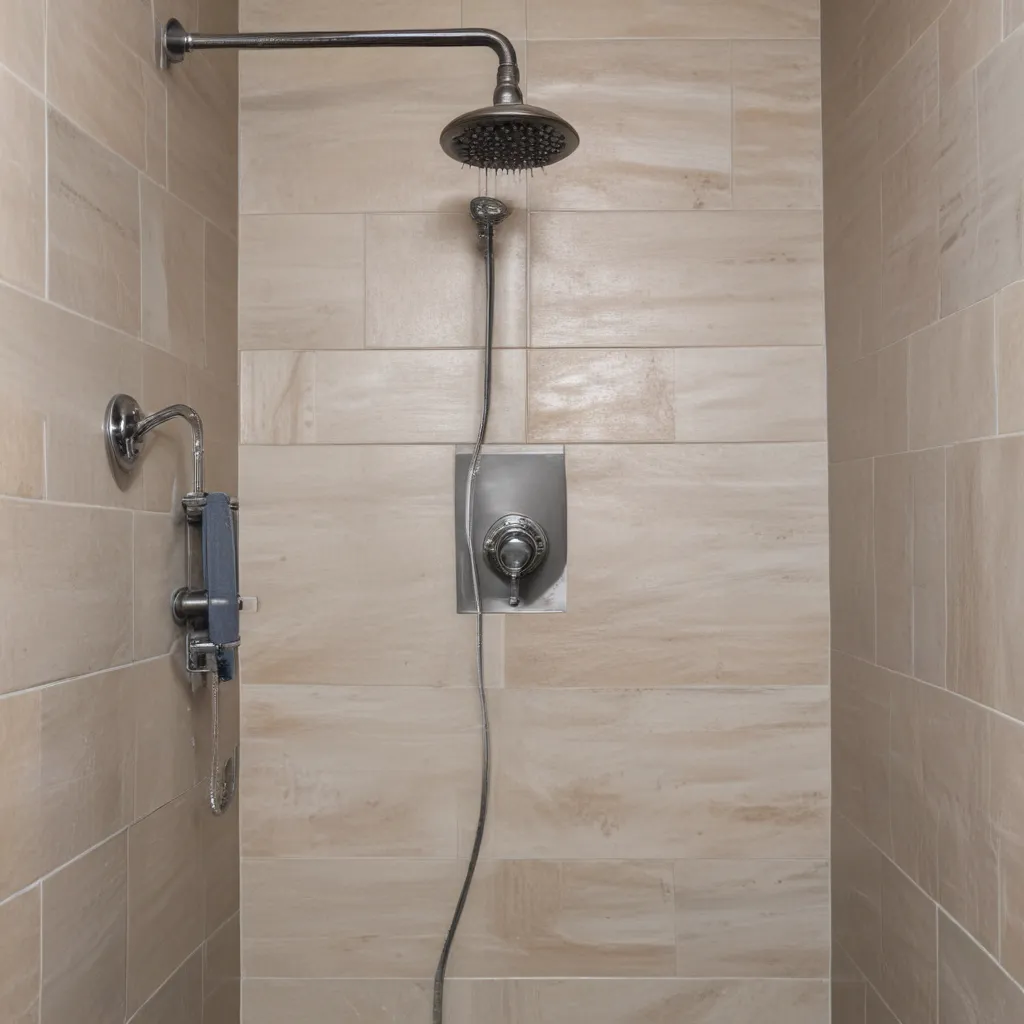
Categories
Tips

Small Bathroom Remodel Before and Afters

Small Bathroom Remodel Before and Afters

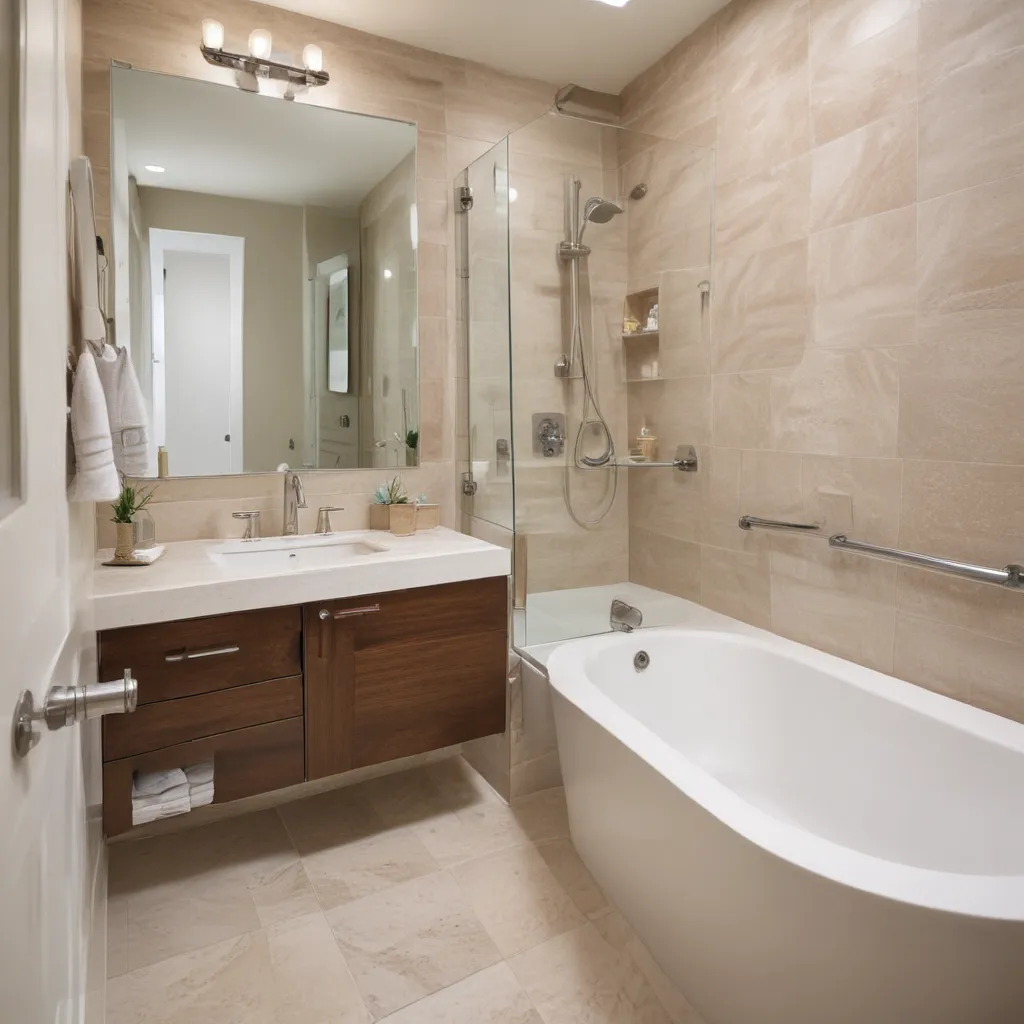
A Spa-Like Transformation: Small Bathrooms with Big Potential

When it comes to small bathrooms, the possibilities for DIY-driven transformations are truly endless. From modest makeovers to complete remodels, these “before” and “after” small bathroom projects prove that no space is too tiny to be turned into a stylish, spa-like retreat.

I’ve been following the work of some truly talented DIY-ers, and I have to say, I’m totally inspired by what they’ve been able to accomplish. These small bathroom renovations show that with a bit of creativity, some elbow grease, and a keen eye for design, even the most cramped and dated spaces can be brought into the 21st century.

From Blah to Spa: Small Bathrooms That Defy Their Size

One of the things that really strikes me about these small bathroom makeovers is how the DIY-ers were able to make the rooms feel so much larger and more open, despite the limited square footage. It’s all about utilizing every inch of space and making smart design choices.

For example, take the small bathroom transformation by Faith Towers Provencher of Design Fixation [1]. She started with a dreary blue-grey space that felt dark and closed in. But by swapping out the wall color for a bright, airy white, introducing sleek silver fixtures, and installing a marble-look tile floor, she was able to create the illusion of a much more spacious room. The new lighting fixture also helps draw the eye upward, further enhancing the sense of openness.

Over at Organized*ish, Lela Burris took an entirely different approach, going bold with black walls and geometric accents [1]. The result is a striking, high-contrast look that feels anything but cramped. And by removing the bulky storage cabinet, she was able to open up the footprint even further.

Thinking Outside the (Small) Box

What I really love about these small bathroom makeovers is the creativity the DIY-ers bring to the table. They’re not just settling for the standard big-box store vanity and builder-grade tile – they’re thinking outside the box and coming up with truly unique solutions.

Take Katja Kromann of A Home For Design, for instance [1]. Her small upstairs bathroom didn’t have any glaring issues, but it also lacked any real personality. With just a new countertop, some fresh paint, and a couple of stylish decor pieces, she was able to transform the space into something truly special.

Or consider Erin Marshall of Live Pretty On a Penny, who tackled her powder room for the “One Room Challenge” [1]. In addition to painting the vanity a gorgeous blue hue and adding vertical shiplap to the walls, she incorporated a statement-making circular mirror and textured wallpaper. Her advice – “Start small, but start” – is perfect for any DIY bathroom project.

Overcoming Challenges with Creativity

Of course, not all of these small bathroom makeovers were smooth sailing. Some of the DIY-ers had to get creative to overcome unique challenges posed by their spaces.

Chloe MacKintosh of Boxwood Avenue, for example, felt her small and dark bathroom was lacking [1]. So she decided to take matters into her own hands, literally – she ended up moving the entire bathroom, taking over part of the hallway to reposition the space in a way that flowed better with the rest of her home. Now that’s dedication!

And for Diane Henkler of In My Own Style, the issue was dealing with a dated pink wallpaper that just had to go [1]. Her solution? A bright, timeless blue that brings the space squarely into the 21st century, while still allowing her signature pops of color to shine through.

Balancing Function and Style

Of course, with small bathrooms, function has to be just as much of a priority as style. And these DIY-ers proved that you can absolutely have both.

Take Lindsey Marlor of Pillow Thought, for instance [1]. Her original first-floor bathroom was seriously lacking in both form and function. But with a complete overhaul that included new wall tile, flooring, and a total shower remodel, she was able to create a space that not only looks stunning, but also feels so much more practical and user-friendly.

Kelly Lynn of Domestic Blonde also recognized the importance of balancing the two [1]. Her small bathroom didn’t have any major issues, but she was still eager for a change. By taking a “less is more” approach, with just a fresh coat of paint and a few thoughtful decor pieces, she was able to make the space feel instantly more functional and cozy.

Turning Disasters into Dreamscapes

And then there are the DIY-ers who took on truly daunting bathroom challenges – and emerged victorious.

Jamie-Lee Burns of the blog Mademoiselle, for instance, had to bring in a contractor to deal with some serious water issues in her small bathroom [1]. But that setback actually turned into an opportunity, as it allowed her to go all-out with her makeover, installing a modern vanity, new marble floor tile, and open shelving that creates the illusion of added space.

Casey Finn of The DIY Playbook faced her own set of hurdles, including a tub that had to go [1]. But by opting for a standalone shower with floor-to-ceiling subway tiles, she was able to totally transform the look and feel of the room.

And for Sabrina Scrivo of the blog Pink Little Notebook, a tight budget didn’t stop her from creating a bathroom that looks like a million bucks [1]. Through some clever work-arounds, like using leftover paint and $6 worth of wood trim, she was able to achieve a high-end aesthetic without breaking the bank.

Lessons Learned: Designing for Small Spaces

As I’ve pored over these incredible small bathroom makeovers, a few key lessons have really stood out to me:

  1. Functional Design is Essential: When you’re working with limited square footage, every inch counts. These DIY-ers showcased genius ways to maximize storage, improve flow, and create the illusion of more space.

  2. Embrace Creative Solutions: From custom vanities to DIY door conversions, the projects highlight the power of thinking outside the box. Small bathrooms demand innovative approaches.

  3. Don’t Underestimate the Power of Details: Even the smallest design choices – a new light fixture, a bold accent tile, a stylish mirror – can have a transformative effect in a compact space.

  4. DIY Can Save You Big: Many of these bathroom makeovers cost a fraction of what a contractor-led remodel would have, thanks to the homeowners’ willingness to get their hands dirty.

  5. Inspiration is Everywhere: These “before” and “after” projects prove that small bathrooms can absolutely be showstoppers. With the right vision and a bit of determination, even the most dated, cramped spaces can become spa-like sanctuaries.

So if you’ve been feeling daunted by the prospect of tackling your own small bathroom remodel, take heart. These DIY success stories are all the proof you need that greatness can come in small packages. With a little creativity and a lot of elbow grease, your blah bathroom can become a beautiful, functional oasis. time to get started!

References

[1] Knowledge from https://www.thespruce.com/small-bathroom-makeovers-5072520
[2] Knowledge from https://www.memehill.com/bathroom-remodeling-ideas-before-and-after/
[3] Knowledge from https://www.hgtv.com/design/remodel/bathroom-remodel/before-and-after-20-incredible-small-bathroom-makeovers-pictures
[4] Knowledge from https://www.celestejacksoninteriors.com/blog/small-bathroom-remodel-ideas
[5] Knowledge from https://www.pinterest.com/pin/52776626862687662/
[6] Knowledge from https://www.addicted2decorating.com/diy-bathroom-remodel-before-after.html
[7] Knowledge from https://www.bhg.com/bathroom/remodeling/makeover/before-and-after-bathrooms/