Categories
Tips

Choosing the Perfect Bathtub

Choosing the Perfect Bathtub

Diving into the World of Bathtubs

When it comes to transforming your bathroom into a personal oasis, the bathtub takes center stage. It’s the throne where we soak away our worries, immerse ourselves in relaxation, and perhaps even sneak in a few chapters of our favorite novel. Choosing the right bathtub is no easy feat, however – with an array of styles, materials, and features to consider, the process can feel as daunting as navigating a porcelain-clad minefield.

Fear not, my porcelain-loving friends! I’m here to guide you through the tub-selecting journey, ensuring you end up with a bathtub that’s a perfect fit for your bathroom and your, ahem, posterior. So, let’s dive in and explore the wondrous world of bathtubs, shall we?

Sizing Up Your Space

Before you even begin perusing the latest tub trends, it’s crucial to take a hard look at your bathroom’s dimensions. After all, what good is a stunning freestanding tub if it’s going to leave you feeling like a sardine in a tin can? [1]

Measure, measure, measure – that should be your mantra. Get out the trusty tape measure and jot down the length, width, and height of your bathroom. Don’t forget to factor in any nooks, crannies, or architectural features that could impact tub placement. Once you have those numbers, you can start narrowing down your options.

Now, I know what you’re thinking – “But I want the biggest, most luxurious tub money can buy!” While I admire your ambition, it’s important to be realistic. Remember, your bathroom isn’t the Taj Mahal, and cramming in a massive tub may leave you feeling more claustrophobic than serene. [2]

Instead, focus on finding a tub that strikes the perfect balance between size and space. Consider opting for a compact freestanding design or a space-saving alcove tub if your bathroom is on the snug side. And for those with a more generous footprint, the world is your oversized, clawfoot-equipped oyster.

Diving into the Details

Alright, now that we’ve tackled the size conundrum, let’s dive into the nitty-gritty of tub selection. As you peruse the endless options, keep these key factors in mind:

Material Matters

From acrylic to cast iron, each bathtub material has its own unique set of pros and cons. [3] Acrylic, for instance, is lightweight and easy to install, but it may not have the same luxurious feel as a solid cast-iron tub. Porcelain-enameled steel, on the other hand, is a budget-friendly option, but it’s more prone to chipping and cracking.

My personal recommendation? If your budget and bathroom can handle the weight, go for a cast-iron tub. These bad boys are built to last, and they retain heat like a champ, ensuring your soak stays toasty from start to finish. Plus, with their vintage-inspired silhouettes, cast-iron tubs ooze old-world charm – perfect for adding a touch of elegance to your bathroom oasis.

Shapes and Styles

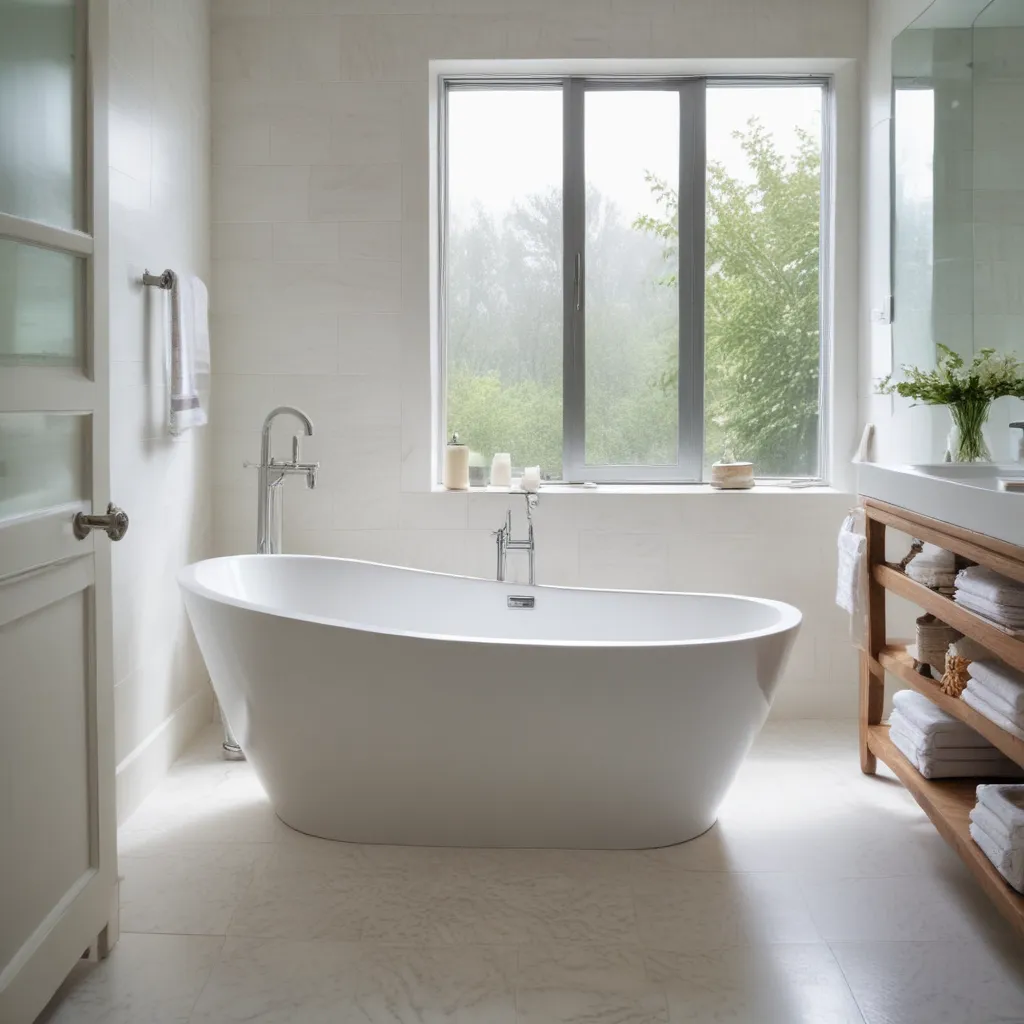
Bathtubs come in a dizzying array of shapes and styles, from the classic claw-footed beauties to the sleek, modern soaking tubs. [4] Curvaceous designs can add a lovely contrast to a boxy bathroom, while square or rectangular tubs might be better suited for larger spaces.

When it comes to finding the perfect shape, consider not just the visual impact, but also how it feels to soak in. Oval and round tubs often provide a more spacious and comfortable experience, while angular designs might be better suited for those who prefer a more upright position.

Special Features

In today’s high-tech world, bathtubs have evolved far beyond the simple porcelain vessels of yesteryear. Luxury features like whirlpool jets, built-in speakers, and even chromotherapy lighting are now available to elevate your bathing experience. [5]

Of course, these bells and whistles come with a heftier price tag, so it’s important to weigh the cost against your personal needs and preferences. If you’re a true spa-lover, splurging on a feature-packed tub might be worth it. But if you’re more of a minimalist, a classic soaking tub might be the way to go.

Navigating Installation

Once you’ve settled on the perfect tub, the next hurdle is getting it into your bathroom – and that’s where things can get tricky. Depending on the style and material you choose, the installation process can range from a straightforward drop-in to a logistical nightmare.

Freestanding tubs, for example, offer the ultimate in flexibility when it comes to placement, but they also tend to be the heaviest and most cumbersome to maneuver. [6] On the other hand, alcove or built-in tubs are generally easier to install, but they require a bit more prep work to ensure a seamless fit.

And let’s not forget about the dreaded plumbing conundrum. Depending on your bathroom’s existing layout, you may need to reroute pipes or make other adjustments to accommodate your new tub. It’s always a good idea to consult a professional before making any major plumbing changes – trust me, you don’t want to end up with a bathtub that’s surrounded by a moat of your own creation.

Budgeting for your Bathtub

Speaking of costs, let’s talk about the elephant in the room – the price tag. Bathtubs can range from a few hundred dollars for a basic plastic model to several thousand for a high-end, custom-made masterpiece. [7]

As with most home improvements, the old adage “you get what you pay for” tends to hold true when it comes to tubs. While a budget-friendly acrylic tub might get the job done, a more premium material like cast iron or copper can elevate the overall look and feel of your bathroom.

That said, it’s important to strike a balance between your aesthetic desires and your financial reality. Set a realistic budget, and then prioritize the features and materials that matter most to you. Maybe you’re willing to splurge on a luxurious freestanding tub, but you’re content with a more affordable vanity. The key is finding the sweet spot that fits both your needs and your wallet.

Putting It All Together

Phew, that was a lot of information to digest! But fear not, my fellow tub enthusiasts – I’ve got one final piece of advice to share.

When it comes to choosing the perfect bathtub, it’s all about striking the right balance between form and function. [8] Sure, you want a tub that looks absolutely stunning, but it’s equally important that it meets your practical needs and fits seamlessly into your bathroom’s overall design.

So, take a deep breath, grab a pen and paper, and start jotting down your must-haves. Do you need a tub that can accommodate your height, or are you more concerned about energy efficiency? Perhaps you’re dreaming of a luxurious, freestanding centerpiece, or maybe a space-saving alcove tub is more your style.

Whatever your priorities may be, remember to keep an open mind and be willing to compromise. With a little bit of research and a healthy dose of creativity, I have no doubt you’ll find the bathtub of your dreams – one that will transform your bathroom into the ultimate oasis of relaxation and rejuvenation.

Now, if you’ll excuse me, I think it’s time for me to run a nice, hot bath. Tub time, anyone?

References

[1] Knowledge from https://www.homesandgardens.com/bathrooms/how-to-choose-a-bathtub

[2] Knowledge from https://www.hgtv.com/design/remodel/bathroom-remodel/how-to-choose-a-bathtub

[3] Knowledge from https://www.badeloftusa.com/how-to-guides/how-to-choose-a-bathtub/

[4] Knowledge from https://www.bhg.com/bathroom/shower-bath/buying-a-tub/

[5] Knowledge from https://www.build.com/how-to-choose-a-bathtub/a36

[6] Knowledge from https://www.familyhandyman.com/list/12-things-to-consider-when-buying-a-new-bathtub/

[7] Knowledge from https://sanycces.es/en/factors-to-consider-when-choosing-the-perfect-bathtub/

[8] Knowledge from https://www.kendallrayburn.com/2016/06/choosing-the-perfect-bathroom-sink-faucet/
Categories
Tips

Common Causes of Bathroom Odors and How to Fix Them

Common Causes of Bathroom Odors and How to Fix Them

Uncovering the Stench: The Unpleasant Truth About Bathroom Odors

Ah, the bathroom – a sanctuary meant for cleanliness and relaxation. Yet, sometimes, it can become a breeding ground for something much more sinister: odors that can make even the bravest soul turn and run. But fear not, my friends! Today, I’m here to uncover the common culprits behind these unpleasant smells and provide you with tried-and-true solutions to reclaim your bathroom’s fresh, inviting atmosphere.

Mold and Mildew: The Damp Duo Wreaking Havoc

One of the most common causes of bathroom odors is the dreaded duo of mold and mildew. [1] These pesky fungi thrive in moist environments, and bathrooms – with their constant exposure to water from showers, sinks, and leaks – provide the perfect breeding ground. As they multiply, they release volatile organic compounds (VOCs) that give off a distinctly musty, unpleasant scent.

The first step in tackling this problem is to identify the source of the moisture. Look for signs of leaks, condensation, or poor ventilation that could be creating the ideal conditions for mold and mildew to flourish. Once you’ve located the problem area, it’s time to take action. Thoroughly clean the affected surfaces with a mixture of water and white vinegar, which can effectively kill off these pesky fungi. [2] Don’t forget to address the underlying issue, whether it’s repairing a leaky pipe or improving your bathroom’s ventilation system.

Clogged Drains: The Slimy Culprit Behind Foul Smells

Another common cause of bathroom odors is clogged drains. Over time, a buildup of hair, soap scum, and other debris can create a perfect environment for bacteria to thrive, leading to a foul stench. [3] The good news is that this problem is relatively easy to solve, and you don’t need to be a plumbing expert to do it.

Start by using a plunger to dislodge any visible blockages in your sink or shower drain. If that doesn’t do the trick, try pouring a baking soda and vinegar mixture down the drain, letting it fizz for a few minutes, and then following up with a generous amount of hot water. [4] This simple home remedy can often break up the gunk and clear the way for fresh-smelling drainage.

If the odor persists, it might be time to call in a professional plumber. They have the tools and expertise to thoroughly clean out your drains, ensuring that any lingering odors are eliminated for good.

Sewer Gases: The Stinky Culprit Lurking in Your Bathroom

One of the most unpleasant bathroom odors you can encounter is the unmistakable stench of sewer gases. This pungent smell can be caused by a variety of issues, from a dried-out P-trap to a blocked vent pipe. [5] And let me tell you, it’s not something you want to ignore – these gases can be highly flammable and even toxic, so it’s crucial to address the problem as soon as possible.

If you suspect sewer gases are the culprit, start by checking the water level in your toilet’s P-trap. This U-shaped pipe is designed to trap water and prevent sewer gases from seeping into your bathroom. If the water level is low, simply pour some more water down the drain to refill it. [6] You can also try pouring a baking soda and vinegar solution down the drain to help clear any blockages.

If the problem persists, it’s time to call in a professional plumber. They’ll be able to identify the root cause, whether it’s a blocked vent pipe or a larger issue with your home’s sewer system, and provide the necessary repairs to eliminate the odor for good.

Conclusion: Reclaiming Your Bathroom’s Fresh Fragrance

Bathroom odors can be a real nightmare, but with a little bit of knowledge and elbow grease, you can conquer them and reclaim the fresh, inviting atmosphere your bathroom deserves. Remember, the key is to identify the root cause of the problem, whether it’s mold and mildew, clogged drains, or sewer gases, and take the appropriate steps to address it.

So, the next time you walk into your bathroom and are greeted by an unpleasant stench, don’t panic. Instead, roll up your sleeves, grab your cleaning supplies, and get ready to transform your sanctuary back into the fresh-smelling oasis it was meant to be. Happy cleaning!

References

[1] Fallon Solutions. “Bathroom Smells: Causes and How to Get Rid of the Pong.” Fallon Solutions, 3 February 2022, https://fallonsolutions.com.au/handy-hints/bathroom-smells-causes-how-get-rid-of-pong/.

[2] Comfort People. “Why Does My Bathroom Smell Like Sewage?” Comfort People, 24 November 2022, https://comfortpeople.com/why-does-my-bathroom-smell-like-sewage/.

[3] Mr. Rooter. “6 Potential Reasons Your Bathroom Smells Like Sewer.” Mr. Rooter, 10 November 2022, https://www.mrrooter.ca/about/blog/2022/november/6-potential-reasons-your-bathroom-smells-like-se/.

[4] Hoffmann Brothers. “How to Get Rid of Sewer Smell.” Hoffmann Brothers, 2023, https://www.hoffmannbros.com/plumbing/sewers/smell-in-bathroom.

[5] Blue Bear Plumbing. “9 Reasons That Your Plumbing Smells.” Blue Bear Plumbing, 2023, https://bluebearplumbing.com/blog/9-reasons-that-your-plumbing-smells/.

[6] How Stuff Works. “How to Get Rid of Sewage Smell in Your Bathroom.” HowStuffWorks, 2023, https://home.howstuffworks.com/home-improvement/household-hints-tips/cleaning-organizing/sewage-small-in-your-bathroom.htm.

Categories
Tips

Adding Statement Tile to Your Bathroom Design

Adding Statement Tile to Your Bathroom Design

Goodbye, Boring Bathroom – Hello, Statement Tile!

Ah, the humble bathroom – often overlooked and relegated to the realm of pure functionality. But what if I told you that your bathroom could be so much more? Enter the world of statement tiles, the design elements that can transform a dull, lifeless space into a captivating oasis.

As a self-proclaimed bathroom enthusiast (yes, that’s a thing!), I’ve seen my fair share of bathroom makeovers. And let me tell you, nothing grabs my attention quite like a stunning, show-stopping tile installation. It’s the equivalent of walking into a room and being immediately struck by the most fabulous outfit – you can’t help but stare in awe and wonder, “Where did they find that?!”

Tile Trends that Wow

In the ever-evolving world of interior design, statement tiles have become the darlings of the bathroom scene. From bold geometrics to dazzling mosaics, these tiles are stealing the spotlight and commanding attention like never before.

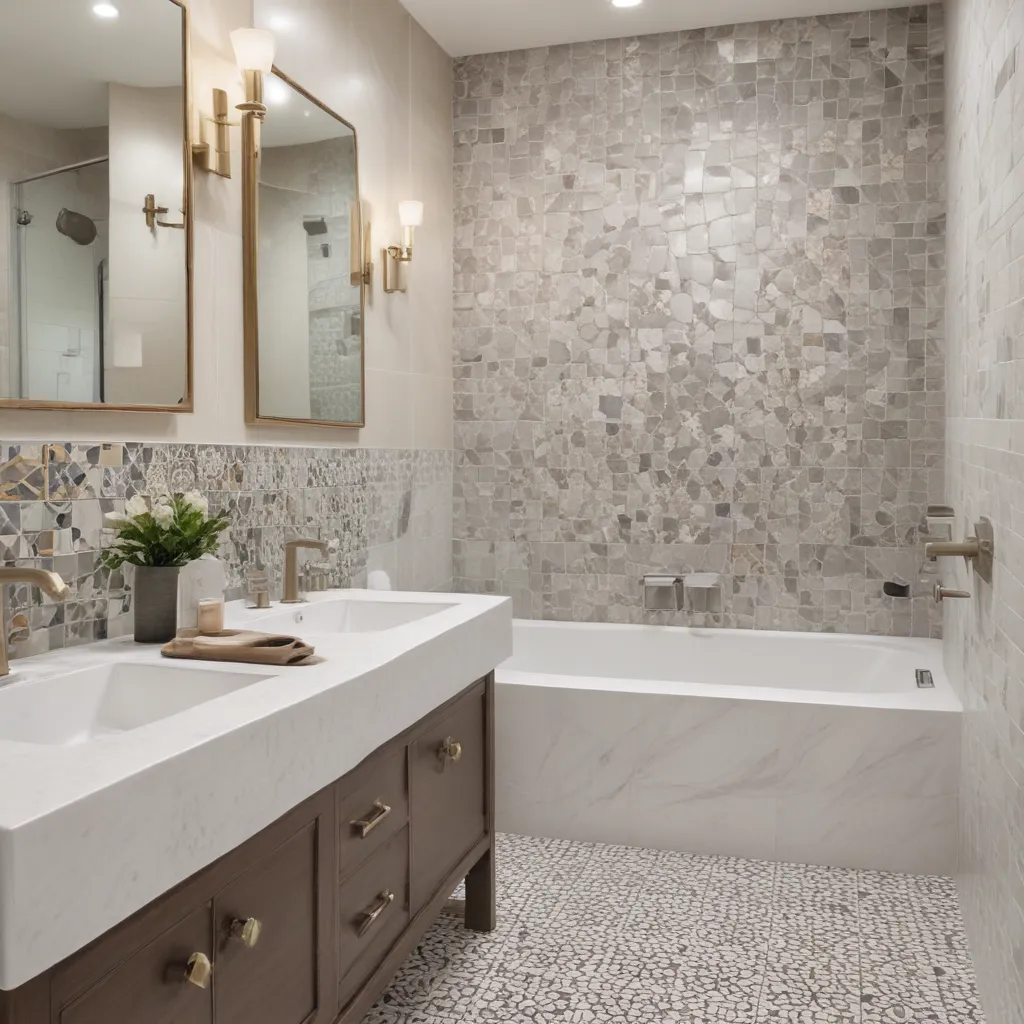
Take, for example, the surge in popularity of Moroccan-inspired patterns. These earthy, artisanal tiles inject a touch of boho-chic charm and nostalgia into any bathroom, instantly transporting you to a dreamy riad in Marrakech. Or how about the timeless allure of terrazzo tiles? With their speckled, eclectic appearance, terrazzo tiles offer a contemporary yet timeless aesthetic that seamlessly blends into both modern and traditional settings.

And let’s not forget the power of color. Gone are the days of muted, neutral palettes. Today, we’re embracing rich jewel tones like emerald green and sapphire blue, as well as playful pops of coral and pink. These vibrant hues infuse bathrooms with a sense of sophistication and personality, making them true showstoppers.

Striking the Right Balance

Now, I know what you’re thinking – “But won’t all that bold tile overwhelm the space?” It’s a valid concern, and one that requires a delicate touch. The key is to strike the perfect balance between making a statement and maintaining a cohesive, harmonious design.

One of my favorite tricks is to use statement tiles as a focal point, such as on a feature wall or in a niche. This allows the eye to be drawn to the captivating tile work, without the rest of the space feeling cluttered or overpowered. Think of it as the sartorial equivalent of pairing a statement necklace with a simple, understated outfit – the accessories take center stage, but the overall look remains elegantly balanced.

Alternatively, you can let your floor be the star of the show. Bold, patterned tiles on the bathroom floor can create the illusion of a larger space and add a touch of drama without feeling overwhelming. Just be sure to keep the walls and other surfaces relatively neutral, allowing the floor tiles to shine without competing for attention.

Personalizing Your Porcelain Paradise

The beauty of statement tiles lies in their ability to transform a space and infuse it with your unique personality. Whether you’re drawn to geometric patterns, intricate mosaics, or rich, jewel-toned hues, there’s a tile out there that’s just begging to be the centerpiece of your dream bathroom.

But don’t just take my word for it – let’s dive into some real-life examples that will have you scrambling for your tile samples.

[1] Take a look at this stunning bathroom from This is Our Bliss, where the homeowner opted for a captivating star mosaic tile on the floor. The gray and white palette creates a crisp, cool aesthetic, while the intricate pattern adds a touch of drama and personality. Imagine sinking your toes into that luxurious flooring every morning as you start your day!

[2] Or how about this bathroom from Precision Countertops, where the homeowner incorporated a bold, geometric backsplash tile? The striking pattern instantly draws the eye and sets the tone for the entire space, elevating the overall design. And the best part? These tiles are not only visually stunning but also highly durable, ensuring that your statement piece will continue to wow for years to come.

[3] And let’s not forget the power of color! 2180 Durangodesign showcases a bathroom that embraces rich, jewel-toned tiles on the walls. The deep, moody hues create a sense of luxury and sophistication, while the unique shape and pattern of the tiles add an extra layer of visual interest. It’s a testament to the transformative power of statement tiles, turning a simple bathroom into a true oasis of relaxation and self-expression.

Embrace the Unexpected

When it comes to statement tiles, the possibilities are truly endless. From the grandeur of a marble-look mosaic to the modern allure of sleek, geometric porcelain, the options are as diverse as your personal style. And the best part? You don’t have to limit yourself to the traditional spots.

Why not consider incorporating statement tiles on your bathroom vanity backsplash or even as a stunning accent wall? [4] Granite and TREND Transformations demonstrates how a vibrant, jewel-toned tile can instantly elevate a vanity, turning it into the focal point of the room. And [5] Mir Mosaic showcases the versatility of statement tiles, using them to create a captivating focal point on a fireplace surround.

The key is to let your creativity shine and embrace the unexpected. After all, your bathroom should be a reflection of your unique personality – a sanctuary where you can unwind and indulge in a little self-care. And what better way to do that than by surrounding yourself with tiles that truly make your heart sing?

Mastering the Art of Statement Tile

Of course, with great power comes great responsibility (or something like that). When it comes to statement tiles, it’s important to approach the installation with a discerning eye and a keen sense of balance. [6] As Maria Killam wisely advises, it’s crucial to have a clear vision for the entire space before diving into your tile selection.

Think of it like putting together the perfect outfit. You wouldn’t just grab a fabulous statement necklace and call it a day, would you? No, you’d carefully curate the rest of your ensemble to complement and enhance the star piece. The same principle applies to your bathroom design.

So, before you start browsing tile samples, take a step back and consider the bigger picture. What’s the overall aesthetic you’re going for? How can the statement tiles work in harmony with the other design elements in the space? By taking the time to plan ahead, you’ll ensure that your bathroom transformation is a seamless, cohesive masterpiece.

Embrace the Journey

Now, I know that the thought of selecting statement tiles can be a bit daunting. After all, these are the design elements that will set the tone for your entire bathroom. But I urge you to embrace the process and let your creativity run wild.

[7] As the experts at Atlas Tile suggest, statement tiles are the ultimate conversation starters. They have the power to transform a space, infusing it with personality and making it a true reflection of your style. So, don’t be afraid to step outside your comfort zone and experiment with bold patterns, vibrant colors, or unexpected shapes.

Remember, your bathroom is your personal oasis – a sanctuary where you can escape the stresses of the day and indulge in a little self-care. And what better way to do that than by surrounding yourself with tiles that make you smile every time you step inside?

So, my friend, are you ready to make a bold statement in your bathroom? Grab your tile samples, let your creativity soar, and get ready to create a space that will have your guests (and your Instagram followers) swooning. After all, who says bathrooms have to be boring? It’s time to break free from the norm and embrace the transformative power of statement tiles.

Categories
Tips

How to Choose Bathroom Paint Colors

How to Choose Bathroom Paint Colors

Unlock the Secrets to a Dreamy Bathroom Makeover

As an interior stylist, I’ve helped countless clients transform their bathrooms from dull and uninspiring to downright dreamy. And you know what’s the key to pulling off that major upgrade? Choosing the perfect paint color. It’s the foundation that sets the tone for the entire space.

But let me tell you, picking the right bathroom paint color is no easy feat. With so many options out there, it can feel like navigating a maze of color swatches – frustrating, to say the least. That’s why I’m here to share my insider tips and tricks to make this process a breeze. Get ready to say goodbye to the days of bathroom paint regret and hello to a space that oozes style and personality.

Understanding the Power of Light

The first step in picking the perfect bathroom paint color is understanding how light plays a crucial role. See, bathrooms are unique spaces that can be tricky when it comes to lighting. From the natural glow of a sunny window to the harsh glare of vanity bulbs, the way light interacts with your walls can make or break a color choice. [1]

Think about it – that dreamy pale blue you fell in love with at the hardware store may end up looking more like a drab gray when it’s bouncing off your bright white tiles. Yikes! That’s why it’s so important to take those paint samples home and see them in your actual bathroom setting. Bring them out in the natural light, shine some lamps on them, and get a feel for how the color will behave in your unique space.

And don’t forget to consider the undertones of your tiles, fixtures, and flooring. If you’ve got warm, earthy tones going on, you’ll want to lean towards paints with similar undertones. Otherwise, you risk that “off” feeling where everything just doesn’t seem to work together. [1]

Neutrals for the Win

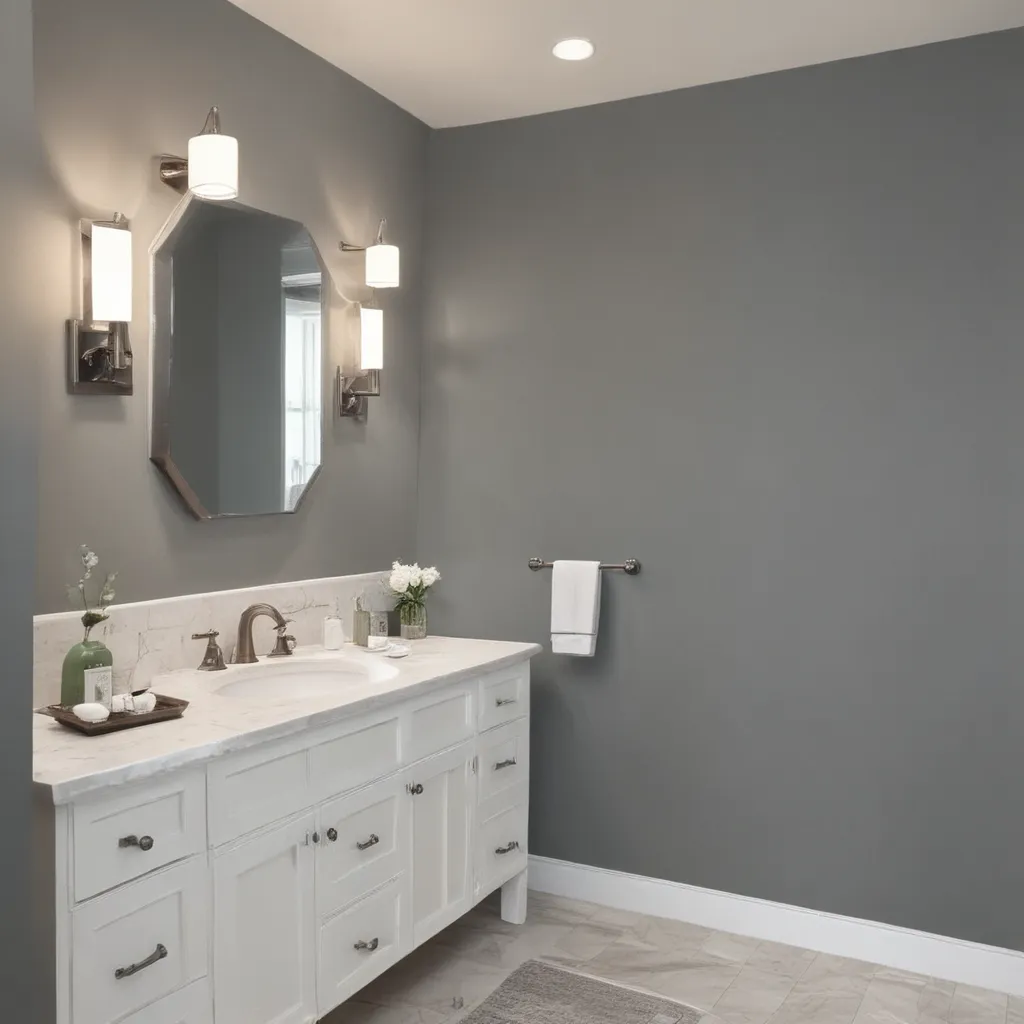
Now, when it comes to bathroom paint colors, I’m a firm believer that you can’t go wrong with neutrals. They’re the ultimate blank canvas that allows you to easily layer in pops of color and texture through your accessories and decor. Plus, they’ve got that soothing, spa-like vibe that’s perfect for creating a relaxing oasis. [2]

Some of my go-to neutral shades include Repose Gray, Agreeable Gray, and Believable Buff from Sherwin-Williams. [1] These colors have just the right amount of warmth and depth to complement a wide range of bathroom styles – from sleek and modern to cozy and traditional.

But don’t be fooled, picking the perfect neutral is no walk in the park. You still need to consider things like lighting, undertones, and how the color will play with your existing fixtures and finishes. That’s where bringing home those paint swatches and doing some comparison shopping comes in handy. [1]

Embrace the Bold

Now, if you’re feeling a little adventurous and want to step outside the neutral box, I say go for it! Bathrooms are the perfect place to experiment with bold, vibrant colors. Think deep, moody blues, rich jewel-toned greens, or even a striking black for a touch of drama. [3]

The key is to make sure the color you choose complements the overall style of your bathroom. A bright, sunny yellow might look stunning in a modern, minimalist space, but it could feel totally out of place in a cozy, traditional setting. [3]

And remember, when it comes to bold bathroom colors, a little goes a long way. You don’t want to overwhelm the space and end up with a headache-inducing vibe. Instead, consider using the color as an accent – maybe on the walls or even just the vanity. That way, you get the wow factor without sacrificing that serene, spa-like feel. [3]

Don’t Forget the Finish

Alright, now that you’ve nailed down the perfect paint color, it’s time to talk about the finish. And let me tell you, this is no small detail. The sheen of your paint can make a huge difference in the overall look and feel of your bathroom. [1]

My recommendation? Stick to an eggshell or satin finish for the walls. These provide a subtle, velvety sheen that’s easy to clean and won’t show every single water spot or fingerprint. For the trim, doors, and cabinetry, go for a satin or semi-gloss finish to really make those details pop. [1]

Whatever you do, steer clear of flat or matte paints. They may look sleek in the can, but they’re a nightmare to maintain in a high-moisture environment like a bathroom. Trust me, you’ll be scrubbing those walls for hours trying to keep them looking fresh and clean. [1]

Putting It All Together

Alright, let’s recap the key steps to choosing the perfect bathroom paint color:

  1. Understand how light and undertones affect the way a color appears in your space.
  2. Embrace neutral shades for a timeless, spa-like vibe, but don’t be afraid to experiment with bold pops of color.
  3. Pay attention to the finish, opting for eggshell or satin on the walls and satin or semi-gloss on trim and cabinetry.

By following these guidelines, you’ll be well on your way to creating a bathroom that’s not just functional, but a true oasis of style and relaxation. So, what are you waiting for? Grab those paint swatches, and let’s get to work on your dream bathroom makeover!

[1] Hampton Redesign, “How to Choose the Best Neutral Paint Colors for Bathrooms”
[2] Forbes Home, “Best Bathroom Paint Colors”
[3] Better Homes & Gardens, “Best Bathroom Colors”

Categories
Tips

Dealing with Leaks in Walk-in Showers

Dealing with Leaks in Walk-in Showers

Avoiding the Common Pitfalls

Oh, walk-in showers – the epitome of modern bathroom design. They’re sleek, spacious, and give you that luxurious hotel-esque feel right in the comfort of your own home. But as with any home improvement project, there can be some tricky pitfalls to avoid. That’s exactly what happened to my friend Lisa when she excitedly shared her plans to install a walk-in shower in her bathroom.

As soon as she told her friends, neighbors, and even a few contractors about her vision, the “Mr. and Mrs. Doubt-Fires” quickly arrived on the scene, raining all over her parade. “It’ll never work in your small bathroom!” they cried. “You’ll end up with water all over the floor!” they warned. Lisa was starting to get discouraged, and she turned to me for guidance.

Well, I’m here to tell you that those Doubt-Fires don’t know what they’re talking about! With the right design and execution, you can absolutely have a stunning, functional walk-in shower, even in a modestly-sized bathroom. You just need to be aware of the common mistakes and how to steer clear of them. So, let’s dive in, shall we?

Size Doesn’t Matter (That Much)

First up, the notion that you need a huge bathroom to make a walk-in shower work is simply not true. [1] Sure, if you’ve got ample square footage to play with, that’s great. But even in a more cozy space, you can still create an amazing walk-in experience. The key is being smart about the layout and using creative design elements.

For example, you can ditch the traditional tub and convert that space into a compact walk-in. With a curved glass block wall or a slim shower screen, you can maintain the open, airy feel without sacrificing precious floor space. [1] And let me tell you, those little design details can make all the difference. It’s all about maximizing the available area and creating the illusion of grandeur, even in a smaller footprint.

Shower Head Placement is Crucial

Now, let’s talk about one of the biggest culprits when it comes to walk-in shower leaks: the shower head placement. [1] It doesn’t take a rocket scientist to figure out that if you’ve got a stationary shower head blasting water directly at the opening, you’re just asking for trouble. That water is going to go rogue, making a splash all over your bathroom floor.

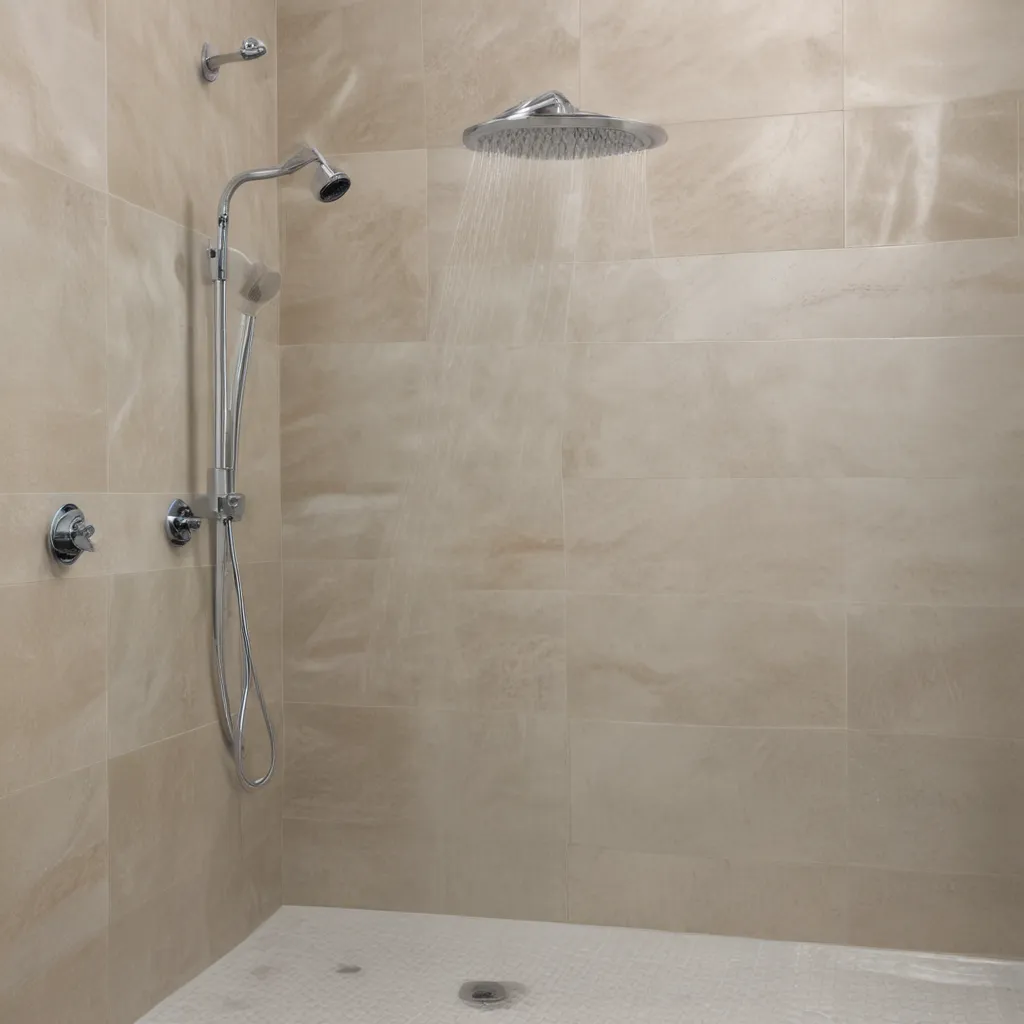
The solution? Ditch the standard shower head and opt for a rain-style head instead. [1] These are designed to direct the water straight down, minimizing the chances of it escaping the shower enclosure. It’s a simple swap that can make a world of difference in keeping your floors dry and your bathroom tidy.

Maintaining Privacy

Ah, the age-old dilemma – how do you create an open, spa-like feel in your walk-in shower while still preserving a sense of privacy? [1] After all, no one wants to feel like they’re showering in front of a live studio audience.

The key is finding the right balance between openness and seclusion. One clever trick is to incorporate an obscure glass block wall or a patterned glass partition. [1] This gives you that luxurious, see-through aesthetic, but with a touch of privacy that keeps prying eyes at bay. It’s the best of both worlds, really.

Level the Playing Field

Nothing ruins the serene vibe of a walk-in shower quite like a floor full of puddles. [1] It’s not just unsightly – it can also lead to some serious water damage if left unchecked. To avoid this nightmare scenario, you need to make sure your shower base and bathroom floor are properly sloped and waterproofed.

The solution? Invest in a pre-sloped and waterproofed shower base. [1] These are designed to channel the water directly into the drain, rather than letting it pool and seep out. It’s a simple fix that can save you from a whole lot of headaches (and expensive repairs) down the line.

Bid Farewell to Tile Woes

Let’s be real – tile showers can be a real pain in the you-know-what to maintain. [1] All those tiny grout lines become a breeding ground for dirt, mold, and grime, and cleaning them is enough to make even the most dedicated neat freak throw in the towel.

But don’t worry, there’s a solution that can give you the luxurious look of tile without the hassle. Enter: laminated shower wall panels. [1] These babies click and lock together, creating a seamless, low-maintenance surface that’s a cinch to keep clean. Bye-bye, scrub brush of doom!

Staying Toasty Warm

One of the downsides of an open walk-in shower design is that it can let all that precious heat and steam escape, leaving you shivering instead of feeling cozy and relaxed. [1] But fear not, there are ways to combat this issue and keep your shower as warm and inviting as a steamy sauna.

First, consider adding a heated floor to your bathroom. [1] This will help maintain a comfortable temperature, even with the open layout. And if you don’t want to go full open-concept, you can always compromise with a pivoting shower screen that gives you the best of both worlds – an open feel with more heat retention.

Putting it All Together

So, there you have it – the seven biggest blunders to avoid when it comes to walk-in showers, and the clever solutions to keep your dream bathroom project on track. [1-8] By tackling these common pitfalls head-on, you can create a stunning, functional walk-in shower that will be the envy of all your friends (sorry, Mr. and Mrs. Doubt-Fire!).

Remember, the key is to think outside the box, get creative with your design, and never let the naysayers rain on your parade. With the right approach, your walk-in shower can be the crowning jewel of your bathroom renovation, a true oasis of relaxation and style. So, what are you waiting for? Let’s get planning!

References

[1] Knowledge from https://blog.innovatebuildingsolutions.com/2019/03/29/walk-in-shower-problems-designs/
[2] Knowledge from https://www.reddit.com/r/Plumbing/comments/pj4tmb/walk_in_shower_leaking_how_can_i_stop_the_water/
[3] Knowledge from https://forum.nachi.org/t/shower-leaking-in-garage/83958
[4] Knowledge from https://www.mybuilder.com/questions/v/56150/walk-in-shower-cubicle-leaking-can-this-be-fixed-by-resealing
[5] Knowledge from https://www.quora.com/If-you-own-a-walk-in-tub-shower-combo-with-door-what-problems-have-you-experienced-over-time-Did-it-leak-around-the-hinged-door
[6] Knowledge from https://blog.innovatebuildingsolutions.com/2019/03/29/walk-in-shower-problems-designs/
[7] Knowledge from https://www.seshomeservices.co.uk/blog/why-is-my-shower-leaking
[8] Knowledge from https://www.megasealed.com.au/how-to-fix-a-leaking-shower-base/

Categories
Tips

Update Your Bathroom with New Fixtures

Update Your Bathroom with New Fixtures

Breathe New Life into Your Bathroom on a Budget

As a self-proclaimed bathroom enthusiast, I can attest that there’s nothing quite like a fresh, stylish bathroom to start your day off right. But let’s be real – who has tens of thousands of dollars lying around to completely overhaul their bathroom? Not this gal, that’s for sure.

Luckily, you don’t need to break the bank to give your bathroom a facelift. With a little creativity and elbow grease, you can transform your tired, outdated space into a relaxing oasis without going over budget. In this article, I’ll share my top tips and tricks for updating your bathroom with new fixtures – no contractor required!

Say Goodbye to Drab and Hello to Fab

When it comes to bathroom updates, one of the easiest and most impactful changes you can make is swapping out old fixtures. Think about it – your sink faucet, shower head, and even your light fixtures are like the jewelry of your bathroom. They have the power to completely elevate (or drastically downgrade) the look and feel of the space.

If your current fixtures are looking a little worse for wear, consider giving them a fresh new look. A simple coat of spray paint can instantly modernize brass or outdated chrome fixtures [5]. Or, for a real wow factor, replace them entirely with sleek, on-trend options.

Just take a look at this before and after from one of my clients [6]. They ditched their almond-colored vanity and dated brass fixtures in favor of a crisp white vanity and shiny new chrome faucets and shower head. The difference is like night and day! And the best part? The whole project cost them less than $500.

Make the Most of Your Vanity

Speaking of vanities, that’s another area where you can really make a big impact without spending a ton. If your existing vanity is in good shape structurally, consider giving it a facelift with a fresh coat of paint or stain. [2] This is an easy and budget-friendly way to transform the look of your bathroom.

Or, if you’re feeling extra crafty, you can even repurpose a vintage piece of furniture into a one-of-a-kind vanity. [2] I once helped a client turn an old dresser into the most charming vanity, complete with a vessel sink and rustic hardware. It was the perfect blend of modern and farmhouse style, and it cost a fraction of what a brand new vanity would have set them back.

And don’t forget about the countertop! Swapping out an old, worn surface for a sleek new one can make a world of difference. Laminate and granite remnants are surprisingly affordable options that can give your vanity an upscale look without the high-end price tag. [2]

Refresh with Textiles and Accessories

Once you’ve tackled the big-ticket items like fixtures and vanities, don’t forget about the little things that can make a big impact. Soft surfaces like towels, rugs, and shower curtains are an easy and affordable way to breathe new life into your bathroom. [2]

Try layering different textures and patterns for a dynamic, designer-worthy look. For example, pair plush Turkish towels with a bold, graphic shower curtain and a cozy shag rug. Or, for a more minimalist vibe, stick to a crisp white and gray color palette with simple, clean-lined accents.

And don’t be afraid to get creative with your storage and organization solutions. Woven baskets, floating shelves, and vintage-inspired canisters can add both style and function to your bathroom. [2] It’s all about finding pieces that not only look great, but also help keep your space tidy and clutter-free.

The Devil’s in the Details

When it comes to bathroom updates, it’s often the little things that make the biggest difference. Take a close look at the details – things like your light fixtures, hardware, and even your toilet paper holder. [2] These seemingly small elements can really pull the whole room together (or make it feel dated and uninspired).

For a quick and easy update, consider swapping out those old, builder-grade light fixtures for something with a bit more personality. [2] A statement-making pendant or sconce can instantly elevate the look and feel of your bathroom. And the best part? You can find affordable, on-trend options at places like IKEA or even your local thrift store.

Don’t forget about the hardware, either. Upgrading things like your faucet, towel bars, and even your toilet paper holder can make a surprisingly big impact. [2] Look for finishes that complement your new fixtures, like brushed gold or matte black, for a cohesive and polished look.

The Bottom Line

At the end of the day, updating your bathroom with new fixtures doesn’t have to be a daunting or expensive undertaking. With a little creativity and a keen eye for detail, you can transform your tired, outdated space into a relaxing oasis that you’ll actually look forward to spending time in.

So what are you waiting for? Grab your toolbox and get to work – your dream bathroom is just a few easy updates away!

[1] https://www.youtube.com/watch?v=IIPcld-aCAk
[2] https://www.bhg.com/bathroom/remodeling/projects/quick-bathroom-updates/
[3] https://www.youtube.com/watch?v=k5r2CjXKoqE
[4] https://www.forbes.com/home-improvement/bathroom/easy-quick-bathroom-updates/
[5] https://www.blesserhouse.com/how-to-spray-paint-shower-fixtures/
[6] https://www.kylieminteriors.ca/ideas-to-update-your-almond-bathroom-toilets-tubs-sinks-and-surrounds/
[7] https://terrylove.com/forums/index.php?threads/advice-needed-on-updating-tub-shower-fixtures.26755/
[8] https://www.allisajacobs.com/modern-bathroom-vanity-lights/

Categories
Tips

How to Layout Your Dream Bathroom

How to Layout Your Dream Bathroom

The Bathroom of My Dreams

I never thought I’d be the type of person to have a “dream bathroom.” You know, the kind you see on Pinterest that you can’t help but re-pin and send to all your friends? Why do we so often lack confidence in ourselves and our abilities? [1] I know I certainly did when it came to tackling this project. But let me tell you, if I can do it – with zero tiling skills to my name – then so can you.

Now, I have to give a quick disclaimer here – my father-in-law John was there to guide me through the early stages. He helped me set that first row of tiles, showed me how to use a level, and then sent me on my way for the next 18 hours. Okay, there were a few more things in between, but John’s the kind of guy who prefers the “tough love” approach. Minimal instructions and a reassuring “you’ve got this” grin, then he’s off, leaving you to your own devices.

But you know what? That laissez-faire attitude of his is precisely what helped me the most. It knocked out my self-doubt and gave me the permission I needed to just dive in and get started. Having that confidence from John in my abilities was a game-changer. [1] Here’s a photo of him checking my work mid-project – a testament to how he pushed me to believe in myself.

Five Steps to Design Your Dream Bathroom

Okay, let’s get back to the nitty-gritty of the design process. Like I said, it was all about baby steps for me. But here are the five key steps that helped me create my dream bathroom:

1. Choosing a Color Palette

For some people, choosing a color scheme can be the most daunting part. We often operate from a place of fear – “What if I hate it?” “What if I get tired of it quickly?” [1] But can I let you in on a little secret? Those questions are totally normal. We all have them! The key is to answer them out loud, acknowledge them, and then move forward anyway.

I started by scouring endless bathroom inspiration on Pinterest, and quickly realized that the all-too-common white, gray, and black palettes were the exact opposite of what I wanted. BORING. Sometimes the best strategy is to rule out the things you don’t like first. [1] Now, I’m a girl who loves color, so I knew I wanted something vibrant and bold. After much deliberation (and some input from my husband Chad), we landed on emerald green. It’s a rich, timeless hue that evokes images of lush, exotic locales – exactly the vibe I was going for.

2. Choosing Tile Size and Style

Since our bathroom is quite small, we decided a smaller-scale tile would work best. In the kitchen, we’d opted for large hexagon cement tiles, but that just wouldn’t have the same impact in the more intimate bathroom space. [3] The folks at our local tile shop, Buena Tile, were incredibly helpful throughout the process. I spent hours in there, asking questions, sharing photos, and refining my vision. They even helped me select the perfect grout color and mortar mix. Needless to say, we became fast friends!

3. Embracing the Mess

I’ll admit, I’m not the biggest fan of mess and chaos. But you know what? When it came to this bathroom renovation, I had to just embrace it. I was caked in dried mortar the entire time, and my normally tidy workspace was a disaster zone. [1] But you know what they say – nothing worth having comes easy. And the same philosophy applies to writing this article. It’s been a bit of a messy process, with headers floating around and photos all over the place. But you know what? It’s getting done, and that’s what matters.

4. Avoiding Paralysis by Analysis

Look, I get it – we all have this tendency to overthink things, to worry about what future buyers might think. “We can’t choose that tile because no one will ever buy the house with it!” [1] But can I be real with you for a second? Unless you’re literally flipping the house, who cares what some hypothetical future buyer might think? This is your space, your sanctuary. Choose the tile you love, the colors that make you happy, and don’t look back.

This mindset, combined with Chad’s laid-back “if we hate it, we’ll change it” attitude, was a total game-changer for us. [1] It allowed us to move forward, avoid getting stuck in analysis paralysis, and just do. And you know what? We ended up loving 97% of our choices. There are a few things we’d do differently, but we can always go back and change that 3% later.

5. Trusting the Process

At the end of the day, this whole bathroom renovation was a journey of trust and self-belief. [1] I had to trust that even though I didn’t have the skills, I could figure it out. I had to trust that the tile would turn out beautifully, even when I was drowning in mortar. And most importantly, I had to trust that the end result would be worth it – my very own dream bathroom.

And you know what? It was. Every time I sink into that claw-foot tub, surrounded by the rich emerald tiles, a glass of wine in hand and a good book nearby, I can’t help but feel a swell of pride. I did this. And so can you.

Your Turn to Create Your Dream Bathroom

If you’re looking for a feminine design and labor perspective, I’m available for consultations. I actually loved the tiling process so much that I even considered starting my own tiling company! (Though the back pain eventually put that dream on hold, and I stuck to the consulting side of things instead.)

So if you’re ready to bring your dream bathroom to life, email me at [email protected] with the subject line “DREAM BATHROOM,” and let’s get started! [1] And if you’re more of a visual learner, be sure to check out the quick video on the process – it really helps to see it in action. [1]

The truth is, we all have the potential to create the bathroom of our dreams. It just takes a little bit of confidence, a whole lot of trust in the process, and the willingness to embrace the mess. So what are you waiting for? Let’s get tiling!

References

[1] Teaquila Farm. “Featured Itinerary: 48 Hours of Romance in Sedona.” Teaquila Farm, 2023, https://www.teaquilafarm.com/post/featured-itinerary-48-hours-of-romance-in-sedona.

[2] Quora. “What would your dream bathroom look like?” Quora, 2023, https://www.quora.com/What-would-your-dream-bathroom-look-like.

[3] Town & Country Living. “Could This Be Your Dream Bathroom?” Town & Country Living, 2023, https://town-n-country-living.com/could-this-be-your-dream-bathroom.html.

[4] Better Homes & Gardens. “Bathroom Layout Guidelines and Requirements.” Better Homes & Gardens, 2023, https://www.bhg.com/bathroom/remodeling/planning/bathroom-layout-guidelines-and-requirements/.

[5] RoomSketcher. “Bathroom Layout: 7 Tips for a Functional Bathroom Design.” RoomSketcher, 2023, https://www.roomsketcher.com/blog/bathroom-layout/.

[6] Planner5D. “Bathroom Planner Tool.” Planner5D, 2023, https://planner5d.com/use/bathroom-planner-tool.

[7] HGTV. “11 Steps to a Dream Bathroom.” HGTV, 2023, https://www.hgtv.com/design/rooms/bathrooms/11-steps-to-a-dream-bathroom-pictures.

[8] The Bird’s Papaya. “The Dream Bathroom Reveal.” The Bird’s Papaya, 2023, https://thebirdspapaya.com/home/the-dream-bathroom-reveal/.

Categories
Tips

How to Refresh Your Bathroom Without Remodeling

How to Refresh Your Bathroom Without Remodeling

How to Refresh Your Bathroom Without Remodeling

Have you ever had one of those home projects that was really nagging at you to get done, but you were having trouble justifying the cost? Such was the case with one of our guest baths, an en suite bath to a room we call my daughter’s bedroom, but one that hardly gets any use as she hasn’t lived here for years. It was a builder grade bathroom, barely 10 years old, with absolutely no charm or character, but nothing terribly offensive either. It’s not like it had pink tile from another century, but truth be told, I hated it nonetheless. Still, the fact that it was both functional and neutral made me put off a renovation for quite some time.

In fact, I’d taken on the project a few years ago of trying to upgrade the look until I was ready for a remodel. But that was always meant to be just a bandaid solution. With most of our big projects out of the way, I recently started to look at the space again and felt it was time to finally tackle the update. However, convincing my husband was another matter. “Why would we spend the money on a room that no one ever sees?” he’d ask. I did my best to explain that the whole point of having guest rooms was to welcome visitors into an inviting space. Then I underscored the resale value aspect. But ultimately, the argument that worked was the one that promised to keep costs low by limiting the big changes.

In this case, that meant working with the existing vanity and keeping the very bland and commonplace shower/tub combo. I’m a homeowner, so I’m used to making compromises. I could live with that. Once I knew we’d be keeping the vanity and the tub footprint in place, I decided to start slow and get some of the less expensive items out of the way first. I did a design board to work out where we were headed, and used that as my roadmap. The tile would be the biggest and most costly change, so I’d save that for later. With the design style defined, I turned my attention to the mirrors and sconces.

Mirrors and Sconces

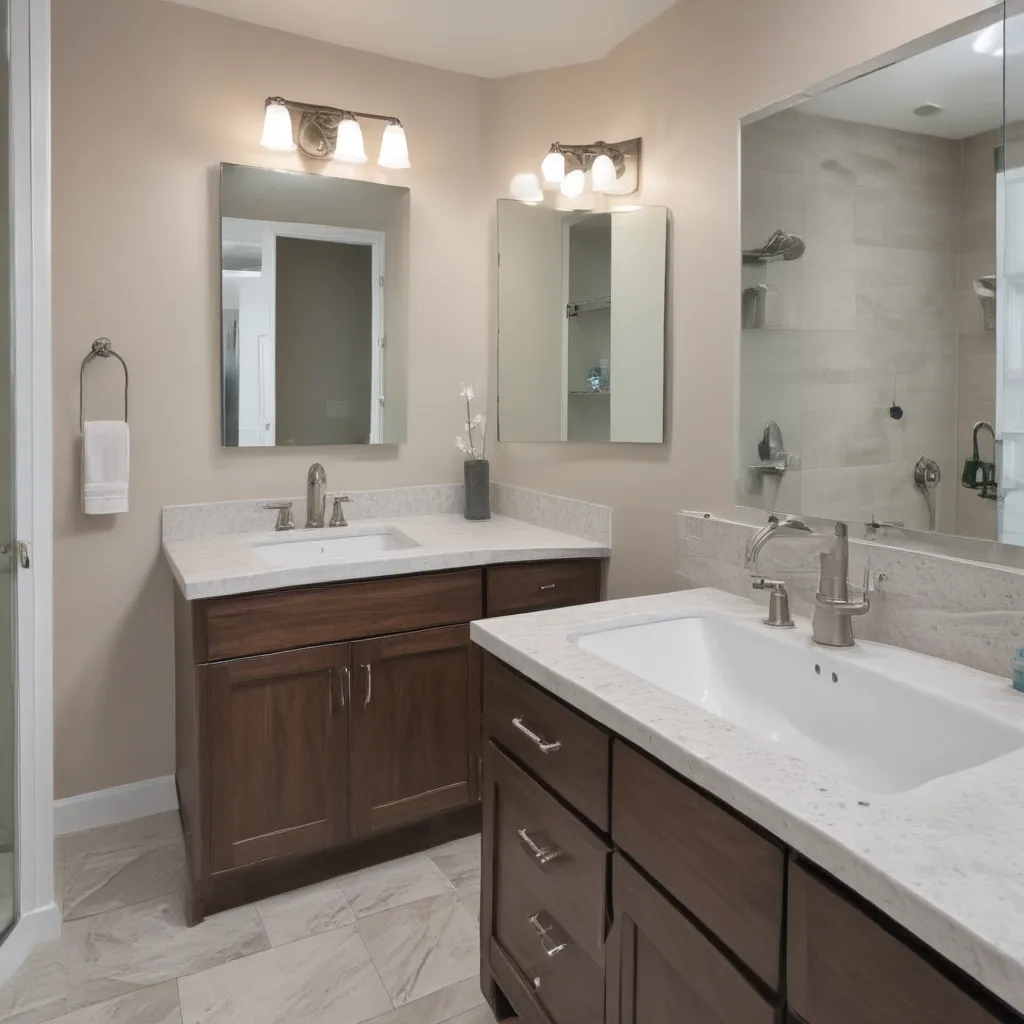
I wanted this room to be a bit more modern than our master bath, a space I’m already wanting to update some details. This new bath would be whites and neutrals, like most of our home, with brass accents for a touch of warmth. I selected a 3-light brass sconce with long industrial bulbs and a simple sleek mirror with very clean lines. Next it was time to look at the vanity countertop.

Vanity Countertop

While I agreed to keep the vanity in place, I was less sanguine about the existing granite counter, a speckled mess that veered a bit pink. Replacing that counter was among my 3 most important objectives (along with floor and shower tile). I opted for a white quartz counter with a marble feel and the simplest of white sinks. I had to reconcile the fact that I’d be keeping the off-white tub and commode, but figured with multiple shades of white I could get away with the white sinks. I also reasoned that the warmth of the new brass faucets I had also selected would soften the gap between the varying whites. This worked successfully in our master bath, so I went for it in here as well. I picked a lower silhouette gooseneck for the faucet shape with very modern lines.

Wall Color and Crown Molding

Things were starting to come together at this point. We added crown molding and changed the wall color to Benjamin Moore Soft Chamois, again selected for its ability to bridge the various whites in the room. This was not the first time I’d updated the vanity, but it was nevertheless time to do it again. I’d known all along this would be part of the project, but I waited until I fleshed out all the other components (especially the tile) before choosing a color.

Vanity Update

To my surprise, I decided to go a bit darker, rarely the option I go for, but one which felt absolutely right and pulled the entire project together. I used Pure & Original Classico chalk paint in Soft Taupe, then replaced the knobs with an understated modern brass one. As always, after 2 coats of paint I added a clear wax top coat for durability.

Tile Selection

Despite the fact that the tile was one of the last things to be completed (although it was installed before I painted the vanity), I had decided on my direction early in the project. The one change I made from the original plan was to pick wood-look porcelain tile for the floors instead of the anticipated white mosaic marble that I’ve put in our other baths. This was a bit of a pivot that helped define the character of the room and the one key thing I changed from the design board on a whim while standing in the tile store. I hesitate to show this side of the bathroom, as it’s the only part that’s unfinished, but I will certainly come back and update the photo once it’s done. This gives you a good view of the mix of white marble with off-white porcelain and illuminates why it was so hard to find a paint color that blended the two. I never expected the tones to match, but was adamant that they didn’t clash. There needed to be the right balance of grey to yellow undertones and I think we got there. (Hard to tell with all the shadows, so take my word, in person, it’s okay.) What we’ll be adding is a sleek glass shower door with a brass handle, which will finish off the space.

Accessories and Decor

As you can see, I limited the expense to tile and countertop. All the rest was done with paint and decor accents, which is always the fun part. For bath accessories, I opted for brass again, in a favorite style I’ve used in our other baths, including towel bar, toilet paper holder and robe hook. I had intended to get the matching shelf for some toiletries, but it was out of stock when I placed my order, so instead I kept the existing pewter shelf and towel bar, but painted the metal gold to work with the rest of the space. I wrestled with this one for a while, but it looked SO much better after painting (even though it was too complicated to take it down and so I painted it on the wall!) I enjoyed using natural, organic decor accents to decorate the space, including found wood bowls, a stone mortar, cement vase and the like, to give the space personality. We rehung the gallery wall that was previously in the room as I still love it, and I’m thrilled with the outcome.

I finally have a space that honors my taste, works with the adjoining bedroom, as well as the home it sits within. I had to make some compromises to achieve my goal yet keep the budget low, and most importantly, I’m now thrilled to welcome guests to enjoy this space!

To get the look, check out the products below:

[Product list with links]

I hope this bathroom refresh without remodeling has inspired you to tackle your own outdated bathroom! Remember, you don’t have to gut the entire space to give it a whole new look. With a little creativity and a thoughtful approach, you can transform your bathroom on a budget.

Categories
Tips

Cleaning and Maintaining Bathroom Caulk

Cleaning and Maintaining Bathroom Caulk

The Caulk Conundrum

Ah, the joys of bathroom maintenance – scrubbing the tile, unclogging the drain, and wrestling with that pesky bathroom caulk. It’s the bane of every homeowner’s existence, isn’t it? You look at that once pristine bead of sealant, only to find it yellowed, cracked, and harboring a nasty colony of mold. Just when you think you’ve got your bathroom all spic and span, Mother Nature comes along and reminds you who’s really in charge.

But fret not, my friends! I’m here to let you in on the secret to keeping your bathroom caulk looking fresh and new, year after year. It’s all about understanding the proper care and feeding of this unsung bathroom hero. So grab your bleach and baking soda, and let’s dive in.

Caulk 101: The Basics

Let’s start with the basics. Silicone caulk is the MVP when it comes to sealing up those troublesome gaps and crevices in your bathroom. [1] It’s designed to last a decade or more, withstanding the constant moisture and temperature fluctuations that come with daily use. But like any diligent employee, it requires regular maintenance to stay in tip-top shape.

You see, bathroom caulk is essentially the first line of defense against water intrusion. It seals up the spaces between your tiles, tub, and fixtures, preventing that pesky H2O from seeping in and wreaking havoc. But over time, that caulk can start to deteriorate – cracking, peeling, and creating the perfect environment for mold and mildew to take hold.

The Mold Menace

Ah, the dreaded mold and mildew. It’s the bane of every bathroom-dweller’s existence. [2] That pinkish, orangish, or yellowish tint you see creeping along the caulk? That’s the telltale sign of bacteria and fungus moving in and making themselves at home. And let me tell you, they’re not the most considerate houseguests.

But fear not, we’ve got a plan of attack. Regular cleaning and maintenance is the key to keeping those microbial troublemakers at bay. [3] A simple mixture of water, hydrogen peroxide, and a bit of elbow grease can work wonders. The peroxide acts as a natural disinfectant, killing off any mold or mildew in its tracks.

And don’t forget about good old bleach – it’s a surefire way to nuke those pesky spores. Just be sure to douse the affected area, let it sit for a bit, and then give it a good scrubbing. [4] The key is to get in there and really give it a thorough cleaning, leaving no crevice untouched.

Maintenance Made Easy

Now, I know what you’re thinking – “But Reuben, ain’t nobody got time for that!” I hear you, my friends. Bathroom maintenance can feel like a never-ending battle. But trust me, a little bit of regular TLC can go a long way.

[5] Make it a habit to clean your caulk as often as you clean the rest of your bathroom. A quick wipe-down with a bleach or peroxide solution every few weeks can work wonders. And don’t be afraid to get in there with a good old-fashioned toothbrush – it’s the perfect tool for getting into those nooks and crannies.

But the real secret? Finding the right caulk for the job. [6] Look for products that are specifically designed to resist mold and mildew growth, with active ingredients that actively discourage those pesky spores from taking up residence. Trust me, it’s a game-changer.

The Caulk Connoisseur’s Toolkit

Of course, prevention is always better than cure. And when it comes to bathroom caulk, that means being proactive from the very beginning. [7] When it’s time to re-caulk your tub or shower, invest in a high-quality sealant that’s built to last.

Look for caulks that are formulated to withstand the constant moisture and temperature changes in your bathroom. Silicone-based products are a great choice, as they maintain their flexibility and adhesion even in the face of expansions and contractions. And don’t be afraid to splurge a bit – the extra cost is worth it when you consider the headache it’ll save you down the line.

Of course, proper installation is key. Make sure to thoroughly clean and prepare the surface before applying the new caulk, and follow the manufacturer’s instructions to the letter. [8] And when it comes time to re-caulk, don’t be afraid to pull out the big guns – a utility knife and some elbow grease can work wonders in removing that old, cracked sealant.

The Caulk Connoisseur’s Toolkit

So there you have it, my friends – the secret to keeping your bathroom caulk looking its best, year after year. It’s all about regular maintenance, the right products, and a little bit of good old-fashioned elbow grease.

But don’t take my word for it. Go forth, embrace your inner caulk connoisseur, and see the transformation for yourself. Your bathroom will thank you – and so will your wallet, when you’re not constantly having to re-caulk and repair those pesky leaks and water damage.

Happy caulking!

References

[1] Grout-experts.com. (2019). Caulk 101: Caulk Cleaning and Maintenance. [online] Available at: https://grout-experts.com/2019/07/caulk-101-caulk-cleaning-and-maintenance/ [Accessed 10 May 2023].

[2] DIY.stackexchange.com. (2020). How to keep shower caulk clean. [online] Available at: https://diy.stackexchange.com/questions/208777/how-to-keep-shower-caulk-clean [Accessed 10 May 2023].

[3] Reddit. (2022). Mold on shower caulk keeps coming back. What do I do? [online] Available at: https://www.reddit.com/r/HomeImprovement/comments/y3sr4u/mold_on_shower_caulk_keeps_coming_back_what_do_i/ [Accessed 10 May 2023].

[4] Structuretech.com. (2020). Mold on Shower Caulk? Here’s How to Get Rid of It. [online] Available at: https://structuretech.com/mold-shower-caulk-2/ [Accessed 10 May 2023].

[5] Sashco.com. (2020). How to Maintain Your Bathroom Sealant. [online] Available at: https://www.sashco.com/how-to-maintain-your-bathroom-sealant/ [Accessed 10 May 2023].

[6] Bathfitter.com. (2023). Bathroom Caulk Maintenance. [online] Available at: https://www.bathfitter.com/us-en/maintenance/ [Accessed 10 May 2023].

[7] Certifiedcleancare.com. (2023). Removing the Caulk From Your Shower: The Need to Know. [online] Available at: https://www.certifiedcleancare.com/diy/removing-the-caulk-from-your-shower-the-need-to-know/ [Accessed 10 May 2023].

[8] Quora.com. (2022). How do people keep shower caulk clean? [online] Available at: https://www.quora.com/How-do-people-keep-shower-caulk-clean [Accessed 10 May 2023].

Categories
Tips

How to Make a Half Bath Look Stylish

How to Make a Half Bath Look Stylish

Transforming a Tiny Space with Style

As someone who has a slight (okay, major) obsession with home decor, I’ve always loved the challenge of making the most of small spaces. And when it comes to half baths, or powder rooms as they’re often called, the design possibilities are endless! These petite little sanctuaries may be short on square footage, but they’re the perfect canvas to unleash your creative flair and inject some serious style.

Embracing the Limitations

Let’s be real, working with a half bath means dealing with some unique limitations. The lack of space can feel constraining, but I like to think of it as an opportunity to get inventive. Instead of seeing it as a burden, I approach it as a fun design puzzle to solve. How can I maximize every precious inch and turn this tiny room into a showstopper?

One of the first things I learned is that going bold is key. In a half bath, you can be a lot more daring with your choices because it’s a contained space. I’ve seen powder rooms rocking jaw-dropping wallpaper, dramatic lighting, and even quirky vintage finds that would be too much in a larger bathroom. But in these diminutive spaces, those bold elements truly shine.

Sourcing Inspiration

When I first started planning the half bath renovation in our new fixer-upper, I knew I wanted to create a space that was equal parts stylish and functional. I scoured the internet for inspiration, and let me tell you, I found a treasure trove of ideas. [1] One of my favorite resources was Apartment Therapy, where I discovered half bath makeovers that oozed personality and panache.

I was particularly drawn to the way designers played with scale and proportion in these tiny rooms. For example, using a large, statement mirror to create the illusion of more space, or incorporating oversized light fixtures that command attention. [2] And the Tattered Pew blog had me swooning over their budget-friendly half bath refresh, complete with a show-stopping black mirror and sleek matte black hardware.

Blending Old and New

As I dug deeper into my research, I realized that one of the keys to a stylish half bath is striking the perfect balance between old and new. [3] The team at Brepurposed nailed this with their modern vintage bathroom, featuring brass fixtures that popped against the crisp white tiles.

I love the idea of pairing classic elements like pedestal sinks or vintage-inspired lighting with more contemporary touches. It creates this really compelling visual contrast that keeps the eye engaged. And don’t be afraid to mix metals! I’ve seen stunning powder rooms that blend brushed nickel, brass, and black finishes in a way that feels cohesive and intentional.

Maximizing Every Inch

When you’re working with limited square footage, it’s crucial to make the most of every nook and cranny. [4] The team at Campbell House proved that you can pack a lot of style into a tiny half bath, with smart storage solutions and a clever layout.

One trick I’ve seen work wonders is utilizing vertical space. Wall-mounted sinks or vanities can free up precious floor real estate, and floating shelves or niches offer discreet storage. And don’t underestimate the power of hooks – they’re a game-changer for providing easy towel access without taking up valuable counter space.

Embracing the Unexpected

Finally, I’ve learned that the true magic in a stylish half bath often comes from the unexpected. [5] HGTV’s examples showcase powder rooms that push the boundaries, with bold color palettes, striking patterns, and unique design elements that make you do a double-take.

For instance, I’ve seen half baths with eye-catching wallpaper, vintage-inspired lighting fixtures, and even funky accent furniture that elevates the space beyond the typical. And Cindy Hattersley’s blog [6] had me dreaming of ways to incorporate unexpected storage solutions, like a vintage ammunition backpack or a tiered metal basket.

Bringing It All Together

As I poured over all these inspiring examples, I realized that the key to a stylish half bath is really about embracing the limitations and using them to your advantage. [7] It’s about being bold, getting creative, and not being afraid to try something a little outside the box.

Whether it’s a dramatic accent wall, a statement mirror, or a unique vintage find, the half bath is the perfect place to let your personal style shine. So go ahead, channel your inner designer and transform that tiny powder room into a space that’s as functional as it is fabulous. After all, good things really do come in small packages.

References

[1] Apartment Therapy. “Half Bath Ideas.” https://www.apartmenttherapy.com/half-bath-ideas-36755344

[2] The Tattered Pew. “How to Refresh Your Half Bath on a Budget.” https://www.thetatteredpew.com/how-to-refresh-your-half-bath-on-a-budget/

[3] Brepurposed. “Stylish & Functional Fixtures in a Modern Vintage Bathroom.” https://www.brepurposed.com/stylish-functional-fixtures-modern-vintage-bathroom/

[4] Campbell House. “Modern Half Bath Renovation on a Budget.” https://campbell-house.com/2020/03/30/modern-half-bath-renovation-on-a-budget/

[5] HGTV. “Half Baths and Powder Rooms Pictures.” https://www.hgtv.com/design/remodel/bathroom-remodel/half-baths-and-powder-rooms-pictures

[6] Cindy Hattersley Design. “Stylish Solutions for Small Baths.” https://cindyhattersleydesign.com/stylish-solutions-for-small-baths/

[7] Quora. “How do I decorate a small half bathroom?” https://www.quora.com/How-do-I-decorate-a-small-half-bathroom