Categories
Tips

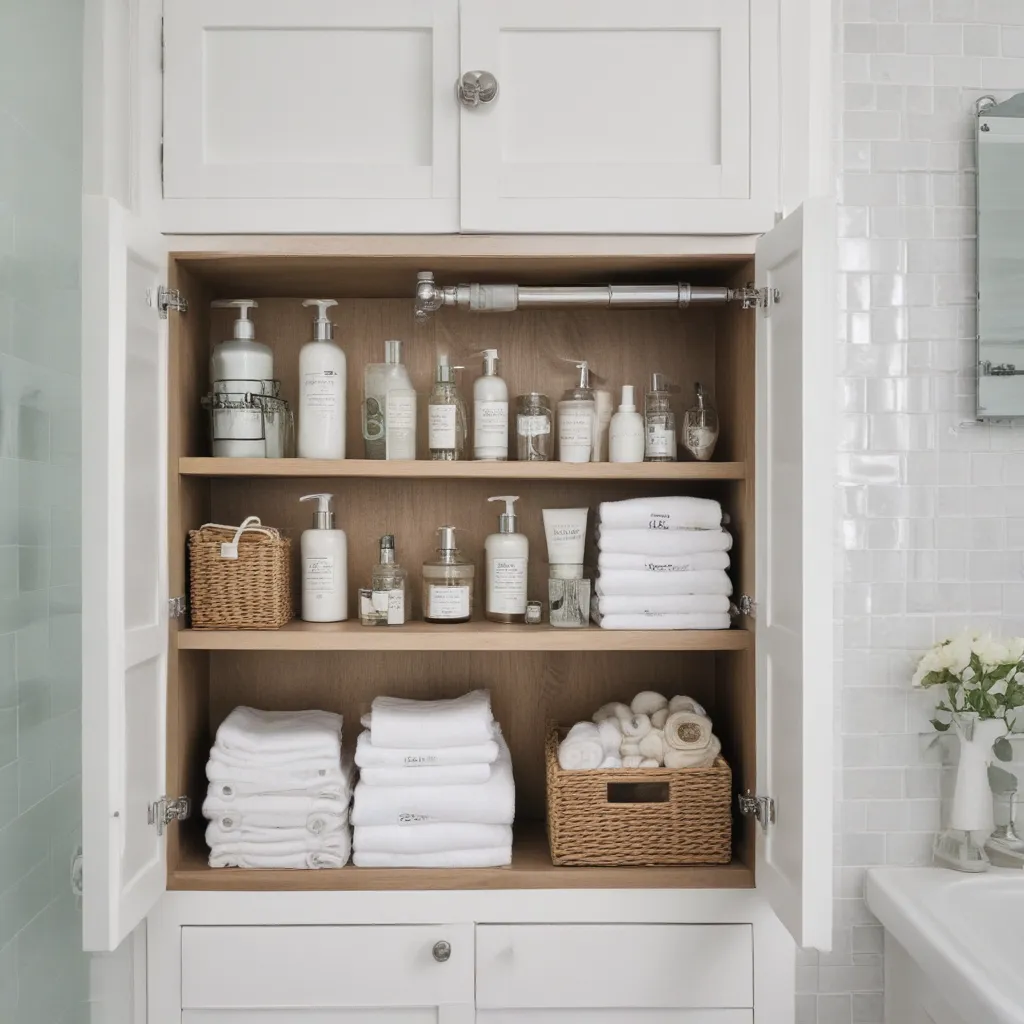
Bathroom Storage Ideas You Havent Thought Of

Bathroom Storage Ideas You Havent Thought Of

Bathroom Storage Ideas You Haven’t Thought Of

Raise your hand if your bathroom is the catch-all for every stray item in your home. Raises hand enthusiastically. Yeah, I’ve been there too. From haircare products to cleaning supplies, it can feel like the smallest room in the house is also the most cluttered.

But fear not, my disorganized friends! I’ve uncovered some ingenious bathroom storage ideas that will have you feeling like a feng shui master in no time.

Maximize Vertical Space

When square footage is at a premium, it’s time to look up. Utilizing vertical space is key for cramped bathrooms. Instead of letting those high shelves gather dust, put them to work!

One of my favorite space-saving tricks is a tiered hanging basket. [1] These nifty organizers let you stack all your essentials – think lotions, hair products, even extra toilet paper – without eating up precious floor space. Just hang them from the shower curtain rod or the back of the door, and voila! Instant storage.

Another clever vertical solution? A towel ladder. [2] This narrow shelf takes up barely any room but provides the perfect spot to stash clean towels, robes, and washcloths. Mount it on an empty wall, and you’ve transformed unused space into prime real estate.

And don’t forget about that often-neglected spot above the toilet. [3] A simple floating shelf is the perfect perch for extra toiletries, decorative accents, or even a few spare rolls of TP. Stash the unsightly stuff behind closed doors and let the prettiest products shine.

Repurpose Unexpected Storage

When you’re short on cabinet space, it’s time to get scrappy. Look around your bathroom – I guarantee there are untapped storage opportunities hiding in plain sight.

Take the humble mason jar, for instance. [4] These versatile vessels make fantastic organizers for cotton balls, Q-tips, hair ties, and more. Arrange them on a shelf or attach them directly to the wall for instant order.

Another surprising storage hero? The trusty corner. [5] Even the tiniest nooks and crannies can become prime real estate with the right shelving unit. Tuck a slim tower into an unused corner, and suddenly you’ve got a home for all your beauty must-haves.

And don’t sleep on the door! The back of your bathroom door is prime real estate for over-the-door storage caddies. [6] Hang them up to keep frequently-used items within easy reach.

Optimize Every Inch

When you’re working with a pint-sized powder room, it’s all about making the most of every square inch. That means getting creative with the space you do have.

Under the sink is a surprisingly versatile spot. [7] Ditch the clutter and install some smart organizers – think tiered drawers or baskets to corral all your odds and ends. And don’t forget to measure that empty space between the sink and the floor. You’d be amazed at what you can tuck in there.

Speaking of the sink, have you considered your vanity situation? A pedestal sink may look sleek, but it seriously cuts into your storage real estate. [8] Opt for a vanity with built-in drawers and cabinets instead, and you’ll have a designated home for all your daily essentials.

And here’s a genius trick I picked up recently: use the back of your bathroom mirror for storage. [9] Hang some hooks or a small organizer panel to keep frequently-used items like your toothbrush, floss, and hair clips within easy reach.

Add a Personal Touch

Alright, friends – we’ve covered the practical side of bathroom organization. But let’s not forget the fun part: making your space look fabulous!

When it comes to storage, aesthetics matter just as much as function. After all, if your organizers are an eyesore, you’ll be less likely to keep them tidy. That’s why I love adding a personal touch to my bathroom storage solutions.

For example, those mason jars I mentioned earlier? I like to give them a quick makeover with a coat of paint or some cute labels. [10] It transforms them from basic to beautiful – and makes me way more excited to keep them organized.

And don’t be afraid to lean into your decorative side when it comes to shelving and racks. [11] A sleek, modern metal frame or a rustic wood ladder can turn utilitarian storage into a stylish focal point. Pair them with pretty baskets, plants, and other bathroom accents, and you’ve got yourself a Pinterest-worthy space.

At the end of the day, the key to effortless bathroom organization is finding storage solutions that work for your specific needs and aesthetic. It may take a bit of trial and error, but trust me – the payoff of a clutter-free oasis is more than worth it.

So go forth, my fellow bathroom-organizing warriors, and conquer that clutter once and for all! Your serene sanctuary awaits.

[1] https://www.apartmentguide.com/blog/9-bathroom-storage-ideas-you-havent-thought-of/
[2] https://www.polishedhabitat.com/bathroom-organization/
[3] https://katieskottage.com/small-bathroom-organization-ideas-you-never-thought-of/
[4] https://www.apartmentguide.com/blog/9-bathroom-storage-ideas-you-havent-thought-of/
[5] https://www.polishedhabitat.com/bathroom-organization/
[6] https://katieskottage.com/small-bathroom-organization-ideas-you-never-thought-of/
[7] https://www.polishedhabitat.com/bathroom-organization/
[8] https://www.mydomaine.com/creative-bathroom-storage-ideas-4767639
[9] https://www.mydomaine.com/creative-bathroom-storage-ideas-4767639
[10] https://tellloveandparty.com/2015/10/diy-bathroom-storage-bins.html
[11] https://www.fiberglassrv.com/forums/f56/storage-ideas-for-casita-spirit-deluxe-89621.html

Categories
Tips

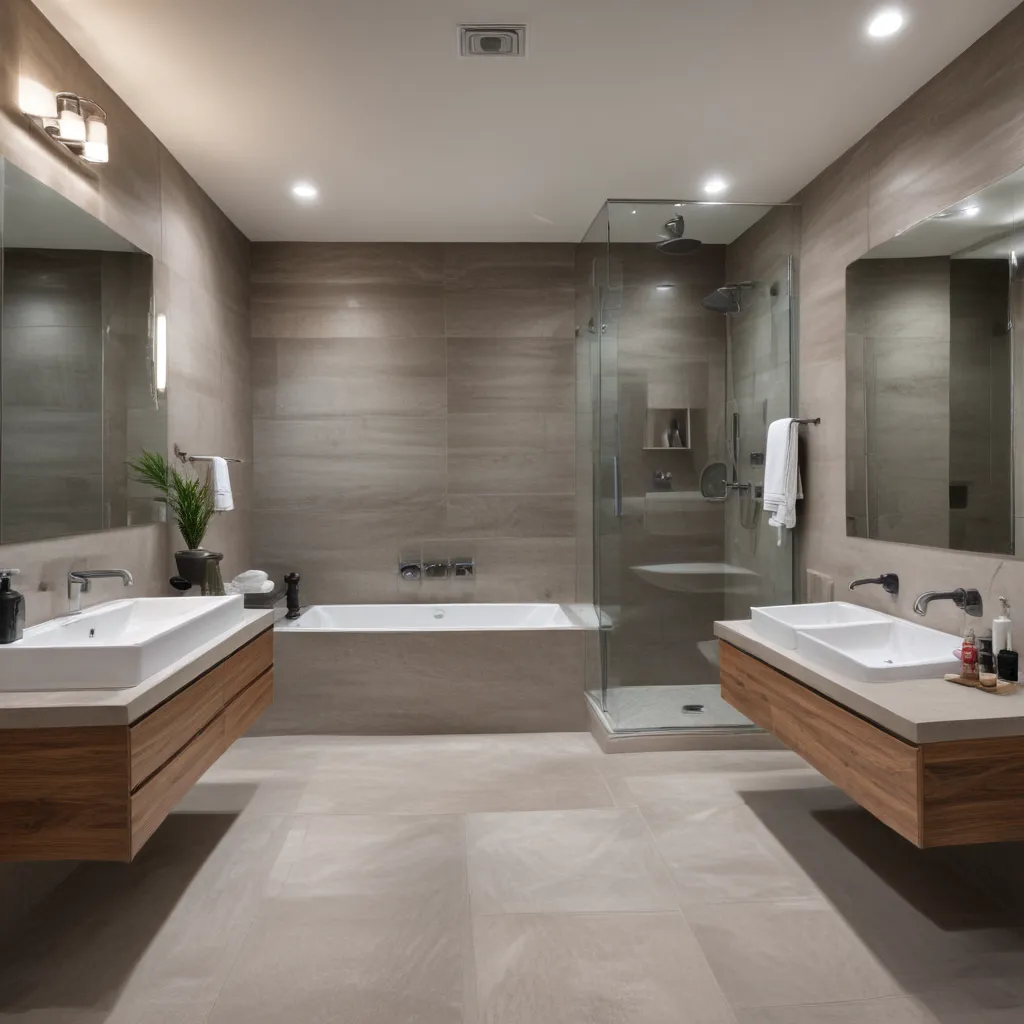
Modern Bathroom Design Ideas

Modern Bathroom Design Ideas

Embrace the Unexpected

Bathrooms are often seen as purely functional spaces – the place where we perform our daily rituals of cleansing and grooming. But why should the bathroom be relegated to the mundane? When it comes to modern bathroom design, I say embrace the unexpected! After all, this is your personal oasis – a place to unwind, refresh, and express your unique style.

Let’s start by tossing out the notion that bathrooms must adhere to a clinical, utilitarian aesthetic. Sure, functionality is important, but that doesn’t mean your space has to be devoid of personality. In fact, injecting a little playfulness and pizzazz can take your bathroom from snooze-worthy to show-stopping.

Take, for example, the powder room in my friend Bianca’s newly renovated home. Rather than playing it safe with a basic white palette, she went bold with a vibrant, abstract wallpaper that instantly catches the eye. The unexpected pattern is balanced by sleek, contemporary fixtures and a floating vanity that keeps the small space feeling open and airy. It’s a masterclass in how to blend the modern and the whimsical for a truly one-of-a-kind look.

Dare to be Different

Of course, modern bathroom design isn’t just about infusing personality through bold color and pattern. It’s also about celebrating the unconventional – those design choices that make you stop and say, “Wait, that’s different…and I love it!”

Take, for instance, the primary bathroom in my colleague Ethan’s loft. Instead of the standard rectangle or oval tub, he opted for a striking, asymmetrical soaking tub that resembles a work of art. Pair that with a walk-in shower enclosed in a single panel of frameless glass, and you’ve got a bathroom that feels more like a high-end spa than a utilitarian space.

But Ethan didn’t stop there. He also incorporated an unexpected design element in the form of a freestanding vanity crafted from reclaimed wood. The rustic, industrial-chic vibe of the vanity provides a captivating contrast to the sleek, modern fixtures and tile work throughout the rest of the room. It’s a masterful blend of styles that defies expectations and delights the senses.

Embrace the Power of Texture

When it comes to modern bathroom design, don’t be afraid to get a little tactile. Incorporating various textures can elevate a space from ordinary to extraordinary.

Just look at the bathroom in my sister’s new loft. Rather than relying solely on smooth, polished surfaces, she mixed in elements like weathered wood, rough-hewn stone, and even a touch of striking metallic accents. The result is a space that feels both luxurious and lived-in – a harmonious balance of masculine and feminine, old and new.

One of my favorite features is the freestanding tub, which is nestled in an alcove clad in a mosaic of natural stone tiles. The interplay of matte and glossy finishes, along with the varied tones and textures of the tile, creates a mesmerizing visual that draws the eye and begs to be touched. It’s a masterclass in how to elevate the everyday into the extraordinary.

Embrace the Power of Contrast

Another key component of modern bathroom design? The art of contrast. By juxtaposing disparate elements, you can imbue your space with a captivating sense of tension and dynamism.

Take, for example, the powder room in my friend Lila’s newly renovated Victorian home. On the surface, it might seem like a study in minimalism, with its crisp white walls and streamlined vanity. But look closer and you’ll notice the unexpected pairing of a sleek, modern vessel sink atop a vintage dresser that’s been repurposed as a vanity. The clash of old and new, industrial and organic, creates a visual interest that’s both surprising and delightful.

Or consider the bathroom in my neighbor Aisha’s mid-century modern abode. Here, she’s embraced the power of contrasting finishes, pairing a glossy black vanity with a rugged, concrete-look tile on the walls. The result is a space that feels both polished and raw, a perfect reflection of the home’s architectural style. It’s a masterclass in how to blend the unexpected for a truly captivating effect.

Conclusion

At the end of the day, modern bathroom design is all about embracing the unexpected, daring to be different, and celebrating the interplay of textures and contrasts. It’s about creating a space that not only functions beautifully but also delights the senses and sparks the imagination.

So, whether you’re dreaming of a serene, spa-like oasis or a bold, personality-packed powder room, don’t be afraid to think outside the box. After all, the bathroom is your personal sanctuary – a place to indulge your senses and express your unique style. So go forth, my friends, and let your modern bathroom design dreams take flight!

References

[1] Houzz. “Modern Bathroom Ideas.” Houzz, www.houzz.com/photos/modern-bathroom-ideas-phbr1-bp~t_712~s_2105.
[2] The Spruce. “Modern Bathroom Design Ideas.” The Spruce, www.thespruce.com/modern-bathroom-design-ideas-4129371.
[3] Pinterest. “Modern Bathrooms.” Pinterest, www.pinterest.com/ccinteriorssf/modern-bathrooms/.
[4] Better Homes & Gardens. “Contemporary Bathroom Ideas.” Better Homes & Gardens, www.bhg.com/bathroom/decorating/modern/contemporary-bathroom-ideas/.
[5] Pinterest. “Modern Bathrooms.” Pinterest, www.pinterest.com/ppeer/modern-bathrooms/.
[6] ELLE DECOR. “65 Modern Luxury Bathrooms.” ELLE DECOR, www.elledecor.com/design-decorate/room-ideas/g1595/modern-luxury-bathrooms/.
[7] HGTV. “Modern Bathroom Design Ideas.” HGTV, www.hgtv.com/design/rooms/bathrooms/modern-bathroom-design-ideas-pictures.
[8] Good Housekeeping. “35 Modern Bathroom Ideas to Upgrade Your Space.” Good Housekeeping, www.goodhousekeeping.com/home/decorating-ideas/g42622463/modern-bathroom-ideas/.

Categories
Tips

Replacing a Bathroom Faucet

Replacing a Bathroom Faucet

Replacing a Bathroom Faucet: A Plumbing Adventure Waiting to Happen

I’m no handyman, but when my old bathroom faucet started leaking, I knew it was time to take matters into my own hands. After all, how hard could it be to replace a simple faucet, right? Little did I know, I was about to embark on a plumbing odyssey that would make MacGyver himself proud.

Assessing the Situation

As I stood in front of the sink, staring at the dripping faucet, I felt a mix of determination and trepidation. I had done some minor home repairs before, but this seemed like a whole new level of challenge. Luckily, I had the internet and a trusty tape measure at my disposal, so I set out to gather as much information as possible.

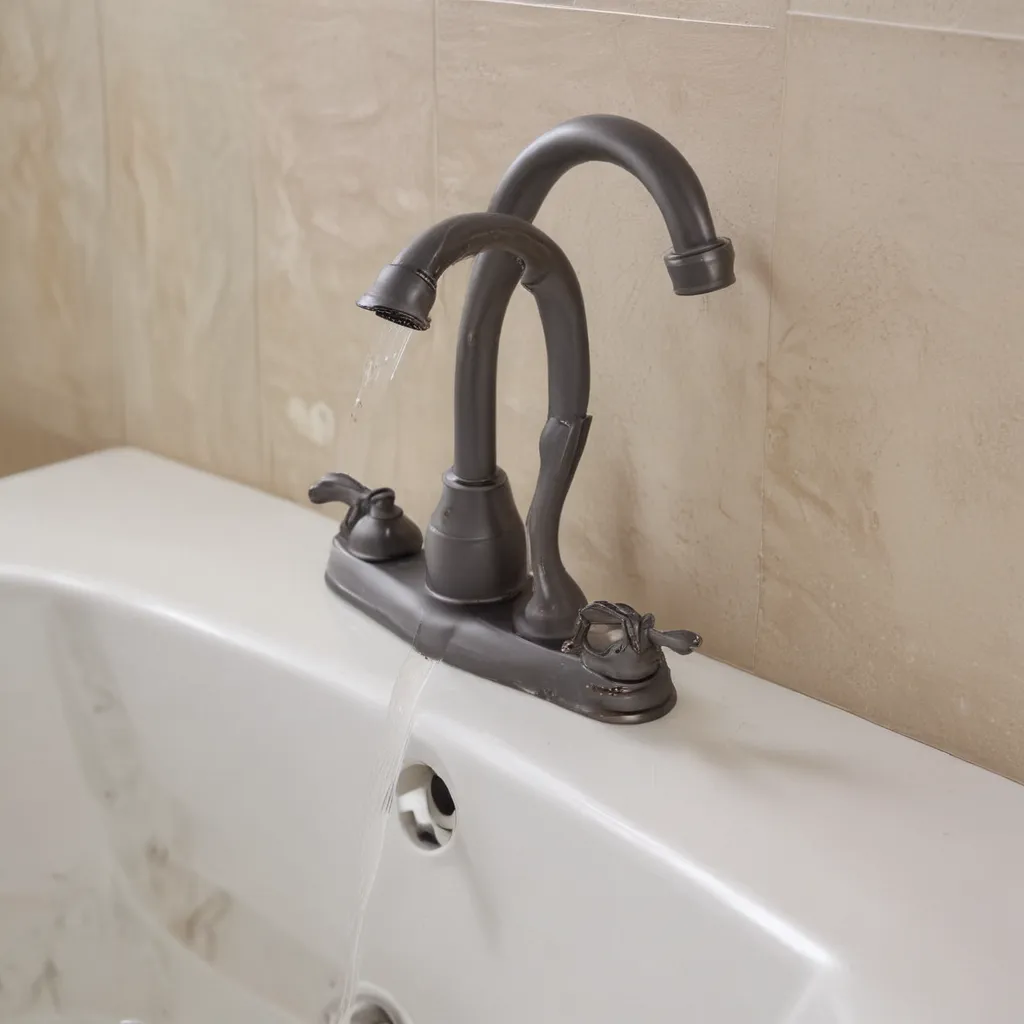
First, I took a close look at the existing faucet. It was a classic two-handle design, with separate knobs for hot and cold water. [1] While it had served me well over the years, I couldn’t help but notice how outdated it looked. “Maybe this is the perfect opportunity to upgrade to a sleek, single-handle faucet,” I thought to myself, already envisioning the modern aesthetic I could achieve.

With tape measure in hand, I carefully documented the dimensions of the existing faucet and sink. [2] This would be crucial in ensuring I purchased the right replacement that would fit seamlessly into the existing setup. After all, the last thing I wanted was to go through all the trouble of removing the old faucet only to find that the new one didn’t quite fit.

Doing My Homework

Armed with the measurements, I turned to the internet for guidance. I scoured the top search results, piecing together a step-by-step plan for the faucet replacement process.

The first video I stumbled upon was a helpful tutorial that walked me through the basic steps. [3] Shut off the water supply, disconnect the old faucet, clean the surface, and install the new one – simple enough, right? Well, as I soon discovered, the devil was in the details.

Next, I delved into a Reddit thread where fellow DIY enthusiasts shared their own faucet-replacing experiences. [4] Some offered valuable insights, like ensuring the new faucet was the right size and configuration for my sink. Others cautioned about potential pitfalls, such as dealing with stubborn mounting nuts or faulty shutoff valves. I made mental notes of all the potential challenges I might face.

To further bolster my confidence, I scoured additional how-to guides from trusted sources like Home Depot [5] and Lowe’s. [6] These resources provided detailed instructions, helpful illustrations, and even recommendations for the best types of faucets to consider. I felt like I was becoming a bona fide plumbing expert, ready to tackle this project head-on.

Putting on My Plumber’s Hat

With a solid game plan in place, I decided it was time to take the plunge (pun intended) and get to work. I gathered my tools, including a wrench, pliers, and a bucket to catch any water spillage. [7] Donning my metaphorical plumber’s hat, I turned off the water supply and prepared to remove the old faucet.

As I unscrewed the mounting nuts and disconnected the water lines, I couldn’t help but feel a sense of excitement. “This is it,” I thought, “the moment of truth.” But, just as I was about to lift out the faucet, I encountered my first obstacle: the lift rod, which controls the drain, seemed stuck in place. [4] Undeterred, I gently wiggled and coaxed it free, taking care not to damage the delicate mechanism.

With the old faucet finally removed, I took a moment to clean the sink surface thoroughly, removing any lingering debris or sealant. [3] This would ensure a smooth and seamless installation for the new faucet.

Embracing the Unexpected

As I began to install the replacement faucet, I encountered yet another challenge. The new design didn’t quite match the existing hole configuration, leaving unsightly gaps around the base. [8] “Ah, the joys of home improvement,” I sighed, mentally preparing for a detour.

Determined to make it work, I scoured the internet again, this time searching for creative solutions. That’s when I stumbled upon a video about replacing an RV bathroom faucet, which had a similar issue. [8] The homeowner’s solution? Crafting a custom mounting plate to cover the gaps. Brilliant!

With newfound inspiration, I set out to construct my own mounting plate. After a few trial-and-error attempts, I finally achieved a seamless fit, securing the new faucet snugly in place. “Take that, plumbing gods!” I exclaimed, feeling a sense of triumph.

The Final Reveal

As I turned the water back on and watched the new faucet come to life, I couldn’t help but admire my handiwork. Gone was the old, drippy faucet, replaced by a sleek, single-handle design that added a touch of modern elegance to my bathroom.

Sure, the process wasn’t as straightforward as I had initially hoped, but that’s what made it all the more satisfying. I had faced challenges, problem-solved, and emerged victorious – a true plumbing warrior.

With a contented sigh, I stepped back and admired my work. The new faucet not only looked fantastic but also operated flawlessly, delivering a steady stream of water with a smooth, precise control. It was the perfect finishing touch to my freshened-up bathroom, and I couldn’t wait to show it off to my friends and family.

As for the old faucet? Well, it’s now safely tucked away in my garage, a memento of my plumbing adventure. Who knows, maybe one day I’ll tackle another DIY project and put it to use again. But for now, I’m simply basking in the glow of my newfound plumbing prowess.

Conclusion

Replacing a bathroom faucet may seem like a daunting task, but with a little bit of preparation, some handy tools, and a willingness to embrace the unexpected, it can be a surprisingly rewarding experience. By following the steps outlined in this article, and drawing inspiration from the wealth of online resources available, you too can tackle this DIY project with confidence.

Remember, the journey may not always be smooth sailing, but the sense of accomplishment you’ll feel when you turn on that shiny new faucet and see it working perfectly will make it all worthwhile. So, what are you waiting for? It’s time to roll up your sleeves, grab your toolkit, and embark on your own plumbing odyssey!

[1] Knowledge from https://www.youtube.com/watch?v=9XBYxHYWEhk
[2] Knowledge from https://www.homedepot.com/c/ah/how-to-replace-a-bathroom-faucet/9ba683603be9fa5395fab901f6128117
[3] Knowledge from https://www.youtube.com/watch?v=gZ0Cz3gRglo
[4] Knowledge from https://www.reddit.com/r/Plumbing/comments/pjc063/help_replacing_bathroom_faucet/
[5] Knowledge from https://www.lowes.com/n/how-to/replace-a-faucet
[6] Knowledge from https://www.youtube.com/watch?v=1PY2wbebWuk
[7] Knowledge from https://www.youtube.com/watch?v=5s4g8yVGPA4
[8] Knowledge from https://www.gonewiththewynns.com/RV-faucet-install

Categories
Tips

DIY Bathroom Remodel Ideas

DIY Bathroom Remodel Ideas

Transforming Your Bathroom on a Budget

As I look back over the years, I realize that I have never undertaken a big remodeling project. My home renovations have been limited to mere cosmetic work – a fresh coat of paint here, some new hardware there. But this time, I decided to take the plunge and completely overhaul not one, but two of my bathrooms! Let me tell you, it was quite the journey, filled with equal parts excitement and trepidation.

Planning is Key

The very first step in my DIY bathroom remodel journey was to find an experienced contractor I could trust. Luckily, my daughter Casey and her husband Finn had used Patrik for all their home projects, and they vouched for his reliability and talent. I invited Patrik over to take a look at my bathrooms and provide an estimate. He informed me that he couldn’t fit me into his schedule until May, but that the entire project would take around three weeks. This gave me ample time to get everything planned and ordered.

One of the best decisions I made was to have Casey’s interior designer friend, Jen, draw up the architectural plans for both bathrooms. This allowed me to visualize the space and make changes before committing to anything. For example, I had my heart set on a freestanding tub, but wasn’t sure if I had the room. Jen’s plans showed me exactly how it would look, and I fell in love with the design. She also helped me determine the ideal tile layout and quantity to order. Having those professional blueprints was invaluable – they ensured Patrik’s crew knew exactly what I wanted, and everything turned out perfectly.

The Ordering Nightmare

As someone living in a small condo without much storage, the ordering process was a major headache for me. Where on earth was I going to keep all the materials until installation time? Thankfully, Casey and Finn came to my rescue and let me use part of their garage. I don’t know what I would have done without that extra space!

The actual ordering was nerve-wracking as well. I had my heart set on using the Cloe tile line, but ran into major shipping delays due to the pandemic. After two failed online orders, I eventually found a local tile shop, The Tile Outlet, that was able to get me the tile and hold it until I needed it. Lesson learned – when it comes to materials, it’s best to go with a local supplier who can provide better service and reliability.

Navigating Homeowner Association Rules

Another unexpected challenge I faced was navigating the rules and regulations of my homeowner’s association. A few days before the project was set to begin, I informed my neighbors about the upcoming construction, only to be told that each unit owner would need to vote on approving the project. What?! I had no idea such a requirement existed. Luckily, my neighbors were understanding, and everyone voted in favor. But it was an embarrassing situation that could have been avoided had I simply read the association’s bylaws ahead of time.

Keeping the Crew Happy

Through it all, I have to give a huge shoutout to Patrik and his crew. They were absolute rockstars, tackling any issue that arose with a smile on their face. To keep them motivated and happy, I made sure to provide regular “treats” – donuts, coffee, water, and even homemade cookies. These small gestures went a long way in ensuring they went above and beyond to deliver the bathrooms of my dreams.

The Reward

As I look back on this whole experience, the biggest lesson I learned is that I should have done this years ago. I’ve always hated my dated, builder-grade bathrooms, but the idea of a full-blown renovation seemed so daunting that I kept putting it off. Now that it’s done, I can say with absolute certainty that the temporary inconvenience was worth it a thousand times over. I feel like I’m living in a fancy hotel when I step into my new bathrooms! The reward of having a space I truly love far outweighs any of the challenges I faced along the way.

So, if you’re on the fence about tackling a bathroom remodel, let me be the one to tell you: don’t wait! The planning and execution may seem overwhelming, but with the right team and a little determination, you can transform your dated bathroom into a beautiful, functional oasis. It’s an investment that will pay dividends in your daily life for years to come.

Additional Resources for DIY Bathroom Remodeling

If you’re feeling inspired to take on your own DIY bathroom remodel, be sure to check out these helpful resources:

[1] Tips for a budget-friendly bathroom makeover: https://graceinmyspace.com/diy-bathroom-remodel-on-a-budget/
[2] Advice for reading homeowner association rules before starting construction: https://www.thisoldhouse.com/bathrooms/21018907/read-this-before-you-redo-a-bath
[3] Ideas for mixing metals and finishes in the bathroom: https://www.youtube.com/watch?v=8_enz98N2n0
[4] Lessons learned from a full bathroom renovation: https://thediyplaybook.com/bathroom-renovation-lessons/

Categories
Tips

Turn Your Bathroom Into a Spa Retreat

Turn Your Bathroom Into a Spa Retreat

Transforming Your Everyday Loo into a Luxurious Oasis

In an ideal world, we’d all be jetting off to the fanciest spas every weekend, slipping into plush robes and sinking into steamy jacuzzis. But let’s be real – that’s not the reality for most of us. Unless you happen to be a millionaire (in which case, props to you!), regular spa trips are probably not in the cards.

That doesn’t mean you can’t bring that same serene, rejuvenating vibe into your own home, though. With a little creativity and some strategic upgrades, you can turn your ho-hum bathroom into a luxurious, spa-like retreat – no pricey membership required.

I may have never actually been to a full-blown spa myself, but I do love my bathroom. There’s just something so calming and tranquil about escaping the chaos of the day, lighting some candles, and indulging in a long, hot soak. And let me tell you, I’ve gotten pretty darn good at recreating that spa experience right in my own tub.

Creating Your Personal Oasis

The key is to focus on all the little details that make a spa day so special – plush towels, soothing scents, mood lighting, and high-end products galore. Start by taking a good look at your current bathroom setup and identifying areas that could use a spa-worthy upgrade.

For starters, consider your bathing situation. If you’re more of a shower person, a steam shower cabin could be the way to go. Not only do they offer that coveted spa-like steam experience, but many models also come loaded with fancy features like Bluetooth speakers, LED lighting, and even built-in aromatherapy. [1] And if baths are more your thing, stock up on all the essential accoutrements – bath bombs, luxe bubble bath, a wooden tub tray for holding your wine glass and latest novel.

Lighting is another crucial element in creating that serene, spa-like ambiance. Ditch the harsh overhead fixtures and opt for softer, more atmospheric lighting instead. Wall sconces, dimmers, and even a few strategically-placed candles can do wonders for setting the right mood. [2]

And don’t forget about the little touches that really make a difference. Plush rugs, potted plants, and high-end bath products displayed in beautiful glass containers can instantly elevate the look and feel of your space. [3] It’s all about crafting that perfect blend of comfort, relaxation, and just a touch of glamour.

Making Time for Self-Care

Of course, transforming your bathroom into a spa retreat is only half the battle. The other crucial component is actually making time to enjoy it. It’s so easy to get caught up in the hustle and bustle of everyday life and neglect our own self-care needs. But trust me, carving out that precious “me time” is worth its weight in gold.

Whether it’s a decadent, hours-long soak or a quick 20-minute shower, make a ritual out of your bathroom routine. Light some candles, queue up your favorite spa playlist, and really lean into the experience. Slather on a luxurious face mask, dry brush your skin, or give yourself a relaxing scalp massage with a nourishing hair treatment. [4] This is your sanctuary – treat it as such.

And don’t be afraid to get a little creative. Sure, you could stick to the traditional spa staples like lavender and eucalyptus. But why not experiment with scents that truly speak to you? Maybe it’s the earthy, woodsy notes of sandalwood or the bright, citrusy aroma of bergamot. Find what makes you feel most calm and centered, and run with it. [5]

At the end of the day, the goal is to craft a bathroom that feels like your own personal oasis – a space where you can truly unwind, recharge, and take a much-needed break from the outside world. With the right mindset and a few strategic upgrades, that dream can absolutely become a reality. So what are you waiting for? It’s time to start turning your humble bathroom into a luxurious spa retreat.

References

[1] https://jennyinneverland.com/2019/10/09/ad-transforming-your-bathroom-into-a-home-spa-retreat/
[2] https://www.bhg.com/bathroom/decorating/ways-to-create-a-calming-bath-281474979502776/
[3] https://www.elledecor.com/design-decorate/g44566601/spa-bathrooms/
[4] https://www.thespruce.com/perfect-spa-retreat-style-bathrooms-1975792
[5] https://www.homesandgardens.com/ideas/spa-bathroom-ideas

Categories
Tips

Low-Cost Bathroom Renovation Ideas

Low-Cost Bathroom Renovation Ideas

Budget-Friendly Bathroom Makeover Secrets Revealed

When it comes to home renovations, the bathroom is often one of the most daunting and expensive spaces to tackle. But fear not, my budget-conscious friends – with a little creativity and elbow grease, you can transform your tired, outdated bathroom into a spa-like oasis without breaking the bank.

As someone who’s been there, done that with multiple bathroom remodels, I’m here to share my hard-earned wisdom and practical tips to help you achieve the bathroom of your dreams on a shoestring budget. Get ready to be inspired, because we’re about to uncover the secrets of low-cost bathroom renovations.

Start with a Solid Plan

The key to a successful, budget-friendly bathroom makeover is having a solid plan in place. Before you even think about picking out tile or fixtures, take the time to assess your space, determine your must-have features, and create a realistic spending plan.

Begin by measuring your bathroom and making a list of everything that needs to be addressed – from outdated vanities to that cringe-worthy ’80s linoleum. Prioritize the items that will have the biggest impact, like replacing the tub or upgrading the lighting. Then, research affordable materials and DIY-friendly projects that can help you achieve the look you want without draining your savings.

Embrace the Power of Paint

One of the easiest and most cost-effective ways to transform your bathroom is with a fresh coat of paint. Don’t be afraid to get creative with color and experiment with bold, unexpected hues. A vibrant accent wall or a soothing, monochromatic palette can instantly elevate the space and make it feel brand new.

Painting your existing vanity or cabinets can also work wonders, saving you the expense of a full cabinet replacement. Just make sure to properly prep the surfaces and use a paint formulated for high-moisture environments. With a little elbow grease, you can breathe new life into tired, outdated cabinetry.

Harness the Magic of Tile

Tile can be a significant investment, but there are ways to make it work within a tight budget. Instead of covering every inch of your bathroom in premium tile, opt for a more selective approach. Use high-end tile as an accent, like a stunning feature wall or a decorative border, and fill in the rest with a more affordable, yet still stylish, option.

Don’t be afraid to get creative with tile patterns and layouts, either. Simple subway tile can take on a whole new personality when arranged in a herringbone or even a chevron pattern. And don’t forget about the power of grout color – swapping out dated, dingy grout for a fresh, modern hue can instantly refresh your space.

Thrift and Upcycle

One person’s trash is another’s treasure, and that adage definitely applies to bathroom renovations. Scour thrift stores, garage sales, and online marketplaces for hidden gems that you can revamp and repurpose. An old dresser or cabinet can be transformed into a unique vanity, and vintage light fixtures can add character and charm to your space.

Get creative with upcycling, too. A can of spray paint can breathe new life into outdated hardware, and a little elbow grease can work wonders on an old clawfoot tub. The possibilities are endless when you’re willing to think outside the box and embrace your inner DIY spirit.

Accessorize with Intention

Don’t underestimate the power of accessories when it comes to your bathroom makeover. Swapping out dated towel bars, shower curtains, and soap dishes can make a big impact without breaking the bank. Look for timeless, high-quality pieces that will stand the test of time and complement your new aesthetic.

And don’t be afraid to incorporate some DIY elements, too. A custom-made floating shelf or a macrame plant hanger can add a personalized touch and help you stay on budget. The key is to choose accessories that not only look great but also serve a practical purpose in your newly renovated space.

Embrace the Unexpected

One of the best things about low-cost bathroom renovations is the opportunity to get creative and embrace the unexpected. Don’t be afraid to think outside the box and try something new, whether it’s a bold wallpaper pattern or a unique light fixture.

Remember, the beauty of a budget-friendly makeover is that you don’t have to play it safe. Experiment with different textures, colors, and materials to create a space that truly reflects your personal style. After all, the most stunning bathrooms are often the ones that dare to be different.

Conclusion

Transforming your bathroom on a budget may seem like a daunting task, but with the right mindset and a little bit of elbow grease, it’s entirely possible. By embracing the power of paint, tile, and clever upcycling, you can create a bathroom that not only looks amazing but also aligns with your financial goals.

So what are you waiting for? Grab your toolbox, put on your creative thinking cap, and get ready to unlock the secrets of low-cost bathroom renovations. Your dream bathroom is just a few budget-friendly steps away.

References:

[1] https://www.bhg.com/bathroom/small/budget-small-baths/
[2] https://www.angiesroost.com/low-cost-bathroom-remodel/
[3] https://thediyplaybook.com/bathroom-renovation-budget/
[4] https://www.thespruce.com/budget-friendly-bathroom-remodel-ideas-7511607
[5] https://simplemadepretty.com/bathroom-remodel-ideas-budget/
[6] https://www.forbes.com/home-improvement/bathroom/cheap-bathroom-remodel-ideas/
[7] https://www.reddit.com/r/Rochester/comments/u0q3yz/cost_for_a_small_bathroom_renovation/
[8] https://www.alisonstorm.com/my-4000-complete-bathroom-renovation/

Categories
Tips

Upgrading Your Bathroom Mirror

Upgrading Your Bathroom Mirror

Breathe New Life into Your Bathroom with a Stunning Mirror Makeover

Ah, the humble bathroom mirror – often overlooked, yet it holds the power to transform the entire space. If you’re stuck with a boring, builder-grade mirror that’s as exciting as watching paint dry, fear not! I’m here to share my secrets for upgrading your bathroom mirror on a budget, so you can say goodbye to that drab reflection and hello to a stunning focal point.

The Builder-Grade Dilemma

I’ll be the first to admit, I’ve had my fair share of run-ins with those builder-grade mirrors. You know the ones – plain, rectangular slabs of glass unceremoniously slapped onto the wall, devoid of any character or charm. It’s like the builder just said, “Eh, good enough!” and moved on to the next task. But not on my watch, my friends.

When we first moved into our home, I took one look at the lifeless mirrors in our bathrooms and knew I had to work my DIY magic. I didn’t want to spend a fortune, but I also refused to settle for a mediocre mirror situation. That’s when the creative juices started flowing, and I stumbled upon some ingenious (and budget-friendly) ways to breathe new life into those builder-grade eyesores.

Framing the Focal Point

One of the easiest and most impactful ways to upgrade a boring bathroom mirror is to frame it. [1] I’m talking about adding a custom, handcrafted frame that instantly elevates the entire look and feel of the space. Think of it as the perfect accessory to complete your bathroom’s ensemble.

Now, I know what you’re thinking – “Framing a mirror? Isn’t that going to be expensive and complicated?” Well, let me put your mind at ease. With a little bit of elbow grease and a few simple tools, you can create a stunning mirror frame for a fraction of the cost of a pre-made one. [2]

The key is finding the right materials and following a straightforward step-by-step process. I started by rummaging through our scrap wood pile (don’t we all have one of those?) and found the perfect pieces to craft my DIY mirror frame. A little bit of crown trim, some 3-inch-wide boards, and a linear piece for the top – voila! With a few strategic cuts and some construction adhesive, I had the makings of a gorgeous, custom-built frame.

Adding Architectural Interest

But the framing fun doesn’t stop there, my friends. [3] Once you’ve got the basic frame in place, you can really take it to the next level by incorporating architectural details that add depth and dimension. Think decorative molding, carved embellishments, or even a touch of gilded accents. The possibilities are endless!

I particularly loved the look of adding those charming half-round wooden balls along the edges of my frame. It gave the whole thing a lovely, vintage-inspired vibe that perfectly complemented the farmhouse-chic aesthetic of my bathroom. And the best part? It was a total cinch to put together. [4]

Personalize, Personalize, Personalize

Now, I know what you’re thinking – “Okay, but how do I make this mirror truly my own?” Well, that’s where the real fun begins. [5] Once you’ve got the frame in place, the world is your oyster when it comes to personalizing your new bathroom centerpiece.

Maybe you’re feeling bold and want to experiment with a bold, contrasting paint color that makes the frame pop. Or perhaps you’re drawn to the rustic charm of a weathered, distressed finish. Heck, you could even add a touch of whimsy with some hand-painted designs or intricate stenciling. The options are endless, my friends.

And let’s not forget about the little details that can really elevate the look – things like decorative hardware, unique accent pieces, or even a cheeky little sign that sets the tone for your bathroom oasis. [6] The key is to have fun and let your creativity shine through. After all, this is your space, and your mirror should reflect your personal style.

The Reveal: A Whole New Bathroom

So, are you ready to say goodbye to that boring, builder-grade mirror and hello to a stunning, personalized focal point that’ll have your friends and family oohing and aahing? Trust me, the transformation is nothing short of magical. [7]

Just imagine walking into your bathroom and being greeted by a mirror that’s not just functional, but a true work of art. A mirror that sets the tone for the entire space and makes you feel like you’re stepping into a high-end spa, rather than your plain-Jane builder-grade abode.

And the best part? You can achieve this incredible upgrade without breaking the bank. With a little bit of creativity, some elbow grease, and a few simple tools, you can create a stunning mirror that’ll have your bathroom looking like a million bucks. [8]

So, what are you waiting for? Grab your hammer, dust off your creativity, and let’s get to work on transforming that boring mirror into the stunning centerpiece your bathroom deserves. Trust me, the end result will be worth every minute of effort. Happy DIYing, my friends!

References:

[1] [Knowledge from https://www.apartmenttherapy.com/frameless-bathroom-mirror-ideas-257890]
[2] [Knowledge from https://ourfauxfarmhouse.com/mirror-frame-wood-diy/]
[3] [Knowledge from https://homeandhallow.com/diy-how-to-frame-a-builder-grade-bathroom-mirror/]
[4] [Knowledge from https://innovativehomemaker.com/diy-bathroom-mirror-update/]
[5] [Knowledge from https://southernyankeediy.com/projects/diy-decor/updating-a-builder-grade-mirror-the-easy-way/]
[6] [Knowledge from https://www.withlovefromkay.com/post/upgrading-your-bathroom-mirrors-for-less-than-50]
[7] [Knowledge from https://www.peacockridgefarm.com/how-to-update-a-builder-grade-bathroom-mirror/]
[8] [Knowledge from https://www.pinterest.com/pin/193021534009989154/]

Categories
Tips

Easy Bathroom Cleaning Hacks

Easy Bathroom Cleaning Hacks

Introduction: Why Bathrooms Deserve Our Attention

Let’s face it – bathrooms are the least glamorous rooms in our homes. They’re the workhorses, the spaces we use to scrub away the grime of daily life. But for all their utilitarian purposes, bathrooms deserve a little TLC too. After all, a clean and sparkling bathroom can transform the entire look and feel of your home.

I know the idea of scrubbing tiles and polishing chrome doesn’t exactly scream “fun afternoon,” but hear me out. With the right strategies and a few clever hacks, you can get your bathroom looking fresh and fabulous without spending hours on your hands and knees. Trust me, the payoff is worth it. Imagine sinking into a gleaming tub at the end of a long day, or stepping into a shower that’s spotless and inviting. Doesn’t that sound like the perfect way to start (or end) your day?

In this ultimate guide, I’m going to share my top bathroom cleaning hacks – from unexpected uses for vodka to the power of baking soda and vinegar. Get ready to wave goodbye to grime and hello to a spa-worthy sanctuary. Let’s get cleaning!

Hack #1: Vodka, the Unexpected Toilet Bowl Cleaner

I’ll admit, when I first heard about using vodka to clean the toilet, I was a bit skeptical. Isn’t that stuff meant for drinking, not scrubbing? But let me tell you, this budget-friendly hack is an absolute game-changer.

Here’s how it works: Simply pour about 1/2 cup of the cheapest vodka you can find directly into your toilet bowl. Let it sit for at least 15 minutes, then give it a good scrub with your trusty toilet brush. The alcohol in the vodka works to break down grime and stains, leaving you with a sparkling clean bowl. And the best part? No harsh chemicals or noxious fumes.

I like to keep a small bottle of vodka tucked away in my cleaning caddy just for this purpose. It’s a simple swap that saves me time and money, without compromising on results. Plus, you can use the leftover vodka to disinfect your toilet seat and lid – just dampen a microfiber cloth and wipe it down. Talk about a multi-tasking miracle!

Hack #2: The Toilet Brush Disinfecting Trick

Speaking of toilet brushes, can we talk about how gross those things can get? I mean, think about it – we use them to scrub away all sorts of unsavory bathroom residue, then just stick them back in their holder, waiting to be used again. Yuck.

But I’ve got a simple hack to keep your toilet brush fresh and sanitized between uses. After each cleaning session, pour a small amount of disinfectant, like bleach or hydrogen peroxide, directly into the toilet brush holder. This creates a disinfecting solution that will automatically clean and deodorize your brush every time you put it away.

No more worrying about germs circulating around your bathroom. Just a quick pour and you’re good to go. It’s an effortless way to maintain a hygienic toilet brush, so you can feel confident that you’re getting a truly clean bowl every time.

Hack #3: Cooking Spray for Streak-Free Showers

If you’re like me, you probably have a love-hate relationship with your shower. On one hand, it’s the perfect place to unwind and wash away the stresses of the day. But on the other, those stubborn water spots and soap scum can make it feel like a never-ending battle.

Enter the unexpected hero: cooking spray. Yes, you read that right. Grab that can of PAM or your preferred non-stick spray, and give your shower doors and walls a quick spritz. Let it sit for a few minutes, then wipe it down with a damp cloth or sponge. The oils in the cooking spray help to break down and lift away built-up grime, leaving you with a streak-free, sparkling clean surface.

I like to do this little routine once a week to keep my shower looking its best. It’s a fast, easy hack that saves me from having to scrub and scrub. Plus, it’s way more budget-friendly than buying specialized shower cleaners. Just remember to give the area a good rinse afterwards to avoid any oily residue.

Bathroom Cleaning Tools: Your New Best Friends

Now that we’ve covered some of my favorite cleaning hacks, let’s talk about the tools that will make your life so much easier. Because let’s be real, no matter how clever your tricks, you still need the right equipment to get the job done efficiently.

First up, let’s address that pesky bathroom exhaust fan. You know, the one that’s probably coated in a thick layer of dust and who knows what else? Instead of trying to tackle it with a cloth (good luck reaching those blades), grab a can of compressed air. Just a quick blast will have that fan looking brand new in no time.

And speaking of dust, don’t forget about your trusty microfiber cloths. These little wonders are true cleaning workhorses, capable of trapping even the smallest particles. I keep a stack of them in different colors so I can designate certain ones for the bathroom versus the kitchen. That way, I never have to worry about cross-contamination.

Last but not least, let’s talk about that often-overlooked bathroom essential: the squeegee. I know, I know, it might seem like an unnecessary purchase, but trust me, it’s a game-changer for keeping your shower doors and tiles sparkling. After every rinse, just give the surfaces a quick squeegee to prevent water spots and soap scum from forming. It’s the easiest way to maintain a clean, streak-free look.

So there you have it – your new cleaning dream team. With the right tools in your arsenal, tackling that bathroom grime will feel like a breeze.

The Dynamic Duo: Baking Soda and Vinegar

Now that we’ve covered some of my favorite unexpected cleaning hacks, let’s dive into a classic combination that never fails: baking soda and vinegar.

I don’t know about you, but I always have these two powerhouse ingredients on hand. They’re inexpensive, non-toxic, and can tackle just about any bathroom cleaning challenge you throw their way. From scrubbing away tough stains to unclogging drains, this dynamic duo is my go-to for a sparkling clean space.

One of my favorite ways to use them? Mix equal parts baking soda and white vinegar to create a fizzy, foaming solution. Apply it to sinks, faucets, tiles – anywhere you need a little extra oomph. Let it sit for a few minutes, then give it a good scrub with an old toothbrush or sponge. The chemical reaction between the baking soda and vinegar helps to break down grime and restore shine.

And don’t forget about that often-neglected shower curtain. Spritz it with a vinegar-based solution to keep mildew and mold at bay. Or, for a quick deodorizing boost, place a few baking soda-filled bowls around the bathroom to absorb odors.

The best part? Baking soda and vinegar are so versatile that you can use them for all kinds of cleaning tasks, from cleaning grout to unclogging drains. Talk about getting the most bang for your buck!

Bathroom Cleaning Schedule: Keeping it Manageable

Okay, let’s be real – no matter how many clever hacks you have up your sleeve, maintaining a clean bathroom can still feel like a never-ending chore. That’s why it’s important to have a solid cleaning schedule in place.

I know, I know, the thought of adding yet another task to your to-do list might make you want to run and hide. But trust me, a little structure can go a long way. It’s all about breaking down the workload into manageable, bite-sized pieces.

For starters, try to do a quick wipe-down of high-traffic areas like the sink and toilet every other day. This helps prevent buildup and keeps things looking tidy in between deeper cleanings. Then, once a week, set aside some time for a more thorough scrub-down. Hit the tiles, clean the mirrors, and tackle any stubborn stains or mildew.

And don’t forget about those often-overlooked spots, like the shower curtain, exhaust fan, and even the toilet brush holder. Make a mental note (or jot it down!) to give those areas some love every month or so. That way, you can stay on top of the deep cleaning without feeling overwhelmed.

The key is to find a schedule that works for your lifestyle and stick to it. Because let’s be honest, a clean bathroom isn’t going to maintain itself. But with a little planning and consistency, you can keep that sanctuary sparkling without sacrificing your precious free time.

Conclusion: Embrace the Joy of a Clean Bathroom

Well, there you have it – my top bathroom cleaning hacks to help you transform your space from drab to fab. From unexpected uses for vodka to the power of baking soda and vinegar, I’ve armed you with all the tools and tricks you need to tackle that bathroom grime head-on.

But beyond the practical benefits of a clean bathroom, there’s something to be said for the pure joy it can bring. Think about it – when was the last time you stepped into a squeaky-clean, freshly-scrubbed bathroom and just felt… content? It’s like a weight lifted off your shoulders, right?

That’s the power of a sparkling sanctuary. It’s about more than just getting rid of the dirt and grime. It’s about creating a space that feels calming, refreshing, and truly your own. And with the right strategies, you can make that feeling a regular part of your routine.

So, what are you waiting for? Grab your microfiber cloths, your baking soda, and your newfound confidence, and let’s get to work. Your dream bathroom awaits!

References

[1] Knowledge from https://www.youtube.com/watch?v=wIRaM8Gx80I
[2] Knowledge from https://www.apartmenttherapy.com/bathroom-cleaning-tips-hacks-36744399
[3] Knowledge from https://www.youtube.com/watch?v=dfqLSuD5Xq0
[4] Knowledge from https://www.thespruce.com/bathroom-cleaning-hacks-7964266
[5] Knowledge from https://www.youtube.com/watch?v=JgDWC9khN24
[6] Knowledge from https://www.architecturaldigest.com/story/bathroom-cleaning
[7] Knowledge from https://www.youtube.com/watch?v=HHxBENUDYDw
[8] Knowledge from https://www.bhg.com/homekeeping/house-cleaning/tips/bathroom-cleaning-hacks/

Categories
Tips

DIY Bathroom Makeover Tips

DIY Bathroom Makeover Tips

Transforming Your Bathroom on a Budget

You know the feeling – that moment when you walk into your bathroom and just feel… blah. The outdated fixtures, the drab tile, the boring vanity – it all screams “builder grade” and leaves you longing for something with a little more personality. Well, my friends, I’m here to tell you that a beautiful, custom-looking bathroom isn’t just for the big spenders. With a little creativity and elbow grease, you can transform your tired tub into a spa-like oasis – all on a shoestring budget.

I’ve been there, trust me. A few years ago, our main bathroom was in serious need of a makeover. The countertop was too low for my 6’6″ son, the tile was straight out of the 80s, and don’t even get me started on that popcorn ceiling. But with some strategic thinking and a DIY spirit, we managed to give this space a total refresh for just $1,000 [1]. And let me tell you, the results are anything but cheap-looking.

So, if you’re ready to ditch the dated decor and create a bathroom you actually enjoy spending time in, buckle up. I’m about to share all my best DIY bathroom makeover tips, from tackling tricky tile to building a custom vanity. Get ready to be inspired – and to save a whole lot of money in the process.

Raise the Roof (Literally)

Let’s start with that pesky ceiling issue. You see, my gentle giant of a son was practically hitting his head every time he tried to wash his hair. Not ideal, to say the least. So, we decided to bust out the old tile and raise the roof by about a foot. [2]

Now, I know what you’re thinking – isn’t that a major structural undertaking? Turns out, it’s not as complicated as it sounds. With a little elbow grease and some creative problem-solving, we were able to open up the space without breaking the bank. We capped off the top of the old tile with a new trim edge, painted it with a fresh coat of Rust-Oleum Tub and Tile Paint, and voila – you’d never know those weren’t original features.

The key was finding a smart solution that worked with the existing footprint of the room. By thinking outside the box, we were able to create the extra headroom my son needed without having to undergo a full-blown renovation. Sometimes, all it takes is a little lateral thinking to transform a space.

Rethinking the Vanity

Now, let’s talk vanity. When we first moved in, our bathroom had one of those builder-grade numbers – you know, the kind with the super-low countertop that makes even average-height folks feel like they’re back in kindergarten. But with a little DIY know-how, we managed to give it a serious upgrade.

First, we removed the top and raised the cabinet base by adding 1×6 boards to the existing frame. After a quick sanding, we hid the seam with a small piece of trim across the front. [2] Then, we built new doors and added some sleek black hardware from Amazon to really elevate the look.

For the countertop, we repurposed a piece of Formica from our pantry rebuild and covered it with an industrial-chic marble vinyl wrap. Seriously, you’d never know it wasn’t the real deal. And the best part? We were able to reuse the old sinks, giving them a modern makeover with matte black faucets.

The whole process took us just six weeks and $1,000, but the transformation is nothing short of jaw-dropping. By getting a little creative with the materials and not being afraid to think outside the box, we were able to create a custom-looking vanity on a budget.

Tile Transformation

Now, let’s talk about that dated tile situation. Our bathroom was rocking some serious 80s vibes, with a speckled beauty that just didn’t jibe with the look we were going for. But instead of ripping it all out and starting fresh ($$$$), we found a genius solution that breathed new life into the space.

First, we tackled the grout issues, learning how to regrout the tub like pros. [2] Then, we used Rust-Oleum’s Tub and Tile kit in white to give the existing tile a facelift. Yep, you read that right – we painted it! And let me tell you, the difference is nothing short of jaw-dropping.

But we didn’t stop there. For the floors, we opted for Rust-Oleum’s new HOME Floor Coating in Aged Gray, which transformed the dated linoleum into a sleek, modern look in just six hours. [2] Talk about a budget-friendly solution!

The key here was being willing to get a little creative and not being afraid to try something outside the norm. Sure, ripping everything out and starting fresh would have been the “easy” route. But where’s the fun in that? By thinking outside the box, we were able to give our bathroom a total refresh for a fraction of the cost.

Lighting and Mirrors

No bathroom makeover would be complete without some serious lighting and mirror upgrades, am I right? And let me tell you, we really went to town in this department.

First, we bid farewell to that single, builder-grade light fixture and installed two gorgeous black and brass beauties from Home Depot. [2] Talk about a game-changer! These stunners really help to anchor the vanity area and add a touch of industrial flair.

But the real showstopper has to be that epic feature wall. Inspired by my love for limewash, we installed a thin brick veneer and then layered on three different shades of Romabio Paints’ Limewash to create an aged, weathered look. [2] Pair that with the custom cedar-framed mirrors we made for just $22 each, and you’ve got a bathroom that looks like it was plucked straight out of a high-end design magazine.

Putting It All Together

At the end of the day, our $1,000 DIY bathroom makeover is proof that you don’t need a huge budget to create a space that looks and feels like a million bucks. It’s all about thinking creatively, being willing to get a little scrappy, and not being afraid to try something new.

From raising the ceiling to refreshing the tile, every single step of this transformation was a labor of love. But the end result? Absolute magic. My gentle giant of a son can now wash his hair without fear of hitting the ceiling, and we all get to enjoy a bathroom that feels custom-made, not cookie-cutter.

So, if you’re staring at your own outdated bathroom and feeling overwhelmed, take a deep breath. With a little elbow grease and a whole lot of imagination, you can transform that tired tub into a spa-like oasis – all on a budget. Trust me, I’ve been there, and the payoff is so, so worth it.

Now, who’s ready to get their DIY on?

References

[1] Knowledge from https://notinggrace.com/1000-diy-bathroom-makeover/
[2] Knowledge from https://www.youtube.com/watch?v=kR4znQ8rMlc

Categories
Tips

Inexpensive Bathroom Update Ideas

Inexpensive Bathroom Update Ideas

Bathrooms on a Budget: Transforming Your Space Without Breaking the Bank

Ah, the humble bathroom – a sanctuary of peace and porcelain. It’s the one room in our homes where we start and end our days, yet it’s often the most neglected when it comes to home renovations. Why? Well, let’s just say the average bathroom remodel can cost an eye-watering $10,000 or more. Ouch!

But fear not, my frugal friends. I’m here to share a treasure trove of budget-friendly bathroom update ideas that will have your space looking like a million bucks (without the million-dollar price tag). Whether you’re dealing with a tiny powder room or a full-sized en-suite, these savvy solutions will help you create the bathroom of your dreams without draining your life savings.

Paint it Pretty

Let’s start with the most obvious (and affordable) option: a fresh coat of paint. [1] I’m telling you, there’s nothing that can transform a space quite like a pop of color. And when it comes to bathrooms, the brighter the better. Think soothing seafoam greens, crisp whites, or even a bold accent wall in a vibrant shade.

Now, I know what you’re thinking – “But what about the humidity? Won’t the paint just peel right off?” Fear not, my paint-shy pals. With the right prep work and the right paint formulas, you can achieve a flawless, long-lasting finish. Just make sure to use a bathroom-specific paint that’s designed to withstand moisture and steam. Trust me, it’ll be worth the extra effort when you see how much life a little color breathes into your space.

Grout Groovy

If painting isn’t your forte, may I introduce you to your new best friend: GroutRenew. [2] This magical elixir is a game-changer for tired, dingy grout. Simply apply it to your existing grout lines, and voila – instant refresh! It comes in a variety of colors, so you can perfectly match your existing tiles or even opt for a whole new look.

But the best part? It’s not just a cosmetic fix; GroutRenew is also a sealant, so it’ll help protect your grout from future stains and discoloration. No more scrubbing for hours, just a quick application and you’re good to go. It’s like a grout facelift, without the plastic surgery price tag.

Vanity Makeovers

Now, let’s talk vanities. [3] We all know that replacing an entire vanity can be a costly endeavor, but who says you have to start from scratch? If your existing vanity is in decent shape, consider giving it a little makeover instead.

A fresh coat of paint can work wonders, transforming that dated oak monstrosity into a sleek, modern masterpiece. Or, if you’re feeling extra crafty, why not try your hand at installing some new hardware? Swapping out those tired old knobs and pulls for something a little more stylish can instantly elevate the look of your bathroom.

And the best part? You don’t have to be a DIY superstar to pull this off. With a little elbow grease and a quick trip to your local hardware store, you can give your vanity a whole new lease on life – no contractor required.

Tile Tricks

Ah, tile – the bane of every budget-conscious homeowner’s existence. Or is it? [3] With a little creativity and a keen eye for design, you can achieve a high-end tile look without the hefty price tag.

For starters, consider using simple white subway tiles as your base. They’re affordable, timeless, and can serve as a beautiful blank canvas for your design. Then, add a pop of personality with a few strategically placed accent tiles. Think sleek black liners, inlaid mosaic patterns, or even a fun, patterned tile for your floor.

And let’s not forget about the power of paint. If your existing tiles are looking a little worse for wear, a few coats of tile paint can give them a whole new lease on life. Just be sure to use a formula that’s specifically designed for bathrooms, and you’ll be good to go.

Accessorize with Attitude

Now that we’ve covered the big-ticket items, let’s talk accessories. [1] These little touches may seem insignificant, but they can make a world of difference in your bathroom’s overall aesthetic.

Start with something as simple as new towels, bath mats, and a fresh shower curtain. Swap out those dull, dated linens for something with a little more personality – think bold patterns, vibrant colors, or even a touch of metallic glam.

And don’t forget about the little things, like new light fixtures, faucets, and hardware. These small-but-mighty upgrades can instantly elevate your space, giving it a high-end, custom-designed feel. The best part? You can often find these items for a fraction of the cost of a full-blown renovation.

Repurpose and Reimagine

Finally, let’s talk about the power of repurposing. [3] Sometimes, the key to a budget-friendly bathroom update lies in finding new life for old, forgotten items.

Take that worn-out dresser, for example. With a little elbow grease and a coat of paint, it can be transformed into a one-of-a-kind vanity. Or how about that vintage claw-foot tub you scored at a flea market? Rather than shelling out for a brand-new tub, give it a little TLC and let it become the focal point of your space.

The possibilities are endless when you start thinking outside the box. So, dust off your creativity, hit the thrift stores, and get ready to breathe new life into your bathroom on a budget.


Conclusion

There you have it, folks – a treasure trove of budget-friendly bathroom update ideas that will have your space looking like a million bucks (without the million-dollar price tag). From paint and grout to vanity makeovers and repurposed treasures, the key is to approach your bathroom renovation with a little creativity and a whole lot of resourcefulness.

So, what are you waiting for? Grab your paintbrushes, your GroutRenew, and your bargaining skills, and get ready to transform your bathroom into the oasis of your dreams. Trust me, your wallet (and your inner designer) will thank you.

References

[1] Knowledge from https://www.bhg.com/bathroom/remodeling/projects/quick-bathroom-updates/
[2] Knowledge from https://www.greysnaildesigns.com/beautiful-budget-bathroom-update-ideas
[3] Knowledge from https://www.bhg.com/bathroom/small/budget-small-baths/