
Introduction to DIY Bathroom Remodeling
Remodeling your bathroom can be one of the most rewarding DIY projects you can take on in your home. Not only does it allow you to update and customize your space, but it can also add significant value to your home when done properly. However, as with any major home renovation project, having the right tools is essential for success.
When taking on a DIY bathroom remodel, you have the option of purchasing all the necessary tools yourself or hiring them as needed. Tool hire allows you to access professional-grade equipment without the high upfront costs of buying everything outright. With the right planning and preparation, hiring tools can be an affordable and convenient way to complete your bathroom renovation.
This comprehensive guide will walk you through everything you need to know about tool hire for a DIY bathroom remodel. We’ll discuss the benefits of hiring tools, the essential equipment you’ll need for each stage of your project, what to look for in a tool hire company, safety tips, and much more. Let’s get started!
Why Choose DIY for Your Bathroom Remodel?
There are many great reasons to take the DIY route when remodeling your bathroom:
- Cost savings – Completing the work yourself will be significantly cheaper than hiring contractors. You save on labor costs while only paying for materials and any hired tools.
- Customization – You can customize your new bathroom to suit your specific taste and needs when you do it yourself.
- Sense of accomplishment – There’s a real feeling of achievement when you successfully remodel an entire room with your own hands.
- Learn new skills – A remodel project allows you to develop useful skills in areas like tiling, plumbing, electrical work, carpentry and more.
- Control over schedule – You can work at your own pace and on your own timeline, without having to accommodate contractor schedules.
As long as you have the time and motivation, a DIY bathroom remodel can be extremely rewarding. Just be sure to educate yourself and don’t take any shortcuts. Hiring the right tools will also go a long way towards making your project a success.
The Importance of Proper Tools in a Bathroom Remodel
The right tools allow you to complete each stage of your bathroom remodel efficiently, correctly, and safely. With professional-grade equipment hired specifically for the project, you’ll get optimal results as you demolish, build, install, repair, construct, and finish your new bathroom.
Attempting a major remodel like this without the proper tools is difficult and often dangerous. Low quality or incorrect tools are more likely to cause injuries or damage. They can also lead to frustration and mistakes that hamper the quality of your finished bathroom.
Hired tools are designed for intensive use on construction sites. They have sufficient power and durability for an involved project like a bathroom remodel. When combined with the right safety gear, proper tools used correctly will get the job done safely.
Don’t take shortcuts when it comes to equipping yourself for a DIY bathroom renovation. Investing in tool hire ensures you’ll have everything you need to complete the project efficiently and safely while saving money in the long run.
Understanding the Concept of Tool Hire
Tool hire simply means renting tools and equipment from a rental company for the duration of your project, then returning them when the job is complete. This allows you affordable access to professional tools without having to buy everything outright.
Common rental items needed for bathroom remodeling include:
- Demolition tools – sledgehammers, pry bars, etc.
- Power tools – drills, sanders, circular saws, jigsaws, etc.
- Plumbing tools – wrenches, cutters, torches, etc.
- Tile cutting and laying tools
- Flooring tools – nail guns, staplers, etc.
- Painting supplies – sprayers, rollers, brushes, etc.
- Safety gear – masks, goggles, ear protection, etc.
When the project is finished, you simply return the tools in good condition. Make sure you understand any rental contracts and policies to avoid surprise fees.
Tool hire supplies DIYers with essential equipment they likely don’t own or want to purchase. It allows everyone access to the tools needed to take on big home renovation projects.
Benefits of Hiring Tools for Your Bathroom Remodel
Here are some of the major benefits that make tool hire a smart choice:
- Cost savings – No need to invest in buying expensive tools you may only use once. Just pay rentals fees for the duration of the project.
- Access to professional equipment – Get high-end tools you likely wouldn’t buy as a DIYer.
- No storage – Don’t have to find space to store tools when the job is done. Simply return them.
- Variety – Tool hire companies offer the complete range of equipment needed for any project. No gaps in what you need.
- Convenience – Easy access to tools and no maintenance or transportation needed. Companies often offer delivery too.
- Training – Many tool hire companies provide guidance on how to properly operate equipment.
- Safety – Well-maintained rental tools have proper safety features.
For occasional DIYers, the benefits of tool hire make complete sense for equipping a bathroom remodel!
Essential Tools for a DIY Bathroom Remodel
Here are some of the essential categories of tools you’ll need to hire for your DIY bathroom remodel:
Demolition Tools

- Sledgehammers
- Pry bars
- Crowbars
- Reciprocating saws
- Circular saws
- Utility knives
- Shop vacuums
- Wheelbarrows
- Dust masks
- Safety goggles
Plumbing Tools
- Basin wrenches
- Pipe cutters
- Torch kits for soldering
- Drain augers
- Plungers
- Buckets
Tile Cutting and Laying Tools
- Tile saws
- Tile cutter tools
- Tile spacers
- Tile removing tools
- Mixing buckets
- Tile adhesive spreader
- Grouting floats
Flooring Tools
- Laminate floor cutters
- Floor nailers
- Edge trimmers
- Hand saws
- Utility knives
Electrical Tools
- Voltage tester
- Fish tape
- Wire strippers
- Cable cutters
- Junction boxes
- Electrical tape
Painting Supplies
- Paint sprayers
- Paint rollers
- Brushes
- Drop cloths
- Paint trays
- Paint scrapers
Safety Gear
- Dust masks
- Safety goggles
- Ear protection
- Knee pads
Having access to these essential tool categories (and more) via hire allows you to carry out every stage of your bathroom remodel successfully.
Safety Equipment for Your DIY Bathroom Remodel
Safety should always be your top priority when taking on DIY projects. Protect yourself and others by using proper safety gear when operating tools and machinery:
- Dust mask – Protects against dangerous inhalation of airborne particles during demolition. Look for an N95 rated mask.
- Safety goggles – Shield eyes from flying debris which can cause permanent damage. Get impact resistant lenses.
- Ear protection – Reduces noise exposure that can lead to hearing loss. Choose earmuffs or disposable earplugs.
- Knee pads – Safeguard knees during flooring installation and low angle work. Get ergonomic gel pads.
- Steel-toe boots – Protect feet from falling objects. Look for lightweight options with metatarsal guards.
- Gloves – Guard hands from blisters, cuts and abrasions. Get heavy duty multi-purpose gloves.
- Dust sheets – Reduce clean up time and protect existing finishes from damage during remodeling.
- First aid kit – Contains essentials for treating minor injuries. Have kit easily accessible.
Never take shortcuts when it comes to protective gear – it’s an investment in your safety and health.
The Role of a Good Plan in Bathroom Remodeling
Careful planning is crucial to the success of any bathroom remodeling project. Here are some key elements your plan should include:
- Detailed drawings/plans – Have accurate drawings of the existing layout along with your proposed changes. Include measurements.
- Materials/shopping list – Make a comprehensive list of every item, material and tools required. Check off items as you go.
- Schedule – Create a realistic day-by-day or week-by-week schedule from demolition to completion. Factor in potential delays.
- Contractor contacts – List names and numbers of any contractors you need like plumbers, electricians etc.
- Budget – Track projected costs versus actual spending for materials, labour, tools, etc. Update regularly.
- Permits – Look into whether you need any permits based on the scope of your remodel. Always get required permits.
Take time upfront to make thorough, thoughtful plans. Your bathroom remodel will proceed smoothly and efficiently if you start with an organized process mapped out.
How to Create a Budget for Your Bathroom Remodel
Creating an accurate budget is key to keeping your bathroom remodel affordable. Here are some tips:
- Research material/labour costs using reputable home renovation sites. Look for average per square foot costs.
- Get multiple quotes from contractors on any work you need subcontracted – plumbing, electrical, demolition etc.
- Add up costs of all materials needed. Be sure to factor in extra materials for breakages and mistakes.
- Research tool rental costs. Call rental companies for quotes and average project tool budgets.
- Factor in permit costs if required.
- Add contingencies for unexpected expenses that may arise like repairs or delays.
- Keep detailed records of all actual costs as you complete the remodel. Track against your budget.
- Look for ways to save, like buying fixtures and materials at discount retailers or waiting for sales.
Having a well-researched budget will ensure there are no financial surprises so your project stays on track. Adjust the scope if needed to align with your budget.
Understanding the Scope of Your Bathroom Remodel
Clearly defining the scope and scale of your bathroom remodel is crucial. This determines the tools you’ll need, how much time it will take, your costs, and the order in which tasks need to be completed. Important factors defining scope include:
Budget – How much can you afford to spend? Get quotes on must-have items to make sure they fit your budget.
Timeline – Do you need the bathroom done quickly, or can the remodel span weeks/months? Length of project impacts tool rentals.
Layout changes – Are you keeping the existing footprint or moving/adding fixtures like shower, sink etc?
Materials – Are you using luxury materials like stone counters or standard like laminate?
Tilework – Standard subway tile or intricate pattern tiles throughout? Tilework impacts tools needed.
Plumbing – Are you updating faucets and fixtures only or doing full replacement?
Electrical – Similar to plumbing, are you doing minor updates only or full rewiring?
Clearly scoping out your plans is crucial before finalizing tool rentals and starting demolition. Know exactly what you’re taking on so there are no surprises down the road in terms of budget and timelines.
Preparing Your Bathroom for Remodeling
Proper prep work before you begin demolition and construction will make the process smoother:
- Empty everything out of the bathroom, including cabinets, drawers and shower/tub. Store items safely.
- Disconnect and cap water supply lines. Turn off water at the main home supply line.
- Disconnect plumbing drains. Close drain lines with plugs.
- Disconnect lighting, fans and outlets. Shut off home’s main electrical panel.
- Remove existing fixtures – vanity, toilet, shower etc.
- Drain water heaters and water lines. Shut off home heating system.
- Lay down drop cloths in the bathroom and just outside to protect from debris and dust.
- Have necessary tools ready and easily accessible – don’t start work until everything needed is on hand.
Thorough pre-remodel prep sets the stage for the demolition and construction process to go smoothly and efficiently.
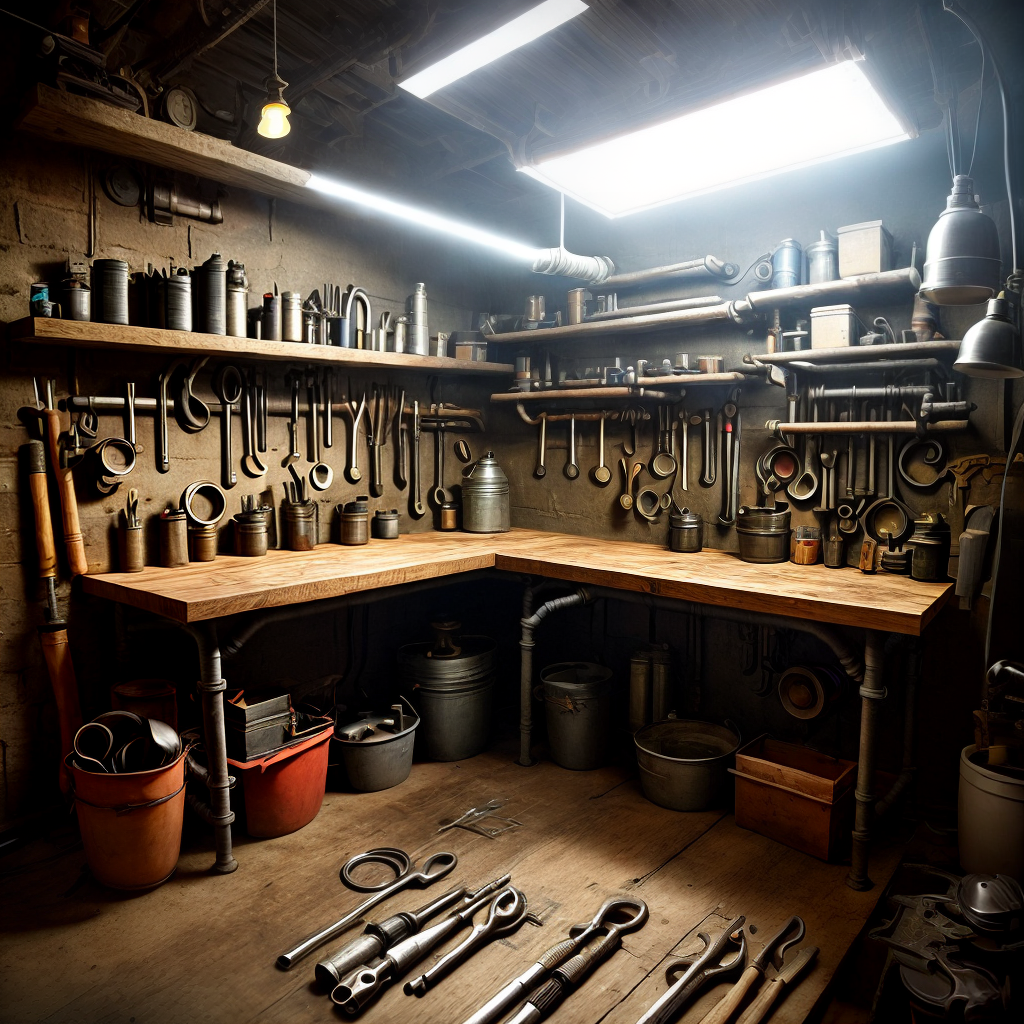
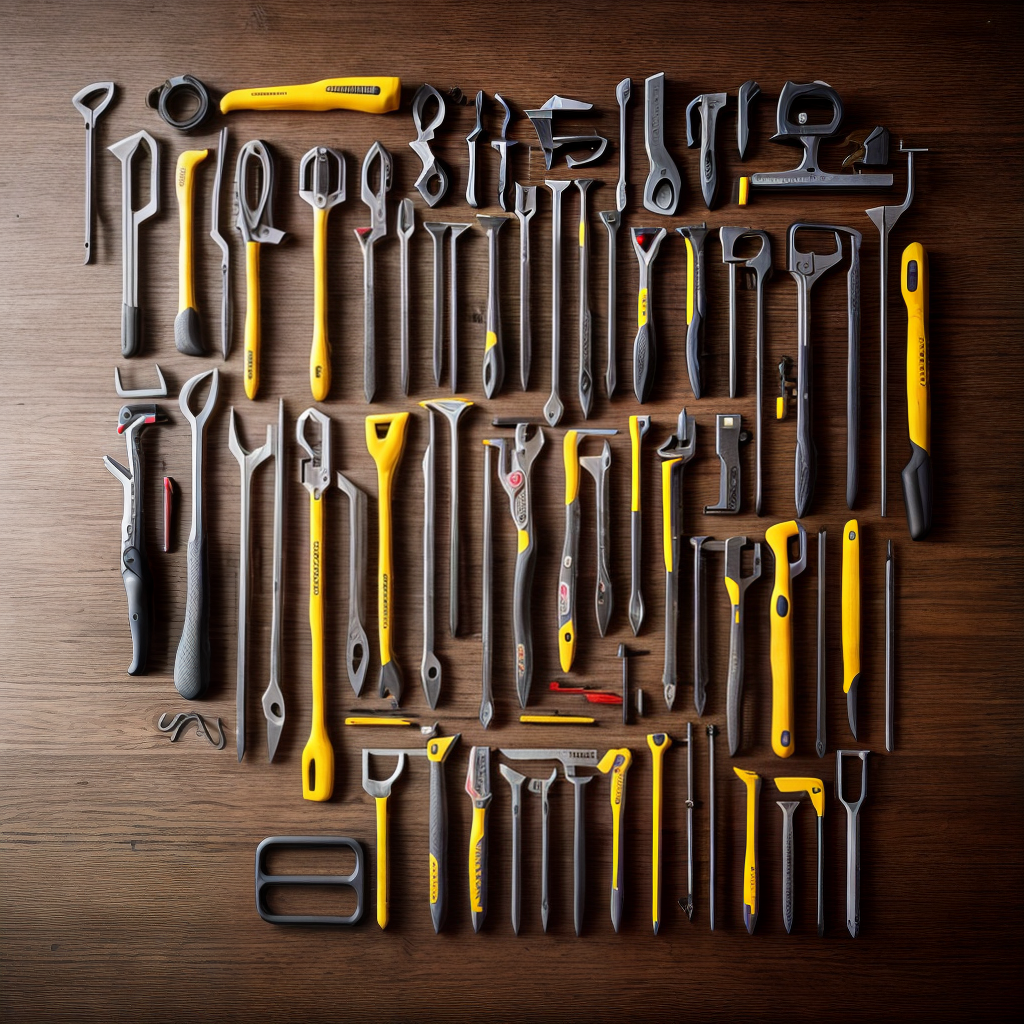
Tools for Demolition and Removal
Demolition is often the first step of a bathroom remodel and requires tools that can safely and effectively rip out and clear existing finishes and fixtures. Useful demolition tools include:
Sledgehammers
Sledgehammers provide brute manual force for breaking down walls and knocking out tile floors/walls. Select size based on your strength and swing capability.
Pry Bars
Pry bars allow you to easily rip out cabinets, nail-down flooring, door frames and trim. Look for sturdy, forged steel bars 2-3 feet long.
Reciprocating Saws
Reciprocating or “Sawzall” saws cut through sink/toilet plumbing, wall studs, flooring and more during demolition. Use wood/metal specialty blades.
Flat Pry Bars
Flat pry bars give better leverage when removing flooring compared to claw bars. Get 18+ inch length for comfort and control.
Utility Knives
Utility knives slice through sealants, built up gunk, and small demolition tasks. Have an abundance of replacement blades on hand.
Wheelbarrows
Wheelbarrows efficiently transport heavy demolished materials like broken tile and wood out for disposal. Look for large rubber tires.
Shop Vacuums
Shop vacuums help control dust and debris during demolition. Look for larger capacity models – at least 6 gallons.
The right demolition tools make starting a bathroom remodel much easier, safer and cleaner. Don’t demolish by hand – you’ll quickly tire out and be at risk for injury.
Tools for Installing New Fixtures
Once demolition is complete, it’s time to install exciting new fixtures like sinks, showers, tubs and toilets. Useful tools include:
Crescent Wrenches
Crescent wrenches securely grip sink drains, supply tubes, p-traps and more while installing. Have multiple sizes up to 10 inches.
Basin Wrenches
Basin wrenches easily reach and turn nuts securing faucets, supply lines and p-traps under sinks and vanities.
Channel Locks
Channel locks provide adjustable grip for holding/twisting pipes, flare fittings, drains and more when installing new plumbing.
Hacksaws
Hacksaws cut pipes, tubing, and plastic parts to length where needed. Select plumber’s blades for easier cuts.
Cordless Drills
Cordless drills drive screws to secure fixtures, faucets, handles and more. Bring charged batteries! 18V+ is best.
Rubber Mallets
Rubber mallets protect fixtures from damage while tapping them securely in place. Choose mallets with larger striking surface.
Stock up on these essentials when gearing up to install the exciting new components of your remodeled bath.
Tools for Plumbing Work in Bathroom Remodeling
Completing the plumbing system is a major part of any bathroom renovation. Specialized tools for this include:
- Pipe wrenches – Adjustable wrenches that grip rounded pipes for twisting and tightening. Have several sizes.
- Tubing cutters – Ratcheting cutters that neatly sever copper tubing for supply lines. Keep extra cutter wheels.
- Hacksaws – For quickly cutting plastic piping to length. Use plumber’s blades.
- Propane torch – Used with lead-free solder to join copper pipes. Get an adjustable flame torch.
- Flux brushes – Applies flux to copper joints to prep for soldering. Have at least 2 clean brushes.
- Sandcloth – Necessary for scuffing and cleaning pipes before soldering. 320+ grit is ideal.
- Emery cloth – Removes corrosion and polishes compression fittings for a tight seal. Get medium and fine grits.
- Pipe threader – Cuts pipe threads for connecting to fixtures. Often rented instead of purchased.
- Tube cutter oil – Prevents copper burrs and lubricates tubing and pipe cutters. Have plenty on hand.
Invest in quality plumbing tools so all your new water supply and drain lines are installed properly.
Tools for Electrical Work in Bathroom Remodeling
Updating lighting, switches, and outlets is often part of a bathroom remodel. Useful electrical tools include:
- Voltage tester – Test wires for current before working. Look for digital models for accuracy.
- Wire strippers – Needed for safely stripping sheathing when splicing wires. Self-adjusting strippers save time.
- Junction boxes – Enclose wire connections. Have variety of sizes for different uses.
- Fish tape – Runs wires through walls. Get sturdy steel models that hold up.
- Cable cutters – Makes neat cuts through thick electrical cable. Invest in heavy duty models.
- Wire nuts – Securely connect spliced wires. Have full range of sizes.
- Electrical tape – Insulates wire connections. Buy quality brands that offer a tight seal.
- Pliers – Needle nose and channel-lock style useful for gripping, bending and cutting.
Safe, professional electrical work requires quality specialty tools. Don’t compromise on equipment.
Tools for Tiling and Flooring
One of the most visible parts of a bathroom remodel is the new tile and flooring. Must-have installation tools include:
Tile Saws
Wet tile saws cut tile and stone cleanly and accurately. Look for adjustable fences and folding stands.
Tile Nippers
Tile nippers cleanly trim and shape tiles around obstacles and for detailed cuts the tile saw can’t make.
Tile Spacers
Tile spacers keep consistent grout lines between tiles as you lay them. Have a variety of sizes.
Tile Adhesive Spreaders
Notched trowels spread tile adhesive evenly and smoothly on the underlayment. Check desired notch size.
Mixing Buckets
Buckets thoroughly mix tile adhesive, grout, and thinset mortar. Get large 6+ gallon tubs.
Grouting Floats
Grouting floats force grout into joints cleanly and smoothly. Have multiple sizes for versatility.
Laminate Floor Cutters
Specialized saws cut laminate planks cleanly and accurately with no splintering. Look for 3-5 blade models.
Rubber Mallets
Rubber mallets tap laminate flooring planks securely together without marring the finish.
Floor Nailers
Pneumatic floor nailers quickly secure tongue and groove flooring. Use proper cleats for flooring type.
Table Saws
Table saws trim doors and jambs to allow for new floor height. Seek sturdy portable saws with guide fences.
Having the right tools takes the frustration and uncertainty out of tiling and installing new floors in a bathroom remodel.
Tools for Painting and Finishing
The final stage of your bathroom remodel is paint and finishes. Useful painting tools include:
Paint Sprayers
Paint sprayers distribute primer and paint quickly and evenly on walls/ceilings. Look for adjustable control knobs.
Paint Rollers
Rollers apply new paint smoothly and quickly. Have variety of nap sizes for different finishes.
Brushes
Trim, angled and roller brushes reach tight corners and edges that rollers can’t. Have multiple high quality brushes.
Drop Cloths
Drop cloths protect existing floors/fixtures from drips, spills and splatter. Get canvas cloth and plastic sheeting.
Paint Scrapers
Scrapers remove paint drips, spills and mistakes. Opt for plastic scrapers to prevent scratching.
Painter’s Tape
Painter’s tape masks off trims, edges and fixtures you don’t want painted. Delicate Surface tape avoids damage.
Paint Trays
Trays hold paint rollers and brushes during painting. Look for rubberized trays that don’t slide.
Proper prep work and the right painting tools will result in a smooth, professional paint finish that completes your new bathroom beautifully.
Specialty Tools for Unique Bathroom Features
If your bathroom remodel includes special features like glass block windows, towel warmers or steam showers, you may need additional specialty tools like:
- Glass block cutters – Cuts glass blocks cleanly without shattering. Have replacement cutter wheels ready.
- Mortar tools – Trowels, grout bags and floats for installing glass block and tile.
- Oscillating multi-tools – Detail sanders to grind openings for outlets behind glass block. Variable speed is best.
- Silicone caulk guns – Adheres glass block and finishes plumbing seals cleanly. Buy quality guns that don’t leak.
- Copper tubing bender – Shapes copper tubing for towel warmers. Use correct size bender for pipe diameter.
- Pex tubing cutter – Cuts flexible Pex tubing for steam shower units. Ensure sharp cutting wheels.
- Steam shower sealing tools – Caulk guns, grout float, mixing paddles to seal steam unit.
Research all the specialty tools you’ll need for any custom bathroom elements in your remodeling plans.
How to Choose the Right Tools for Your Project
Choosing the right tools comes down to properly matching the tools to the scope and specifics of your bathroom remodel. Consider factors like:
- The types of fixtures you’re installing – standard bathtub or a whirlpool tub has different tool needs.
- The age of your home – are you dealing with modern or old plumbing lines?
- How much tilework is involved – large format tiles need different tools than intricate mosaic tiles.
- What types of surfaces you’re demolishing – ceramics tiles vs glued laminate floors demand different demolition tools.
- Your level of DIY experience – opt for simpler manual tools if less experienced.
Don’t underestimate your tool needs, but also avoid renting equipment you don’t really require. Outline your project specifics then carefully match tools to the job. Ask the tool hire company for specific recommendations.
When to Hire vs. When to Buy Tools
Deciding between hiring tools or buying depends on factors like:
Cost
- Hiring pros – Only pay rental fees without owning equipment long-term
- Buying pros – Eventually pays for itself if doing regular DIY
Usage
- Hiring pros – Access tools for a single project
- Buying pros – Have tools whenever you need them
Storage
- Hiring pros – Don’t need space to store tools long-term
- Buying cons – Need workshop or garage space to store tools
Maintenance
- Hiring pros – Avoid upkeep of tools
- Buying cons – Must maintain, repair and replace owned tools
For a major one-time project like a bathroom remodel, hiring tools generally makes more sense for the average DIYer. Calculate total rental fees to decide on the best option for your needs and budget.
Finding a Reliable Tool Hire Company
Look for these traits when choosing a tool hire company:
- Reputation – Check reviews and ask for referrals to find well-regarded companies. Avoid unestablished, sketchy operations.
- Range of inventory – Tool libraries should offer all the equipment you need for bathroom projects. Look for plumbing, electrical, tile and flooring tools.
- Flexible rental terms – Accommodates how long you need tools. Avoid companies that rush checkouts.
- Delivery options – Offers delivery and pickup so you don’t have to transport tools.
- Training – Provides guidance on how to safely operate equipment. Look for hands-on demos.
- Well maintained equipment – Tools should be in good shape, not worn out or defective. Inspect thoroughly.
- Fair pricing – Reasonable fees for daily, weekly or monthly rentals. Avoid sketchy hidden fees.
Take time to find a tool rental company that meets your needs and enables your project’s success.
Understanding Tool Hire Contracts
Before hiring tools, understand key elements of tool rental contracts:
- Rental rates – Have clear agreed upon rates for daily, weekly and 4 week tool rentals. Compare company rates.
- Damage waivers – Optional fees that cover damage to tools while renting. Decide if worth expense.
- Delivery/pickup – Policies on delivery timeframes and charges. Arrange time and location for returns.
- Cleaning requirements – Some companies require tools be cleaned before return to avoid fees.
- Late fees – Significant late fees often apply to tools returned past due date. Avoid by clearly noting dates due.
- Extensions – Understand costs and policies around extending a tool rental if project runs over.
- Restricted tools – Specialty tools may have restrictions, extra deposits or require proof of certificate to rent.
Never feel rushed into signing a tool hire contract. Read carefully and understand all fees and policies to avoid surprises.
Tips for Saving Money on Tool Hire
Tool rentals have costs, but you can save with these tips:
- Only rent tools you can’t buy reasonably. Don’t rent low cost consumables like painter’s tape.
- Compare rates across multiple tool hire companies. Avoid assumptions that bigger is cheaper.
- Look for bundle deals on common tool combinations for projects.
- Only rent tools for duration you need them. Return promptly to avoid unneeded extra rental days.
- Buy accessories like drill bits and sandpaper yourself. Tool companies charge premium rates.
- Avoid unnecessary damage waivers on simpler or cordless tools.
- Share tool rentals with DIY friends if projects align. Split costs.
- Clean tools thoroughly before return to avoid cleaning surcharges.
- Ask about customer loyalty discounts for repeat business.
With smart planning and savvy moves, you can absolutely reduce your tool rental costs and stay on budget.
Safety Tips for Using Hired Tools
Follow these tips for safely handling rented tools on your DIY bathroom remodel:
- Carefully read tool manuals and get hands-on demos from the hire company on how to properly use tools before starting work. Don’t guess.
- Inspect tools thoroughly at rental pickup. Ensure they are undamaged and in good working order.
- Wear proper protective gear like goggles, dust masks, gloves and ear protection. Never take shortcuts on safety.
- Ensure you have the right accessories – blades, bits, wheels, batteries etc. – for each tool. Use as directed.
- Check tools for defects like frayed cords or excessive wear before each use. Return defective equipment immediately for replacements.
- Keep rented tools locked up in a safe cleared space when not in use to prevent injury or theft.
- Avoid hazards like wet areas, cluttered workspaces, trip risks, exposed cords and any distractions when operating tools.
Using hired tools safely takes knowledge, preparation and full focus on the work. Stay cautious to avoid accidents.
Returning Hired Tools: What You Need to Know
Follow rental company policies to avoid extra charges when returning tools:
- Return all tools and accessories by the due date or extend rental period if needed. Late fees are steep.
- Make sure tools are clean and undamaged. You may be charged repair or cleaning fees for excessively dirty tools not properly maintained.
- Check tools against your rental receipt to ensure all items are accounted for. You don’t want to pay for a missing tool.
- Ask for a return receipt showing when you returned tools. This provides proof if any disputes about late gear arise.
- Inspect tools with staff at returns desk before leaving. Point out any existing damage so you are not blamed.
- Replace expendables like used bulbs, filters and blades yourself if required by contract.
- Keep tool rental receipts and contracts on file in case an issue arises later on.
Following good rental tool etiquette ensures fair wear-and-tear and timely returns to avoid surprise fees.
Case Study: Successful Bathroom Remodel with Hired Tools
James, a DIY enthusiast, completed a stunning bathroom remodel exclusively using tools hired from a local equipment rental company. Here is how it went:
Demolition – By hiring a demolition hammer, pry bar and reciprocating saw for the removal process, James was able to rip out the dated tile, vanity, and fixtures quickly and safely without hand demolition.
Plumbing – For installing the new sink, faucet and toilet, specialized tools like basin wrenches, channel-locks, and a tubing cutter allowed James to get the job done right.
Tiling – Instead of buying expensive specialized tile saws and nippers, James simply hired them for the duration of the tile installation. They delivered clean precise cuts.
Painting – An electric paint sprayer was hired to quickly and evenly prime and paint the bathroom. This saved hours of time and energy versus rolling paint.
In total, hiring tools for the month-long remodel cost James under $500 as opposed to thousands of dollars in purchases. Without access to hired tools, this project would not have been possible as a DIYer. The results were stunning!
Common Mistakes to Avoid in DIY Bathroom Remodeling
Learning from other’s mistakes helps you avoid common pitfalls like:
- Attempting extensive plumbing or electrical work without sufficient knowledge or hiring pros. This often ends in faulty installations or code violations.
- Not pulling all required local permits. Unapproved work could force you to redo projects.
- Buying trendy finishes that date quickly vs. classic styles that endure. Going too trendy results in frequent remodeling.
- Cheaping out on important but unglamorous items like waterproofing and ventilation. This leads to moisture and mold issues.
- Doing layer-upon-layer remodels vs. fully gutting and starting fresh. Eventually older layers causing problems need addressing.
- Focusing completely on aesthetics but ignoring important factors like accessibility, storage and lighting. Form over function causes long-term issues.
- Underestimating costs for material and labor. Lack of budgeting leads to significant financial stress.
- Not following tool safety protocols. This results in hazardous situations and injuries.
Learn from other DIYer’s mistakes and avoid easily avoided issues on your own bathroom remodel.
How to Handle Unexpected Issues During Remodeling
No matter how carefully you plan, surprises can arise during a bathroom remodel. Here are some tips for handling unexpected issues:
Damaged underlayment – If the sub-floor or drywall beneath old finishes is damaged, you may need to replace sections. Have extra material on hand just in case.
Hidden leaks – Leaks inside walls often only emerge after demolition. Be prepared to cut into walls to find the source, then make repairs.
Electrical/plumbing issues – Faulty existing electrical or plumbing may require re-running wiring or pipes. A pro may be needed.
Permit challenges – Local codes and permit requirements may force you to alter plans. Be flexible.
Out-of-stock materials – Order fixtures and specialty materials with long lead times early to avoid delays if stocks run out.
Tool breakdowns – Have backup tools or alternate options if a rented tool breaks down mid-job.
Remaining flexible and budgeting extra time and funds for the unexpected will help you handle any curve balls during your remodel.
Maintaining Your Tools During the Remodel
Keep tools from rental companies functioning optimally:
- Store tools in a dry, secure area when not in use. Cover large equipment with tarps or plastic.
- Transport tools safely. Don’t simply toss them in the back of a truck unrestrained.
- Clean tools regularly during the project to remove built up debris and dust. Follow rental company protocols.
- Check for issues like oil drips, excessive wear and loose nuts/bolts/fittings periodically. Address issues immediately.
- Replace parts like screens, filters, blades etc. as recommended to keep tools running smoothly.
- Ensure tools stay lubricated and charged as needed. Maintain chargers.
- If a tool breaks despite proper care, contact the rental company immediately to arrange a replacement. Don’t try home repairs.
Caring for rented tools properly ensures they remain in good shape throughout your project and avoids repair costs.
Post-Remodel Cleanup: Tools and Tips
Thorough cleanup completes your bath remodel beautifully:
- Use shop vacuums, mops and brooms to remove dust, dirt and debris from all surfaces, corners and crevices.
- Empty shop vacs as soon as dust bins are full to prevent clogs. Replace filters as needed if excessively dirty.
- Clean all new fixtures like tubs, showers, sinks etc. Remove construction dust using non-abrasive cleaners and microfiber cloths.
- Use painter’s tape to lift up small drywall flakes and splatters. Avoid abrasive scrapers.
- Spot clean tool marks and scuffs on walls with very mild cleaner and soft rag. Start gently.
- Remove paint splatters on glass using plastic paint scraper and wood cleaner. Avoid damaging glass.
- Sweep and mop tile/vinyl floors several times with diluted cleaner to remove hidden dust and set the grout.
- Run humidifier and dehumidifier to remove drywall dust and any humidity from new paint and adhesives.
- Allow 100% cure times for grout and caulk. Avoid wet cleaning initially which can cause cracks.
- Use air filtration units running 24/7 during and after the remodel to capture fine particulates.
A sparkling clean new bathroom makes all your hard work worthwhile.
DIY Bathroom Remodel: A Rewarding Experience
After putting in long hours and hard work on your DIY bathroom remodel, take pride in seeing your vision come to life in the finished space. Enjoy soaking in the satisfaction of having tackled a major home renovation yourself – from the initial planning stages to the final cleaning.
While the process may have been filled with unexpected challenges, developing problem-solving skills and learning as you go is all part of the growing experience of DIY projects. You can step back and appreciate your perseverance anytime flaws feel more obvious than successes.
Remember that even professionals with years of experience encounter trial-and-error and imperfections too. Your bathroom’s charm comes from it being uniquely yours, worries and all. That personal touch is something to treasure.
So pat yourself on the back for everything you learned in the process. Then get ready to enjoy a beautiful new room every day! You did it.
The Impact of a Remodeled Bathroom on Home Value
Beyond just improving your enjoyment of the space, remodeling your outdated or dysfunctional bathroom pays dividends when it comes time to sell your home. Here are some of the top ways a refreshed bathroom can boost resale value:
Increased functionality – Updated storage, fixtures, counters, lighting and layout all add value by improving usability.
New finishes – Fresh paint, flooring, tile and cabinetry make the space feel brand new again. This adds instant equity.
Universal appeal – Neutral, classic designs appeal to the widest range of buyers vs. overly personalized rooms.
Added space – Removing walls, adding extensions or making better use of existing space opens up the room.
Improved access – Updates like curb-free showers, comfort height toilets and pedestal sinks increase accessibility.
Energy efficiency – New water-conserving toilets, faucets and lighting trim utility costs.
Low maintenance – Fresh surfaces that are easy to clean like vinyl plank flooring and ceramic wall tiles appeal to buyers.
Increased lighting – Proper lighting adds brightness and feels more spacious. Add both general and task lighting.
Proper ventilation – Ensuring adequate ventilation and extractor fans reduces humidity and mold risks.
Higher-end finishes – Small touches like finely finished wood vanities, granite counters and glass vessel sinks boost perceived value.
With strategic renovations that appeal to the masses, you can recoup 60-70% or more of your bathroom remodel investment through increased resale value.
Essential Power Tools for Bathroom Remodeling
These versatile power tools speed up key tasks in a bathroom remodel:
- Circular saw – Makes straight cuts through tile, laminates, wall boards when modifications needed. Choose 7 1/4” blade.
- Reciprocating saw – Cuts through pipes, studs, flooring during demolition. Have multiple wood + metal blades.
- Jigsaw – Handles curved cuts like opening up walls for plumbing. Select fine tooth blade.
- Oscillating multi-tool – Detail sander cuts finish nails, openings for electrical boxes, small demo tasks.
- Power drill – Drives screws to secure new hardware, tighten fittings + fixtures. Cordless works well.
- Power sander – Smooths cut edges of flooring, drywall for seamless transitions between new and existing. Orbital type recommended.
- Router – Trims door edges for adjustments after installing new flooring. 1+ HP motor handles tough jobs.
- Nail gun – Speeds installation of molding and finishing trim. Choose brad nailer or finish nailer.
- Heat gun – Removes old flooring and wall tile when demolishing by softening adhesives. Have multiple nozzles.
Renting power tools prevents purchasing costly specialty items you may rarely need again. Ensure proper training before operating.
Essential Hand Tools for Bathroom Remodeling
Hand tools for essential bathroom remodel tasks include:
- Tape measure – Maps measurements of current space and required cuts. Get retractable 25′ model.
- Utility knife – Slices cleanly through sealant, adhesive, wall board. Have extra blades.
- Pry bar – Pulls up laminate, tile, molding, door casings with ease. Choose forged high carbon steel.
- Hammer – Pounds in/pulls out nails as needed. Get curved claw design.
- Pliers – Grips, twists, pulls out nails, shapes wire. Have 2-3 different plier styles.
- Basin wrench – Reaches into tight spaces to remove/install sink plumbing.
- Hacksaw – Cuts metal piping to length. Select high TPI blade.
- Putty knives – Spread adhesive and spackle smoothly. Have assorted sizes.
- Level tools – Ensures fixtures, tiles, mirrors mount evenly. Get large and small levels.
- Stud finder – Locates studs behind walls for secure installation of brackets, lights etc.
Stock up on these DIY bathroom remodeling tool essentials for completing a wide variety of tasks.
Understanding Your Bathroom’s Plumbing System
Know the key components that supply water to and drain water from your bathroom during a plumbing overhaul:
Water supply – Main water supply line brings water to the home. Branch lines deliver water to bathroom group of fixtures.
Shut-off valves – Individual shut-off valves control water flow to toilet, sink, shower/tub. Allows working on one fixture at a time.
Drain-waste-vent – Drain pipe carries wastewater to the main sewer line. Vent pipe releases sewer gases outside.
Traps – Curved pipes beneath sinks and tubs hold water to prevent sewer gas entering living space.
Fixtures – Toilets, sinks, baths, showers that use water need proper installation to avoid leaks.
Faucets – Faucets control water flow and mix hot and cold lines. Showerheads release water from pipes.
Supply tubes – Flexible tubes with compression fittings connect faucets to water supply.
P-traps – Curved trap pipes link drains to sink/tub tailpieces. Keeps sewer gas out.
Learn your bathroom’s plumbing anatomy before remodeling to ensure repairs or replacements go smoothly. Consult diagrams in home improvement books.
Understanding Your Bathroom’s Electrical System
Familiarize yourself with basic bathroom electrical systems including:
- Breaker panel – The main circuit breaker panel controls electricity flow to the bathroom. Shut power here during work.
- GFCI outlets – GFCI outlets near wet areas like sinks protect from electrocution. Test before working.
- Switches – Switches on walls control lighting fixtures. Have diagrams noting what each controls.
- Lights – Lighting may include vanity lights, ceiling fixtures, or cabinet lighting. Update old lights.
- Exhaust fans – Bathroom exhaust fans cut humidity and vent smells/steam. Ensure fans are ducted outside.
- Point of use heaters – Small heaters on walls provide heating. Only use special bathroom safe heaters.
- Low voltage – Some features like speakers use low voltage wiring. This requires different handling.
Understand functions before altering electrical systems. Faulty electrical can cause shock or fire hazards. Consult an electrician if unsure.
How to Safely Remove Old Bathroom Fixtures
Removing old plumbing fixtures without damaging your pipes or valves:
- Turn off home water supply and individual fixture valves before beginning removal. Open faucets to depressurize.
- Have a bucket ready to catch any water left in pipes. Keep rags handy to contain drips.
- Disconnect and remove old or degraded supply tubes from faucets/fixtures carefully with proper wrenches.
- Twist tubes gently to break the seal then pull away slowly. Wrap pipes ends with rags to avoid scratches.
- Remove mounting nuts, brackets and retainers that secure fixtures with appropriate wrenches/drivers.
- Carefully detach fixtures from wall and lift out. Take out any remaining mounting hardware.
- Use putty knives to gently pry away caulk residue without damaging walls.
- Thoroughly clean valve fittings and clear any debris with rags before installing new fixtures.
- Consider replacing valves and supply tubes for easier installation and water efficiency.
Follow these safe practices to avoid costly pipe and valve damage during fixture removal.
How to Install a New Bathtub: Tools and Tips
Installing a fresh new bathtub improves your bathing experience. Follow these steps:
Prep
- Clear bathroom of obstructions. Have easy access to plumbing and electrical lines.
- Assemble tub, faucet, valves and drain per manufacturer instructions.
- Clean and smooth subfloor where the tub base will sit. Cover with underlayment if needed.
Installation
- Set tub in place and connect drain pipes to plumbing wastes lines.
- Make all faucet, spout and valve connections. Test for leaks.
- Seal all tub edges and seams with silicone caulk. Smooth with wet finger.
- Consider hiring an electrician to hardwire whirlpool motor if installing this type of tub.
- Surround bottom half of tub with cement board or suitable waterproof surround.
Finish Plumbing
- Once tub is fully set, complete final plumbing hookups of drains, P-traps, supply risers etc.
- Caulk around pipes, valves and tub edge with waterproof silicone caulk.
New bathtubs require carefully connecting plumbing and surrounding with waterproof materials. Acrylic and porcelain enamel surfaces clean up easiest long-term. Enjoy a relaxing soak when done!
How to Install a New Shower: Tools and Tips
Follow this process to safely install a fresh new shower:
Prep
- Turn off home water supply and cap existing shower valves. Remove old shower/surfaces fully.
- Examine the subfloor for levelness and waterproofing. Lay cement board prior if needed.
- Have all new shower components ready – valves, handles, showerheads, shelves, rods.
Install Shower Pan
- Set prefabricated shower pan in place and level using shims. Connect to drain pipes.
- OR apply mortar for a custom shower floor and pitch slightly towards drain. Set drain flange.
Mount Valves + Plumbing
- Mount new shower valves and stop valves into wall at desired heights per manufacturer instructions.
- Connect hot and cold supply lines to shower valves. Connect shower arm and head to valve outlet.
- Test water flow. Seal all connections points with silicone caulk.
Install Wall Surrounds
- Install cement board, tile-ready surrounds or waterproof drywall up to desired height on all shower walls.
- Apply waterproofing paints or membranes to surround materials.
Enjoy a revamped showering experience with proper installation techniques ensuring water flows correctly through new shower valves, heads and drains.
How to Install a New Toilet: Tools and Tips
Upgrading an old inefficient toilet improves functionality. Follow these steps:
Prep
- Turn off water supply and flush to empty tank. Use rag to contain remaining water in bowl.
- Disconnect and remove old toilet. Plug floor drain opening to prevent gas escape.
- Clear wax ring seal from drain flange. Level flange if needed.
Install New Toilet
- Place wax ring on drain flange centered. Lower new toilet onto flange applying even pressure. Don’t shift position once placed.
- Insert bowl bolts through toilet base to secure to flange. Alternately tighten nuts to secure toilet in place.
- Reconnect water supply line to tank inlet. Turn on water and allow tank to fill. Test for any leaks at base or fittings.
- Seal toilet base to floor with silicone caulk for stability and odor prevention.
Choosing a comfortable height efficient toilet with modern flushing technology can save significant water over the lifetime of your bathroom remodel.
How to Install a New Sink: Tools and Tips
Follow these key steps to properly mount your beautiful new sink:
Prep
- Clear area under sink of obstructions. Turn off shut-off valves feeding old sink. Disconnect water lines and remove sink.
- Check that water supply lines are right length and height for new sink location. Adjust as needed.
Install Mounting Hardware
- Set sink basin or vanity top in place. Mark faucet, handle and tailpiece locations.
- Following manufacturer templates, drill any necessary holes for faucets/handles/spouts.
- Mount mounting brackets, anchor bolts or cleats according to directions.
Mount Sink
- Set sink basin/vanity top in place aligning with hardware. Secure tightly but avoid overtightening.
- Run a thin caulk bead around the sink edge for waterproofing and sound dampening.
Connect Plumbing
- Connect drain pipes, trap arm and tailpiece. Connect water supply tubes to faucet and handles.
- Seal all connections with silicone caulk. Test for leaks after turning water back on.
Beautiful new sinks with modern water-saving faucets give your bathroom an impressive facelift!
How to Install New Cabinets: Tools and Tips
Follow these steps for installing new bathroom cabinets safely and securely:
Prep
- Remove existing cabinets fully including support cleats/brackets attached to walls.
- Examine walls for level and plumb. Patch as needed to create even mounting surface.
Mount Cabinets
- Mark stud locations to align cabinet cleats. Attach wall cleats securely into studs with screws.
- Lift cabinets into place, sliding onto cleats. Ensure level. Screw into studs through cabinet back.
- Connect cabinets together through pre-drilled holes if multiple units.
Install Countertops
- Set sink basins and vanity tops onto cabinets, shimming if needed to level. Don’t overload screws.
- Clamp sink edges to counter. Drill pilot holes and secure with counter sink screws.
Finish
- Seal all countertop seams with silicone caulk. Allow to fully cure before water exposure.
- Use silicone caulk around cabinet perimeter edges where they meet walls.
Well installed bathroom cabinets create ample storage space. Ensure cabinets remain securely attached to properly support countertops.
How to Install New Lighting: Tools and Tips
Proper lighting transforms a bathroom’s functionality and ambiance. Follow these tips:
Prep
- Turn off electrical supply at breaker panel. Remove old light fixtures fully – don’t just disconnect wires.
- Replace existing wiring with GFCI circuits if not already upgraded.
- Examine placement of new lights and mark locations.
Install New Fixtures
- Follow manufacturer instructions to mount new fixture junction boxes and housings. Secure firmly to studs or backing material.
- Run wiring from breaker panel through walls to each new electrical fixture. Provide ample slack.
- Connect wires securely matching colors using twist-on connectors. Tuck all wires neatly into boxes.
- Attach light fixtures, lamps and light bars using included screws and brackets.
Finish Electrical
- Seal all light junction boxes per code using silicone caulk to prevent moisture entry.
- Test all new lights to ensure proper operation. Replace any old switches.
- Consider installing dimmer switches for adjustable ambiance.
Bathroom lighting design should layer ambient, task, and accent lighting for functionality and design.
How to Install New Flooring: Tools and Tips
Installing fresh flooring completes your bathroom’s transformation. Use these tips:
Prep
- Clear space entirely of existing flooring and underlayment. Remove toilet and vanity.
- Examine subfloor for level and integrity. Make any repairs needed.
- Ensure subfloor is clean and dry. Seal if porous. Include vapor barrier for vinyl.
Lay New Floor
- For tile, apply thinset mortar with notched trowel, lay tiles with spacers and use levelers to keep even.
- For vinyl plank, lay underlayment first. Stagger planks tightly without deforming.
- For laminate, lay foam underlayment before clicking planks together. Leave expansion gaps.
Finish Floor
- Allow installed tile to set 24-48 hours before grouting. Apply grout carefully using floats.
- For vinyl and laminate, run trim molding around room edges covering any gaps. Secure tightly.
- Reinstall vanity, toilet etc. using shims to evenly fill height gaps created by new floor.
- Caulk perimeter edges and molding gaps with flexible silicone caulk.
Allow adequate drying time for floors before walking on or exposing to water to prevent damage.
How to Paint Your Bathroom: Tools and Tips
Paint refreshes a bathroom’s look easily. Follow these best practices:
Prep
- Remove switch plates, fixtures, vents and rasings. Fill holes and cracks with spackle and sand smooth.
- Wash walls thoroughly then lightly sand glossy areas to allow paint to adhere.
- Wipe walls using solution of TSP and water to remove residue and dirt. Rinse.
- Tape off any adjacent areas you don’t want painted like trim and ceilings. Cover floors.
Paint
- Apply 1-2 coats of quality bathroom primer like Zinsser to create a sound base. Allow drying fully between coats.
- Use brush to cut-in corners and edges with your topcoat paint. Then roll walls using 3/8″ nap roller in V shapes.
- Work in sections starting from the top down. Maintain a wet edge between sections to prevent lap marks.
- Ideally apply 2 coats of bathroom specific paint like Benjamin Moore’s Waterborne Bathroom Paint, allowing 2 hour dry time.
Finish
- Remove all painter’s tape after allowing your final coat to dry overnight.
- Reinstall wall plates, fixtures, vents etc. Consider new plates throughout for a fresh look.
Choosing mold/mildew resistant bathroom paints prevents regrowth, stains and frequent re-painting. Proper prep leads to smooth results.
How to Add Finishing Touches: Tools and Tips
Final touches refine your remodeled bathroom’s look:
Hardware – Dress up cabinets and drawers with new knobs and pulls in polished metallics, glass or ceramic styles.
Fixtures – Consider a fresh matching set of bath accessories like shower caddies, robe hooks, towel bars and toilet paper holders.
Plants – Potted plants add natural appeal. Opt for low maintenance varieties that thrive in humidity.
Artwork – Hang visually soothing or inspiring pieces that align with your design scheme. Consider waterproof plexiglass frames.
Mirrors – Beautiful framed mirrors amplify light. Hang at standing height for use when dressing.
Storage – Add function with wall shelves, under-sink organizers and drawer dividers. Keep extra toiletries handy.
Scent – Light candles or use essential oil diffusers to create a pleasing aroma in the space. Opt for relaxing or energizing scents.
Texture – Include different tactile elements like wicker baskets, cotton towels, ceramic accessories and upholstered stools.
Cleaning tools – Keep cleaning easy with a discrete caddy stocked with sponges, spray bottles and cleaning solutions.
With careful attention to aesthetic details, you can give your new bathroom polish and personality.
How to Handle Plumbing Issues During Remodeling
Plumbing problems inevitably arise when renovating a bathroom. Here are tips for handling them:
- Leaks – Thoroughly examine pipes and supply tubes for cracks and punctures. Replace damaged sections and couplings rather than patching small leaks which may fail later.
- Corroded pipes – For sections with rust and corrosion damage, cut out the affected portion and splice in a new pipe segment using couplings.
- No water flow – If a fixture suddenly loses water, check shut-off valves first to ensure they are fully open. Try closing and reopening valve. If still no flow, inspect pipes for obstructions.
- Clogged drains – First use a zip-it style drain cleaning tool. For tough clogs a drain auger is needed to clear blockages in wall and floor drains. Avoid harsh chemical drain cleaners.
- Dripping faucets – Disassemble faucet handles and valve cartridges. Replace worn washers and O-rings. Thoroughly clean interior parts.
- Loose joints – If pipes or supply tubes shift, tighten fittings with wrenches or replace worn gaskets and seals. Seal with non-hardening pipe thread seal tape.
- Faulty valves – Drippy, leaking or incorrectly operating shut-off and mixing valves need replacement. Matching their make and model ensures best fit.
- Damaged tubing – Kinked, crushed or cracked supply tubing or drain pipes should be replaced in their entirety for safety.
Arm yourself with the right plumbing tools and spare parts to tackle bathroom plumbing repairs during remodeling. Consult a pro if issues persist.
How to Handle Electrical Issues During Remodeling
Electrical issues commonly surface when renovating a bathroom. Effective troubleshooting techniques:
- No power – Check breaker panel for any tripped breakers. Reset tripped GFCI outlets by hitting “reset” button. Test outlets with voltage meter before working.
- Faulty wiring – If outlets spark or frequently trip, wiring likely needs replacement. Consult an electrician.
- Exposed wires – Use wire nuts and electrical tape to cap any exposed wires in opened walls. Never leave bare.
- Short circuits – If new light or fan doesn’t work, wires may be shorting. Inspect junction box for loose connections, naked ground wires etc.
- GFCI or switch damage – Replace old outlets and switches with new GFCI and water-resistant models rated for bathrooms.
- Overheating – If fixtures frequently overheat, wiring may be undersized. Upgrade to heavier gauge wiring following codes.
- No ground – Install GFCI outlets which don’t require grounding. For whirlpool tubs get electrical inspector approval.
- Adding circuits – When adding circuits and outlets, ensure bathroom has dedicated 20 amp GFCI protected circuit as required by code.
Consult a licensed electrician if unfamiliar with bath electrical requirements. Improper wiring can cause electrocution.
How to Handle Structural Issues During Remodeling
Structural problems uncovered during a bathroom remodel require expertise to assess and repair correctly:
- Water damage – Standing water from chronic leaks can compromise floor and wall framing. Mold also signifies moisture issues.
- Wood rot – Inspect under tub and shower surrounds for spongy damaged wood indicating leaks. Rotted wood needs complete replacement.
- Mold – Improper fan ventilation causes excess moisture leading to mold growth. Mold requires remediation to prevent regrowth.
- Damaged subfloor – Underlayment like cement board may be needed to strengthen a subfloor with worn or broken panels and joists.
- Wall/ceiling cracks – Cracks from shifting often worsen over time. Repair cracks then determine if a larger structural issue is causing them.
- Asbestos – In older homes, insulation or floor tiles may contain asbestos and require abatement. Do not disturb these areas.
- Load issues – If the floor sags under heavy freestanding tubs filled with water, sister joists may be needed for added support.
Consult a general contractor if you discover any significant structural damage beyond basic repairs. Ensure safety.
How to Stay Organized During Your Bathroom Remodel
Remodeling brings chaos. Stay organized with these tips:
- Clear bathroom completely. Designate temporary space elsewhere to store contents during project.
- Box and label fixtures, tools, materials etc. kept on site so items don’t get misplaced in work area.
- Photograph bathroom before demolition from all angles. Refer back to visualize original layout when rebuilding.
- Maintain a detailed remodel notebook tracking tasks completed, measurements, photos, notes, changes etc. in one place.
- Create checklists breaking down tasks into smaller action items. Check off as you go and add new items immediately.
- Set up labeled bins and trays to sort hardware like knobs, connectors, tile spacers etc. Prevent losing small pieces.
- Designate a clean up time at the end of each workday to avoid dangerous clutter and accidents.
- Prevent tracking debris through home by removing shoes and work clothes right at bathroom doorway.
- Schedule deliveries of bulky material so items are onsite right when you need them.
Staying highly organized prevents frustrating searches for tools and materials during hectic renovation.
How to Keep Your Home Clean During Remodeling
Remodeling inevitably creates dust and debris. Try these pro tips:
- Seal off work area completely by taping plastic sheeting over doorway. Cut flap to enter.
- Lay drop cloths and rosin paper down in layers to protect floors and surfaces from damage.
- Run air scrubbers and HEPA filter vacuums continuously to trap airborne dust. Consider rentals.
- Wear shoe covers when leaving work area and remove before entering clean home areas.
- Use damp rags for cleanup to contain dust. Avoid dry sweeping.
- Take out trash frequently to prevent piles of dusty debris accumulating on site.
- Set up portable containment unit or dumpster rental so debris can be tossed directly rather than stockpiling indoors.
- Schedule demolition and dust-heavy work for times when occupants can vacate home for a while after.
- Replace HVAC air filters frequently during and post-remodel to catch debris circulating through ducts.
Proper containment measures take effort but prevent dust from migrating into the rest of your home during renovation.
How to Stay on Schedule with Your Bathroom Remodel
Remodels hardly ever finish on time. Stay on schedule with:
- Build in 20% extra time into projected timeline for inevitable delays and learning curves as a DIYer.
- Confirm lead times for ordered materials/fixtures. Order well in advance to prevent delays if items are backordered.
- Have go-to takeout meals and prepared snacks on hand so you don’t lose time cooking. Stock up on disposable plates.
- Set a firm end-of-day deadline so clean up doesn’t cut into valuable next-day work time.
- Stick to your established work hours and timeline to avoid project fatigue and burnout.
- Create a detailed day-by-day calendar noting what tasks will be completed when. Check off as you go.
- When falling behind, look for shortcuts like hiring a task out rather than losing time struggling.
- Communicate delays to family and explain the revised timeline. Manage expectations.
- For major unexpected delays, consider extending rental period for large equipment like demolition tools to prevent rushed progress.
Careful scheduling and project management prevents days lost to unexpected problems derailing your timeline.
How to Stay on Budget with Your Bathroom Remodel
It’s easy to go over budget on a remodel. Stick to your budget with these tips:
- Research all material/labor costs in advance and get quotes. Base budget on actual data.
- Add a 10-15% buffer to your budget for cost overages and incidentals. Avoid cutting it too close.
- Review the budget with family before signing off. Agree on areas that can be reduced if needed to lower price.
- Openly discuss any changes that arise and weigh their costs vs. benefits. Only proceed if it works with the budget.
- Comparison shop suppliers for best prices on high cost items like tubs and vanities. Don’t assume the first quote is the lowest.
- Look for ways to reallocate from splurges to needs if some items exceed planned costs. Focus on invisible upgrades first.
- Examine the labor costs for tasks you can feasibly DIY even with a learning curve. Sweat equity saves money.
- Check with tool rental companies for minimum rental periods. Only rent equipment for the days truly needed.
Budget diligently, allow for contingencies, and be willing to make adjustments as needed to complete your remodel without heartache over costs.
How to Handle Stress During Your Bathroom Remodel
Bathroom remodels add stress. Try these tips to cope:
- Remind yourself daily that construction messes and inconveniences are temporary. The end result will be worth it.
- Play favorite upbeat music to lift your mood when work feels overwhelming or frustrating.
- Take regular breaks during long workdays to rest muscles, eat energizing snacks and clear your mind.
- Use meditation, stretching or other relaxation techniques to calm your mind when tensions rise. Breathe deeply.
- Don’t sweat small setbacks or imperfections. Let go of feeling that everything must turn out perfectly.
- Laugh about mishaps like broken tiles and incorrect paint colors. Agonizing worsens the situation.
- When you’ve reached your stress limit for the day, stop work. Overexerting yourself helps no one.
- Lean on family for moral support and shoulder massages. Communicate if you need help staying encouraged.
- Make time for fun outside of remodeling like movies or dinner out. Don’t let the project consume you.
Know when to walk away. Manage expectations and acknowledge when you’ve maxed out your stress capacity.
How to Enjoy the Process of Remodeling Your Bathroom
Stay positive and enjoy remodeling with these perspective shifts:
- Instead of dreading demolition, look at it as a satisfying clean slate to work from.
- When problems arise think of them as opportunities to learn and further develop your skills.
- Mix up tasks between heavy lifting days and lighter detail work so pace stays engaging.
- Upbeat music and podcasts make repetitive work like grouting and caulking more enjoyable.
- On nice days open windows and doors to enjoy fresh air and bird songs as you work.
- Invite friends over to socialize while tiling or painting. Many hands make light work.
- Spend time visualizing how lovely the finished space will look and feel when you’re in the thick of it.
- Research fun decorative touches like funky shower curtains and novelty switch plates to add flair.
- Believe in your abilities to handle this, even when challenges emerge. Confidence reduces stress.
- Appreciate unexpected insights into plumbing and electrical systems gained by remodeling access.
Adjusting your mindset helps make even the toughest remodel days more positive and meaningful.
How to Celebrate the Completion of Your Bathroom Remodel
Mark the end of your remodel with a fun celebration:
- Take a long, relaxing soak in your beautiful new tub with a bath bomb, candles and music.
- Indulge in champagne and strawberries in the tub or lounge area to celebrate your hard work.
- Display fun before and after photos of the remodel in your bathroom or share online for everyone to admire.
- Frame your very first receipt or tile or another memorable remodel memento in the space.
- Have friends over for a spa party to inaugurate your new space and show off your handiwork.
- Install a personalized vinyl decal or framed sign in the bathroom with your name and remodel completion date.
- Display thank you cards to contractors who helped bring your vision to life.
- Write a positive online review for rental companies or suppliers who provided great service. Pay it forward.
- Take time to acknowledge your persistence in completing a challenging DIY project before life takes over again.
Marking the end of a major renovation helps provide closure. Enjoy your revamped oasis!
How to Maintain Your Newly Remodeled Bathroom
Keep your new bathroom looking fabulous:
- Clean ceramic tile grout with diluted bleach-free cleaner and soft brush monthly. Re-seal grout yearly.
- Use bathroom cleaner and soft cloth weekly on countertops and sinks. Avoid abrasive pads.
- Use squeegee on shower walls and glass after each use to limit soap scum and mineral build up.
- Hang up towels and bath mats to dry between uses to prevent mildew in damp fabrics.
- Run bath and sink water on occasion with drain stoppers closed to fill p-traps. Prevent evaporation allowing sewer gas escape.
- Clean stubborn toilet bowl stains with pumice stone. Disinfect toilet weekly.
- Dust light fixtures and top of cabinets monthly to avoid excessive grime buildup.
- Polish metal faucets and fixtures as needed with soft cloth.
- Inspect caulk and re-apply as needed, especially around tubs and showers. Watch for cracks or gaps.
- Run bathroom fan during and after showering to minimize humidity and prevent mold growth.
Regular cleaning and maintenance keeps your bathroom looking like new for years beyond the remodel! Establish simple routines.
How to Choose the Right Tiles for Your Bathroom
Key tips for selecting bathroom tiles:
- Durability – Bathroom tiles endure significant moisture. Ensure tiles rated for high water resistance. Porcelain and ceramic best.
- Grout suitability – Small mosaic tiles involve more grout lines that require more sealing from water penetration.
- Slip resistance – Floor tiles must be slip resistant. Check COF ratings. Add textural accents for traction.
- Easy maintenance – Bathrooms need easy-clean tiles. Gloss and polished finishes clean easiest.
- Even layout – Field tiles should have uniform size and color consistency for even pattern. Inspect batches.
- Wet area ratings – Shower wall tiles must be approved for wet area installation and rated for humidity resistance.
- ** coordinated colors** – Choose grout and trim profiles that coordinate with tile color. Bring samples home.
Selecting durable, water-resistant tiles suited for the specific use area ensures your bathroom finishes stay beautiful long term.
How to Choose the Right Paint for Your Bathroom
Picking the optimal bathroom paint finish involves:
- Mildew resistance – Bathroom paints should have EPA registered mildewcide to inhibit mold/mildew growth in wet areas.
- Cleanable finish – Opt for satin or semi-gloss sheens. High-gloss resists stains but shows flaws. Avoid flat paint.
- Moisture resistant – Latex paints withstand humidity better than oil-based. Ensure label specifies bathroom usage.
- Zero VOC – Low or no VOC (volatile organic compounds) paint improves indoor air quality. Important in small bathrooms.
- Coordinating colors – Sample paint cards allow you to coordinate wall/trim/ceiling colors.
- Adequate coverage – Higher quality paints offer better hide and coverage. Go for one-coat coverage if possible.
- Coordinated products – Use primer and paint from the same manufacturer for optimal compatibility.
The right paint creates a breathable water-resistant surface that renews your bathroom beautifully and practically.
How to Choose the Right Fixtures for Your Bathroom
Choose bathroom fixtures that meet your needs:
Functionality – Ensure faucets, showerheads, toilets and sinks suit your usage – kids, multi-user, accessibility etc.
Finish – Finishes like chrome, bronze and nickel suit different decor styles. Coordinate fixtures.
Simplified cleaning – Look for smooth, non-porous materials like porcelain that resist grime buildup. Avoid ornate carved fixtures.
Water efficiency – Choose EPA WaterSense labeled toilets, faucets and showerheads to conserve water.
Durability – Metal construction and thick vitreous china last longer than cheap acrylic and plastic.
Comfort – Test comfort height toilets. Pick faucets and showerheads that meet your height and needs.
Warranty – Better brands offer at least 1 year to lifetime warranties against defects.
Style cohesion – Match faucet and fixture style to your decor – traditional, modern, retro etc.
Selecting high-performing fixtures tailored to your lifestyle prevents needing early replacements.
How to Choose the Right Lighting for Your Bathroom
Bathroom lighting should address:
- General lighting – Ceiling flush or semi-flush fixtures brightly light full bathroom space.
- Task lighting – Vanity strip lighting illuminates face for grooming. Wall sconces light shower area.
- Ambient lighting – Decorative pendants, chandeliers or wall mounted fixtures create mood.
- ADA compliance – Wall mounted lights beside mirrors aid those in wheelchairs.
- Ventilation – Pick moisture resistant fixtures. Install exhaust fan if no windows.
- Bulb type – LED bulbs conserve energy. Pick appropriate lumens for brightness needed.
- Location – Place lighting where it best replaces natural light fixtures block. Avoid shadows.
- Dimensions – Scale lighting to fit the room. Avoid overwhelming small bathrooms.
- Controls – Dimmer switches allow adjustable light levels. Include occupancy/vacancy sensors.
Carefully layered lighting ensures your bathroom is bright, functional and beautiful.
How to Choose the Right Accessories for Your Bathroom
Accessories put the finishing touches on a bathroom’s look:
- Material – Choose accessories made of moisture-resistant materials like stainless steel, ceramic or mildew-resistant fabric. Avoid fleece covers.
- Wipeable – Ease of cleaning is key in bathrooms. Ensure accessories with smooth non-porous surfaces.
- Storage – Look for space-saving over-toilet organizers, wall shelves and under-sink caddies.
- Simplicity – Avoid cluttered look. Seek clean lines and minimal embellishments on accessories.
- Spa style – Coordinating accessories like tumblers, tissue box covers and trays create a serene spa aesthetic. Stick to one collection.
- Pops of color – Vivid towels, rugs and shower curtain infuse fun colors without overwhelming space.
- Theming – Choose themed accessory sets like nautical, botanical or boho style to set a mood.
- Personalization – Monogrammed towels, wall prints and photos add personalized flair.
- Budget – Shop discount stores like Marshalls, Ross and Ollies for stylish affordable accessory finds.
With a coordinated style and colors, properly scaled bathroom accessories enhance your new space functionally and visually.
How to Choose the Right Layout for Your Bathroom
An effective bathroom layout balances these elements:
- Traffic flow – Place doors, fixtures and furnishings to avoid congestion and allow natural movement flow.
- Existing plumbing/electrical – Work with existing sink, toilet and shower hookups when reasonable to avoid cost and work of relocating.
- Purpose of space – Youth bathroom with lots of play storage vs. master bath oasis have different layout needs.
- Natural light – Arrange space so windows and skylights are not blocked by furnishings or walls.
- Multi-user access – For family baths, design allows more than one person using sink/toilet at once.
- ADA compliance – At minimum have 36″ between walls and fixtures for wheelchair accessibility.
- Privacy – Design master bath area to keep toilet separate from other activity zones. Use walls or curtains.
- Furniture sizes – Measure fixtures and furnishings before finalizing layout. Adjust as needed to fit properly.
- Harmony – Arrange furnishings in a balanced, functional way suited to room size and shape.
Carefully thinking through user needs and practicalities ensures your new bathroom layout works beautifully.
How to Choose the Right Style for Your Bathroom
When planning your bathroom style, consider:
- Overall home style – Let your home’s architecture and decor guide the aesthetic. Contemporary, traditional, cottage, eclectic etc.
- Personal style – If your home doesn’t have a clear style, choose one that suits your taste.
- Other rooms – Coordinate the style with other rooms for a cohesive feel.
- Purpose – Kids and utility baths can be more playful. Master baths more serene.
- Era – Vintage, modern, postmodern and other eras inspire design elements. Research the look fully.
- Color scheme – Some styles have signature palettes like all white modern or jewel toned Victorian.
- Fixtures – Certain styles have defining features like air tubs in vintage baths. Incorporate these.
- Collections – Design a space around collections you already own and love like botanical prints.
- Budget – Seek affordable ways to evoke luxe styles on a budget like carrera-patterned tile vs. real marble.
Choose a bathroom style that delights and inspires you each time you enter the space.
How to Choose the Right Contractor for Your Bathroom
Choosing contractors for your bathroom remodel:
- Get referrals from trusted friends and read online reviews. Meet at least 3 potential contractors.
- Look for licensed professionals insured and bonded. Verify credentials and standing with state boards.
- Ask to see past project photos showcasing their skills and style. Ensure quality matches your vision.
- Get a detailed written estimate outlining scope of work, materials, timeline and price. Compare bids.
- Ask how they communicate during projects and handle delays/issues. Good communication skills are key.
- Inquire about their typical clientele. Experts in residential remodels are ideal.
- Request and check contractor references from past clients.
- Verify availability. Experienced contractors book up. You want your project prioritized.
- Choose contractors willing to do phased or partial work if you wish to DIY part of the remodel.
- Ensure you have good rapport. Trust your gut feelings about their professionalism and fit.
Taking time to carefully vet contractors ensures you assemble the right team for your dream bathroom.
How to Choose the Right Materials for Your Bathroom
Picking durable, attractive bathroom materials that work within budget:
Surfaces – Porcelain or ceramic tile, natural stone, and glass mosaics handle humidity. Avoid real wood floors.
Tub/shower – Enameled steel, acrylic, cultured marble, and fiberglass are waterproof options. Avoid plain plaster.
Counters – Quartz composite, solid surface, and porcelain are durable, non-porous options within reach.
Cabinets – Plastic laminate and thermofoil withstand moisture. Look for thick plywood box construction.
Hardware – Solid brass, nickel, and chrome avoid corrosion. Pass on unsealed steel.
Plumbing – Chrome or nickel finished brass parts resist corrosion. Avoid plain copper pipes.
Lighting – Damp-rated fixtures often use polyethylene, silicone gaskets. Make sure glass is tempered.
Paint – Water-resistant satin or semi-gloss latex formulated for bathrooms.
Do diligent product research and read reviews to find real-life performance data before purchasing bathroom materials.
How to Choose the Right Design for Your Bathroom
A cohesive attractive bathroom design includes:
- Unity – Repetition of colors, materials, shapes and styles ties the whole room together.
- Focal point – Center the design around a stunning feature like a soaking tub, ornate mirror or nature view.
- Lighting layers – Mix general, task and accent lighting for ambiance and function.
- Multifunctional features – Incorporate storage into design elements like a recessed medicine cabinet.
- Harmony – Combine elements like tile, cabinetry, metals and fixtures in a pleasing, coordinated way.
- Personalization – Add unique special touches through art, accessories or memorabilia you love.
- Soothing colors – Stick to soft calming hues like blues, greens and grays accented by whites.
- Purposeful lighting – Design the lighting plan specifically around how each area will be used.
- Thoughtful details – Elevate the design with high-end taps, engraved mirrors, quirky drawer knobs etc.
A successful bathroom design delights the senses, sets the mood and enhances your wellbeing.
How to Choose the Right Theme for Your Bathroom
Thematic touches personalize a bathroom. Theme ideas include:
Maritime – Coastal blues, ropes, anchors and driftwood evoke seaside cottages.
Tropical – Vibrant botanical prints, rattans and wood tones feel exotic.
Rustic – Natural stone, bare woods, galvanized metals and plaids give a cozy, outdoorsy feel.
Modern – Sleek metallics, linear tiles, concrete and glass elements feel contemporary.
Retro – Vintage travel posters, checkerboard tile and clawfoot tubs channel yesteryear.
Spa – Calm neutrals, soft towels, candles and soaking tub pamper.
Eclectic – A fun, whimsical mix of colors, prints and materials sparks joy.
Monochromatic – Sticking to shades of one color makes a bold statement.
Glam – Metallic finishes, jeweled tile, shimmering glass and dramatic light fixtures add luxe dazzle.
Choose a theme that resonates with your hobbies, collections or dreams to personalize your bath with a unique style signature.
How to Choose the Right Color Scheme for Your Bathroom
Picking cohesive bathroom colors:
- Stick to a simple 3 color scheme – one main color, secondary color, and accent shade.
- Layer shades of a single color family like soft greens to aqua blues for a soothing spa look.
- Neutrals like whites, grays and beiges work well with any style. Introduce colors through textures and accessories.
- Reference color wheel pairings to create pleasant, balanced palettes. analogous hues for harmony, complementary colors for vibrancy.
- Draw inspiration from things you find calming like sandy beaches or reviving like fresh herbs.
- Look at photos of bathrooms you admire and note the color schemes and ratios.
- Choose accent colors sparingly in small doses like towels or framed art. Avoid overwhelming with color.
- Consider lighting. Yellow or blue walls will read differently under cool vs. warm light temperatures.
- Order paint samples to view colors in the space before fully committing. Colors look different on walls.
Picking a versatile color scheme you enjoy will make your bathroom a welcoming space for years to come.
How to Choose the Right Storage for Your Bathroom
Well-planned bathroom storage is essential. Consider:
- Audit how much linen, toiletry and cleaning item storage you need. Look in existing cabinets to make a list.
- Measure under sink vanity space and optimize it with customized organizers. Stack bins vertically.
- Look for bath furniture like cabinets, shelving and over-toilet units that add storage without clutter.
- Have open shelving for folded towels near showers. Enclosed cabinets for toiletries contain clutter.
- Include drawers for organizing small items. Pull-outs allow access to back of cabinets.
- Plan height adjustable shelves in linen closets to accommodate bottles to bedding.
- Use trays and baskets to corral items like hair products, first aid supplies and makeup.
- Install storage caddies inside showers and tub surrounds for bath accessories.
- Look for dual purpose furniture like cabinets that double as stools with cushion tops or hold hidden hampers.
With ample well-designed storage, you can keep bath items neatly organized and out of sight.
How to Choose the Right Ventilation for Your Bathroom
Proper ventilation controls humidity that damages bathrooms. Look for:
- Exterior venting – Vents like exhaust fans must duct moisture outside, not just recirculate into attic space. This prevents mold.
- Sufficient CFM – The fan’s airflow rate should be at least 50-80 CFM for baths under 100 sq ft. Larger baths need 100-150 CFM fans.
- Occupancy sensors – Humidity sensors that automatically turn ventilation on when moisture is detected are convenient options.
- Timer switches – Let fans run 20-30 mins after showering. Timers make this easy.
- Quiet operation – Pick fans rated for quiet operation. Cheap rattly fans get turned off quickly.
- Night light – Models with built-in night lights aid safe overnight bathroom trips.
- Cleaning ease – Choose exhaust fans with easily detachable grilles that provide access to fan blades for cleaning.
- ENERGY STAR – Select EnergySTAR certified fans using LED lighting and efficient DC motors.
Good ventilation improves indoor air quality, prevents mold and protects your bathroom surfaces. Don’t overlook this important pick.
How to Choose the Right Heating for Your Bathroom
Warm your bathroom comfortably:
- Look for central heating system vents in bathroom. Close other rooms’ vents to direct maximum heat there.
- Adjust central system blower setting to run longer, providing consistent warmth.
- Set programmable thermostat to keep bathroom warmer than other rooms which aren’t occupied for long periods.
- Ensure adequate insulation and caulk leaks to retain heat.
- Install compact electric heaters on walls or ceilings. Pick sealed safety models.
- Radiant floor heating provides enveloping warmth. Electric mats can be added under most flooring types.
- Towel warmers conveniently heat towels. Some models feature built-in timers or thermostats.
- Tub and sink recirculating pumps keep water hot in pipes for ready supply of warm water.
- Install insulation wrapped ducting on exposed hot water pipes.
A warm bathroom promotes relaxation and good hygiene during winter. Multiple complementary heating methods work best.
How to Choose the Right Mirror for Your Bathroom
Pick mirrors that maximize function and style:
- Place centrally above sinks for easy use. Go as big as the space allows to open up small bathrooms.
- Opt for unframed mirrors with beveled edges for a clean contemporary look. Or select ornate framed mirrors for traditional spaces.
- Install mirrors strategically across from windows to reflect light and views.
- Multi-pane medicine cabinets offer concealed storage without compromising mirror space.
- Backlit LED mirrors provide ideal visibility for makeup application and grooming.
- For steamy showers, look for fog resistant mirrors with anti-condensation coating.
- Choose mirror height based on primary users. Standard height is 40″, ADA height 36″, kid height 30″.
- Incorporate specialty mirrors like magnifying shaving mirrors for men or rounded cosmetic mirrors.
- Distortive acrylic mirrors inject whimsical accent pieces.
Bathroom mirrors should be functional, well-placed and suit the decor style. Maximize visibility.
How to Choose the Right Vanity for Your Bathroom
Picking the perfect bath vanity involves:
- Matching vanity height to your needs. Standard is 32-34” but comfort height (36”) islands work well.
- Choosing a solid water-resistant top material like quartz, granite or treated wood. Avoid particle board.
- Getting a style – traditional, modern, shabby chic – that fits your bathroom decor.
- Looking for soft close doors and drawers to prevent loud banging. Look for full extension drawers.
- Getting adequate storage with interior organizers to prevent “junk drawer” syndrome.
- Selecting durable finishes that withstand humidity like engineered wood veneers and thermally fused laminate.
- Using vanities with built-in sinks for easy installation. Verify sink clearance space.
- Measuring carefully to ensure perfect fit. Allow for extra breathing room on sides.
- Checking legs are weight bearing for solid stone tops. Verify wall mounting support if present.
The right vanity provides functional storage and ties your bathroom decor together beautifully.
How to Choose the Right Shower Curtain for Your Bathroom
Pick shower curtains that work well and look great:
- Measure carefully for proper width and length. Curtains should lap over 6+ inches beyond shower edges.
- Match curtain height to top of showerhead to contain all spray. Add an extension rod if needed.
- Opt for weighted hems and magnets along vertical edges to improve closure and contain water.
- Ensure machine washable, quick dry fabrics that resist soap scum and mildew like polyester and microfiber.
- Avoid poufy curtains. Streamlined styles move better and resist water collection.
- Look for coated fabrics like EVA, nylon and vinyl that offer further water protection while retaining aesthetics.
- Use liner curtains on tub interiors to block moisture and buildup on nice outer shower curtains.
- Make sure grommets slide easily along rod. Curtains shouldn’t bind or sag.
Measure precisely and pick high quality shower curtains and liners made specifically for wet areas.
How to Choose the Right Bath Mat for Your Bathroom
Select bath mats suited to placement and traffic:
- Measure space inside tub/shower as well as entry area. Buy corresponding sized mats.
- Match mat depth to ledge space inside tub. Avoid skimpy mats that get soaked.
- Use rubber-backed mats or those with suction cups inside tub/shower to prevent slips.
- Get longer runners for high traffic areas outside tub to absorb drips from multiple steps.
- Choose super absorbent and quick-drying chenille, microfiber or bamboo mat fabrics.
- Look for washable fabrics that won’t fade, pill or develop mildew.
- Get coordinating sets of tub, sink and toilet mats to tie space together.
- Opt for simple unfussy styles as bathroom mats get changed frequently for cleaning.
- Color coordinate. For white bathrooms, get clear rubber backed mats to maintain brightness.
Take time to measure so you get well-fitted bath mats that enhance safety and work with your space.
How to Choose the Right Towels for Your Bathroom
Pick quality towels that suit your bathroom:
- Softer 100% cotton towels feel best but don’t last as long as cotton/poly blends. Choose per your preference.
- Look at grams per square meter (GSM). Around 600 GSM offers good absorbency and durability.
- Low pill or high pile towels feel plush for years. Yarns like Egyptian or Pima cotton minimize lint.
- Get multiple coordinating colors to visually change up towels between washes.
- White and solid light towels keep bathrooms feeling clean and bright.
- Measure existing towel bars and rods. Buy sizes that will actually fit space rather than overhang.
- Choose bath, hand and face towel sets with unified sizing for cohesion. Include washcloths.
- Supplement with fun printed and monogrammed towels for individual flare.
- Budget for extra towels to allow rotations in the laundry. 12-20 towels suggested per family bathroom.
The right high-quality towels lend comfort while reinforcing your bathroom’s stylishness.
How to Choose the Right Soap Dispenser for Your Bathroom
Pick functional, stylish soap dispensers:
- Mount above or next to sinks for easy access when hand washing.
- Look for bottom loading dispensers. Top-load drips down sides with use.
- Ensure pumps dispense the right amount of your soap. Test before installing permanently with adhesives.
- Opt for durable materials like metal or ceramic rather than plastic. Matches higher-end faucets.
- Include built-in drip trays to contain messy drips. Or mount above backsplash.
- Determine bottle capacity needed based on household size and frequency of refills desired.
- Verify dispenser openings accommodate your soap bottle necks when refilling.
- Choose style – sleek contemporary, rustic apothecary jar etc – matching your bathroom decor.
- Consider touchless auto-dispensing options for maximum hygiene.
- For kids, select fun designs they’ll enjoy using to promote hand washing.
Picking the right soap dispensers prevents messy countertops and ensures easy soap dispensing.
How to Choose the Right Toothbrush Holder for Your Bathroom
Toothbrush holders have design considerations:
- Allow 1.5-2” width per brush minimum. Measure your toothbrushes before buying.
- Wall mounted holders save counter space. Look for drip trays to catch water.
- Freestanding holders work well on vanities. Seek weighted bases.
- Draining toothbrush holders fully dry bristles between uses, preventing germ growth.
- Look for bristle covering lids to protect brushes from airborne germs while stored.
- Color coordinate with your bathroom’s style. Also offer neutral clear options.
- For kids, fun cartoon designs encourage brushing. Individualizing with different colors helps distinguish brushes.
- Glass holders have a clean polished look. Get tempered glass avoid cracks.
- Upgrade to higher-end materials like ceramic, copper or bamboo instead of basic plastics.
Keep your family’s toothbrushes neatly corralled in a functional toothbrush holder suited for your space.
Conclusion: Enjoying Your Newly Remodeled Bathroom
Completing your dream bathroom remodel involves many details, long to-do lists, and some frustrating setbacks. But the final rewarding result is well worth all your hard work and care. Follow the guidance in this comprehensive guide regarding tool rentals, design choices and project management to ensure your DIY bathroom remodeling project goes as smoothly as possible.
Approach each step patiently, allow plenty of time for learning curves, and don’t let small hiccups undermine your confidence. With the right tools and problem-solving mindset, you can tackle this ambitious home project. Ultimately you’ll gain invaluable skills as well as a stunning new bathroom your whole family can enjoy for years to come.