Categories
Designs

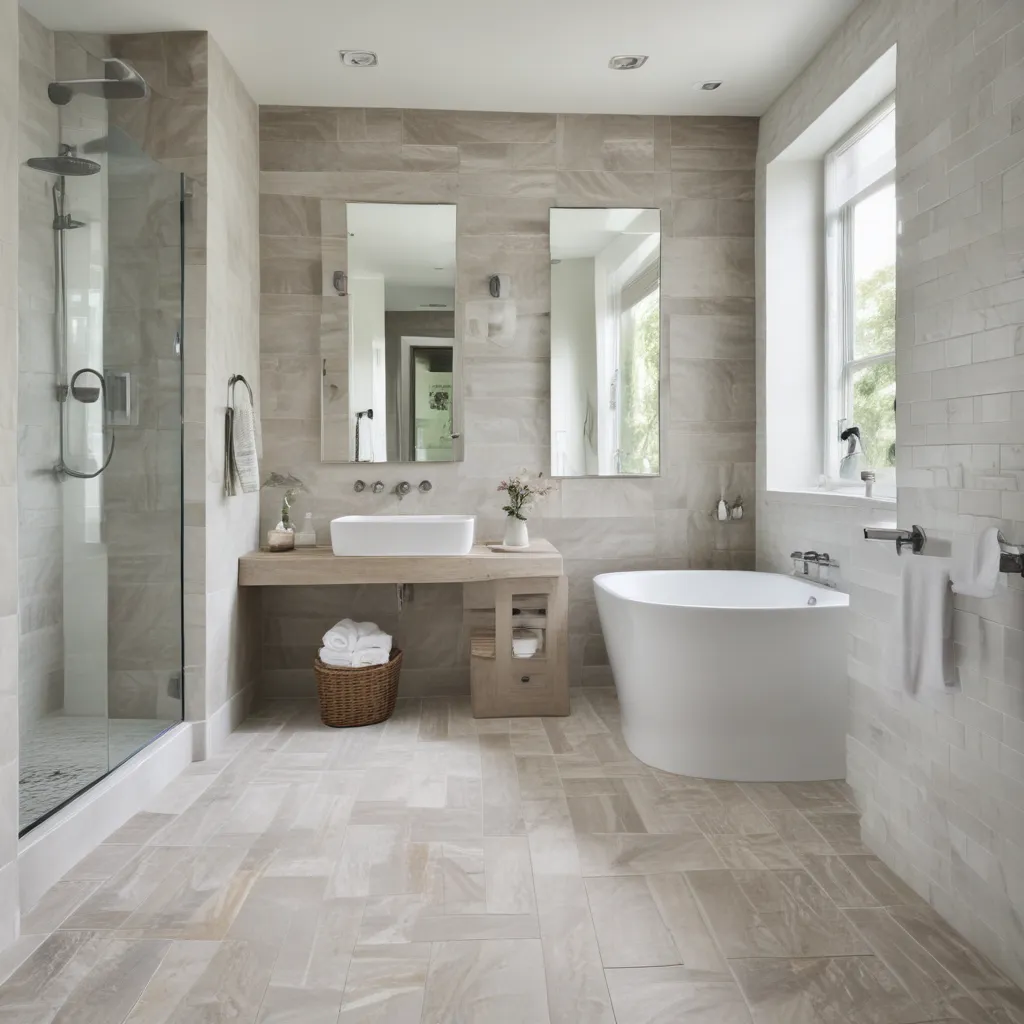
Choosing Bathroom Flooring That Makes a Statement

Choosing Bathroom Flooring That Makes a Statement

Diving into Bathroom Design

I’m really excited to have the opportunity to help you choose the perfect bathroom flooring that will make a statement in your space. When it came to designing the master and guest bathrooms in my own home during a recent renovation, I have to admit that I made some quick, and in hindsight, rather thoughtless decisions. Luckily, it all turned out great, but I want to be more intentional in the planning process now that I have a little more knowledge and prior experience under my belt.

Deciding on materials for a bathroom can be a hugely overwhelming task, especially if you’re like me and absolutely adore all the beautiful tile options out there. There are just so many gorgeous, cost-effective choices, and this can easily lead to decision paralysis. So, I thought it would be incredibly helpful to put together a comprehensive guide to walk you through the process of choosing bathroom flooring that will make a statement in your space.

This is based on my own experience and what worked for me, but of course, you may need to tweak things here and there to fit your own unique approach. Regardless, I hope this gives you a solid place to start. And don’t worry, I’m not going to bog you down with boring design rules – I firmly believe in doing what you love rather than sticking to rigid guidelines. Let’s dive in and have some fun!

Gathering Inspiration

The first step in this process is the easiest and most enjoyable part – gathering inspiration. Get yourself on Pinterest, create a dedicated board for bathroom ideas, and start pinning away! Don’t worry about budget or practicality at this stage – just go wild and pin everything that catches your eye.

You can also reach out to your friends, both online and in real life, and ask them to point you towards any bathroom designs they’ve seen that they think you might love. I even had one friend text me a photo from the bathroom of a local coffee shop – talk about unexpected inspiration!

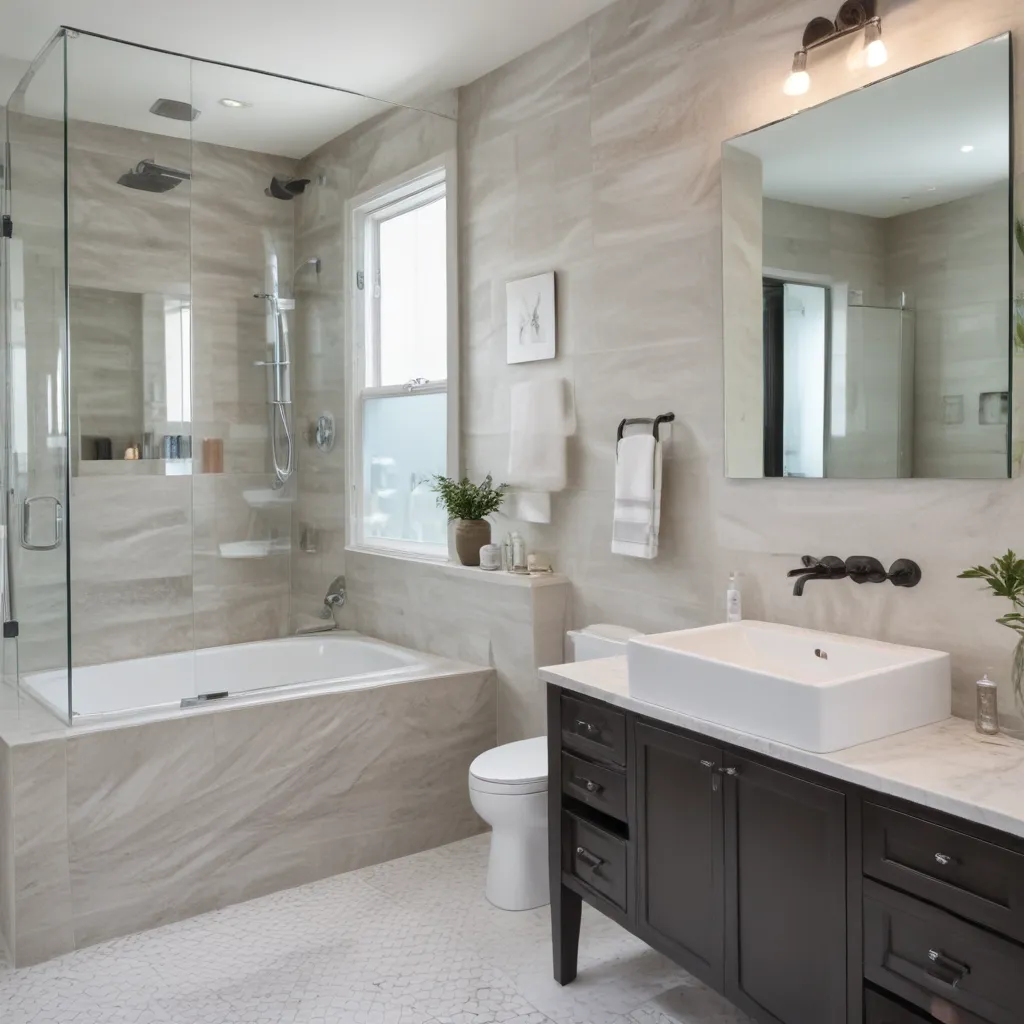
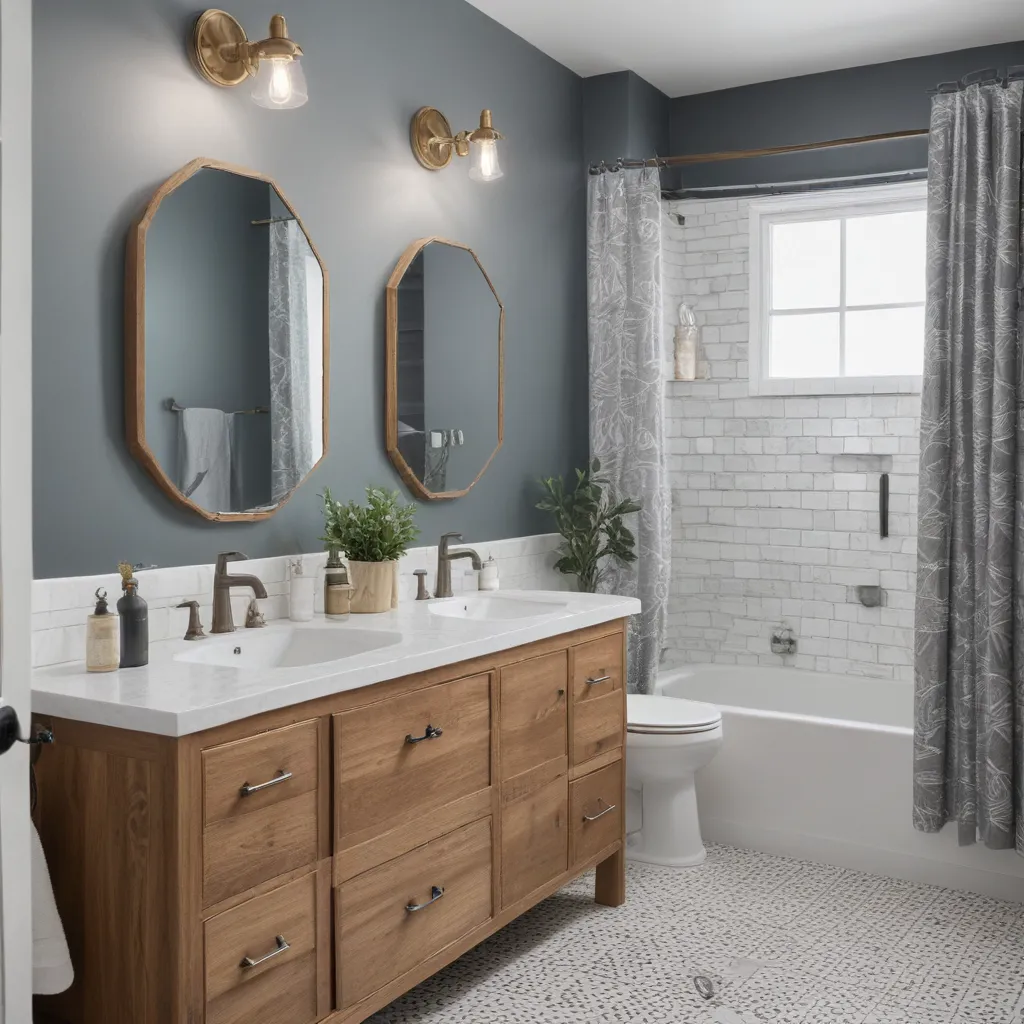
Once you’ve amassed a solid collection of images, start looking for any recurring elements or themes. Try to narrow those down to a few of your absolute favorite statement materials. On my own Pinterest board, my top picks were marble floors, dark hexagon tile, and warm brass and wood accents. [1]

Designing Your Dream Bathroom

With that inspiration under your belt, it’s time to start actually designing your dream bathroom. Now, I know this can feel incredibly overwhelming, but I’ve got a fool-proof process to break it down into manageable steps.

First up, grab a pen and paper (or your digital equivalent) and let’s start planning. Are you keeping any existing elements from your current bathroom, like original tile or a vanity? Have you already purchased something that you want to incorporate into your new design? Make a note of those things.

Now, here’s where the real fun begins. I like to think of this stage as solving a high-stakes Rubik’s cube. Each element of the design needs to work on its own (i.e., you need to genuinely love it) and also in relation to all the other materials you’re considering. It’s a delicate balance, but trust me, there’s a magical moment where everything just clicks into place.

If you’re struggling to make everything fit together seamlessly, here are a few broad guidelines that I follow:
– Opt for neutral, timeless base materials (like tile or countertops) and use pops of color and pattern through accessories
– Make sure the finishes and textures complement each other, rather than compete
– Don’t be afraid to try unexpected combinations – that’s where the real magic happens!

Once you’ve nailed down your design plan on paper, the next step is to create a mood board. This will help you visualize the room and ensure that all your materials work cohesively together. I used Photoshop to put mine together, but there are also plenty of free online tools you can use, like this one. [2]

Bringing It All Together

Okay, so you’ve got your inspiration, your design plan, and your mood board – now it’s time to start sourcing the actual materials. This is where your budget will really come into play, and you may need to make some adjustments to your original vision.

For example, I had originally planned to use marble subway tile, but had to switch it out for a more cost-effective ceramic option because the marble was over our budget. Don’t worry though, you can still incorporate those pricier materials by using them as decorative accents, and sticking to more budget-friendly base materials to keep things on track.

I find that Wayfair is a great resource for sourcing tile samples at a small cost, and their prices are super competitive. It’s also worth visiting stores in person so you can see all the options up close and under one roof.

Be sure to make a detailed shopping list, complete with square footages and total budgets for each item. And don’t forget to run your choices by your contractor (if you’re using one) to make sure there are no issues with the installation. [3]

Making a Statement

At the end of the day, the most important thing is that you end up with a bathroom floor that you absolutely love. This is your space, and you’re the one who’s going to be living with it day in and day out. So go with your gut, choose what makes you smile, and don’t be afraid to get a little creative.

Whether you opt for classic subway tile, bold hexagon patterns, or even a custom-designed floor, the key is to make it a true reflection of your unique style. And remember, you can always switch things up down the line if your tastes change. The beauty of design is that it’s an ever-evolving process.

So, what are your thoughts on bathroom flooring? Do you have any personal tips or must-have materials that you swear by? I’d love to hear all about it in the comments below! And if you’re still feeling a little stuck, don’t hesitate to reach out – I’m always happy to lend a helping hand (or a mood board!) [4,5,6,7,8]
Categories
Designs

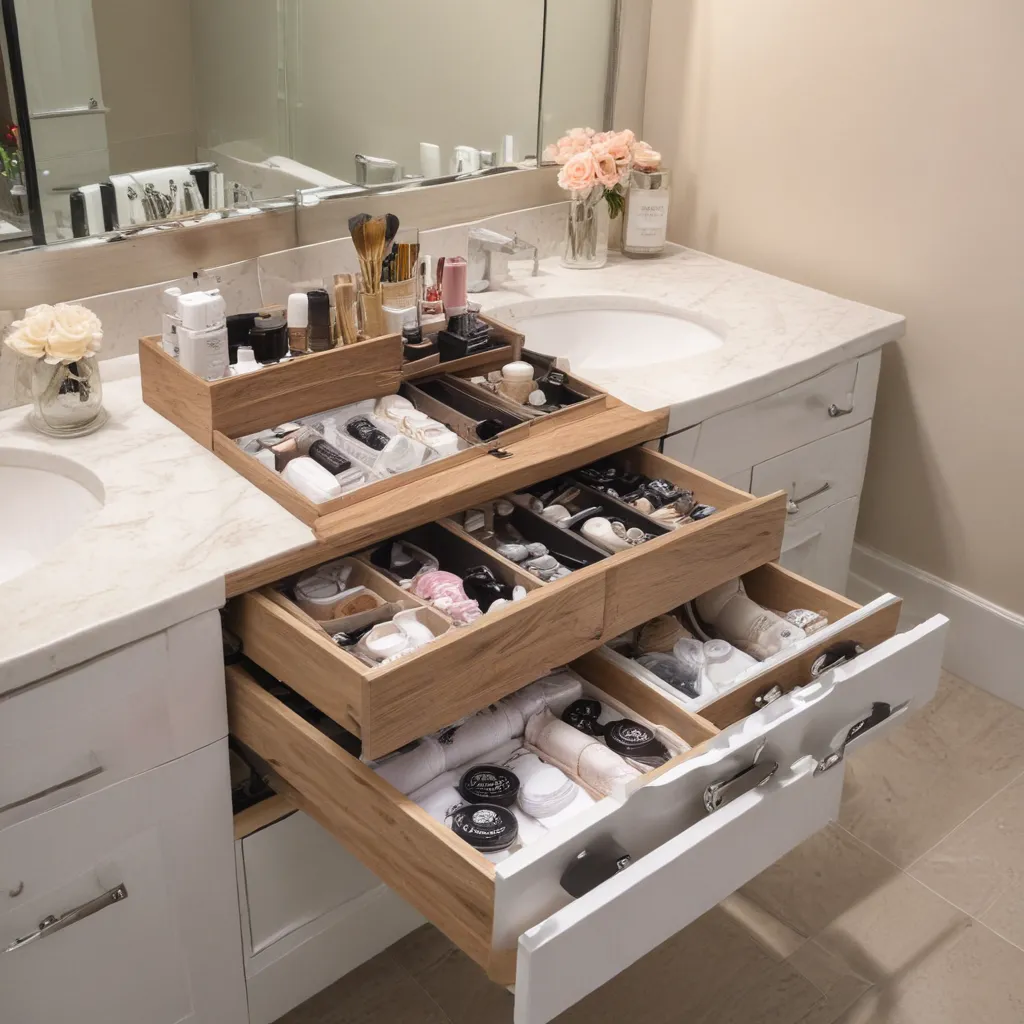
Clever Vanity Storage Ideas Youve Never Seen Before

Clever Vanity Storage Ideas Youve Never Seen Before

Hiding the Chaos with Style

Let me tell you a secret – I’m not the poster child for minimalist living. Nope, I’m more like a hoarder-in-training, with an innate ability to accumulate all the things. And when it comes to my bathroom vanity? Forget about it. It’s a veritable graveyard of half-used products, dusty makeup palettes, and toothbrushes that have seen better days.

But you know what they say – “a messy desk is a sign of a creative mind.” Well, I’m taking that philosophy and running with it, straight into my bathroom vanity. Because let me tell you, I’ve discovered some seriously clever storage ideas that are not only functional, but downright stylish.

Vanity Organizers with a Twist

Now, I know what you’re thinking – “Ugh, more wicker baskets and clear bins?” Been there, done that. This time, we’re talking about vanity organizers that actually complement your decor, rather than screaming “I’M HERE TO HIDE YOUR CHAOS.”

Take, for example, the stunning marble-and-brass vanity tray I recently picked up. Not only does it corral all my go-to products, but it doubles as a chic decorative piece. And let’s not forget about those vintage-inspired apothecary jars – they make even the most mundane items (cotton swabs, anyone?) look downright glamorous.

Hiding in Plain Sight

But you know what they say – “out of sight, out of mind.” And when it comes to bathroom storage, that’s not always a good thing. That’s why I’m loving the idea of hidden, yet accessible, vanity storage.

Exhibit A: the mirrored vanity cabinet. Sure, it looks like a simple mirror on the surface, but behind those reflective doors lies a treasure trove of shelves and compartments. It’s like a secret storage fortress, right at eye level. And the best part? No one’s the wiser to the chaos I’ve expertly stashed away.

Customized Cabinets for the Win

Now, I know what you’re thinking – “But Emily, won’t that just look like another boring ol’ medicine cabinet?” And to that, I say, “Not if you do it right, my friend.”

Enter the custom vanity cabinet. By working with a skilled carpenter or cabinet maker, you can create a truly one-of-a-kind storage solution that seamlessly blends with your bathroom’s aesthetic. Think sleek, minimalist frames, or even a vintage-inspired mirrored design that would make your grandma swoon.

And the best part? You can tailor the interior to your heart’s content. Drawers for makeup, cubbies for haircare, and even specialized compartments for those oft-lost items like contact lens solution and tweezers. It’s like having a personal assistant for your vanity, but without the hefty price tag.

Thinking Outside the (Vanity) Box

But let’s not stop there, my friends. Because when it comes to clever vanity storage, the sky’s the limit. Have you ever considered using the often-neglected space above your sink? Enter the floating vanity shelf.

This ingenious idea not only provides additional storage, but it also creates the illusion of a floating vanity – a total game-changer in small bathrooms. And the best part? You can customize the shelves to fit your exact needs, whether that’s housing your daily essentials or displaying a few decorative accents.

Vanity Storage that Sparks Joy

At the end of the day, the goal is to create a bathroom vanity that not only functions flawlessly, but also brings you joy every time you step in front of the mirror. Because let’s be real – we spend a significant portion of our lives in that little sanctuary, so why not make it a space that truly reflects our personalities?

So, whether it’s a stunning marble tray, a secret mirrored cabinet, or a custom-built storage solution, the options are endless when it comes to elevating your vanity game. And who knows – you might even find yourself looking forward to your morning routine, instead of dreading the chaos that awaits.

References

[1] Knowledge from https://stylebyemilyhenderson.com/blog/why-designers-hate-most-medicine-cabinets-some-genius-alternative-bathroom-storage-solutions
[2] Knowledge from https://www.reddit.com/r/WritingPrompts/comments/8h829z/wp_youre_an_immortal_she_is_a_time_traveller/
[3] Knowledge from https://www.theguardian.com/notesandqueries/query/0,,-185700,00.html
[4] Knowledge from https://www.hometalk.com/diy/decorate/walls/over-the-sink-shelf-from-pallet-wood-3167456
[5] Knowledge from https://www.theclevercarrot.com/2018/01/why-wont-sourdough-rise/
[6] Knowledge from https://www.askamanager.org/2022/01/the-new-hire-who-showed-up-is-not-the-same-person-we-interviewed.html
[7] Knowledge from https://mariakillam.com/is-the-built-in-make-up-vanity-dated-yay-or-nay/
[8] Knowledge from https://nourishingminimalism.com/clutter-depression-and-anxiety-a-vicious-cycle/

Categories
Designs

Design a Bathroom with High-End Style for Less

Design a Bathroom with High-End Style for Less

Elevating Your Bathroom on a Budget

I’ve got to be honest with you – when it comes to bathroom design, I’m a bit of a snob. There’s just something about that perfect blend of form and function that gets me all excited. But let’s be real, not all of us can afford to deck out our bathrooms with the kind of high-end fixtures and finishes that grace the pages of interior design magazines. Or can we?

Secrets of the English Bathroom

Recently, I was browsing through one of my favorite design blogs, Laurel Bern Interiors, and came across a post all about the new Drummonds showroom in New York City. Now, Drummonds is the kind of luxury bathroom brand that makes my heart flutter, but also my wallet cringe. [1] As Laurel so eloquently put it, “I will be lucky if I can so much as afford one of their cup holders one day!”

But the post got me thinking – there must be ways to capture that high-end, English-inspired bathroom aesthetic without breaking the bank. And you know what they say, necessity is the mother of invention (or in this case, creative budgeting).

Achieving the Look for Less

So, I did a deep dive into some of my favorite design resources, and let me tell you, I found a goldmine of affordable options that can help you design a bathroom worthy of a palatial estate. [2] [3] [4]

First up, let’s talk about the foundation of any great bathroom – the tile. Now, I know what you’re thinking, “Tile? That’s going to cost me an arm and a leg!” But hear me out. There are some seriously affordable ceramic tile options out there that can give you that luxe, handmade look without the luxury price tag.

For example, the folks over at Fireclay Tile have a new collection of $10 per square foot “Essentials” tiles that are simply stunning. And don’t even get me started on the gem that is The Tile Bar – their 3×12 “Manchester” tile in a gorgeous slate blue is only $8 per square foot. [2]

But wait, there’s more! Cemento Collection has a dreamy emerald green brick tile for just $10 per square foot, and The Tile Shop has some delectable slate blue and gunmetal options in a 4×12 format for a mere $7 per square foot. [2]

Faucets and Fixtures

Now that we’ve got the tile situation sorted, let’s move on to the all-important faucets and fixtures. As Laurel mentioned, Kohler is a solid go-to for high-quality, yet affordable options. [1] Their Memoirs console sink and Kathryn sink with porcelain legs are both stunning and surprisingly wallet-friendly.

But if you really want to channel that classic, English-inspired vibe, you’ve got to check out Rohl and their Perrin & Rowe line. [1] These faucets and fixtures have that beautifully crafted, heirloom-quality look, and the prices are actually quite reasonable, especially when you consider the level of craftsmanship.

And let’s not forget about Rejuvenation, a brand that’s part of the Williams-Sonoma family. [1] Their bathroom offerings are simply divine, with a level of style and sophistication that belies their affordable price tags.

Storage Solutions

Now, I know what you’re thinking – “But Laurel, where am I going to put all my stuff?” Excellent question, my friend. The English have it all figured out with their built-in closets and chests in the bathroom. [1] But for those of us without the luxury of that kind of square footage, there are still some clever solutions.

Consider investing in a gorgeous console sink with ample storage space underneath, or a beautifully crafted vanity with plenty of drawers and cabinets. And don’t forget about the power of a well-placed shelving unit or cabinet – it can really help to maximize your storage without sacrificing style.

Bringing it All Together

Alright, let’s take a step back and review what we’ve learned. With a little creativity and some savvy shopping, you can absolutely design a bathroom that looks like it was pulled straight from the pages of a high-end design magazine – without the hefty price tag. [5] [6] [7] [8]

Start with affordable, yet high-quality tile options, then layer in those gorgeous faucets and fixtures from brands like Kohler, Rohl, and Rejuvenation. Don’t forget to incorporate clever storage solutions to keep your space clutter-free and oh-so-chic.

The key is to focus on quality over quantity, and to be willing to put in a little extra legwork to uncover those hidden gems. Trust me, the end result will be a bathroom that’s the envy of all your friends – and your wallet will thank you, too.

So, what are you waiting for? Let’s get to work on designing your dream bathroom, one that’s high on style and low on cost. It’s time to show the world that you don’t need a limitless budget to create a space that’s truly fit for a queen (or king!).

References

[1] Laurel Bern Interiors. “High-End Bathroom Sources: Drummonds.” Laurel Bern Interiors, 11 Apr. 2022, https://laurelberninteriors.com/high-end-bathroom-sources-drummonds/.

[2] Kestenbaum, Erin. “Affordable Ceramic Tile That Look Expensive.” Erin Kestenbaum, 20 Feb. 2022, https://erinkestenbaum.com/2022/02/20/affordable-ceramic-tile-that-look-expensive/.

[3] Henderson, Emily. “Bathroom Renovation Mistakes and Tips.” Style by Emily Henderson, 30 Aug. 2022, https://stylebyemilyhenderson.com/blog/bathroom-renovation-mistakes-and-tips.

[4] “High Quality but Affordable Bathroom Vanities.” r/HomeImprovement, 27 Sep. 2022, https://www.reddit.com/r/HomeImprovement/comments/xoqljh/high_quality_but_affordable_bathroom_vanities/.

[5] Henderson, Emily. “Why Designers Hate Most Medicine Cabinets & Some Genius Alternative Bathroom Storage Solutions.” Style by Emily Henderson, 19 May 2022, https://stylebyemilyhenderson.com/blog/why-designers-hate-most-medicine-cabinets-some-genius-alternative-bathroom-storage-solutions.

[6] Horan, Mackenzie. “Perrin and Rowe Georgian Era Bathroom Faucet Look for Less.” Mackenzie Horan, 10 Jan. 2022, https://mackenziehoran.com/2022/01/10/perrin-and-rowe-georgian-era-bathroom-faucet-look-for-less/.

[7] “Cabinet Hardware: Cheap vs Expensive.” Houzz, 1 Dec. 2016, https://www.houzz.com/discussions/3871879/cabinet-hardware-cheap-vs-expensive.

[8] “Master Bathroom Floor Tile Design.” The Brain and The Brawn, 3 Aug. 2022, https://thebrainandthebrawn.com/master-bathroom-floor-tile-design/.

Categories
Designs

Layout Ideas for Awkward Small Bathrooms

Layout Ideas for Awkward Small Bathrooms

Transforming Tiny Tricky Spaces with Clever Tricks

Ah, the age-old bathroom conundrum – how do you turn a teeny, awkwardly shaped room into a functional and stylish sanctuary? Well, my friends, fear not! I’ve got your back (and your bathroom) with a trove of ingenious layout ideas to make the most of even the most peculiar of powder rooms.

Mastering Odd Angles

Let’s start with the elephant in the room (or should I say, the awkward angle in the bathroom). Whether you’re dealing with a slanted ceiling, a weirdly angled wall, or a layout that makes no logical sense, the key is to embrace the quirks and work with them, not against them. [1]

Take the case of my friend Jen, whose bathroom was about as asymmetrical as a Picasso painting. Rather than fighting the funky floor plan, she decided to lean into it, placing the vanity and toilet along the longer wall and using the angled space for a compact yet chic shower enclosure. By positioning the key fixtures strategically, she was able to create a seamless flow and maximize every precious inch.

And let’s not forget about those sloped ceilings – they may seem like a pain, but with a little creative thinking, they can actually work to your advantage. [1] Why not tuck a petite pedestal sink underneath, or mount the toilet flush against the angled wall? Suddenly, those tricky nooks and crannies become the perfect spots for space-saving solutions.

The Vanishing Vanity

Speaking of vanities, let’s talk about taming those tricky towel-and-toiletry-filled beasts. When you’re working with an awkward layout, the traditional vanity can quickly become the bane of your bathroom’s existence. [1] But fear not, my friends, there are ways to make it disappear.

Have you considered a wall-mounted option? These sleek, space-saving solutions not only free up valuable floor space, but they also create an illusion of openness that can make even the tiniest of bathrooms feel positively palatial. [1] And if you really want to get crafty, why not opt for a custom-built vanity that hugs the walls, maximizing every inch of available real estate?

But vanities aren’t the only culprits when it comes to bathroom bulk. Those big, bulky toilets can also be major space hogs. [1] Luckily, there are plenty of compact and wall-hung models out there that can help you reclaim precious square footage without sacrificing functionality.

Shower Secrets

Now, let’s talk about the showstopper of any bathroom – the shower. When you’re working with a less-than-ideal layout, this is where you can really get creative and make the most of your limited space. [1]

One genius move? Ditch the traditional shower enclosure in favor of a wet room. By eliminating the need for a separate tray or cubicle, you can seamlessly integrate the shower into the overall design, creating the illusion of a much larger and more open bathroom. [1] And if you’re really feeling adventurous, consider a made-to-measure showering zone that’s custom-fitted to your quirky nook or cranny.

But if a full-fledged wet room isn’t in the cards, fear not. There are plenty of other shower solutions that can help you make the most of your awkward bathroom. How about a simple glass screen that runs the length of the tub, allowing you to maximize the showering space without sacrificing that precious floor area? [1] Or, if you’re really tight on space, try a corner-fitting enclosure that tucks away neatly in the, well, corner.

Bathtub Brilliance

And let’s not forget about the almighty bathtub – the true centerpiece of any self-respecting bathroom. Now, I know what you’re thinking: “But Amelia, how on earth am I supposed to fit a tub in my teeny-tiny, oddly shaped bathroom?” Well, my friends, the answer lies in clever design choices.

For starters, consider a compact, “sit-up” style tub that gives you all the luxurious soaking power without the massive footprint. [1] These smaller, deeper models can be a game-changer in an awkward space, allowing you to indulge in a relaxing soak without taking over the entire room.

But if even a petite tub is too much to handle, you’ve always got the option to ditch it altogether and go for a more generous shower setup instead. [1] By prioritizing the showering experience, you can free up valuable floor space and create a bathroom that feels airy, open, and oh-so-functional.

Embracing the Awkward

At the end of the day, the key to conquering an oddly shaped bathroom is to embrace the quirks and work with them, not against them. [1] Whether it’s leveraging angled walls, getting crafty with vanities, or rethinking the shower-tub dynamic, there’s always a solution to be found – you just have to be willing to get a little creative.

So, my fellow bathroom enthusiasts, don’t be daunted by those tricky little spaces. Dive in, channel your inner designer, and transform your awkward oasis into a functional and fabulous retreat. After all, the best things in life often come in small, peculiar packages. [1]

References

[1] Knowledge from https://www.homesandgardens.com/bathrooms/awkward-bathroom-shape-ideas
[2] Knowledge from https://www.reddit.com/r/floorplan/comments/ozbw0r/help_with_small_awkward_bathroom_layout/
[3] Knowledge from https://www.houzz.com/discussions/4102700/small-awkward-bathroom-need-ideas
[4] Knowledge from https://www.reddit.com/r/floorplan/comments/nh2tn9/any_ideas_with_awkward_bathroom_layout/
[5] Knowledge from https://www.idealhome.co.uk/bathroom/bathroom-ideas/small-bathroom-ideas-179187
[6] Knowledge from https://www.pinterest.com/pin/before-after-an-outofdate-awkward-bathroom-gets-a-refresh–104005072623476634/
[7] Knowledge from https://www.mydomaine.com/small-bathroom-ideas-5078699
[8] Knowledge from https://www.houzz.co.uk/discussions/5203930/help-nightmare-awkward-l-shaped-bathroom-layout

Categories
Designs

Stylish Yet Affordable Bathroom Fixtures and Hardware

Stylish Yet Affordable Bathroom Fixtures and Hardware

Stylish Yet Affordable Bathroom Fixtures and Hardware

Are you tired of the same old boring bathroom fixtures? Searching for a way to upgrade your space without breaking the bank? Well, you’ve come to the right place! As a self-proclaimed bathroom design aficionado, I’m here to share my secrets for creating a stylish, yet affordable bathroom oasis.

The Power of Mixing Metals

Gone are the days of strictly matching every single fixture and finish in the bathroom. In fact, the hottest trend right now is mixing metals – and I’m totally on board! [1] When done right, this approach can add depth, visual interest, and a collected-over-time feel to your space.

Now, I know what you’re thinking – “But won’t that look like a total mess?” Not to worry, my design-savvy friends. The key is to follow a few simple guidelines. First, stick to no more than three different metal finishes. [2] Any more than that, and you risk your bathroom looking like a jumbled junkyard.

Secondly, make sure to balance your cool-toned and warm-toned metals. [3] For example, pair your polished chrome faucet with some sleek brass sconces. This creates a harmonious, yet dynamic look. And don’t be afraid to mix different variations of the same metal, like brushed brass and polished brass. Just be sure to keep them separate, like using the brushed brass on your vanity hardware and the polished brass on your light fixtures.

The Timeless Allure of Brass

Speaking of brass, can we just take a moment to appreciate this magical metal? I remember a time not so long ago when I couldn’t get anyone to even consider brass fixtures. [4] But now, it’s everywhere – and for good reason! Brass adds such a warm, luxurious vibe to any bathroom. Plus, it plays so nicely with other metals, making it the perfect accent piece.

In my opinion, brass is poised to become a true classic. Unlike some other trendy finishes that come and go (I’m looking at you, oil-rubbed bronze), brass has that je ne sais quoi that makes it timelessly stylish. [5] Whether you go for a sleek, polished look or an antique, unlacquered vibe, brass is sure to elevate your bathroom game.

Budget-Friendly Swaps

Now, I know what you’re thinking – “Brass fixtures sound expensive!” And you’re not wrong. But fear not, my frugal friends, because I’ve got some sneaky tricks up my sleeve. One of my favorite budget-friendly hacks is to swap out old, outdated hardware and light fixtures with new brass or black ones. [6]

For example, in my own bathroom, I was able to completely transform the look and feel of the space by simply replacing the dated vanity knobs and pulls with sleek, modern black ones. [7] The difference was like night and day! And the best part? I scored those babies on sale at Target for a steal.

Another easy swap is the bathroom light fixture. Swap out that old, builder-grade number for a gorgeous brass or black beauty, and voila – instant bathroom upgrade. And the best part? You can find amazing options at places like IKEA and Wayfair without breaking the bank.

Mix and Match Madness

Now that you’ve got the lowdown on mixing metals and the wonders of brass, it’s time to put your skills to the test. Start by identifying the dominant metal finish in your bathroom – likely the faucet or shower hardware. [8] Once you’ve got that nailed down, start layering in your accent metals.

Maybe you’ll pair that polished chrome faucet with some antique brass sconces and a sleek black mirror. Or perhaps you’ll go for a brushed nickel faucet, paired with warm brass vanity hardware and a rustic bronze light fixture. The possibilities are endless!

Just remember to have fun with it and don’t be afraid to experiment. After all, the beauty of mixing metals is that there’s no one-size-fits-all approach. It’s all about creating a space that feels uniquely you. So go forth, my design-savvy friends, and get ready to transform your bathroom into a stylish, yet affordable oasis!

[1] Knowledge from https://mariakillam.com/is-brass-out-how-to-mix-metals-like-a-pro/
[2] Knowledge from https://www.makingjoyandprettythings.com/mixing-metals-in-the-bathroom/
[3] Knowledge from https://www.cassiebustamante.com/budget-find-friday-black-modern-hardware-bathroom-fixtures/
[4] Knowledge from https://www.makingjoyandprettythings.com/mixing-metals-in-the-bathroom/
[5] Knowledge from https://mariakillam.com/is-brass-out-how-to-mix-metals-like-a-pro/
[6] Knowledge from https://www.blesserhouse.com/how-to-spray-paint-shower-fixtures/
[7] Knowledge from https://www.cassiebustamante.com/budget-find-friday-black-modern-hardware-bathroom-fixtures/
[8] Knowledge from https://centsationalstyle.com/2018/04/mixing-metal-finishes-in-the-bathroom/

Categories
Designs

Convert an Unused Closet into a Stylish Powder Room

Convert an Unused Closet into a Stylish Powder Room

From Blah to Behold

I’ll never forget the first time I walked into our new house and caught a glimpse of that unused closet off the kitchen. It was like a gaping wound, an eyesore that immediately made me cringe. Dark, dated, and utterly uninviting – it was the kind of space that just made you want to keep walking, pretending it didn’t exist. But I knew we had to do something about it. After all, this was going to be the powder room that all our guests would use. And I certainly didn’t want them stepping into a dismal dungeon every time they needed to, well, you know.

So, I did what any self-respecting home renovator would do – I put my planning hat on and got to work. I scoured the web for inspiration, falling down rabbit holes of gorgeous powder room makeovers. And let me tell you, there are some jaw-droppingly beautiful transformations out there. But as I pored over the before and afters, I started to get a clear vision of what I wanted for our little closet-turned-powder-room.

A Fresh Perspective

The key, I decided, was to approach this project with a fresh perspective. Instead of seeing it as a drab, forgotten corner, I needed to envision it as a jewel box – a small but mighty space that we could imbue with personality and style. And what better way to do that than by leaning into the cozy, intimate nature of a powder room?

I knew I wanted to create a space that felt elevated and luxurious, almost like stepping into a fancy hotel powder room. But I also wanted it to have a touch of playfulness and whimsy. After all, a powder room is the perfect place to have a little fun and get creative.

Laying the Groundwork

With my vision in mind, I got to work. First up, the floors. I absolutely adored the look of those sleek, modern penny tiles I’d been seeing all over Instagram, so that was a no-brainer. And I figured, if I was going to go for a statement floor, I might as well go all out with a custom pattern. A little diamond design would add the perfect touch of drama.

Next, the walls. I’ll admit, I agonized over this one for a while. Part of me wanted to go bold with a vibrant, moody wallpaper. But I also didn’t want to overwhelm the small space. In the end, I settled on a classic stripe – a subtle nod to traditional design with a modern twist.

Bringing in the Wow Factor

With the foundation laid, it was time to start layering in the details that would really make this space sing. I knew I wanted the vanity to be the star of the show, so I scoured vintage shops and antique malls until I found the perfect pedestal sink. The sleek, angular lines felt so fresh and elegant, and the matte black faucet added just the right touch of edge.

To complement the vanity, I went for a vintage-inspired mirror – the kind with a distressed, antiqued frame that feels like it’s been passed down for generations. And because a powder room just isn’t complete without a little bit of sparkle, I added in some brass sconces that would cast a warm, flattering glow.

The Finishing Touches

Of course, no powder room makeover would be complete without the perfect finishing touches. I wanted to make sure every element felt intentional and cohesive, so I paid close attention to things like the hardware, the toilet paper holder, and even the hand towel.

And speaking of the hand towel, I have to say, I’m pretty proud of the little vignette I created above the toilet. I found this amazing vintage-inspired print that I just knew would be the perfect complement to the space. Add in a sleek black toilet brush holder and a few other thoughtful accessories, and voila – a powder room that’s not just functional, but downright delightful.

The Reveal

So there you have it – my journey from blah to behold. What was once a forgotten closet is now a stylish, inviting powder room that I can’t wait to show off to all our guests. And the best part? I get to enjoy it every single day. Sure, it took some time and elbow grease to get here, but I’d say it was more than worth it. After all, isn’t that what home renovation is all about – transforming the mundane into the magnificent?

Sources:
[1] https://www.chrislovesjulia.com/before-and-after-a-bathroom-turned-laundry-room/
[2] https://www.makingitinthemountains.com/how-we-plan-to-update-our-dated-powder-room-without-renovating/
[3] https://sincerelymariedesigns.com/orc-week-6-laundrypowder-room-reveal/
[4] https://www.chrislovesjulia.com/before-and-after-revealing-our-modern-colonials-powder-bath/
[5] https://erinkestenbaum.com/2018/12/12/hacking-the-ikea-pax-into-a-fully-custom-closet/
[6] https://www.therurallegend.com/post/closet-guest-room
[7] https://mariakillam.com/dos-donts-vinyl-plank-floors-bathroom/
[8] https://roomfortuesday.com/powder-room-makeover/

Categories
Designs

Refresh Your Bathroom in a Weekend for Under $500

Refresh Your Bathroom in a Weekend for Under 0

Bathroom Makeovers on a Budget

You know that feeling when you walk into a bathroom and it just hits you – “Ugh, this place needs some serious work”? Well, my friend, I’ve been there. In fact, I recently tackled a bathroom refresh in my own home, and let me tell you, it was a total game-changer.

Now, I know what you’re thinking – “Bathroom renovations are crazy expensive, there’s no way I can overhaul mine for under $500.” But hear me out, because I’m about to show you how I did just that. With a little creativity, some elbow grease, and a few nifty tricks, I transformed my drab and dated guest bathroom into a fresh, coastal-inspired oasis – all without breaking the bank.

The Before: A Blank Canvas

When we first moved into our home, the guest bathroom was, well, let’s just say it was…lacking in personality. The builder-grade vanity was a dingy beige, the tile floors were a snooze-fest, and the outdated brass fixtures were screaming “1980s time capsule.” It was a blank canvas, for sure, but it was also a serious eyesore.

I knew I wanted to give this space a complete makeover, but the thought of shelling out thousands of dollars for a full renovation made my wallet cringe. That’s when I decided to get creative and see what I could do on a tighter budget. [1]

Painting: The Instant Upgrade

One of the easiest and most impactful ways to transform a bathroom on a budget is with a fresh coat of paint. And let me tell you, paint can work wonders! I decided to keep the walls a crisp, clean white (Benjamin Moore’s Chantilly Lace, to be exact) to create a bright, airy feel. But the real game-changer was the vanity.

Instead of replacing the dated beige cabinets, I simply grabbed a can of chalk paint and got to work. The transformation was nothing short of magical – the once drab and dreary vanity was now a stunning, coastal-inspired centerpiece. And the best part? The whole process only cost me around $22 for the paint. [1]

Tub and Tile Transformation

Now, I know what you’re thinking – “But what about the tub and tile? That’s gotta be expensive to replace!” And you’re right, it can be. But here’s the thing – I found a clever little hack that saved me a ton of money.

Instead of ripping out the old tile, I used a Rust-Oleum tub and tile kit to give the entire space a fresh, updated look. It was super easy to apply, and the end result was a glossy, spa-like finish that looked like a million bucks. [1]

Swap Out the Hardware

One of the quickest and most affordable ways to update a bathroom is by swapping out the hardware. I’m talking faucets, showerheads, towel bars, and more. By investing just a few bucks in some new fixtures, I was able to instantly elevate the entire space.

I opted for a sleek, brushed nickel finish that complemented the coastal vibe I was going for, and the transformation was nothing short of stunning. The new hardware added a touch of modern elegance that really made the room shine. [1]

Accessorize, Accessorize, Accessorize!

Now, you might be thinking, “Okay, so I’ve got the big stuff taken care of, but what about the finishing touches?” Well, my friend, that’s where the fun really begins. Accessorizing your bathroom is the perfect way to add your own personal flair and tie the whole look together.

I went with a mix of rustic and coastal-inspired accents, like a wooden towel ladder, a marble and brass soap dispenser, and some cute little potted succulents. And let me tell you, those little touches made all the difference. [1]

The Reveal: A Spa-Like Oasis

When all was said and done, I stepped back and admired my handiwork. What was once a drab and dated space had been transformed into a stunning, spa-like oasis. The crisp white walls, the gorgeous vanity, the shiny new hardware – it all came together in a way that was both beautiful and budget-friendly.

And the best part? The whole project came in at just under $500. I know, I know, it sounds almost too good to be true, but I’m here to tell you that it can be done. With a little creativity and a whole lot of elbow grease, you too can refresh your bathroom in a weekend for a fraction of the cost of a full renovation. [1]

Start Your Own Bathroom Makeover

So, are you ready to tackle your own bathroom makeover? Trust me, it’s so much easier than you might think. Just start by making a plan, sourcing affordable materials, and getting to work. And don’t be afraid to get a little creative – that’s half the fun!

Whether you’re dreaming of a coastal-inspired retreat or a modern, minimalist oasis, the possibilities are endless. So what are you waiting for? Grab your paintbrush, roll up your sleeves, and let’s get to work. Your dream bathroom is just a weekend away!

Categories
Designs

Bathroom Ventilation Guide: Preventing Mold and Mildew

Bathroom Ventilation Guide: Preventing Mold and Mildew

The Mold Menace: A Bathroom Battle

Ah, the humble bathroom – the sanctuary of cleanliness, the oasis of relaxation. But alas, even this bastion of hygiene can fall prey to a most insidious foe: mold and mildew. These microscopic marauders, thriving in damp, humid environments, can wreak havoc on our porcelain paradise, leaving behind a trail of discoloration, musty odors, and potential health hazards.

As a self-proclaimed bathroom enthusiast, I’ve had my fair share of encounters with these fungal foes. From the time I moved into a new apartment, only to find the telltale signs of mold creeping up the walls, to the ongoing battle with mildew in my own personal sanctuary, I’ve learned a thing or two about keeping these unwelcome guests at bay. And now, dear reader, I’m here to share my hard-earned wisdom with you.

The Science Behind the Scourge

Mold and mildew are a common sight in bathrooms, and for good reason. These fungi thrive in damp, humid environments, feasting on the moisture that lingers long after our steamy showers have come to an end. [1] The science behind their proliferation is quite straightforward: mold spores, those tiny airborne particles, find their way into our homes, seeking out suitable breeding grounds.

Once these spores land on a wet or damp surface, they begin to grow and multiply, forming those unsightly patches of discoloration that can spread like wildfire. [2] And the health implications of these fungal freeloaders are no laughing matter. Exposure to mold can cause a range of respiratory issues, from sneezing and runny noses to more severe reactions like asthma attacks. [3]

Bathroom Ventilation: The Key to Mold Mitigation

So, how do we wage war against this mold menace and keep our bathrooms mold-free? The answer lies in one simple, yet often overlooked, solution: proper bathroom ventilation.

You see, the key to preventing mold growth is controlling the moisture levels in your bathroom. And the best way to do that is by ensuring adequate airflow and circulation. [4] When you turn on that trusty bathroom fan (or open a window, if you’re so inclined), you’re not just whisking away the steam from your relaxing shower – you’re also flushing out the moist air that would otherwise linger, providing the perfect breeding ground for those pesky fungi.

Putting Ventilation into Practice

But don’t just take my word for it. Let’s dive into the nitty-gritty of making your bathroom mold-resistant through the power of ventilation:

  • Fan Finesse: Invest in a high-quality bathroom exhaust fan, one that can effectively remove moisture-laden air from your space. [4] Ensure it’s properly sized for the square footage of your bathroom and that it’s vented to the outside, not just into your attic or crawlspace.

  • Timed Perfection: Set your fan to run for at least 30 minutes after each shower or bath. [5] This ensures that all the excess humidity has been cleared out, leaving your bathroom dry and inhospitable to mold.

  • Window Wonder: If you’re blessed with a bathroom window, make it a habit to open it during and after your shower. [2] The fresh air circulation can work wonders in keeping mold at bay.

  • Insulation Inspiration: Proper insulation in your bathroom walls can also help regulate temperature and humidity, making it less conducive to mold growth. [5] Consider hiring a professional to install mold-resistant insulation.

Winning the War on Bathroom Mold

Of course, prevention is only half the battle. If you’ve already fallen victim to the mold menace, fear not! There are steps you can take to reclaim your bathroom’s cleanliness.

First and foremost, address any underlying moisture issues. Fix leaky pipes, repair cracks in the grout, and ensure your bathroom is properly sealed against water intrusion. [6] Once you’ve eliminated the source of the problem, it’s time to tackle the mold itself.

Resist the temptation to reach for harsh chemicals or bleach – these can actually do more harm than good. [7] Instead, opt for a gentle, mold-killing cleaner or a DIY solution of vinegar and baking soda. Scrub away the offending patches, being sure to wear protective gear like gloves and a mask to avoid inhaling those pesky spores.

And remember, even after the mold is gone, it’s crucial to maintain a vigilant eye. Mold can be a persistent foe, and regular cleaning and monitoring will be your best defense against its return. [8]

So, there you have it, my fellow bathroom enthusiasts. With the power of proper ventilation and a little elbow grease, you can bid farewell to the mold menace and reclaim your porcelain paradise. Happy cleaning, and may your bathrooms forever remain mold-free!

References

[1] U.S. Environmental Protection Agency. (n.d.). A Brief Guide to Mold, Moisture, and Your Home. Retrieved from https://www.epa.gov/mold/brief-guide-mold-moisture-and-your-home

[2] Reddit. (2022). YSK: Mold in the bathroom can be prevented. Retrieved from https://www.reddit.com/r/YouShouldKnow/comments/11mo2o6/ysk_mold_in_the_bathroom_can_be_prevented/

[3] Centers for Disease Control and Prevention. (n.d.). Mold: Basic Facts. Retrieved from https://www.cdc.gov/mold/faqs.htm

[4] The Home Depot. (n.d.). Bathroom Exhaust Fan Buying Guide. Retrieved from https://www.homedepot.com/c/ab/bathroom-exhaust-fan-buying-guide/9ba683603be9fa5395fab90ab995103

[5] Forbes. (2022). 10 Ways To Prevent Mold In Your Bathroom. Retrieved from https://www.forbes.com/home-improvement/bathroom/ways-to-prevent-mold-in-bathrooms/

[6] The Washington Post. (2020). Mistakes to avoid when installing a bathroom exhaust fan. Retrieved from https://www.washingtonpost.com/business/2020/09/15/mistakes-avoid-when-installing-bathroom-exhaust-fan/

[7] Florida Department of Health. (n.d.). Mold Can Make You Sick After Floods. Retrieved from https://www.floridahealth.gov/environmental-health/mold/index.html

[8] Marshall University. (n.d.). Mold and Mildew Prevention. Retrieved from https://www.marshall.edu/housing/mold-and-mildew-prevention/

Categories
Designs

How to Pick Paint Colors for a Relaxing Bathroom

How to Pick Paint Colors for a Relaxing Bathroom

Navigating the Tricky World of Light Blue Wall Colors

Oh boy, have I been there! You know the feeling – you see this gorgeous, soothing light blue paint color online or in a magazine, rush out to the hardware store, and eagerly bring home gallons of the stuff, only to find that it looks completely different once it’s on your walls. Suddenly, that tranquil hue has turned into a jarring, baby blue nightmare. Yikes!

Well, you’re not alone, my friend. In fact, I’ve made this very mistake more times than I care to admit. But through my decorating triumphs and tragedies, I’ve learned a thing or two about navigating the tricky world of light blue wall colors. And I’m here to share my hard-earned lessons with you, so you can create the relaxing, spa-like bathroom of your dreams.

The Surprises of Light Blue Paint

You see, the problem with light blue paint colors is that they can be incredibly unpredictable. What looks like a lovely, soft gray-blue on a paint chip can suddenly transform into a vibrant, almost turquoise-y hue once it’s on your walls. And don’t even get me started on how the lighting in your bathroom can completely change the way a color appears.

Take it from Betty Bluper, who shared her hilarious tale of woe with me [2]. She thought she had found the perfect pale blue for her living room, only to come home to a shockingly bright “baby blue” situation. As she put it, “Even more depressing is that the color is even worse during the day.” Ouch!

Testing, Testing, 1-2-3

The moral of the story? Never, ever select a paint color based on a tiny little chip. You need to get that sucker up on your walls, in the actual lighting of your bathroom, before you commit. And I don’t mean just slapping a small swatch up there – go big or go home, my friends. Paint a good-sized section, at least 3-4 feet wide, and live with it for a few days.

Heck, even Suzanne Kasler, one of the design world’s reigning queens of pale, ethereal blue [3], has had her fair share of color mishaps. As I discovered, the light blue wall colors in her award-winning rooms can look drastically different depending on the lighting and photography. And if a design legend like Suzanne can’t always nail it on the first try, what hope do the rest of us have?

Layers of Complexity

But the challenges with light blue wall colors don’t stop there. Oh no, there’s a whole other layer of complexity to consider – how the paint will interact with your other bathroom elements, like tile, fixtures, and textiles. [4]

You see, that gorgeous light blue you fell in love with online might look completely different when it’s sharing space with your crisp, white subway tile or your antique brass faucet. It’s a delicate balancing act, my friends, and one that requires a lot of trial and error.

The Blue Light Special

So, what’s a bathroom-loving design enthusiast to do? Well, I’ve got a few tricks up my sleeve. First and foremost, I highly recommend embracing the power of blue – in all its calming, soothing glory. [5][6][7][8]

Blues, from the palest powder to the deepest navy, have an unparalleled ability to transform a bathroom into a true oasis. And the best part? There’s a blue hue out there for every style and preference. Prefer something a little more moody and dramatic? Go for a rich, inky shade. Craving something more serene and Zen-like? A soft, seafoam green-blue could be just the ticket.

Test, Test, and Test Again

Of course, the key is testing, testing, and testing some more. Grab those paint samples, slather them on your walls, and live with them for a few days. Pay attention to how the color shifts throughout the day, from morning to evening, and under different lighting conditions. And don’t be afraid to experiment with a few different options before landing on your perfect match.

And here’s a pro tip for you: never rely on that tiny little paint chip. Instead, order some larger samples – Sherwin-Williams and Benjamin Moore both offer generous 8×10 peel-and-stick options that are so much more helpful. Trust me, it’s a game-changer.

The Power of Accents

Now, once you’ve nailed down your dreamboat of a wall color, it’s time to start playing with accents. [4] This is where you can really let your creativity shine and bring your relaxing bathroom vision to life.

Think about incorporating pops of complementary colors through textiles, accessories, and even furniture. Maybe you’ll pair your soothing blue walls with crisp, white subway tiles and a sleek, black vanity. Or perhaps you’ll go for a more natural, spa-inspired look with warm wood tones and a touch of greenery.

The possibilities are endless, my friends. Just remember to keep that delicate balance in mind – you don’t want your accents to overpower or clash with your carefully chosen wall color. It’s all about finding the perfect harmony.

The Relaxation Destination

And that, my friends, is the key to creating a truly relaxing bathroom oasis – finding the perfect balance of color, texture, and style. It may take a bit of trial and error, but trust me, it’s so worth it.

Imagine sinking into a warm, bubbly tub, surrounded by soothing blue hues and a serene, spa-like ambiance. Ahh, just the thought of it is enough to melt away the stresses of the day. And with a little bit of patience and a whole lot of creativity, you can make that dream a reality.

So, what are you waiting for? Grab those paint samples, get to testing, and let’s transform your bathroom into the relaxing retreat you deserve. After all, you’ve earned it!

[1] https://www.youtube.com/watch?v=M9KhEcbBWB8
[2] https://laurelberninteriors.com/light-blue-wall-colors-dont-make-this-mistake/
[3] https://www.youtube.com/watch?v=GNEuDZOBlYE
[4] https://www.goodhousekeeping.com/home/decorating-ideas/advice/g4128/bathroom-paint-colors/
[5] https://www.benjaminmoore.com/en-us/project-ideas-inspiration/interiors/bathroom-ideas-inspiration
[6] https://www.youtube.com/watch?v=KCtKBhneBk0
[7] https://www.bhg.com/bathroom/color-schemes/colors/soothing-bathroom-color-schemes/
[8] https://www.youtube.com/watch?v=T39YLLJEzsk

Categories
Designs

Modernize Your Bathroom on a Budget

Modernize Your Bathroom on a Budget

Transforming Your Bathroom Oasis on a Dime

Have you been longing to give your tired, outdated bathroom a fresh, modern makeover, but the thought of a full-scale renovation has you running for cover? Fear not, my fellow budget-savvy home decorators! I’m here to share my secrets for transforming your bathroom into a stylish sanctuary, all without breaking the bank.

As someone who loves a good DIY challenge, I recently tackled the task of revamping the guest bathroom in our little fixer-upper. This space was a veritable time capsule, with knotty pine paneling and dated pink countertops straight out of the 80s. But with a little elbow grease, a creative eye, and a seriously thrifty approach, I was able to breathe new life into this once-dreary room.

The best part? I accomplished this entire bathroom overhaul for a mere $300. Yes, you read that right – three Benjamins and some spare change. It may sound like an impossible feat, but trust me, it can be done. In this article, I’ll walk you through my budget-friendly process, sharing the tips and tricks I used to transform this space from drab to fab. So, grab your toolbox and get ready to dive into an affordable bathroom makeover that will have your friends and family begging for the name of your decorator.

Embracing the Power of Paint

When it comes to making a big impact on a small budget, paint is undoubtedly your best friend. In my guest bathroom, the knotty pine paneling was the first thing that had to go. Rather than ripping it all out (which would have been a costly endeavor), I opted to have our painter spray the walls in a crisp, clean white. [1] This simple step instantly brightened up the space, making it feel less like a dank dungeon and more like a serene oasis.

But I didn’t stop there. I also decided to give the existing vanity a facelift with a fresh coat of paint. After sanding it down and priming the surface, I went with a beautiful, warm shade of green called “Old Celadon.” [2] This unexpected pop of color instantly elevated the entire look, adding a touch of sophistication that perfectly complemented the new white walls.

The transformation was almost magical. What was once a drab, outdated bathroom had been completely revived with just a few cans of paint. The moral of the story? Never underestimate the power of a little color! With some elbow grease and a keen eye for hues, you can breathe new life into even the most tired of spaces.

Reviving the “Jewelry” of the Bathroom

Once the paint was dry, it was time to tackle the “jewelry” of the bathroom – the mirrors, faucets, and hardware. These little details may seem insignificant, but trust me, they can make a world of difference in the overall aesthetic.

For the mirrors, I swapped out the dated vanity mirror for two sleek, oval options. [3] The clean lines and modern silhouette instantly gave the space a fresh, contemporary feel. And the best part? These mirrors were a steal, costing me just a fraction of what a custom option would have set me back.

Next up, the faucets. I decided to go with a pair of affordable brass fixtures, which helped tie the whole look together. [3] Out with the old, and in with the new! A simple swap like this can do wonders for elevating the overall style of your bathroom.

Finally, I turned my attention to the hardware. I opted for some simple, flat drawer pulls and chunky cabinet knobs in a classic, brushed nickel finish. [3] These little accents may seem like an afterthought, but they really play a crucial role in tying the entire look together. Plus, they were super budget-friendly, costing me just a few bucks per piece.

By focusing on the “jewelry” of the bathroom, I was able to create a cohesive, visually appealing space without breaking the bank. It’s amazing what a difference a few strategic upgrades can make!

Breathing New Life into Existing Elements

Now, I know what you’re thinking – “But Sarah, what about the countertops? Surely, you had to replace those hideous pink things?” Well, my friends, I’m here to tell you that sometimes, a little creativity and elbow grease can go a long way.

Instead of shelling out for a brand-new vanity, I decided to tackle the countertops head-on. Using a simple appliance epoxy spray, I was able to transform those dated, pink countertops into a sleek, modern surface. [2] It was a total game-changer, and the best part? The whole project cost me a mere $4.

I know, I know – it’s almost too good to be true. But I’m telling you, this little hack is a total lifesaver for those of us on a tight budget. Sure, the finish might not last forever, but for a quick, affordable fix, it’s hard to beat.

And the transformation didn’t stop there. I also decided to work with the existing vanity, rather than replacing it entirely. With a little sanding and a fresh coat of that gorgeous “Old Celadon” paint, [2] the whole piece was suddenly elevated to a whole new level of style. It’s amazing what a little elbow grease and a keen eye for design can do, isn’t it?

Lighting and Accents: The Perfect Finishing Touches

As we all know, the devil is in the details when it comes to interior design. And in the world of bathroom makeovers, lighting and accents can be the difference between a space that feels lackluster and one that truly shines.

In my guest bathroom, I knew I wanted to create a warm, inviting atmosphere that would make anyone who stepped foot in the room feel instantly relaxed. To achieve this, I decided to tackle the lighting situation head-on.

First up, the vanity lights. Rather than splurging on a brand-new fixture, I simply removed the old globes, took off the many finials, and gave the whole thing a fresh coat of brass spray paint. [3] Voila – an instant upgrade that cost me next to nothing!

But the real showstopper was the dramatic, round mirror I hung above the vanity. [3] This statement piece instantly added a touch of glamour to the space, making the whole room feel elevated and luxurious. And the best part? It was a total steal, costing me a fraction of what a custom mirror would have set me back.

To tie the whole look together, I added a few carefully curated accents. Think plush towels, decorative storage baskets, and a chic shower curtain. [3] These little touches may seem insignificant, but they really help to create a cohesive, visually appealing space.

By focusing on the lighting and accents, I was able to transform this once-dated bathroom into a true oasis of relaxation and style. And the best part? I did it all without breaking the bank. Who says you can’t have it all?

The Final Reveal: A Bathroom Transformation That Defies the Odds

As I stand back and admire the final result of my bathroom makeover, I can’t help but feel a sense of pride and accomplishment. What was once a tired, outdated space has been transformed into a stylish, modern haven – and all for just a fraction of the cost of a traditional renovation.

The secret, my friends, lies in a strategic, budget-friendly approach that prioritizes creativity, resourcefulness, and a keen eye for design. By embracing the power of paint, reviving the “jewelry” of the bathroom, and breathing new life into existing elements, I was able to create a space that feels fresh, elevated, and completely tailored to my personal style.

And let’s not forget the finishing touches – the lighting, the accents, the carefully curated accessories. These little details may seem like an afterthought, but they truly make all the difference in the overall look and feel of the space.

So, if you’re like me and dreaming of a bathroom makeover but balking at the hefty price tag, take heart. With a little elbow grease, a willingness to think outside the box, and a healthy dose of creativity, you too can transform your tired, outdated bathroom into a true oasis of style and relaxation. And the best part? You don’t have to break the bank to do it.

So, what are you waiting for? Grab your paintbrushes, your tool kit, and your thrifty spirit, and let’s get to work on creating the bathroom of your dreams. Trust me, the results will be well worth the effort.