Categories
Designs

Cozy Bathroom Decorating Ideas for Winter

Cozy Bathroom Decorating Ideas for Winter

Snuggling Up in the Tub: Crafting a Cozy Bathroom Oasis

As the temperatures drop and the snow begins to blanket the ground, there’s nothing quite like retreating to a warm, inviting bathroom to escape the chill of winter. While many of us focus on cozying up our living rooms and bedrooms during the colder months, the bathroom is often overlooked as a space to create a serene, soothing atmosphere. But trust me, with a few strategic touches, you can transform your bathroom into a cozy winter sanctuary that you’ll never want to leave.

[1] Just imagine it: you’ve had a long, stressful day, and all you want to do is sink into a steaming hot bubble bath, surrounded by flickering candles and plush, fluffy towels. As you inhale the calming scents of lavender or vanilla, the worries of the world melt away, and you’re left feeling refreshed, rejuvenated, and ready to take on whatever the season has in store. Doesn’t that sound like the ultimate winter self-care ritual?

Creating Cozy Ambiance with Lighting and Textiles

One of the easiest ways to make your bathroom feel cozy and inviting during the winter is to focus on lighting and textiles. [2] As the days grow shorter and the nights longer, good lighting becomes essential for creating a warm, welcoming vibe. Ditch the harsh overhead fixtures and opt for soft, diffused lighting instead. Sconces flanking the mirror, a statement pendant light, or even a few strategically placed candles can instantly transform the mood.

[3] And don’t forget about those plush, cozy textiles! Swap out your thin, summer-weight towels for luxurious, oversized bath sheets in rich, jewel-toned hues. Layer in a fluffy bathmat and a few decorative throw pillows for added comfort and visual interest. If you’re feeling extra indulgent, consider investing in a cozy robe or slippers to complete the spa-like experience.

Embracing Natural Elements for a Rustic-Chic Look

When it comes to winter bathroom decor, I’m a firm believer in bringing the outdoors in. [4] Think about incorporating natural elements like carved wooden shelves, woven baskets, or even a stunning driftwood mirror to infuse your space with a touch of rustic-chic charm. These organic materials not only add visual interest but also help to create a warm, earthy vibe that’s perfect for the colder months.

[5] And let’s not forget about the power of greenery! Houseplants are a great way to breathe life into your bathroom and add a pop of color and freshness. Opt for low-maintenance varieties like succulents or ferns that can thrive in the often-humid bathroom environment. Cluster them together on a windowsill or hang them from the ceiling for a truly impressive display.

Cozy Accents to Elevate Your Bathroom Bliss

Now that we’ve covered the basics of creating a cozy bathroom oasis, let’s dive into some of the finer details that can really take your winter retreat to the next level. [6] Plush, fluffy rugs in neutral tones like ivory or gray can instantly add a sense of warmth and comfort underfoot. And don’t be afraid to layer in a few decorative throws or pillows for an extra dose of coziness.

[7] Another must-have for your winter bathroom? Scented candles, of course! Opt for seasonal scents like cinnamon, vanilla, or pine to fill the air with a sense of holiday cheer. And don’t forget about the power of essential oils – try diffusing a blend of calming lavender and invigorating eucalyptus to create a truly spa-like experience.

[8] Finally, consider incorporating some unexpected, whimsical elements to really make your bathroom stand out. A vintage-inspired claw-foot tub, a cozy reading nook, or even a small fireplace (if you’re really feeling adventurous) can all add a touch of cozy charm that’s sure to delight.

So, there you have it – my top tips for crafting a cozy, winter-ready bathroom that you’ll never want to leave. Whether you’re looking to create a relaxing oasis or a festive holiday retreat, these ideas are sure to inspire. Now, if you’ll excuse me, I’ve got a date with a bubble bath and a good book.

Categories
Designs

Clever Bathroom Storage Ideas for Tiny Homes and Apartments

Clever Bathroom Storage Ideas for Tiny Homes and Apartments

Maximize Every Inch of Your Tiny Bathroom

Ah, the joys of living in a cozy, compact apartment – the charm of city life, the convenience of being close to everything, and the constant struggle to find a place for all your stuff. If you’re like me, your bathroom is probably the tiniest room in the house, yet it’s expected to serve as a sanctuary, a spa, and a storage unit all rolled into one. But fear not, my fellow tiny-home dwellers! I’m here to share some clever bathroom storage ideas that will help you maximize every precious inch of space.

Vertical Thinking: Maximize Vertical Storage

When floor space is limited, it’s time to look up. Vertical storage is your best friend in a small bathroom. [1] Install wall-mounted shelves or cabinets to keep towels, toiletries, and décor items neatly organized and within reach. Floating shelves are a great option, as they don’t take up any valuable floor space.

Another clever vertical hack is to use the space behind the door. [2] Attach a magnetic memo board or a series of hooks to the back of the door to hang hairdryers, straighteners, and other small items. This keeps them off the counter and out of sight when not in use.

Drawer Dividers: The Organizational Lifesaver

Raise your hand if your bathroom drawers are a jumbled mess of half-empty bottles, stray bobby pins, and who knows what else. [3] Drawer dividers are the key to taming the chaos. Invest in some simple organizers to section off your drawers and keep everything in its place. Dedicate specific areas for makeup, hair products, first-aid supplies, and anything else that tends to get lost in the depths of your vanity.

The Tidy Tub Trick

Showers and tubs can be a surprisingly versatile storage spot. [4] Install a wall-mounted caddy or shelves to hold your shampoo, conditioner, and other shower essentials. This keeps them off the floor and within easy reach. For an extra-sleek look, decant your products into matching glass bottles and line them up on the shelves.

Repurposed Perfection

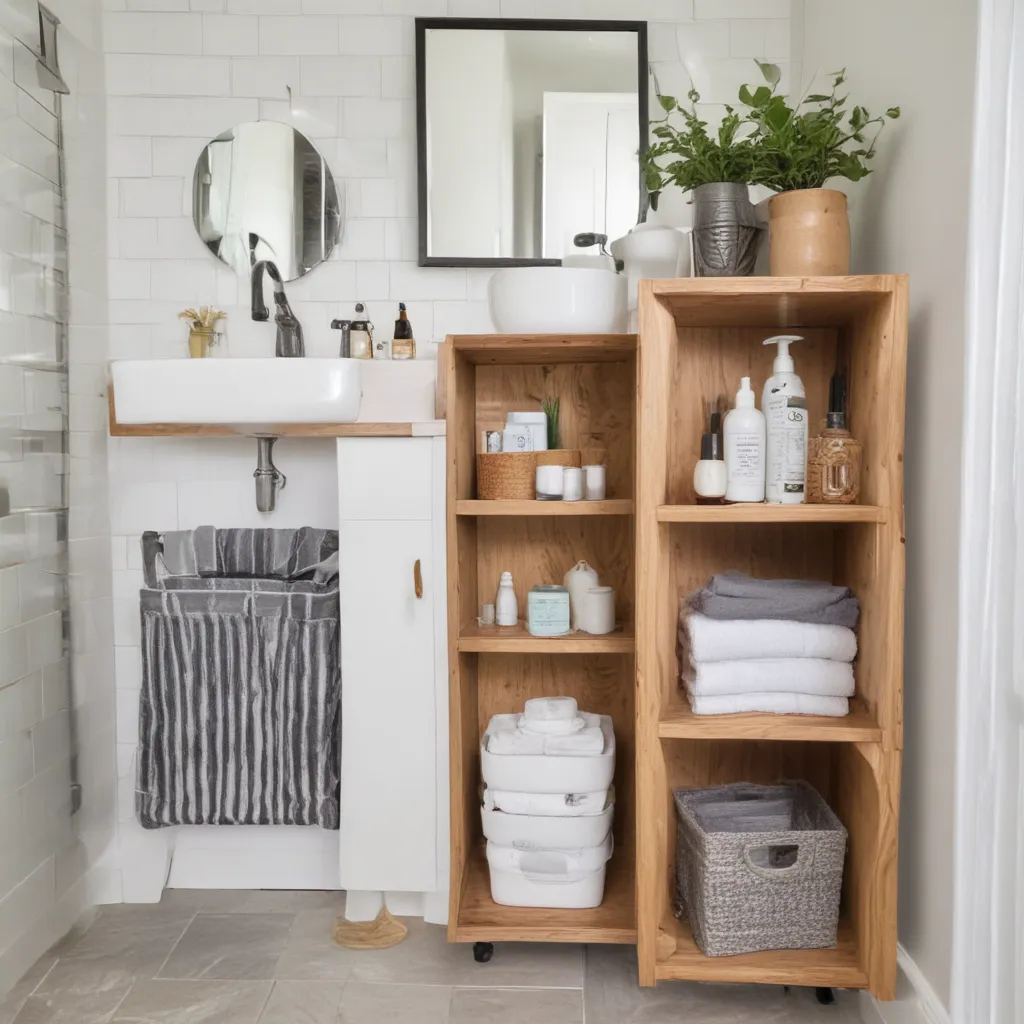
Sometimes, the best small-space solutions come from looking beyond the traditional bathroom gear. [5] Repurpose a narrow bookshelf or even a rolling bar cart to create a mobile storage unit for towels, toilet paper, and other necessities. The cart can tuck neatly against the wall when not in use, and you can wheel it over to the tub when it’s time for a luxurious soak.

The Power of Pegboards

Pegboards may bring to mind the garage or workshop, but they can be a game-changer in the bathroom too. [6] Mount a pegboard above the vanity or toilet to hang baskets, hooks, and other organizational tools. This allows you to keep everyday items within easy reach while freeing up precious counter and cabinet space.

Clever Cubbies and Baskets

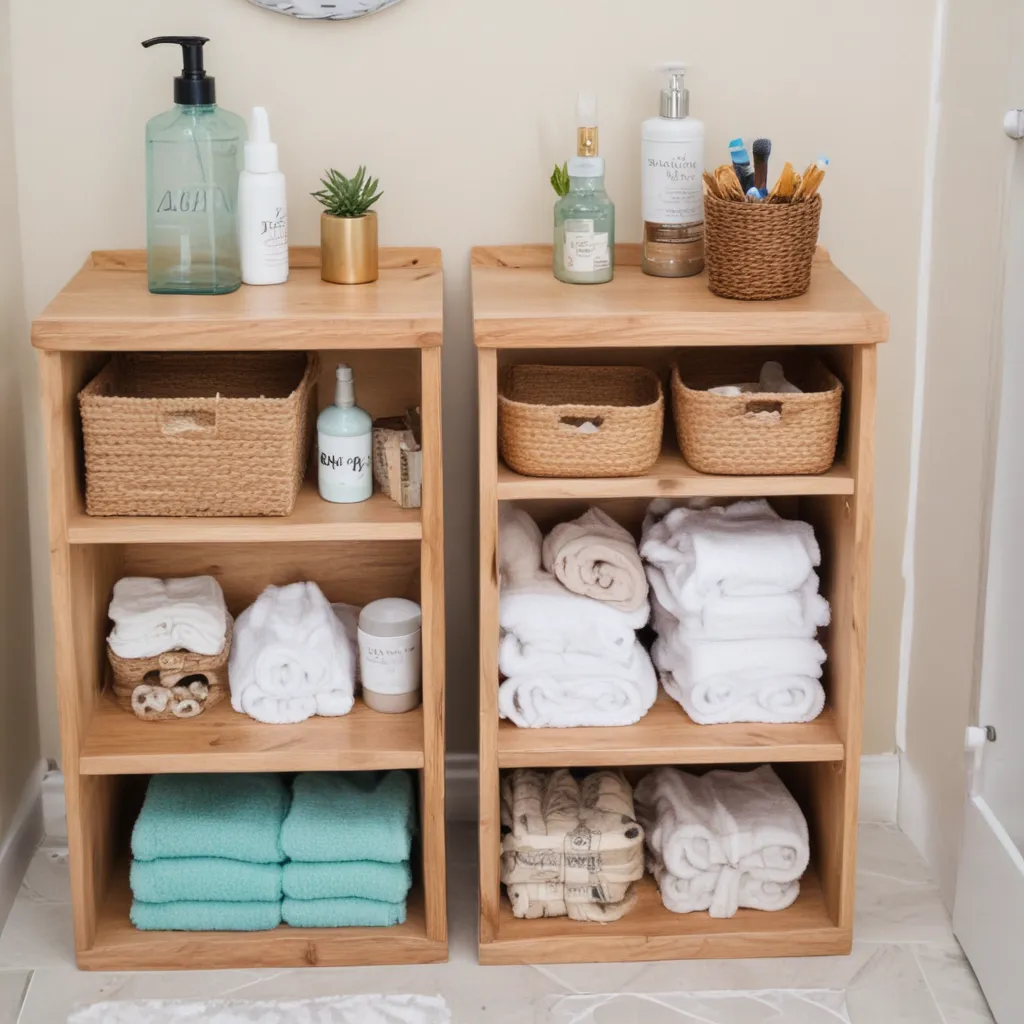
When all else fails, turn to the trusty cubby or basket. [7] Wall-mounted cubbies or woven baskets can provide a stylish and functional way to store rolled-up towels, extra toilet paper, and even decorative items like plants or candles. Bonus points if you can find units with different-sized compartments to accommodate various items.

Embrace the Unexpected

The key to maximizing storage in a tiny bathroom is to think outside the traditional box. [8] Consider repurposing furniture pieces from other rooms, like a slim console table or a vintage dresser, to create a one-of-a-kind vanity with plenty of storage space. Don’t be afraid to get creative and find unexpected ways to squeeze in extra storage wherever you can.

Remember, my fellow tiny-home dwellers, the secret to a clutter-free, zen-like bathroom is all about using every inch of available space. With a little creativity and some clever storage solutions, you can transform your petite powder room into a personal oasis. So, what are you waiting for? Let’s get organizing!

References

[1] https://www.apartmenttherapy.com/small-bathroom-ideas-design-storage-256392
[2] https://www.bhg.com/bathroom/storage/storage-solutions/hacks-to-make-the-most-of-your-tiny-bathroom/
[3] https://www.goodhousekeeping.com/home/organizing/tips/g810/small-bathroom-storage/
[4] https://www.pinterest.com/pin/367184175879140994/
[5] https://www.apartmenttherapy.com/storage-solution-ideas-from-a-tiny-new-york-bathroom-241153
[6] https://www.pinterest.com/pin/5-storage-solutions-for-your-rental-bathroom-tips–279363983113181713/
[7] https://www.pinterest.com/pin/57209857752831153/
[8] https://www.reddit.com/r/AskNYC/comments/mmujvk/maximizing_space_in_a_tiny_apartment/

Categories
Designs

Tips for Making a Dark Small Bathroom Feel Light and Bright

Tips for Making a Dark Small Bathroom Feel Light and Bright

Brightening Up a Dim Bathroom

Is your bathroom dark, dreary, and devoid of natural light? I feel your pain, my friend. When I bought my first home, the tiny basement bathroom was the stuff of nightmares – a cramped, windowless cave that made me want to keep the door firmly shut at all times.

But over time, through a combination of strategic design choices and a healthy dose of creativity, I was able to transform that gloomy space into a bright, airy oasis. And let me tell you, it was a game-changer. No more creepy, cave-like vibes – just a refreshing, welcoming bathroom that I actually enjoyed spending time in.

If you’re struggling with a dark, dingy bathroom, fear not. I’m about to share all my hard-won tips and tricks for making even the most stubbornly shadowy space feel light and bright. From lighting hacks to sneaky visual tricks, get ready to wave goodbye to that dungeon-like bathroom of yours and hello to a bathroom that’s worthy of a design magazine spread.

Lighting is Key

When it comes to brightening up a dark bathroom, lighting is easily the most important ingredient. After all, what good are all those other design tricks if you can’t actually see them?

I learned early on that simply slapping some basic overhead lighting wasn’t going to cut it. No, to really make a difference, you need to get strategic with your lighting plan. Start by evaluating the size and layout of your bathroom – is it a cozy powder room or a spacious master suite? That will help determine the right mix of lighting fixtures to use.

For smaller bathrooms, wall-mounted sconces or vanity lights are an absolute must. Not only do they provide ample illumination right where you need it most (hello, mirror!), but they also free up precious floor and counter space. Pair those with some recessed ceiling lights for a layered effect that makes the whole room feel brighter and more open.

In a larger bathroom, pendants or a statement chandelier can make a striking visual impact while also flooding the space with light. Just be sure to choose fixtures with ample wattage – no sad, dinky bulbs allowed! And don’t forget to consider the color temperature of your bulbs. Warm, soft white tones create a cozy vibe, while cool, bright white hues can make a space feel larger and more airy.

The final lighting tip? Dimmers are your best friend. Being able to adjust the brightness means you can shift the mood from energizing and productive to relaxing and spa-like at the flick of a switch. Trust me, it makes a world of difference.

Mirrors, Mirrors on the Wall

Another essential element in brightening up a dark bathroom? Mirrors, mirrors, and more mirrors. These reflective surfaces have magical powers when it comes to creating the illusion of space and light.

The key is to position your mirrors strategically – ideally, across from a light source like a window or vanity lights. That way, they can bounce that precious illumination around the room, making everything feel brighter and more open.

But don’t stop at just one mirror. Mix and match different shapes, sizes, and styles to add visual interest and depth. A large, statement mirror above the vanity is a no-brainer, but consider flanking it with smaller sconce mirrors or even a floor-to-ceiling mirror to really maximize the effect.

And don’t be afraid to get a little creative. Instead of the standard rectangular mirror, try a round, arched, or even asymmetrical version. These unique shapes can add a touch of personality while still serving their light-reflecting purpose.

The end result? A bathroom that feels infinitely more spacious and airy, with light dancing all around. It’s like magic, I tell you.

The Power of Paint

When it comes to brightening up a dark bathroom, paint color is yet another powerful tool in your arsenal. And contrary to what you might think, dark, moody hues aren’t necessarily off-limits.

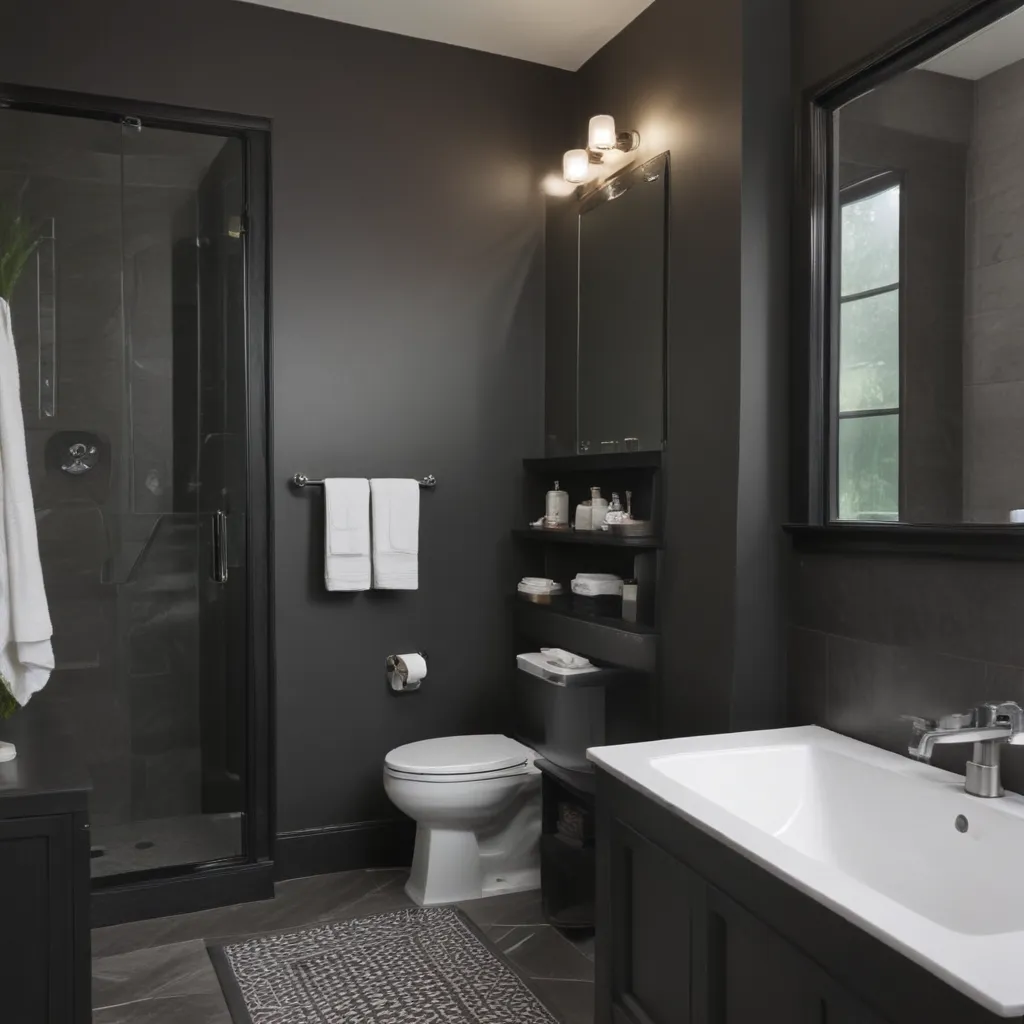
In fact, a deep, saturated color can actually make a small, shadowy bathroom feel more intentional and cozy, rather than just dreary. The key is to pair those rich tones with plenty of natural light sources (hello, mirrors!) and clean, crisp white accents.

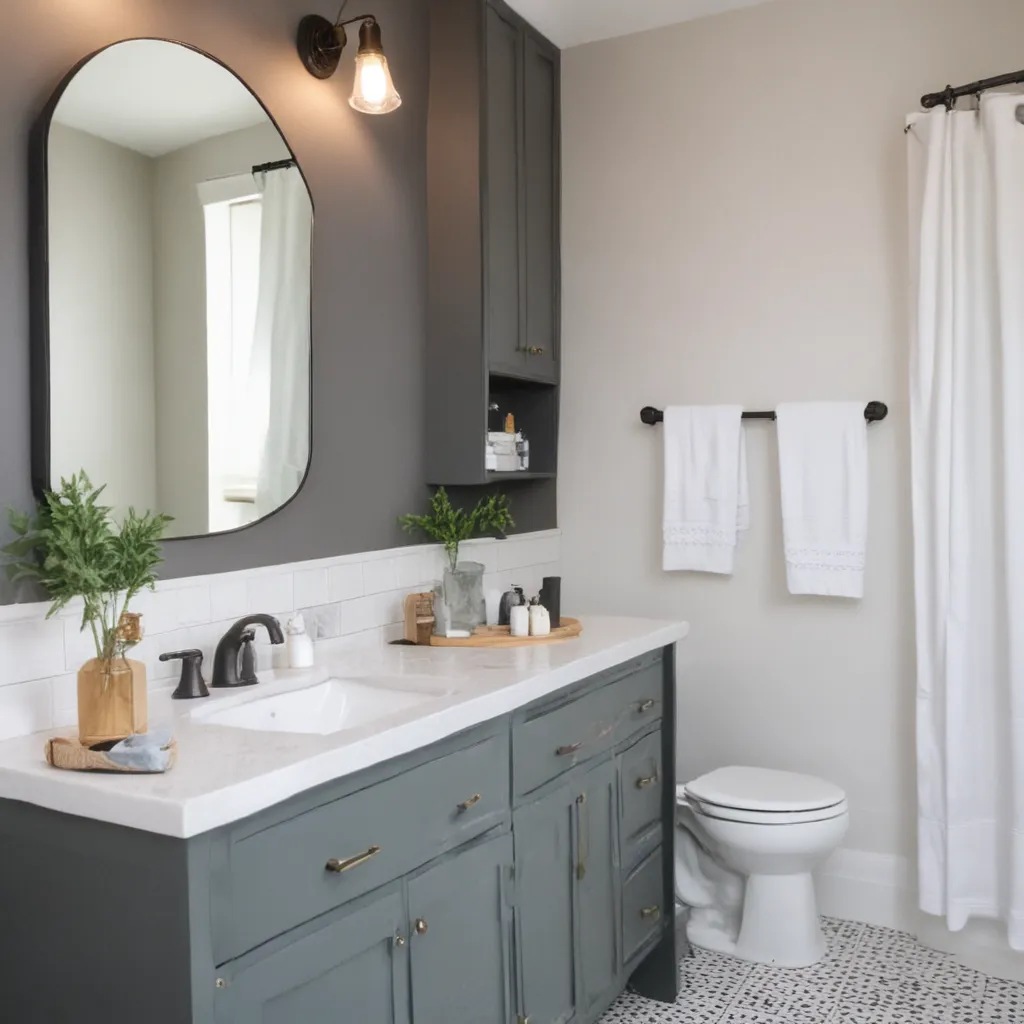
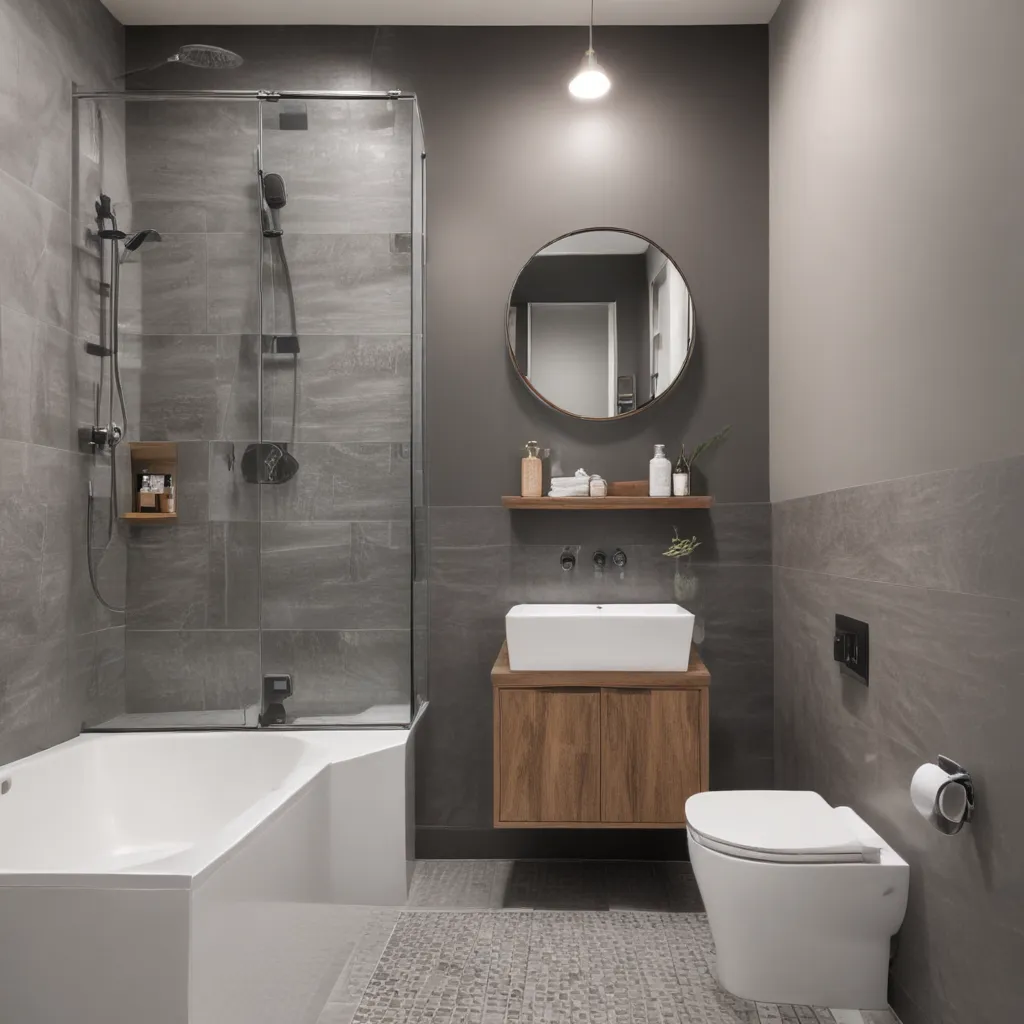
But if you’re still wary of going too bold, light, airy neutrals are always a safe bet. Think soft grays, warm beiges, or fresh whites – colors that reflect light and create a sense of openness. And don’t forget about the ceiling! Painting it the same color as the walls can make the room feel bigger and more cohesive.

Of course, color is highly personal, so don’t be afraid to experiment a bit. Grab some sample pots and test out a few options to see what feels right in your space. After all, the perfect paint color can be the difference between a dark, drab bathroom and a bright, beautiful oasis.

Greenery for the Win

Okay, hear me out – adding a few strategically placed plants to your dark bathroom might just be the missing piece to your brightening-up puzzle.

Now, I know what you’re thinking: “But plants need light! How on earth are they going to thrive in my windowless wonder of a bathroom?” Fair point. That’s why you’ll want to opt for low-maintenance, low-light-loving varieties like snake plants, ZZ plants, or pothos.

These resilient beauties not only add a touch of natural, living beauty to your space, but they can also help purify the air and create a sense of serenity. Plus, the lush, verdant foliage provides a lovely contrast to all that tile and porcelain, instantly making the room feel warmer and more inviting.

Tuck a plant or two onto your vanity, hang a trailing vine from the ceiling, or even incorporate a small plant stand – the options are endless. Just be sure to choose a container that complements your overall design scheme, and don’t overdo it. A few well-placed greenery accents are all you need to breathe new life into a dark bathroom.

A Pop of Color (Or Two)

While neutral, light-reflecting hues are a safe bet for brightening up a dark bathroom, don’t be afraid to inject a little personality with a pop of color. A bold, vibrant accent can instantly elevate the space and make it feel more inviting.

The trick is to use color strategically, rather than going overboard. Start small with a cheerful shower curtain, a vibrant bathmat, or a statement-making piece of wall art. These colorful accents will draw the eye and create an energizing focal point, without overwhelming the room.

If you’re feeling particularly adventurous, you could even consider painting your vanity or adding a colored tile backsplash. Just be sure to balance those bold hues with plenty of lighter, neutral elements to maintain that airy, open feel.

Remember, when it comes to brightening up a dark bathroom, a little color can go a long way. So don’t be afraid to experiment and have fun with it – after all, your bathroom should be a reflection of your personal style.

Decluttering is Key

Let’s be real – even the most beautifully designed, well-lit bathroom can feel dark and cramped if it’s cluttered to the brim. That’s why decluttering and streamlining your space should be a top priority when trying to brighten things up.

Start by taking a good, hard look at what’s taking up valuable real estate on your vanity, shelves, and countertops. Do you really need all those half-empty bottles of shampoo and random knickknacks? Probably not. Take some time to purge the unnecessary and keep only the essentials within easy reach.

Once you’ve cleared the clutter, look for smart storage solutions to neatly tuck away the remaining items. Wall-mounted shelves, mirrored medicine cabinets, and under-sink organizers are all great options that will help keep your bathroom feeling clean, open, and airy.

And don’t forget about the little details, too. Replace bulky towel racks with sleek, minimalist versions, ditch the dated toilet paper holder, and consider swapping out your tired old bathmat for a fresh, light-colored one. Every little decluttering win adds up, making your bathroom feel brighter, bigger, and more serene.

Bringing in the Light

If your dark bathroom is truly a lost cause when it comes to natural light, it might be time to consider more permanent solutions. And I’m not just talking about slapping on a fresh coat of paint or adding a few mirrors – I’m talking about bringing in the big guns.

I’m referring, of course, to the wonder that is the skylight. Think about it – a strategically placed skylight can flood your bathroom with natural light, instantly making the space feel airier and more inviting. And if a full-blown skylight isn’t in the budget, a tubular light (like a Solatube) can be a more affordable alternative that still does the trick.

But if you’re not ready to go the skylight route, fear not. You can still create the illusion of light and openness with a few well-placed design tricks. Consider installing a glass shower door or even forgoing a door altogether, allowing the bathroom to feel more seamlessly connected to the rest of your home.

And don’t forget about the power of reflective surfaces. Mirrored walls, high-gloss tile, and even a metallic light fixture can all help bounce light around the room, making it feel brighter and more spacious.

No matter which route you choose, the key is to find ways to introduce as much natural light as possible. Because when it comes to brightening up a dark bathroom, nothing beats the real thing.

Putting It All Together

Transforming a dark, dreary bathroom into a bright, airy oasis might seem like a daunting task, but trust me – it’s totally doable. With the right mix of strategic lighting, smart storage, and a few design tricks up your sleeve, you can turn even the most stubborn windowless wonder into a bathroom you’re actually excited to spend time in.

Start by focusing on your lighting plan, making sure to layer different types of fixtures to create that perfect balance of ambiance and functionality. Then, take advantage of the magic of mirrors to reflect light and create the illusion of space. Pair those reflective surfaces with a fresh, light-reflecting paint color, and you’re well on your way to a brighter, more inviting bathroom.

Don’t forget to inject a little personality, too – a pop of color here, a touch of greenery there. And always, always keep decluttering and streamlining top of mind. The less visual clutter, the more open and airy your bathroom will feel.

Finally, if you’re really struggling with a lack of natural light, don’t be afraid to explore more permanent solutions like skylights or tubular lights. Because when it comes to brightening up a dark bathroom, every little bit of illumination counts.

So, what are you waiting for? Grab your toolbox and let’s get to work transforming that dark, dreary bathroom of yours. With a little creativity and a whole lot of elbow grease, I promise you’ll be basking in the glow of your bright, beautiful new oasis in no time.

[1] https://www.architecturaldigest.com/story/small-bathroom-ideas-for-a-brighter-breezier-space
[2] https://www.deltafaucet.com/il/style-design/making-your-dark-bathroom-brighter
[3] https://www.apartmenttherapy.com/how-to-brighten-up-a-bathroom-with-zero-windows-36660018
[4] https://stylebyemilyhenderson.com/blog/make-dark-room-brighter
[5] https://graceinmyspace.com/10-creative-ideas-to-make-your-windowless-bathroom-bright-and-airy/
[6] https://thediyplaybook.com/paint-color-for-bathroom-with-no-windows/
[7] https://www.thriftydecorchick.com/2016/02/the-daylight-bulb-amazing.html
[8] https://www.taralenneydesign.com/post/the-biggest-mistake-you-re-making-with-lighting-and-how-to-fix-it
Categories
Designs

Refresh Your Bathroom in a Weekend for Under $200

Refresh Your Bathroom in a Weekend for Under 0

A Weekend Well Spent

If you’re like me, your bathroom is probably the one room in your home that’s constantly in need of a little TLC. Whether it’s outdated fixtures, drab decor, or just that general feeling of staleness, bathrooms can quickly start to feel stale and uninviting. But fear not, my fellow bathroom enthusiasts! I’m here to share my secrets for giving your tired tub a total refresh – all in the span of just one weekend and for under $200.

Revamp on a Dime

Not long ago, I found myself staring at the oh-so-classic white tile and tub in my own Jack-and-Jill bathroom, feeling like something was missing. Sure, it was perfectly functional, but it lacked any real personality. That’s when I decided to embark on a little weekend project to breathe some new life into the space.

The key, I quickly realized, was to focus on the small details. Rather than a full-blown renovation, I opted for a more targeted approach – one that would add just the right amount of visual interest without breaking the bank. Armed with a little creativity, a can-do attitude, and a budget of under $200, I set out to transform this tired bathroom into a stylish retreat.

Paint the Town (Blue)

My first order of business was to add a pop of color to the space. Now, I know what you’re thinking – painting an entire bathroom can be a real time-suck. But hear me out. Instead of tackling the walls, I decided to focus on a single accent wall, painting a bold blue band that would extend all the way around the room. This not only added a fresh, modern touch, but it also served as the inspiration for the rest of my design choices.

To make the color separation more distinct, I even carried the blue hue over to an old bar stool I had lying around, transforming it into a functional and visually striking display surface. With the help of some painter’s tape and a steady hand, I had the entire project completed in just a couple of hours. [1]

Sew Impressive

Next up, it was time to turn my attention to the shower curtain. Now, I know what you’re thinking – a shower curtain? Really? But trust me, this simple swap can make a world of difference. I started with a basic white curtain, but then put my sewing skills to the test, adding a custom blue fabric panel to the bottom. By incorporating the same color scheme, I was able to tie the entire space together seamlessly.

And let me tell you, sewing that French seam was no easy feat, but the end result was worth every stitch. Not only did it look impeccable, but it also allowed me to personalize the curtain to perfectly fit the dimensions of my tub. [1]

Art Attack

With the major pieces in place, it was time to tackle the walls. Now, I’ll admit, I’m no Picasso, but I’ve always had a soft spot for abstract art. So, I decided to channel my inner artist and create a few custom pieces to hang on the freshly painted walls.

Using some simple craft supplies and a whole lot of creativity, I managed to whip up three unique wall hangings that perfectly complemented the blue and white color scheme. From a bold brushstroke masterpiece to a playful splash of paint, these DIY creations added the perfect finishing touch to my bathroom oasis. [1]

Final Touches

Of course, no bathroom makeover would be complete without a few final flourishes. I couldn’t resist scooping up some plush white towels and cushy bath mats, and I even treated myself to a new showerhead and a sleek, modern curtain rod. [3]

And the best part? I was able to source all of these items from a variety of local retailers, staying well within my $200 budget. [1] By shopping smart and embracing my inner DIY spirit, I transformed this once-lackluster bathroom into a true haven of relaxation – all in the span of a single weekend.

The Moral of the Story

The takeaway here is simple: you don’t need to break the bank to give your bathroom a much-needed refresh. With a little creativity, some elbow grease, and a strategic approach, you can breathe new life into even the most tired of spaces. So, what are you waiting for? Grab your paint brushes, dust off your sewing machine, and get ready to create your very own oasis – all for under $200 and in just one weekend. [2, 4, 5, 6, 7, 8]

Categories
Designs

Small Laundry Room and Bathroom Combo Ideas

Small Laundry Room and Bathroom Combo Ideas

Transforming Tight Spaces with Style and Function

As a self-proclaimed home organization enthusiast, I’ve had my fair share of experience tackling tricky spaces. But when it came to our tiny laundry room-bathroom combo, I’ll admit – I was stumped. How on earth could we squeeze in all the necessities while maintaining a stylish, inviting atmosphere? Well, after a bit of creative problem-solving (and some trial and error), I’m thrilled to share the transformation.

From Drab to Fab: Breathing New Life into a Cramped Space

When we first moved into our cozy ranch-style home, the laundry room-bathroom combo was, well, less than impressive. Dingy walls, outdated fixtures, and zero storage – it was a functional nightmare masquerading as a necessary eyesore. But I’m not one to back down from a design challenge. [1] Inspired by the gorgeous laundry room-bathroom combos I’d been swooning over on Pinterest, I was determined to make this space shine.

Embracing the Unexpected: Designing for Function and Flair

The key, I soon realized, was to approach this project with an open mind and a willingness to think outside the box. After all, when you’re working with limited square footage, conventional wisdom often goes out the window. [2] I started by taking a hard look at our existing setup, scrutinizing every nook and cranny for hidden potential. And that’s when the lightbulb moment struck – why not incorporate the washer and dryer right into the bathroom design?

Stacking Up Style: Maximizing Space with Stackable Appliances

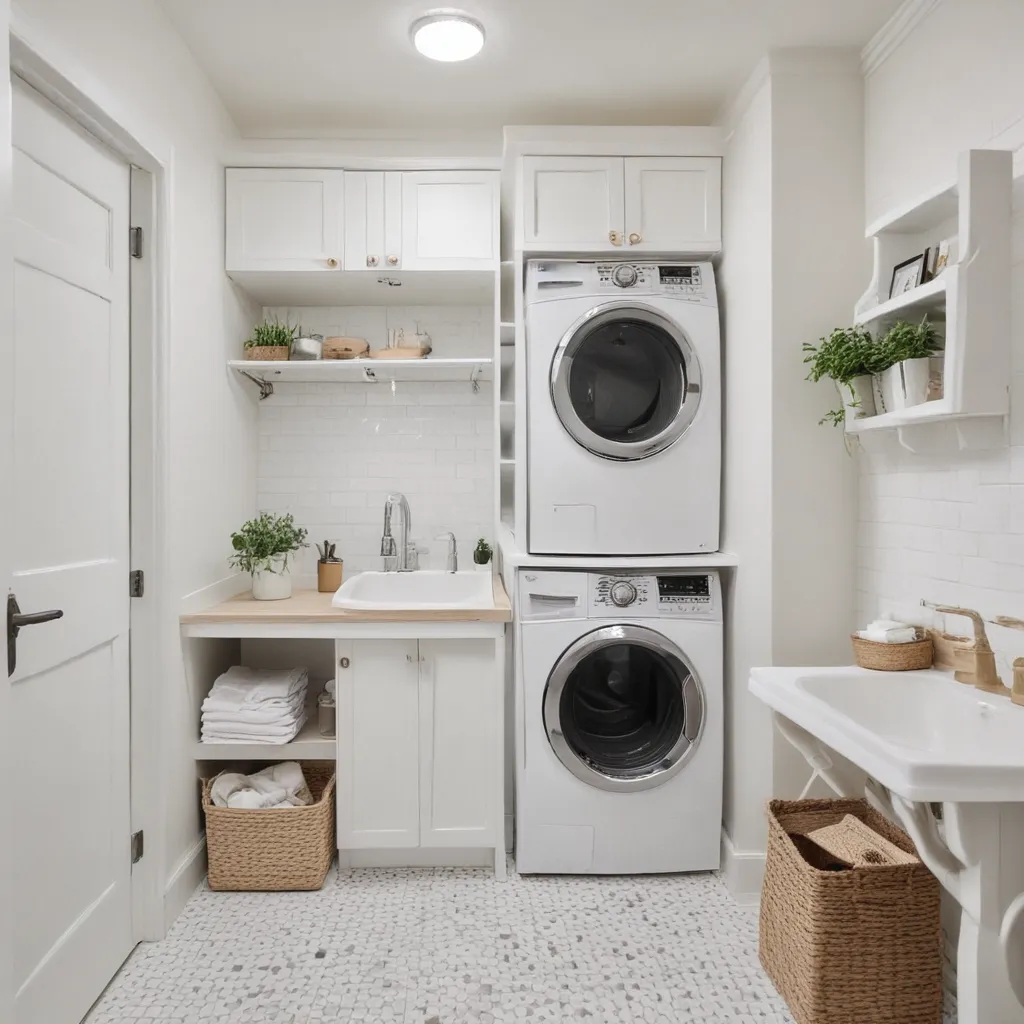
Now, I know what you’re thinking – “A washer and dryer in the bathroom? Isn’t that a bit… unconventional?” And you’d be right. But hear me out. By opting for a sleek, stackable set, we were able to free up valuable floor space without sacrificing functionality. [3] Plus, the clean, modern aesthetic of our new front-loading machines seamlessly blended with the updated bathroom decor. It was a win-win!

Multifunctional Marvel: Transforming a “Laundry Closet” into a Chic Oasis

With the appliances taken care of, I turned my attention to the rest of the space. [4] One of my favorite features is the custom-built counter that runs the length of the wall, providing ample surface area for folding clothes and even doubling as a vanity. And the best part? We were able to tuck the linen storage right underneath, keeping everything neatly organized and easily accessible.

Lighting the Way: Brightening Up a Dim Space

No cozy bathroom is complete without the perfect lighting, and this room was no exception. [5] We opted for sleek, minimalist fixtures that not only illuminated the space but also complemented the overall aesthetic. And let me tell you, the difference it made was nothing short of transformative. Gone were the days of squinting to see my reflection in the mirror – this new and improved setup had me feeling like a Hollywood starlet.

Accessorizing for the Win: Elevating the Everyday

As any interior design aficionado will tell you, the devil is in the details. [6] That’s why I made sure to select stylish, functional accessories that would tie the whole room together. From the vintage-inspired TP holder to the swoon-worthy laundry soap dispenser, every element was carefully curated to create a cohesive, visually appealing space.

The Finishing Touches: Bringing in Personal Flair

But the real magic happened when I started incorporating those all-important personal touches. [7] A cheerful sign, a cozy throw, a few potted plants – these little details transformed the room from a bland utility space into a truly inviting oasis. And let’s not forget the pièce de résistance: the framed vintage-inspired art that now graces the wall, adding a touch of whimsy and character.

Embracing the Challenge: Lessons Learned and Future Plans

As I step back and admire the finished product, I can’t help but feel a sense of pride. What was once a dreary, uninspiring corner of our home has blossomed into a charming, functional sanctuary. [8] And while the journey wasn’t without its challenges, the end result has left me brimming with ideas for future projects. Who knows, maybe I’ll even tackle the master bathroom next – but that’s a story for another day.

Conclusion: Finding Beauty in the Unexpected

So, if you find yourself facing the daunting task of combining a laundry room and bathroom, take heart. With a little creativity, a dash of resourcefulness, and a whole lot of personal flair, you too can transform a cramped, uninspiring space into a true design masterpiece. After all, the best things in life often come in small packages – and this compact, multipurpose oasis is living proof.

References:
[1] https://www.pinterest.com/ssscov/bathroom-laundry-combo/
[2] https://foxhollowcottage.com/small-space-combination-laundry-room-powder-bathroom-refresh.html
[3] https://www.pinterest.com/sugarpienorman/laundry-bathroom-combo/
[4] https://www.houzz.com/photos/small-bathroom-laundry-room-ideas-phbr2-bp~t_712~a_30-231–3402-20848
[5] https://www.pinterest.com/whytileideas/bathroom-and-laundry-room-combination/
[6] https://www.houzz.com/photos/bathroom-laundry-room-ideas-phbr1-bp~t_712~a_3402-20848
[7] https://www.reddit.com/r/HomeImprovement/comments/oagdmp/combining_bathroom_and_laundry_good_or_bad_idea/
[8] https://www.houzz.com/discussions/5212509/laundry-room-bathroom-combo

Categories
Designs

Super Practical DIY Bathroom Storage Solutions

Super Practical DIY Bathroom Storage Solutions

Finding Inspiration in Mason Jars

Oh, mason jars – those humble glass vessels that can transform any space into a charming farmhouse oasis. I recently found myself staring at a growing collection of these jars, wondering how I could put them to good use in my bathroom. After some digging, I uncovered a treasure trove of brilliant mason jar organization ideas that had me itching to get my hands dirty.

You see, I’m a bit of a hoarder when it comes to bath products. My vanity drawers are a jumbled mess of half-used moisturizers, tangled hair ties, and cotton swabs fighting for precious real estate. But not anymore! I’m ready to bring some order to the chaos with the help of my new mason jar allies.

[1] The Creek Line House shared a fantastic roundup of mason jar organization projects, from clever desk organizers to stylish bathroom accessories. I was particularly drawn to the idea of using mason jars as vases, storing my various lotions and potions in a visually appealing way. Heck, I might even try my hand at a mason jar herb garden to add a fresh, natural element to my self-care routine.

As I dove deeper into the world of mason jar DIYs, I discovered even more ingenious ways to streamline my bathroom. Imagine a tidy display of cotton balls and Q-tips in adorable jars, or a hanging rack of nail polish bottles that would make any beauty junkie swoon. The possibilities are endless!

Embracing Baskets for Bathroom Bliss

While mason jars may have stolen the spotlight, let’s not forget about the humble storage basket. [2] Shabby Fufu’s bathroom organization ideas had me swooning, especially the use of stylish baskets to corral towels, toiletries, and other essentials.

I love the idea of tucking these baskets into nooks and crannies, maximizing every inch of available space. Plus, they add a touch of rustic charm that perfectly complements my farmhouse-inspired decor. No more unsightly piles of toilet paper or tangled hair tools – just neat, tidy baskets that double as decor.

Conquering Clutter with Clever Hacks

Of course, mason jars and baskets are just the beginning when it comes to smart bathroom storage solutions. [3] Liz Marie Blog offered up a treasure trove of DIY projects that had my organizational heart racing.

One that particularly caught my eye was the tiered tray made from dollar store items. Who knew a few candlesticks and metal trays could transform into such a chic and functional piece? I can already envision mine adorned with my most-used beauty products, keeping them easily accessible while maintaining a stylish aesthetic.

Another genius idea was the magnetic makeup board. By attaching small magnets to my makeup essentials, I can create a customized display that keeps everything neatly organized and at the ready. Goodbye, jumbled drawers – hello, streamlined vanity!

Maximizing Small Spaces with Clever Tricks

Now, I know not everyone has the luxury of a sprawling master bathroom. [4] Good Housekeeping’s tips for small bathroom storage had me taking notes, especially the idea of utilizing vertical space with shelves and over-the-toilet organizers.

As someone with a modest powder room, I’m always on the hunt for ways to squeeze in extra storage without sacrificing style. Slip-in cabinets and tiered towers sound like the perfect solution, allowing me to stash away toiletries and linens while showcasing a few decorative touches.

And let’s not forget the power of the humble towel rack. [5] Emily Henderson’s article on why designers hate medicine cabinets inspired me to think outside the box. A sleek, wall-mounted towel holder could be the perfect spot to display my fluffiest, most Instagrammable towels.

Crafting a Customized Oasis

At the end of the day, the key to bathroom bliss is finding storage solutions that cater to your specific needs and aesthetic preferences. [6] Makely Home’s DIY chalkboard towel rack is a shining example of how a little creativity can transform a utilitarian space into a personalized sanctuary.

I love the idea of using that blank canvas to leave little notes for my family or jot down reminders. It’s the perfect blend of function and flair, adding a touch of farmhouse charm without sacrificing practicality. Plus, the fact that I can easily swap out the chalkboard design means I can keep my bathroom feeling fresh and ever-evolving.

Embracing the Unexpected

As I’ve uncovered through my research, the true secret to conquering bathroom clutter lies in thinking outside the box. [7] The No Rules Home’s article on mudroom shoe storage had me pondering unexpected ways to repurpose furniture and decor for my bathroom needs.

Maybe a rustic bar cart could serve as the perfect mobile storage unit, housing extra towels, beauty tools, and cleaning supplies. Or perhaps a vintage dresser with its drawers labeled for various essentials could be the stylish solution I’ve been searching for.

The beauty of DIY bathroom organization is that there’s no one-size-fits-all approach. It’s all about getting creative, embracing the unexpected, and finding solutions that align with your personal style and space constraints. So, why settle for a cluttered vanity when you can craft a customized oasis that sparks joy every time you step inside?

With a little elbow grease and a dash of imagination, the possibilities for transforming your bathroom are truly endless. So, let’s get to work, shall we? The clean, organized sanctuary of your dreams is just a DIY project away.

[1] Knowledge from https://www.creeklinehouse.com/mason-jar-organizing-ideas/
[2] Knowledge from https://shabbyfufu.com/bathroom-storage-baskets-organization/
[3] Knowledge from https://www.lizmarieblog.com/2013/01/master-bathroom-organizing-ideas/
[4] Knowledge from https://www.goodhousekeeping.com/home/organizing/tips/g810/small-bathroom-storage/
[5] Knowledge from https://stylebyemilyhenderson.com/blog/why-designers-hate-most-medicine-cabinets-some-genius-alternative-bathroom-storage-solutions
[6] Knowledge from https://www.brepurposed.com/pretty-practical-laundry-room-storage/
[7] Knowledge from https://thenoruleshome.com/blog/mudroom-shoe-storage/

Categories
Designs

Small Bathroom Remodel Ideas That Make a Big Impact

Small Bathroom Remodel Ideas That Make a Big Impact

Turning a Tiny Tub into a Tranquil Retreat

I’ll be the first to admit – I’ve always been a sucker for a good bathroom makeover. There’s just something so satisfying about transforming a drab, outdated space into a serene oasis. And let me tell you, I’ve seen my fair share of dreary bathrooms in need of a serious facelift. But when my daughter Lizzy called me up the other day, bubbling with excitement about her plans to revamp her small guest bathroom, I couldn’t wait to lend a hand.

Lizzy and her husband bought their 90s fixer-upper about three years ago, and she’s been slowly but surely putting her stamp on the place. The first order of business? Repainting the kitchen and primary bathroom cabinets with some of our Bungalow 47 Furniture Paint. And let me tell you, that fresh coat of paint made all the difference – it was like the house had been given a whole new lease on life. [1]

But now, Lizzy had her sights set on updating the second bathroom, as well as the main powder room. And as a professional photographer and self-proclaimed DIY maven, I knew she’d be more than up for the challenge. She was determined to breathe new life into these spaces without breaking the bank.

Small Bathroom, Big Personality

Lizzy decided to tackle the powder room first, and let me tell you, the transformation is nothing short of stunning. This tiny space used to have a basic pedestal sink, which just wasn’t cutting it in the storage department. So Lizzy found a cute little vanity on Facebook Marketplace for a mere $20, along with a faucet for $12 – talk about a steal!

Using our Bungalow 47 Furniture Paint in the color “Topiary,” she gave the vanity a fresh, deep green hue. Now, instead of feeling cramped and utilitarian, this powder room exudes warmth and personality. And the best part? Lizzy didn’t have to shell out an arm and a leg to make it happen. [1]

But Lizzy didn’t stop there. Knowing that the bland tile floors were really bringing the space down, she decided to jazz them up with a little DIY magic. Using an epoxy paint, she created a complementary pattern that ties in seamlessly with the fun, patterned tile in the adjacent hallway. Talk about a budget-friendly solution! [1]

And just when I thought the powder room couldn’t get any cuter, Lizzy busted out her artistic skills and hand-painted a simple design on the back wall behind the toilet. Using our Bungalow 47 Furniture Paint in “Paddleboat,” she added a playful, graphic element that really brings the whole room together. [1]

To maximize the small footprint, Lizzy also installed some floating shelves above the toilet, providing much-needed storage without taking up valuable floor space. And by opting for a vintage mirror from my stash, she was able to add even more character to the space. [1]

Revamping the Kids’ Bath

With the powder room looking absolutely fabulous, Lizzy set her sights on updating the bathroom her girls use. And let me tell you, this space was in desperate need of some TLC. The outdated oak cabinets and greenish vanity top had her saying “wa, wa, waaaa” every time she walked in.

But once again, Lizzy proved that a little paint can work wonders. She custom-mixed a gorgeous pale pink shade from our Bungalow 47 line and got to work transforming those cabinets. The gold hardware she added provided the perfect finishing touch, giving the space a luxe, spa-like feel. [1]

Lizzy didn’t stop there, though. She also swapped out the plumbing fixtures, opting for a gleaming gold tone that complements the pink cabinets beautifully. And by scooping up some cute floral and polka dot hand towels, she was able to infuse even more personality into the room. [1]

The best part? Lizzy achieved this whole look without having to completely gut the space. By focusing on the small but impactful details – like paint, hardware, and accessories – she was able to breathe new life into this tired bathroom, all while staying on a tight budget.

Budgeting for a Bathroom Remodel

Now, I know what you’re thinking – a bathroom remodel, no matter how small, can’t be cheap. But Lizzy’s approach proves that with a little creativity and elbow grease, you can transform your space without breaking the bank.

The key, she says, is to start by assessing exactly what needs to be done. Does the flooring need to be replaced, or can it be updated with something like paint or vinyl overlays? Are the walls in good shape, or do they need a fresh coat of paint or new wallpaper? And what about the tub or shower – can it be refinished or does it need to be swapped out entirely? [1]

Lizzy also suggests getting creative with storage solutions, like her floating shelves in the powder room. By maximizing every inch of available space, you can cut down on the need for bulky vanities or cabinets.

And when it comes to fixtures and finishes, Lizzy recommends looking for budget-friendly options that still pack a punch. Things like spray-painted hardware or salvaged mirrors can give your space an elevated look without the high-end price tag.

Of course, no bathroom remodel is complete without a healthy dose of personal style. Lizzy’s decision to hand-paint a pattern on the powder room wall is a prime example of how you can infuse your own unique flair into the project. And by selecting colors, textures, and accessories that reflect your personal taste, you can create a space that feels truly custom, no matter your budget.

Wrapping Up

As I look at the “before” and “after” photos of Lizzy’s bathroom transformations, I can’t help but feel incredibly inspired. She’s proven that with a little elbow grease, a lot of creativity, and some strategic shopping, you can turn even the tiniest of bathrooms into a show-stopping retreat.

So if you’re feeling overwhelmed by the prospect of a bathroom remodel, take a deep breath and channel your inner Lizzy. Start by assessing your space and your budget, then get ready to unleash your inner designer. With a little bit of planning and a lot of passion, you can transform your drab bathroom into a sanctuary that makes a big impact – no matter its size.

References:
[1] Bungalow 47. “How to Do a Budget Small Bathroom Remodel with Flair and Creativity.” https://bungalow47.com/how-to-do-a-budget-small-bathroom-remodel-with-flair-and-creativity/

Categories
Designs

Modern Bathroom Design Ideas on a Tight Budget

Modern Bathroom Design Ideas on a Tight Budget

Create an Oasis on a Shoestring

Ah, the bathroom – the often-overlooked sanctuary of the home. While kitchens may get all the glory, I firmly believe that a well-designed bathroom can truly transform your daily routine. And the good news? You don’t need to break the bank to achieve that spa-like serenity.

As someone who’s tackled my fair share of budget-friendly bathroom makeovers, I’m here to share my secrets for creating a modern, stylish space without the hefty price tag. It’s all about getting creative, thinking outside the tile box, and making smart, strategic investments. So grab your budget and let’s dive in!

Embrace the Power of Paint

One of the most impactful and cost-effective ways to update your bathroom? A fresh coat of paint. Gone are the days of dingy, dated walls – with the right hue, you can instantly elevate the entire space.

My pro tip? Opt for a light, airy color palette. Soft grays, soothing blues, and crisp whites have a way of making even the tiniest of bathrooms feel larger and more inviting. And the best part? A gallon of paint typically costs less than $50, making it a budget-friendly update that packs a serious punch.

But don’t stop at the walls – get creative and consider painting your vanity, cabinets, or even the ceiling for a truly cohesive look. It’s amazing how a little pigment can transform the entire vibe of a room.

Repurpose and Revamp

When it comes to bathroom design on a budget, the art of repurposing is your new best friend. Instead of splurging on brand-new fixtures and vanities, see what hidden gems you can uncover at flea markets, thrift stores, or even your own garage.

Take, for example, the vanity in my last bathroom reno. I found an antique dresser at a local antique shop, gave it a fresh coat of paint, and voila – a one-of-a-kind statement piece that cost a fraction of a traditional vanity. And the storage? Unbeatable.

The same goes for mirrors, light fixtures, and even towel bars. With a little elbow grease and a keen eye, you can transform everyday items into custom, high-end-looking accessories. [1] Just be sure to measure carefully and plan ahead to ensure a seamless fit and integration with your existing plumbing and electrical.

Embrace the Beauty of Tile (On a Budget)

Tile is often one of the biggest budget-busters when it comes to bathroom renovations. But fear not, my fellow design enthusiasts – there are ways to get that luxurious, tile-clad look without the hefty price tag.

One of my favorite tricks? Opt for a simple, classic tile like subway or metro tiles, and then get creative with the pattern and grout color. [2] A herringbone or chevron layout can instantly elevate the space, while darker grout lines add a touch of visual interest and help camouflage any imperfections.

And let’s not forget about the power of peel-and-stick tiles. These budget-friendly options have come a long way in recent years, offering a wide range of styles and patterns that can easily transform a dated floor or backsplash. Plus, they’re a breeze to install, making them a great DIY project for the bathroom.

Embrace the Power of Accessories

When it comes to bathroom design, the devil is truly in the details. And the best part? Accessories are often the most budget-friendly way to make a big impact.

Think beyond the basic towel and shower curtain and get creative with things like:
– Stylish soap dispensers and toothbrush holders
– Decorative baskets and trays for storing extra supplies
– Hanging plants or small artwork to add pops of color and personality
– Chic towel racks, robe hooks, and other functional-yet-fashionable hardware

The key is to choose pieces that not only look great but also serve a practical purpose. [3] This way, you’re getting the best of both worlds – a beautiful bathroom that’s also highly functional.

And don’t be afraid to mix and match styles and materials. Pairing sleek, modern accents with rustic, farmhouse-inspired pieces can create a truly unique, personalized look.

Maximize Every Inch

In the world of bathroom design, square footage is often at a premium. But with a little creativity and strategic planning, you can transform even the tiniest of spaces into a functional, stylish oasis.

One of my favorite tricks? Utilize vertical space to the fullest. [4] Install floating shelves, add a tall, narrow cabinet, or even mount the toilet paper holder high on the wall to free up precious counter and floor space. And don’t forget about the power of recessed medicine cabinets – they can provide essential storage without taking up valuable real estate.

Another game-changer? Opt for a pedestal sink or a wall-mounted vanity. These sleek, space-saving options can instantly make a small bathroom feel more open and airy.

And when it comes to lighting, go for fixtures that do double duty. Sconces that pull double-duty as task lighting and ambiance-setting decor pieces are a budget-friendly win-win.

The Finishing Touches

As with any room in your home, the final touches can truly make or break the overall design. And when it comes to bathrooms, those little details can make a big difference.

Think beyond the basic towels and rugs and consider adding in unique, personalized elements like:
– Framed artwork or mirrors
– Decorative jars or vases
– Vintage-inspired hardware or accessories
– Lush, greenery-filled planters

The key is to choose pieces that not only look great but also have a functional purpose. [5] A ladder-style towel rack, for example, can provide essential storage while also adding a rustic, farmhouse-inspired touch.

And don’t be afraid to get creative with DIY projects. A simple, budget-friendly shower curtain can be transformed with a little fabric and glue, or you can try your hand at building a custom vanity or shelving unit.

At the end of the day, the true magic happens when you thoughtfully curate a blend of high and low, old and new. It’s all about finding that perfect balance that reflects your personal style and makes your bathroom feel like a truly special, one-of-a-kind retreat.

Putting It All Together

Transforming your bathroom on a tight budget may seem like a daunting task, but with a little creativity and a whole lot of determination, the possibilities are endless. From embracing the power of paint to repurposing and revamping, the key is to think outside the tile box and find smart, strategic ways to make the most of your space.

And don’t forget the finishing touches – those little details that truly bring your vision to life. Whether it’s a mix of modern and vintage accents or a DIY project that puts your personal stamp on the space, the goal is to create a bathroom that not only looks amazing but also feels like a true oasis.

So what are you waiting for? Grab your budget, channel your inner designer, and let’s get to work on creating the bathroom of your dreams – no hefty price tag required. [6] [7] [8] Happy renovating!

Categories
Designs

Make Your Bathroom Feel Airy and Open in 4 Easy Steps

Make Your Bathroom Feel Airy and Open in 4 Easy Steps

Step 1: Embrace Natural Light

When it comes to creating an airy and open bathroom, natural light is your best friend. Start by assessing the existing windows in your space. If possible, consider enlarging or repositioning them to allow more sunshine to flood in. Skylights are another fantastic option, as they can brighten up even the most cramped of bathrooms.

But it’s not just about the size and placement of the windows. The way you dress them can also impact the overall ambiance. Opt for sheer, lightweight curtains or blinds that can be easily opened to maximize natural illumination. Avoid heavy, bulky window treatments that may block the light and make the room feel closed in.

Step 2: Utilize Light-Colored Finishes

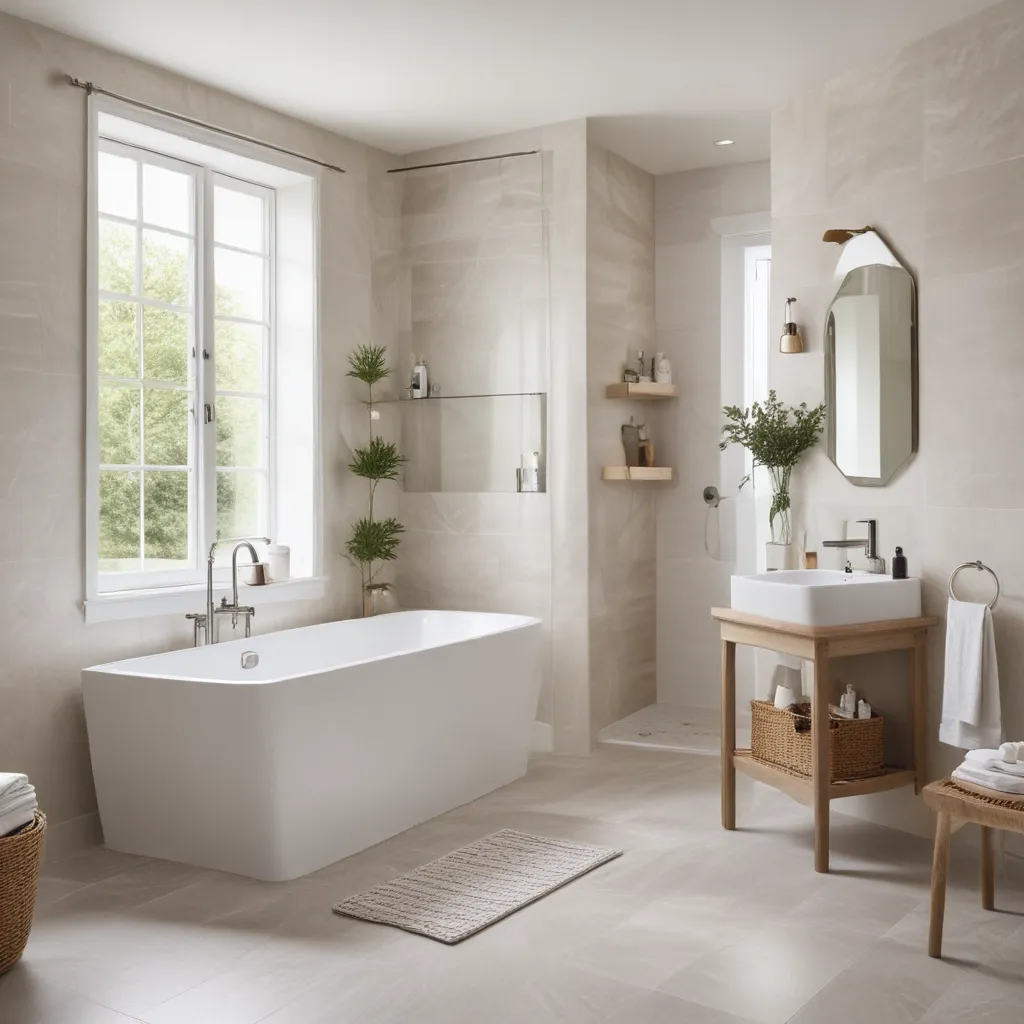
The materials and finishes you choose for your bathroom can make a big difference in creating an airy feel. Stick to a light color palette, such as whites, creams, and soft grays. These hues have a way of reflecting light and creating a sense of openness.

When it comes to tiles, consider large-format options that can visually expand the space. Subway tiles are a classic choice, but you can also explore options like hexagon or arabesque patterns to add visual interest. For the vanity and countertops, opt for materials like quartz or marble that have a clean, sleek appearance.

Step 3: Maximize Storage and Minimize Clutter

Clutter can quickly make a bathroom feel cramped and chaotic. Incorporate storage solutions that help you keep your space organized and tidy. Built-in shelves, vanity drawers, and recessed niches are all great options for stashing away toiletries, towels, and other essentials.

Consider the placement of these storage elements carefully. Positioning them at eye level or above can help create a sense of airiness, as opposed to bulky, floor-to-ceiling cabinetry that can weigh down the room. Additionally, use transparent or open-backed shelving to maintain a light and airy visual flow.

Step 4: Bring in Reflective Surfaces

Mirrors are a must-have in any bathroom, but they can also play a crucial role in enhancing the sense of openness. Strategically placed mirrors can reflect light and create the illusion of a larger space. Opt for oversized or even floor-to-ceiling mirrors that can visually expand the room.

You can also incorporate other reflective surfaces, such as shiny chrome or brushed nickel fixtures, to help bounce light around the space. Polished tile or glass accents can also contribute to this effect, creating a bright and airy atmosphere.

By implementing these four simple steps, you can transform your bathroom into a serene, spa-like oasis that feels open, airy, and inviting. Remember, the key is to focus on maximizing natural light, using light-colored finishes, minimizing clutter, and incorporating reflective surfaces. With a little bit of planning and creativity, you can create a bathroom that feels like a true haven within your home.

[1] Tiny Bits of Happiness. (2020, May 4). Easy Natural Hair: A Beginner’s Guide to Embracing Your Wavy Hair. https://www.tinybitsofhappiness.com/blog/2020/may/easynaturalhair.

[2] Winter Daisy. (n.d.). Kids Bathroom Reveal. http://www.winterdaisy.com/blog/tag/kids+bathroom.

[3] 1111 Light Lane. (2020, January 1). Before + After Home Tour: Modern + Classic 1970’s Ranch. https://1111lightlane.com/2020/01/before-after-home-tour-modern-classic-1970s-ranch/.

[4] Joan Bissdorf. (2023, February 18). How to Remodel a Bathroom: A Step-by-Step to Bathroom Gut Renovation. https://www.joanbissdorf.com/blog/2023/2/18/how-to-remodel-a-bathroom-a-step-by-step-to-bathroom-gut-renovation.

[5] Vox. (2018, February 19). What the psychedelic drug ayahuasca showed me about my life. https://www.vox.com/first-person/2018/2/19/16739386/ayahuasca-retreat-psychedelic-hallucination-meditation.

[6] True Design House. (n.d.). Bathroom Staging Plan. https://www.true-design-house.com/blog/bathroom-staging-plan.

[7] Quora. (n.d.). How do I tell if somebody’s coming in my room while I’m gone? https://www.quora.com/How-do-I-tell-if-somebodys-coming-in-my-room-while-Im-gone.

[8] Modern Mrs. Darcy. (n.d.). White Walls. https://modernmrsdarcy.com/white-walls/.

Categories
Designs

Bathroom Countertop Materials With Lots of Personality

Bathroom Countertop Materials With Lots of Personality

A Cautionary Tale of Marble Madness

Well, hello there! I’m Grace, the Social Media Manager for Emily Henderson Design, and I’m thrilled to be writing this article all about bathroom countertop materials. Now, I’ll admit, when Emily and Arlyn asked me to tackle this topic, I was a bit nervous. As a trained interior designer, I know my way around stone slabs and surfaces, but turning that knowledge into an engaging, human-like article? That’s a whole other beast!

But you know what they say – when life gives you lemons, make lemonade. And let me tell you, I’ve got a pitcher full of the good stuff to share with you all today. Because let’s be real, choosing the right bathroom countertops is no easy feat. There are so many options out there, each with their own unique personality and quirks. It’s enough to make your head spin!

Marble Madness: A Love Story

Now, I may be biased, but I have to start with the star of the show – marble. Oh, marble, how I love thee. It’s the stuff design dreams are made of, am I right? The way those veins dance across the surface, the cool touch against your skin – it’s enough to make a girl’s heart skip a beat.

But before you go running off to the stone yard, let me drop a little truth bomb on you. Marble is not for the faint of heart. It’s like that gorgeous, high-maintenance significant other you can’t help but fall for, despite all the warning signs. You see, marble is a bit of a diva when it comes to maintenance. It’s porous, which means it’s susceptible to staining and etching faster than you can say “oops, I spilled my morning coffee.”

The Marble Conundrum

I remember when I was in college, taking those geology classes and learning all about the different types of marble – Carrara, Calacatta, Statuario, you name it. I thought I had it all figured out. “Oh, I’m going to be a geologist for sure!” I’d tell my dad, beaming with pride.

Well, dear old dad quickly burst that bubble, laughing in my face and reminding me that geologists actually have to, you know, go outside and get their hands dirty. Needless to say, that dream was short-lived. But the love for marble? That’s never gone away.

The Marble Makeover

Fast forward to present day, and I’m still swooning over marble. In fact, the team at EHD has used it in quite a few of our projects, including the Portland kitchen and media room wet bar. And let me tell you, that Montclair Danby marble is a sight to behold.

But with marble, you’ve got to be prepared for the good, the bad, and the downright ugly. Those water stains, the etching from acidic spills – it’s enough to make even the most seasoned designer pull their hair out. But you know what? I wouldn’t have it any other way.

Embracing the Imperfections

You see, I’ve come to realize that the beauty of marble is in its imperfections. Those little scars and blemishes? They’re like the wrinkles on an old friend’s face – they tell a story, a testament to a life well-lived. And that’s exactly how I want to approach my own marble countertops, should I ever be so lucky.

Sure, I’ll wipe up spills as quickly as I can, but I’m not going to stress about the inevitable. Those water marks? They’re just memories waiting to happen. That marinara stain? A reminder of the delicious meal I shared with friends. It’s all part of the charm, the character that makes marble so darn irresistible.

Marble: Not for the Faint of Heart

But I get it, not everyone is as enamored with marble’s quirks as I am. In fact, some of you might be reading this, nodding your head and thinking, “Yeah, that’s not for me.” And that’s okay! Marble isn’t for everyone, and that’s the beauty of the wide world of bathroom countertop materials.

Exploring the Alternatives

Take granite, for example. It’s a bit of a workhorse, isn’t it? Tough as nails, resistant to scratches and stains, and oh-so-pretty to boot. Or how about quartzite? It’s like marble’s stronger, more durable cousin, with that same captivating look. And let’s not forget about engineered quartz and porcelain – the low-maintenance superstars of the countertop world.

The key is to really think about your lifestyle, your design aesthetic, and your tolerance for a little extra TLC. Because let’s be honest, no matter what material you choose, your bathroom countertops are going to see their fair share of, well, life. The question is, are you ready to embrace the imperfections?

Finding Your Bathroom Countertop Soulmate

So, my fellow design enthusiasts, the choice is yours. Will it be the high-maintenance, but oh-so-alluring marble? Or will you opt for the practical, yet still stunning, granite or quartzite? Maybe you’re more of a quartz or porcelain person, craving that low-maintenance lifestyle.

Whichever path you choose, remember this: your bathroom countertops are a reflection of your personality. They’re the stage on which you’ll get ready, the surface that will witness your morning routines and your late-night indulgences. So choose wisely, my friends, and don’t be afraid to let a little (or a lot) of your true self shine through.

Because at the end of the day, the perfect bathroom countertop isn’t just about looks – it’s about finding the material that speaks to your soul. And who knows, maybe that soul just so happens to be a little bit marble mad, like mine.

The Countertop Comparison

Material Hardness Porosity Stain Resistance Heat Resistance Maintenance
Marble 3 3 Low Medium High
Granite 5 2 High High Medium
Quartzite 7 1 High High Low
Quartz 6 1 High Low Low
Porcelain 7 1 High High Low
Limestone 3 3 Low Medium High
Soapstone 1 2 High High Medium

Sources

[1] Life in Grace Blog – “Living with Marble Countertops, a cautionary tale”
[2] New Life Bath and Kitchen – “How to Select Bathroom Countertops”
[3] Style by Emily Henderson – “The Ultimate Guide to Picking Countertops & Stone Surfaces”
[4] John M. Colaneri – “Dress Your Kitchen”
[5] True Blue Surfaces – “How to Match Countertops and Backsplash”
[6] Marble Systems – “Bathroom Countertop with Sink Duos: Beyond the Ordinary Bathrooms”
[7] R&D Marble – “Bathroom Countertops vs Kitchen Countertops: Main Differences”
[8] The Detroit News – “Home Advisor: Bathroom materials – what to embrace and what to avoid”