Categories
Designs

Rustic Elements For A Cozy Cabin Bathroom

Rustic Elements For A Cozy Cabin Bathroom

Sinking Into the Serenity: Crafting a Cozy Cabin Bathroom Oasis

As someone who grew up in the heart of the Rockies, I’ve always been fascinated by the allure of rustic cabin design. There’s just something so inviting about the warm, natural textures and earthy tones that transport you to a peaceful, off-the-grid haven. And when it comes to creating that cozy cabin ambiance, the bathroom is a space that deserves just as much attention as the rest of the home.

Embracing the Elements: Bringing Rustic Charm to the Bath

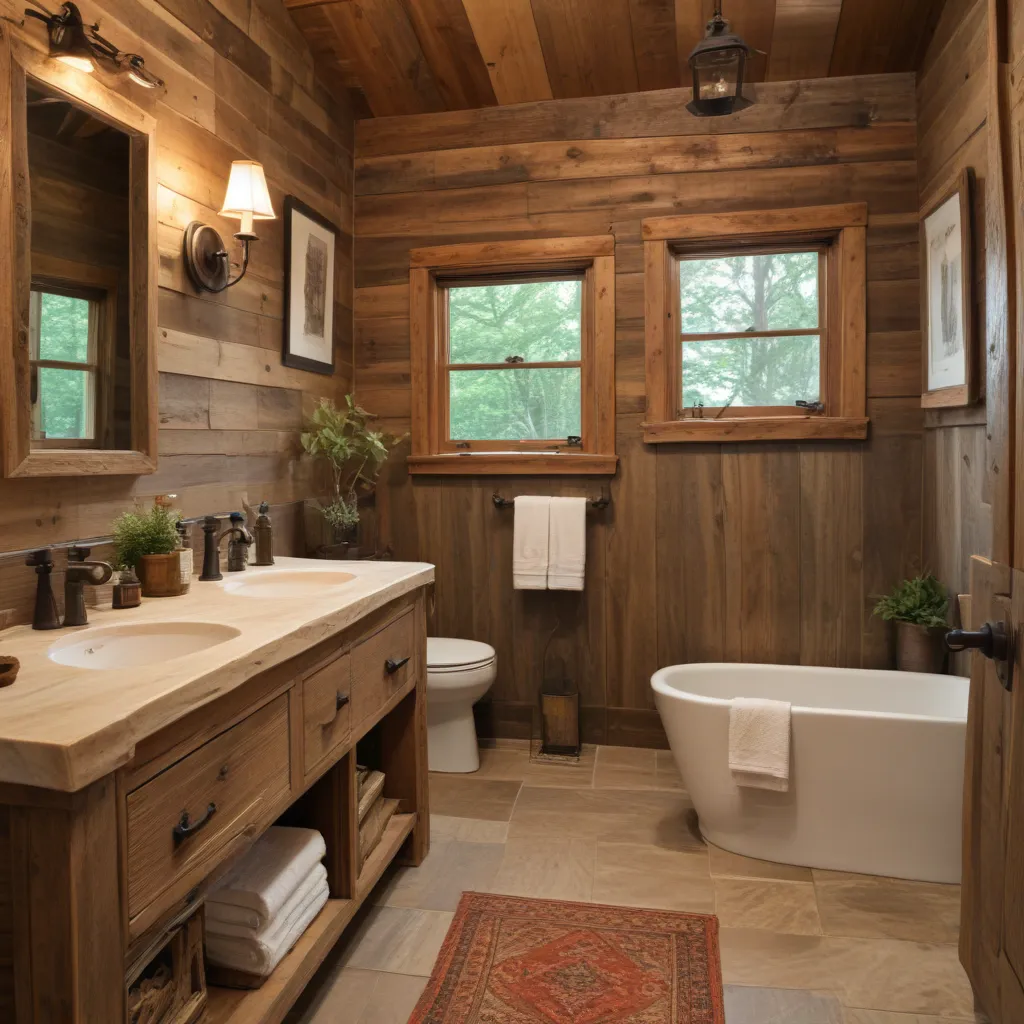
When I first started planning the renovation of my own cabin bathroom, I knew I wanted to capture the essence of the great outdoors while still maintaining a sense of modern comfort. After scouring through endless inspiration galleries, I stumbled upon some truly breathtaking designs that seamlessly blended rustic and refined elements. [1] From reclaimed wood accents to natural stone vanities, these bathrooms had a way of making you feel like you were bathing in the heart of a secluded forest oasis.

One of my favorite design finds was a stunning vanity crafted from weathered barn wood. [2] The rugged, unfinished texture perfectly complemented the sleek vessel sink sitting atop it, creating a captivating juxtaposition of old and new. And the warm, earthy tones of the wood stood in beautiful contrast to the crisp, white subway tiles that lined the walls. It was like stepping into a luxurious treehouse, complete with all the modern amenities you could ever want.

Rustic Refinement: Curating the Perfect Cabin-Inspired Bath

As I continued to research and plan, I realized that the key to nailing the cozy cabin aesthetic was all about finding the right balance between rustic and refined. [3] Sure, you could go full-on lumberjack with exposed beams and a claw-foot tub, but that might veer a little too far into the “roughing it” territory for my taste.

Instead, I opted for a more polished interpretation, mixing in sleek, contemporary fixtures with those classic cabin-inspired elements. [4] Think: a modern rainfall showerhead paired with a rustic wooden bench, or a sleek vanity mirror framed in distressed wood. By cherry-picking the best of both worlds, I was able to create a bathroom that felt cozy and inviting, yet still elevated and sophisticated.

Bringing in the Outdoors: Embracing Natural Textures and Tones

Of course, no true cabin-inspired bathroom would be complete without a healthy dose of nature-inspired accents. [5] I made sure to incorporate plenty of natural stone, from the smooth, polished countertops to the earthy, textured tiles that covered the floors and shower walls. And to really drive home that great-outdoors vibe, I added in a few rustic wooden shelves, perfect for displaying my collection of natural bath products.

But it wasn’t just the materials that helped bring the outdoors in – the color palette played a crucial role as well. [6] Gone were the stark, clinical whites and grays of a traditional modern bathroom. Instead, I opted for warm, earthy tones like rich browns, muted greens, and soothing blues that evoked the tranquility of a secluded forest oasis.

Cozy Cabin Comforts: Layering in the Little Luxuries

Of course, as much as I wanted to capture that rustic, cabin-inspired aesthetic, I also knew that comfort and functionality couldn’t be sacrificed. [7] After all, what’s the point of having a gorgeous bathroom if it’s not actually comfortable to use?

That’s why I made sure to incorporate plenty of cozy, luxurious touches, like a plush, oversized bath mat, a deep, soaking tub, and a towel warmer to keep things toasty even on the chilliest of mornings. [8] And to really drive home that sense of indulgence, I added in a few unexpected elements, like a freestanding, LED-lit vanity mirror and a sleek, modern fireplace insert to keep the space feeling cozy and inviting.

Crafting a Cozy Cabin Oasis: The Final Reveal

When all was said and done, I couldn’t help but feel a sense of pure pride and satisfaction as I stepped back and admired my new cabin-inspired bathroom. [3] It was the perfect blend of rustic charm and modern luxury, a true oasis of serenity that transported me to a peaceful, off-the-grid retreat every time I stepped inside.

Whether I’m soaking in the tub, enjoying the warm glow of the fireplace, or simply admiring the natural beauty of the weathered wood and stone, this bathroom has become my own personal sanctuary – a true reflection of the cozy, cabin-inspired lifestyle I’ve always dreamed of.

References

[1] https://www.mountainliving.com/10-cozy-and-rustic-bathroom-designs/
[2] https://www.pnwanderers.com/blog/a-night-at-millards-cabin-in-packwood-washington
[3] https://www.pinterest.com/leeleepitts/cozy-cabin/
[4] https://www.elandelwoodproducts.com/landing-pages/about-rusticcabin
[5] https://www.pinterest.com/pin/10-cozy-and-rustic-bathroom-designs-mountain-living–309763280601155316/
[6] https://www.homesandgardens.com/interior-design/cabin-decor-ideas
[7] https://togetherdesignbuild.com/top-5-rustic-bathroom-renovation-ideas-in-leander-tx/
[8] https://town-n-country-living.com/cabin-style-decorating-ideas.html
Categories
Designs

Dramatic Bathrooms Inspired By Nature

Dramatic Bathrooms Inspired By Nature

Discovering the Beauty of Nature-Inspired Design

As I step into my bathroom, I can’t help but feel a sense of calm wash over me. Gone are the dated, dreary tiles and the oppressive darkness that once consumed the space. In their place, a serene oasis has emerged – one that seamlessly blends the beauty of the great outdoors with the luxurious comforts of a modern sanctuary.

It all started a few months ago when I decided it was time to tackle the long-overdue renovation of my master bathroom. I’ll admit, the thought of a complete overhaul was a bit daunting at first. After all, this wasn’t just any ordinary room – it was a deeply personal space, one that set the tone for my entire morning routine and evening wind-down. But as I began to immerse myself in the world of bathroom design, something unexpected happened: I found myself drawn to the natural world for inspiration.

Embracing the Earthy Allure

Perhaps it was the calming effect of my daily hikes through the nearby redwood forest, or the mesmerizing ebb and flow of the ocean just miles away. Whatever the catalyst, I knew I wanted to infuse that same sense of serenity and wonder into my bathroom oasis. Gone were the stark, clinical tile choices of the past. Instead, I found myself gravitating towards rich, warm wood tones and organic textures that evoked the rustic charm of a cabin retreat.

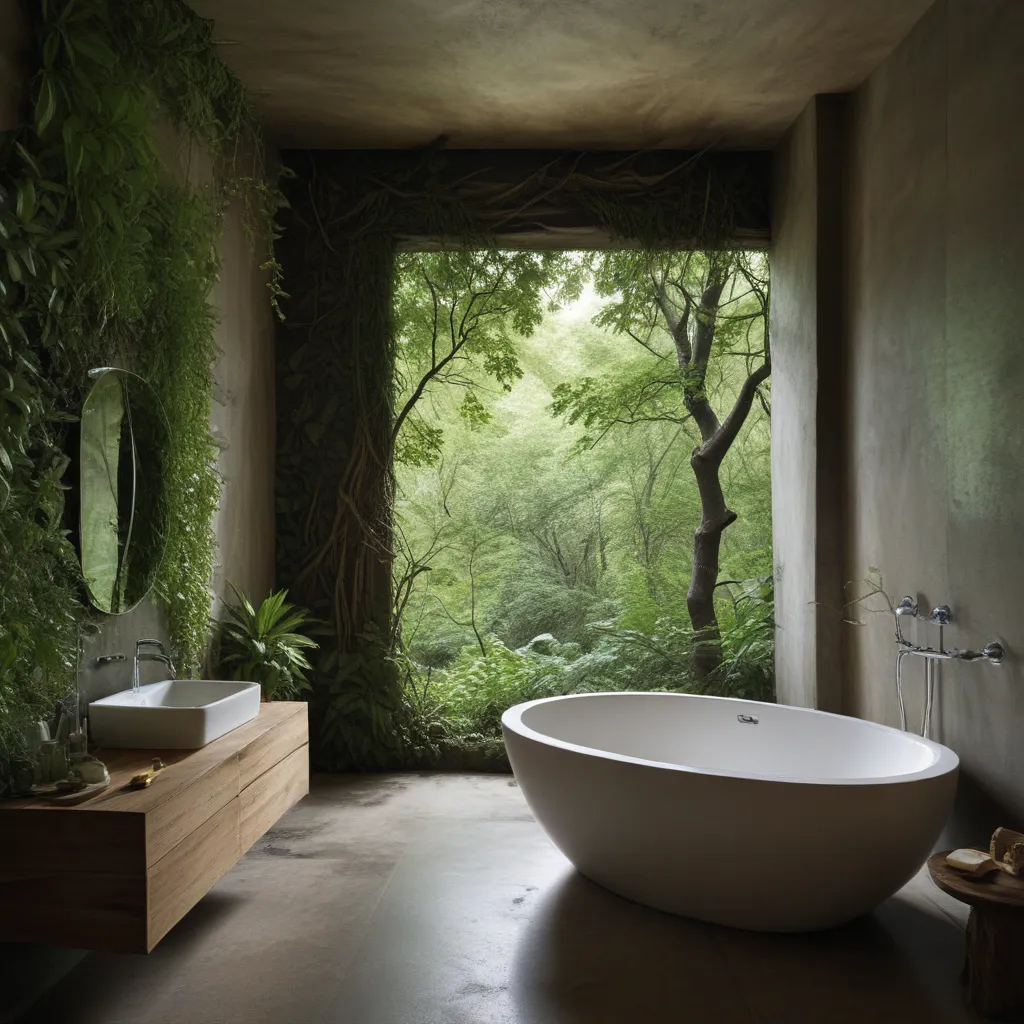
As I pored over design blogs and Pinterest boards [1], I discovered a wealth of breathtaking bathrooms that had seamlessly integrated elements of nature. From the moody, jewel-toned tiles that mimicked the depths of the sea [2] to the lush, vertical gardens that brought the outdoors in [3], these spaces radiated a level of drama and sophistication that felt utterly captivating.

Crafting a Cohesive Sanctuary

With a renewed sense of inspiration, I set out to craft my own nature-inspired masterpiece. The first step was to establish a cohesive color palette that would serve as the foundation for the entire space. Embracing the earthy tones of the redwood forest, I settled on a rich, warm walnut for the vanity and flooring, accented by soft sage greens and hints of brass for a touch of elegance.

As I delved deeper into the design process, I found myself continuously drawn to the idea of creating a sense of immersion – of truly blurring the lines between the indoors and the great outdoors. This manifested in the form of a tadelakt plaster shower, its weathered, textural finish evoking the rugged beauty of a rocky cliff face. Overhead, a skylight allowed natural light to pour in, casting a warm glow that danced across the undulating walls.

Layering in Personal Touches

But this bathroom transformation wasn’t just about curating the perfect aesthetic – it was also about infusing the space with my own unique personality and experiences. Inspired by my love for the natural world, I incorporated elements like driftwood accents, artisanal ceramic vessels, and a stunning botanical-inspired wallpaper that wrapped around the vanity area.

As I stood back and admired the finished result, I couldn’t help but feel a sense of pride and accomplishment. This wasn’t just a bathroom – it was a sanctuary, a true oasis that seamlessly blended the beauty of nature with the comforts of modern living. And what’s more, it was a space that I couldn’t wait to share with family and friends, inviting them to step into my own little slice of natural wonder.

Embracing the Drama, Enhancing the Calm

Of course, creating a nature-inspired bathroom oasis wasn’t without its challenges. As I delved deeper into the renovation process, I encountered a few unexpected hurdles, like the persistent leaks that threatened to derail the entire project [4]. But through it all, I remained steadfast in my vision, knowing that the end result would be worth the effort.

And as I now find myself sinking into a warm, fragrant bath, surrounded by the soothing sounds of a trickling water feature and the gentle glow of candlelight, I can confidently say that the drama was well worth it. This bathroom has become a true haven, a place where I can escape the stresses of the day and immerse myself in the tranquil beauty of the natural world.

So, if you’re feeling inspired to breathe new life into your own bathroom sanctuary, I urge you to look to the great outdoors for guidance. Whether it’s the calming hues of a forest canopy or the mesmerizing patterns of a meandering river, there’s a wealth of natural wonder just waiting to be discovered. And who knows – you might just uncover your own little slice of dramatic, nature-inspired bliss.

References

[1] Knowledge from https://www.pinterest.com/pin/498210777511711608/

[2] Knowledge from https://stugastudio.com/blogs/inspiration/walnut-flooring-bathroom

[3] Knowledge from https://www.instagram.com/nikkichuhome/p/CvV_KW5Ot7L/

[4] Knowledge from https://www.thewoodgraincottage.com/2015/08/12/master-bathroom-tile-drama/

Categories
Designs

Luxurious Textures To Transform Your Bathroom

Luxurious Textures To Transform Your Bathroom

Unveiling My Bathroom Transformation

Hey there, friends! Today, I’m thrilled to share with you the culmination of years of trials, tribulations, blessings, delays, hard work, creativity, and vision. As an interior designer, I believe that every space in a home should reflect the personality and lifestyle of the people who dwell there. And let me tell you, the original bathroom in my home did just that – but for all the wrong reasons. [1]

The issue was that the execution of my vision was, well, let’s just say it was beyond “piss poor.” This caused a plethora of problems, repairs, and ultimately, a complete gut and redo. But you know what they say, “when life gives you lemons, make lemonade!” And that’s exactly what I did. [1]

I loved everything about our bathroom before. It was literally the bathroom I had dreamed of since we first met our house. The moody color palette was the foundation, and all of the added details like the tiled surround, hidden niches, and the mixed finishes made it perfect. So, how do you improve on perfection? Well, my friends, you don’t. Everything had changed. [1]

A New Beginning

First of all, I was now designing for one. This was the first project I took on after losing Marcus, and it was the first time I had no one’s needs to consider besides my own. That was a weight I wasn’t expecting, but I walked through the process completely open-minded, listening to my gut more than my brain. My instinct? Go light. And that’s exactly what I did. [1]

The blessing behind this project was the generosity of The Tile Shop. They were the brand behind the first bathroom makeover and watched as I shared the story of it falling apart on my Instagram stories. After seeing that I had to rip up the floor due to plumbing issues and take out the shower due to mold issues, the team reached out to me, offering to help in every way they could. “Help” doesn’t even begin to cover it. That’s why I call them a blessing. [1]

Not only did they provide all of the new tile and tiling supplies necessary for my bathroom redo, they also flew in the amazing Jason McDaniel of Stoneman Construction in Portland, OR to ensure the perfect tile job was done! With life changing a mile a minute, I wanted to create a sanctuary just for myself that was all my own; a place where I could unwind, relax, and find inspiration. The Tile Shop and Jason allowed me to embark on a journey to completely redesign and transform this space into something truly remarkable. [1]

Inspiration and Design Elements

Every design project begins with inspiration, and for my primary bathroom, I drew mine from the various spas I’ve been able to experience. I wanted to bring that sense of calm and serenity into my bathroom, so ‘light and luxury’ was the theme I kept in mind. I also wanted to be sure that I kept things interesting with mixed finishes and lots of visual texture, so while going light in the color palette, I brought in wood tones, terrazzo flooring, and black and brass metals for a collected and layered effect. [2]

To achieve the light and luxurious space I envisioned, I carefully selected design elements that would complement the color palette (wall and trim color are Sherwin Williams Panda White SW6147) and create a harmonious atmosphere. Here are some of the key design elements I incorporated: [2]

Textured Tiles

I opted for a 4×4 ceramic zellige-style wall tile by Riad in the color sand. The handmade look with the varying tones creates depth and interest. And I’ve had a dream to incorporate terrazzo flooring into our home, and I knew this was the perfect spot for it. Since true terrazzo was out of the budget and timeline, I chose the next best thing: these 8×8 terrazzo bianco marco porcelain tiles. The white body had “chips” of black, browns, and grays, which made them the perfect neutral but textured foundation for the space. [1]

Curbless Shower

In our first bathroom makeover, I asked our contractor to incorporate a curbless shower. Because the space was on the small side, I didn’t want to stop the eye with a break at the shower. They explained that it would be a costly change as they would have to dig up the entire foundation and repour it to lower it for drainage. Jason, however, came in with a genius and cost-efficient solution to just repour a new foundation right on top of the old one. It’s hard to see, but the floor in the shower slopes away from the back wall. That way, all the water drains into the “invisible” drain where the floor meets the glass enclosure! This simple design feature makes the overall space feel so much bigger and adds a modern sophistication to the space. [1]

Vanity and Storage

I chose a new white oak finish floating double vanity with a white cultured marble countertop. It’s modern and has ample storage to ensure that the bathroom remains clutter-free and functional. And to amp up the storage, I found these woven baskets for extra towels and toilet paper. They tuck away perfectly underneath the vanity. [1]

Lighting

I was not letting go of my Focal Point sconces from Blueprint Lighting that were from the previous renovation. The white and brass finish worked perfectly with the new color scheme. And you know natural light is key, so the Velux Sun Tunnel wasn’t going anywhere either! [1]

Accents

I also reused our brass-framed mirrors and had them reinstalled over the newly tiled niches. This little bit of hidden storage still makes my heart sing. [1]

Bells and Whistles

This go-round, when thinking about the “luxury” aspect of the project, I had to think a little hard about how to bring that into this bathroom. Thankfully, the team at Kohler took the guessing work out of it for me and sent me all new matte black plumbing fixtures from the Purist collection and Components collection, including faucets with rocker handles and a brand new Comfort-height Highline toilet with the C3-230 smart bidet! I’m new to the bidet game, and let me tell you, my life has been changed! It has a nightlight, seat warmer, dryer, and more! You name it, this bidet has it! [3]

The Finishing Touches

No design project is complete without those finishing touches that bring a space to life. I added a hand-painted mural to the small walls that weren’t tiled to bring the beige to life with some movement. And no space of mine is complete without adding some plant life. This ZZ plant in an aged clay planter was all the space needed. [4]

The Transformation

This transformation of my primary bathroom has brought me so much relief and a sense of peace. It’s now a space where I can escape the stresses of daily life and know that it’s not one of those stressors anymore. The soft colors, luxurious textures, and thoughtful design elements have truly elevated this space to a new level of beauty and functionality. [5]

As an interior designer, I’ve had the privilege of transforming countless spaces for my clients, but this project was particularly special because it was a reflection of my own personal style and vision. It serves as a reminder that even with the best intentions, great design needs even greater execution to be successful. And with the right inspiration, creativity, and a little bit of hard work, any space can be transformed into something truly remarkable. [6]

I hope my primary bathroom redesign inspires you to embark on your own design journey and create a space that speaks to your heart and soul. Remember, your home should be a reflection of you, a place where you can find comfort, joy, and inspiration every day. Thank you for joining me on this journey, and I can’t wait to share more design adventures with you soon. Until then, cheers, friends! [7]

References

[1] Carmeon Hamilton. “A True Transformation: Unveiling My Primary Bathroom Redesign.” Carmeon Hamilton, 2023. https://carmeonhamilton.com/blog/a-true-transformation-unveiling-my-primary-bathroom-redesign.

[2] “The Art of Bathroom Design: Selecting Colors & Textures.” Avanity, 31 Jan. 2024. https://www.avanity.com/blogs/avanity/the-art-of-bathroom-design-selecting-colors-textures.

[3] “25 Guest Bathroom Remodel Ideas.” LXHausys, 2023. https://www.lxhausys.com/us/blog/25-guest-bathroom-remodel-ideas/.

[4] “Geometry.House.” Instagram, 2023. https://www.instagram.com/geometry.house/reel/C3smw10xdhE/.

[5] “Luxurious Bathroom Upgrades.” Home and Texture, 2023. https://homeandtexture.com/luxurious-bathroom-upgrades/.

[6] Kinger, Ullas. LinkedIn, 2023. https://www.linkedin.com/posts/ullas-kinger-a75177170_bathroom-design-bathtub-activity-7096510712943906816-SsEi.

[7] “Luxury Bathroom Ideas.” Forbes, 2023. https://www.forbes.com/home-improvement/bathroom/luxury-bathroom-ideas/.

[8] Killam, Maria. “Dos & Don’ts of Vinyl Plank Floors in the Bathroom.” Maria Killam, 2023. https://mariakillam.com/dos-donts-vinyl-plank-floors-bathroom/.

Categories
Designs

Warm Woods For Cozy Bathroom Designs

Warm Woods For Cozy Bathroom Designs

Bringing Warmth and Coziness to Your Bathroom Retreat

As a self-proclaimed homebody, I’ve always believed that the bathroom should be a sanctuary – a private oasis where you can unwind, relax, and rejuvenate. And when it comes to creating that cozy, inviting atmosphere, there’s nothing quite like the natural warmth and charm of wood.

In this in-depth article, I’m excited to share my top tips and design inspirations for incorporating warm wood tones into your bathroom for a truly serene and comforting retreat. Whether you’re renovating from scratch or simply looking to refresh your existing space, get ready to discover how the right mix of wooden elements can transform your bathroom into a cozy haven.

Choosing the Right Wood Tones

The first step in crafting a cozy bathroom with warm wood is to understand the importance of blending different tones and textures. You see, using the same wood throughout can sometimes make a space feel a bit flat and one-dimensional. Instead, we want to create that inviting, layered look by mixing and matching complementary hues.

As I learned from the design experts at Chris Loves Julia [1], the key is to start by identifying your “dominant” wood tone – perhaps it’s the flooring or a statement vanity. From there, you can introduce contrast by bringing in lighter and darker accents.

The real magic happens when you pay attention to the undertones. Is your dominant wood piece warm and cozy, with rich amber or reddish hues? Then you’ll want to pair it with other warm-toned woods like oak, maple, or cherry. On the other hand, if you’re working with a cooler-toned wood like ash or walnut, seek out pieces with similar gray or blue-ish undertones.

Textures and Grains for Cozy Character

But it’s not just about the color – the actual texture and grain of the wood can also make a big difference in the overall coziness factor. As the team at Kindred Homestead [2] suggests, going for woods with a more pronounced, rustic grain can instantly add that casual, lived-in vibe.

Think about it – a sleek, polished wood vanity with a delicate grain might look stunning, but it won’t necessarily evoke the same sense of warmth and comfort as, say, a reclaimed wood shelf or a vanity with visible knots and imperfections. Those uneven, textured surfaces are what give a bathroom that cozy, earthy feel.

Of course, you don’t have to sacrifice style for coziness. As Liz Marie Blog [3] points out, you can absolutely strike a balance by mixing woods with different grains – pairing a smooth, contemporary vanity with a rustic barn door or shelving unit, for example.

Warm Accents for Added Coziness

Now, once you’ve nailed down the foundation of your warm wood tones, it’s time to layer in those delightful little accents that really take your bathroom’s coziness to the next level. Because as Houzz [4] suggests, it’s all about adding those warm, inviting elements throughout the space.

I’m talking about things like woven baskets for storage, wooden trays and accessories, and even faux greenery arrangements to bring in that natural, earthy vibe. And don’t forget about lighting – strategically placed lamps and candles can create the most wonderfully cozy ambiance.

In fact, as Dave and Jenny Marrs [5] shared, greenery is one of their go-to tricks for instantly cozying up a space. Even if you don’t have a green thumb (same here!), faux plants and dried florals can work just as well.

Bringing it all Together

Of course, no cozy bathroom design is complete without a few personal touches. As Emily Henderson [7] suggests, something as simple as adding an antique mirror or a chalkboard wall can instantly elevate the sense of warmth and character.

And let’s not forget about the textiles – plush towels, cozy rugs, and maybe even a little bench or stool where you can perch and unwind. As Gathered [8] points out, these little details can truly make all the difference in creating that inviting, serene atmosphere.

So whether you’re starting fresh with a bathroom renovation or just looking to refresh your existing space, I hope these tips have inspired you to embrace the natural warmth and charm of wood. Because when it comes to crafting a cozy, restorative bathroom retreat, there’s truly nothing quite like the beautiful, timeless appeal of warm, wooden accents.

References

[1] Knowledge from https://www.chrislovesjulia.com/how-to-mix-wood-tones-like-a-pro/
[2] Knowledge from https://www.pinterest.com/pin/31243791153480230/
[3] Knowledge from https://www.lizmarieblog.com/2016/04/how-to-make-any-room-cozy/
[4] Knowledge from https://www.houzz.com/discussions/2668047/why-bright-airy-instead-of-warm-cozy
[5] Knowledge from https://www.daveandjennymarrs.com/small-house-to-cozy-casita-season-4/
[6] Knowledge from https://www.instagram.com/dorraayadi/p/C1H2C-XIBYc/
[7] Knowledge from https://stylebyemilyhenderson.com/blog/basement-cozy-makeover-ideas
[8] Knowledge from https://gatheredky.com/blog/bfcjq8vh7unl4njpgbb1hctpw126fj

Categories
Tips

Keep Your Shower Grout Looking Fresh

Keep Your Shower Grout Looking Fresh

Keep Your Shower Grout Looking Fresh

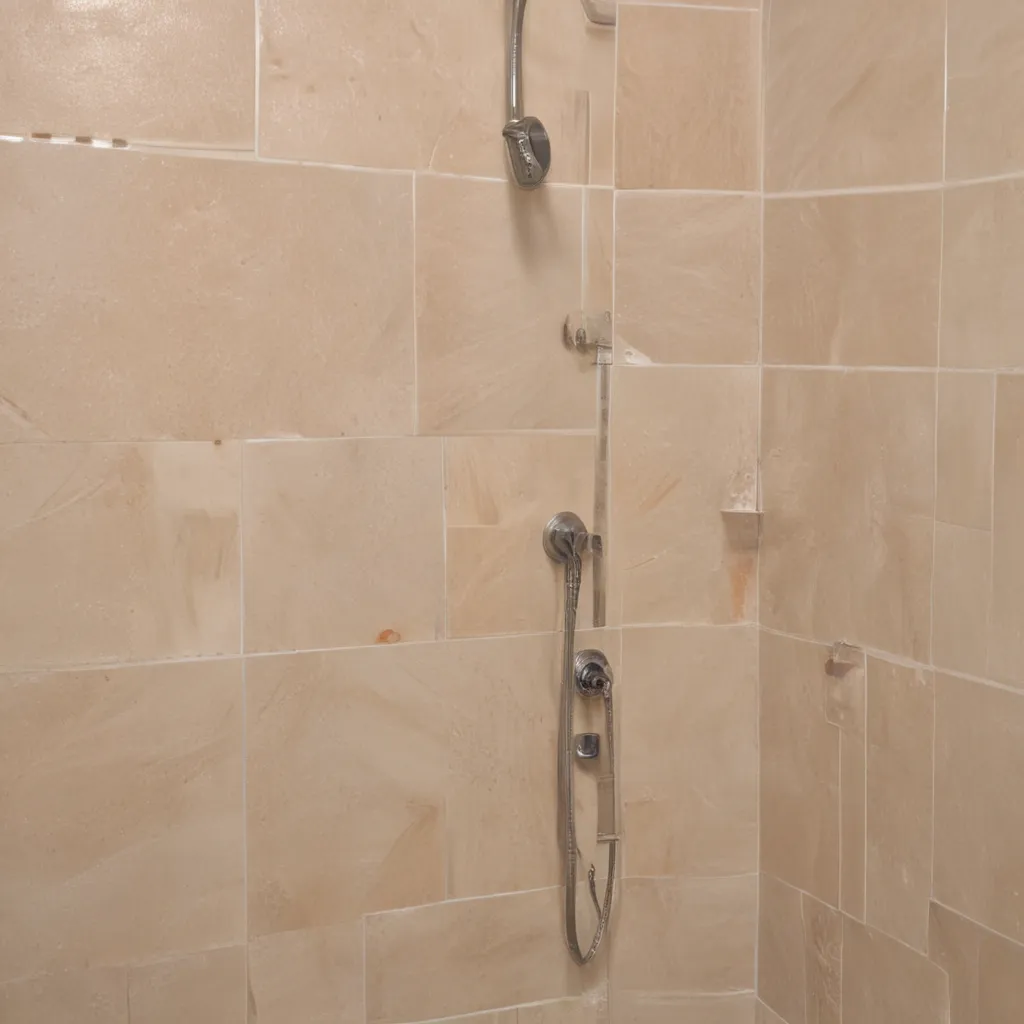
Oh, the eternal battle with grout! That pesky stuff that lines our tiles, destined to become a breeding ground for mold, mildew, and general grossness. But fear not, my bathroom-beautifying friends, for I have uncovered the secrets to keeping your shower grout looking spotless and shower-ready all year round.

Scrubbing, Scrubbing, and More Scrubbing

When I first moved into our fixer-upper of a home, the previous owners had left behind a real grout nightmare in the bathrooms. I’m talking about that dingy, discolored, downright depressing grout that makes you just want to rip out the entire tile setup and start fresh. Well, I tried the good old-fashioned elbow grease approach, scrubbing and scrubbing until my fingers were raw. I went through every cleaning product under the sun, from harsh chemicals to natural DIY concoctions. But no matter how hard I scrubbed, that grout just wouldn’t budge. [1]

It was a truly soul-crushing experience – I felt like I was waging an endless war against the grime. Just when I thought I was making progress, the dang grout would revert back to its dingy, stained state. I was ready to throw in the towel and resign myself to a lifetime of unsightly shower walls.

The Grout Renew Revelation

But then, a stroke of luck! I stumbled upon a product called Polyblend Grout Renew, and let me tell you, it was a game-changer. [2] At just $12 from the Home Depot, this stuff is a total miracle worker. I’m talking about a complete 180-degree transformation. The once-grungy grout lines were now sparkling clean and bright white, like something out of a magazine.

Now, I’ll admit, applying the Grout Renew was a bit of a tedious process. It took me several hours, spread out over a few days, to get the job done. But let me tell you, it was so worth it. I ended up having to do a bit of scrubbing beforehand to get the surface clean, but after that, it was just a matter of carefully painting on the Grout Renew with a small craft brush. [3]

Maintenance Made Easy

The best part? The Grout Renew isn’t just a temporary fix. According to the reviews I’ve read, it can actually hold up for years without needing to be reapplied. [4] All you have to do is give it a good 24-hour drying period, and then you’re good to go. No more constant scrubbing or worrying about mold and mildew taking over.

Of course, regular cleaning is still essential to keeping your shower grout looking its best. I like to use a marble-specific cleaner, which keeps things fresh and prevents any new stains or discoloration. And a quick squeegee after each shower helps prevent water buildup, which can lead to that dreaded grime creeping back in. [5]

A Grout Transformation Made in Heaven

Believe me, I know the thought of spending hours hunched over your bathroom floor, meticulously painting grout lines, doesn’t exactly sound like a good time. But trust me, the results are so worth it. Walking into my freshly renovated bathroom now, I practically do a little dance every time I see that sparkling white grout. It’s like a whole new space, and I can’t believe I ever had to stare at that dingy, depressing mess.

So if you’re struggling with the same grout woes I was, don’t give up hope. Grab yourself a bottle of Grout Renew, put on your best podcast, and get to work. Your future self (and your guests) will thank you. Here’s to a future of gleaming, grime-free grout lines, my friends!

[1] https://www.younghouselove.com/how-you-like-me-now-grout/
[2] https://www.reddit.com/r/HomeImprovement/comments/pguo16/how_to_make_shower_grout_look_new_again_without/
[3] https://thediyplaybook.com/renew-dirty-bathroom-grout/
[4] https://erinkestenbaum.com/2019/08/27/do-we-regret-using-marble-tile-in-our-shower/
[5] https://sweetteal.com/2020/01/how-to-make-old-grout-look-like-new/

Categories
Tips

Things to Consider When Remodeling Your Bathroom

Things to Consider When Remodeling Your Bathroom

Planning for the Perfect Bathroom Oasis

Before I start any project, there is a whole lot of planning behind the scenes. It usually starts with a Pinterest board of my dreams and it ends with a very detailed spreadsheet! Today, I’ve put together a bathroom remodel checklist as a guide to help you plan your ultimate bathroom renovation! [1]

We have been building and renovating homes our whole lives, and my husband is a general contractor, so we have a good idea of what is required now before we get into any project. We could probably throw together a ballpark list pretty quickly at this point, but I never do that. I think the planning phase of any remodeling project is the most important part.

We are working up to our large ensuite renovation. This is the third (and final) bathroom we will be renovating in this house, and because it’s the largest, it’s also going to be the most luxe and involved. The first bathroom we did was the kid’s bathroom, and the second one was the guest bathroom. [1]

Evaluating the Existing Layout

The first thing you should consider when planning is to evaluate the bathroom layout. Is the room large enough? What are the pain points in the room? Do you wish you had a walk-in shower instead of a tub? Does the door swing into the back of the toilet? Is there enough storage space? [1]

At this point, I think it’s great to just make a list of things you would like to have in the renovated space (in a perfect world). Once you have that list, look at your existing bathroom and try to see what might be done to make improvements to meet your wish list. If a large shower is important to you but you don’t have much space, would you sacrifice a bathtub in order to have a luxurious shower? If you would like a double vanity, do you have enough room to fit that into the size of the space as it is? Is there a closet or any wasted space in an adjacent room that you can carve out a bit of new space to add to your bathroom? [1]

If you have trouble envisioning changes beyond what is currently there, your best bet might be to hire an interior designer or architect to give you some space planning options. A bathroom designer might give you ideas you haven’t even considered! [1]

Navigating Layout Obstacles

In our bathroom, for the most part, is a very large room but the room is quite square and it has some significant obstacles that we had to work around. We have a large skylight in the ceiling and a large window on one wall, which makes the placement of any new walls or the location of the vanity or shower, which ultimately you probably don’t want in front of a window, more difficult. [1]

We decided early on that we really really wanted a separate toilet room and a larger shower but those obstacles I talked about above really made it difficult to figure out. In the end, we figured out how to squeeze in the things we wanted to the existing layout without making too many drastic changes to the plumbing. You can see in the before and after floor plan below what we are planning! [1]

Prioritizing Natural Lighting

Don’t forget to consider natural light. If your bathroom doesn’t have a lot of it, would it be worth it to you for the additional cost to add a window or a skylight? Can you add enough artificial light to make the space functional enough? Good lighting is so important to any bathroom design. [1]

In my guest bathroom, I installed two fairly low-light sconces and it ended up being too dim for that space, so it’s not something I want to do again in the next bathroom makeover. [1]

Defining Your Aesthetic

Once you have determined the layout, it’s time for the dreaming! I generally keep Pinterest boards and saved Instagram images in folders separated by room types, so all I have to do to see what kind of room I love is open up my “Bathrooms” Pinterest board. [1]

I think it is a great idea when you are gearing up for any renovation to really try to nail down what you like. You may not be able to incorporate everything from your dream bathroom, but you will be able to bring in small design touches here and there to make even a small bathroom feel like the bathroom of your dreams. [1]

Make a mood board of your finishes to make sure you are happy with how it all works together. At this point, I think it’s helpful to make a list of things you would really like to have. Just some general items like “marble tile,” “nickel sconces,” or “statement mirror”. You don’t have to splurge on each of those items but it might help you decide what to splurge on, and also what is the most important to you if budget cuts need to happen! [1]

Finalizing the Plan

Now that you have a layout and an idea of the design, it’s time to put together a list of everything you need to complete your renovation. I’ve included a printable list at the end of this post so that you can print this off and fill it out, as you need it. This is also a good time to either speak with a general contractor (if you are using one) or an electrician and a plumber and obtain some quotes. [1]

When talking with an electrician, think about not only where you might want lighting fixtures, but also plug-ins and switches. Let your electrician know all of the changes you will need. Some special considerations might be adding a plug-in inside your vanity for hair tools, a plug near the toilet for a fancy toilet seat, or overhead for wall lighting changes. [2]

When speaking with the plumber, it is helpful if you have all of your fixtures picked out and can communicate any layout changes as well as changes in things like valves behind the wall that might be more intrusive to replace. [2]

What I like to do when I’m sticking with a budget (because who doesn’t have a budget!) is start out this list with some generic ballpark allowances for each item. If I don’t know off the top of my head what something might cost, I do a little google-research to get a rough cost and try to include a little cushion. Then as I make final choices and the quotes start rolling in, I refine the numbers. [1]

Ordering and Scheduling

Once you add it all up, if it’s not within your budget, go back a few steps and look at where you can save. Less expensive finishes, maybe reworking your existing vanity instead of buying a new vanity, or reworking some of the layout changes. [1]

Once you are happy with the budget and the layout, it’s time to start ordering! Some items can have long lead times and it’s best to get everything on site before you even lift a sledgehammer. Some special order items might take 6 – 8 weeks after you order before they arrive, or even longer. [1]

There are some things you can ultimately do a bit later, but if you are hiring someone especially you are going to want to make sure they have everything they need to get things done without a delay. A reputable contractor will likely insist on this because coming back over and over to do little bits of the project as pieces come in is not very efficient. Once Contractors move on to another project it can be very hard for them to try to come back! [1]

Navigating Plumbing and Waterproofing

Bathroom Fixture Rough-ins – Ordering bathroom fixtures is actually quite complicated and if you are not confident, have your plumber look over your selections to make sure you have all the bits and pieces you need. For example, for whatever shower control you choose you will need the corresponding valve that goes behind the wall. Each plumbing brand has its own valves so this is really important that you get the one that corresponds to your fixtures. Also, when you order a lot of faucets and shower controls they are often sold without the handles. This is because there are sometimes different handle options for the same fixtures. So make sure you are ordering all the pieces you need! [1]

Waterproofing – figuring out your tile is one thing but the most important part of any tile system is the waterproofing. You want to make sure that your shower at a minimum is properly waterproofed. There are several different systems for waterproofing so it is a good idea to look into that and determine how you are going to do it. I went over how I waterproofed our kid’s shower walls in our kid’s bathtub surround in this post, and I will likely use this system again for our ensuite. You may also want to consider waterproofing the floor, which might add a bit of thickness to your floor system, too. [3]

Vanities and Custom Stone Counters

Custom vanities will require more lead time so get an estimate for delivery from your supplier. Also, if you are going the custom vanity route you will likely be working with a separate company to install the countertop. If it is stone, they will need to template it after the vanity goes in and then fabricate it, so be aware of that lead time when planning your schedule. In my area it’s 3 – 4 weeks between countertop templating and countertop installation, so it’s super important to try to get the vanity in as soon as possible! [1]

Bringing It All Together

Once everything has been ordered, you can make yourself a project timeline based on when supplies will arrive. To be safe, you can wait until you have everything on site, or at the very least a solid delivery date for key items. Here is a general order of things I use when planning my schedule. Some things can be moved around a little bit too but this is a guideline! [1]

If you are DIY’ing it like we do, we look at our personal schedule and try to realistically think of how long it will take us to do something and schedule it in to our weekends. Then we line up any trades based on that! [1]

Bathrooms are one of the smallest rooms in the house but they can cost so much money! It is very important to know what you are getting into with your bath remodel. There are a lot of moving parts to a big project like this but if you are organized you can avoid unexpected costs (to some degree) and your bathroom renovation has a much better chance of running smoothly. [1]

I’ve been behind the scenes working on the planning of my bathroom for quite a long time and I’m so excited that demo day is almost here! Follow along with me on Instagram or here on the blog as we tackle this huge project, DIY style! [1]

[1] Knowledge from https://erinzubotdesign.com/bathroom-remodel-checklist-and-guide/
[2] Knowledge from https://www.thisoldhouse.com/bathrooms/21019042/11-things-to-consider-before-you-remodel-your-bathroom
[3] Knowledge from https://www.remodelista.com/posts/what-to-know-bathroom-remodel-tips-cost/
[4] Knowledge from https://www.hogandesignandconstruction.com/checklist-19-things-to-think-about-when-remodeling-your-bathroom
[5] Knowledge from https://www.reddit.com/r/HomeImprovement/comments/s40sqm/im_about_to_start_an_entire_bathroom_remodel_any/
[6] Knowledge from https://www.houzz.com/magazine/15-design-tips-to-know-before-remodeling-your-bathroom-stsetivw-vs~42379490
[7] Knowledge from https://www.joanbissdorf.com/blog/2023/2/18/how-to-remodel-a-bathroom-a-step-by-step-to-bathroom-gut-renovation
[8] Knowledge from https://www.hgtv.com/design/remodel/bathroom-remodel/bath-remodeling-what-to-consider

Categories
Tips

Replace or Regrout? Tips for Your Bathroom Tile

Replace or Regrout? Tips for Your Bathroom Tile

Tile Troubles? Time for a Tactical Makeover!

Ah, the bathroom tile conundrum – a classic homeowner’s headache. Do you replace the whole thing or simply regrout? It’s a decision that can send even the most seasoned DIYer into a tailspin. But fear not, my tiled friends, I’m here to guide you through this porcelain predicament with a little humor, a lot of know-how, and some handy tips straight from the pros.

You see, I’ve been there, done that, and let me tell you – regrouting can work wonders. As Lee from The Spruce [5] puts it, “When tile looks old and dingy, consider regrouting the tile instead of replacing it. Full tile replacement is messy and difficult. As long as the tile is in good shape, regrouting the tile can work wonders by making the entire installation look brand-new.”

Regrouting Rundown: A Step-by-Step Guide

Now, let’s dive into the nitty-gritty of regrouting. It’s a two-step process, and with the right tools and a little elbow grease, you can transform your tired tiles into a sparkling sanctuary.

First up, the grout removal. Grab your trusty oscillating tool, fitted with a diamond-tipped grout removal blade [5], and get to work. This nifty gadget will quickly pulverize that hardened grout, leaving you with a clean slate. Just be careful not to let the blade nick or chip your precious tiles.

Once you’ve cleared out the old grout, it’s time to mix up a fresh batch. [5] The key is to get the consistency just right – smooth, paste-like, and just barely pourable. Scoop it up with a rubber grout float and press it firmly into those freshly cleaned seams, working in alternating directions to ensure complete coverage.

Now, the fun part – sponging away the excess. Use a barely damp sponge and a gentle touch to remove any hazy residue. Voila! Your tiles are looking brand spankin’ new.

Regrouting vs. Retiling: The Big Bathroom Showdown

But wait, there’s more! What if your tile woes run deeper than a little grout grime? That’s where the big decision comes in – do you regrout or do you retile?

According to the pros, [5] regrouting is generally the more cost-effective and less labor-intensive option, as long as your tiles are in good shape. But if you’ve got cracked, missing, or otherwise damaged tiles, it might be time to go for a full-blown retile.

To help you weigh your options, let’s take a look at the pros and cons of each:

Regrouting Retiling
Pros: Pros:
– Significantly cheaper than retiling – Addresses deeper tile issues
– Less messy and disruptive – Allows for a complete design overhaul
– Can make old tiles look brand new – Provides a fresh, updated look
Cons: Cons:
– Doesn’t address cracked or missing tiles – More expensive and labor-intensive
– Requires careful prep work – Highly disruptive to your bathroom routine
– Results may not last as long as retiling – Can be tricky for DIYers

So, there you have it, folks – the great bathroom tile debate in a nutshell. Whether you choose to regrout or retile, just remember to weigh the pros and cons, gather the right tools, and embrace the process. Who knows, you might even have a little fun along the way!

The Ultimate Tile Toolkit: Tools of the Trade

Now, let’s talk tools. [5] As I mentioned, the oscillating tool with a grout removal blade is the real MVP here. But you’ll also want to have a manual grout removal tool, a margin trowel for mixing, a rubber grout float, and a moistened sponge on hand.

The total cost for these regrouting essentials can range from $80 to $200 or more, depending on the quality of the tools. But if you don’t already have them, many home improvement stores offer tool rentals, so you can save a few bucks.

Tile Transformation: Inspiration and Ideas

Ready to get started on your bathroom tile makeover? Before you dive in, take a moment to explore some inspiration. Whether you’re leaning towards a sleek, modern look or a retro, mid-century vibe, [6] [7] there’s endless bathroom tile eye candy out there to spark your creativity.

And remember, even if regrouting is your path forward, don’t be afraid to get a little adventurous with your grout color choices. [8] Who says bathroom tile has to be boring? Mix it up, have fun, and let your personality shine through.

So, there you have it, my fellow tile enthusiasts – everything you need to know to tackle that bathroom tile dilemma. Whether you choose to regrout or retile, just remember to approach it with a healthy dose of humor, a pinch of creativity, and a whole lot of determination. Your bathroom deserves a little TLC, and you’ve got this!

References

[1] https://www.youtube.com/watch?v=XFvrV4sFA7k
[2] https://www.johnbridge.com/vbulletin/showthread.php?t=824
[3] https://www.youtube.com/watch?v=a1dL5bKB90c
[4] https://www.thespruce.com/how-to-regrout-bathroom-tile-1822629
[5] https://www.thespruce.com/how-to-regrout-bathroom-tile-1822629
[6] https://www.reddit.com/r/midcenturymodern/comments/ya7yr6/mid_century_bathroom_advice_please_likely_need_to/
[7] https://www.youtube.com/watch?v=4uyn5RmLzyc
[8] https://www.reddit.com/r/HomeImprovement/comments/3s93kl/advice_sought_do_i_need_to_regrout_my_whole_shower/

Categories
Designs

Elevate Your Bathroom With Metallic Accents

Elevate Your Bathroom With Metallic Accents

Unlock the Glamour of Metallic Accents in Your Bathroom

When it comes to transforming your bathroom into a luxurious oasis, the secret weapon lies in the subtle yet captivating power of metallic accents. As someone who loves a touch of glitz and glam (but definitely not enough to live inside a disco ball), I’m here to share my insights on how to elevate your bathroom with the help of these shimmering finishes.

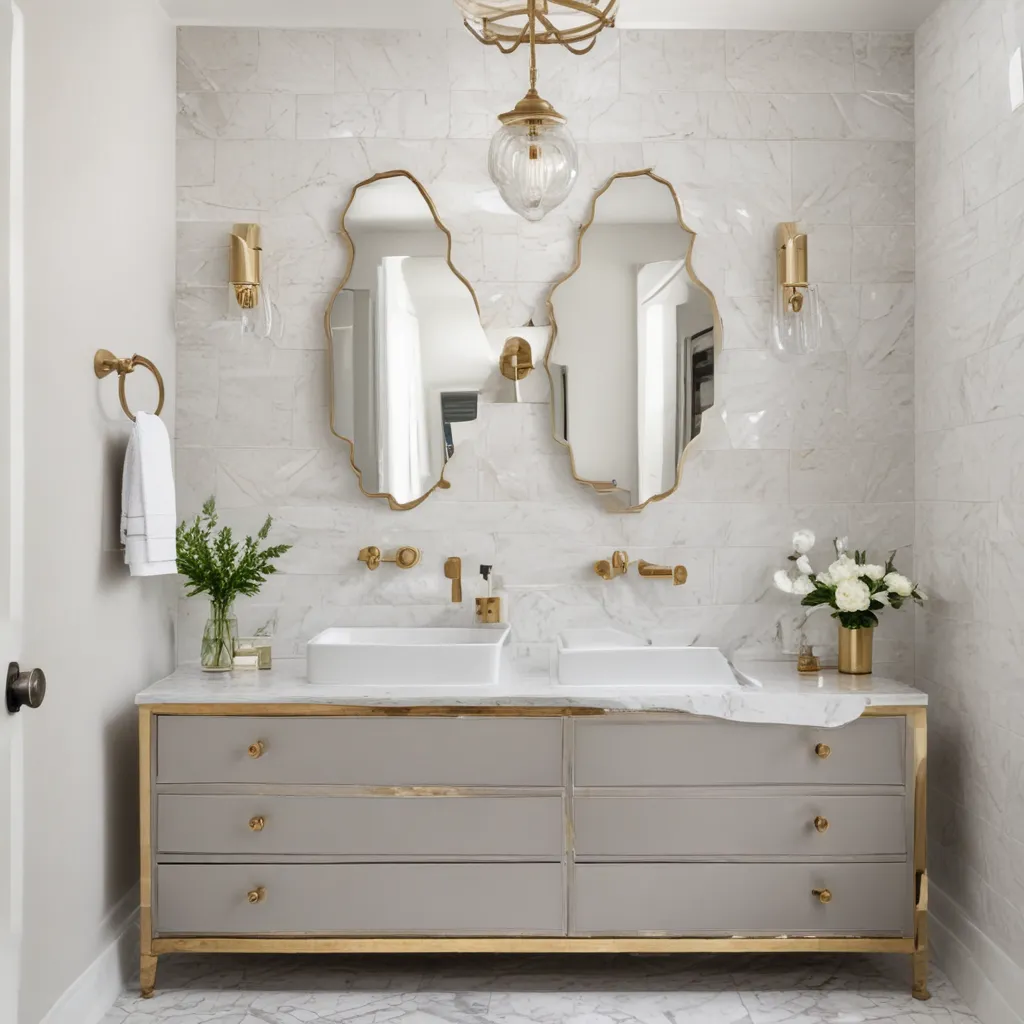
Imagine stepping into your bathroom and being greeted by the warm glow of brushed gold fixtures, the sleek shine of chrome hardware, or the rich elegance of copper accessories. These metallic elements have the ability to instantly elevate the overall ambiance, infusing your personal sanctuary with a sense of refined sophistication. [1]

But don’t worry, you don’t have to go full-on Vegas showgirl to achieve this look. In fact, I’m a firm believer in the power of strategic sprinkling when it comes to adding a touch of glamour to your home. It’s all about finding the perfect balance, where the metallic accents become the stars of the show without stealing the spotlight entirely.

Metallic Marvels: Elevating Your Bathroom One Accent at a Time

One of the easiest ways to incorporate metallic accents into your bathroom is through your fixtures and hardware. Swapping out those tired, old faucets and showerheads for shiny new ones in gold, silver, or bronze can instantly transform the entire space. [2] Think about it – when was the last time you truly admired your bathroom sink? By adding a touch of metallic elegance, you can turn a mundane fixture into a true focal point.

But it doesn’t stop there. Metallic accents can be seamlessly woven throughout your bathroom decor, from the sleek lines of a modernist mirror frame to the captivating shine of a vintage-inspired vanity light. [3] And let’s not forget about the power of metallic accessories – a gleaming soap dish, a set of sparkling canisters, or a stunning metallic tray for your toiletries can instantly elevate the overall aesthetic.

The beauty of this approach is that you can start small and gradually build up the metallic elements, tailoring the look to your personal style and preferences. Maybe you start with just a single gold-plated towel bar and then slowly add in a few more metallic touches as you feel inspired. The key is to have fun with it and let your creativity shine through.

Metallic Masterpiece: Blending Textures and Tones

Of course, the true art of incorporating metallic accents into your bathroom lies in the way you balance them with other materials and textures. [4] After all, you don’t want your space to look like a shiny, metallized version of itself. That would be the crafty equivalent of a sparkly tornado through your sanity.

Instead, try mixing and matching your metallic elements with natural materials like wood, stone, or marble. The contrast between the sleek, polished finishes and the organic textures can create a stunning visual harmony that elevates the entire space. [5] Imagine a vanity with a smooth, brushed nickel faucet paired with a rustic wooden countertop – the juxtaposition is simply divine.

And don’t be afraid to play with different metallic tones as well. Mixing gold, silver, and bronze accents can add depth and dimension to your bathroom, creating a layered and sophisticated look. [6] It’s all about finding the right balance and letting your personal style shine through.

Metallic Magic: Transforming Your Bathroom into a Luxurious Retreat

As you’ve probably gathered by now, I’m a firm believer in the power of metallic accents to transform a simple bathroom into a luxurious, spa-like retreat. [7] Whether you’re drawn to the warm, inviting glow of brass, the sleek elegance of chrome, or the rich, opulent feel of copper, these shimmering finishes have the ability to elevate your personal sanctuary.

So, what are you waiting for? Embrace your inner design diva and start sprinkling those metallic accents throughout your bathroom. From gleaming faucets to stunning mirrors, the possibilities are endless. [8] Just remember to have fun with it, experiment with different materials and textures, and let your unique style shine through. After all, a little bit of metallic magic can go a long way in transforming your bathroom into a true oasis of relaxation and sophistication.

Categories
Tips

Picking Paint Colors for a Small Bathroom

Picking Paint Colors for a Small Bathroom

Navigating the Tricky Terrain of Tiny Tubs

As a design enthusiast, I’ve had my fair share of experience tackling the challenge of small bathrooms. Most recently, I took on the task of revamping my dad’s windowless guest bathroom, and let me tell you, choosing the perfect paint color was no easy feat.

But fear not, my bathroom-beautifying friends! I’m here to share my hard-earned wisdom and guide you through the process of picking the perfect hue for your petite powder room.

Embracing the Darkness: Why Bright White Isn’t Always the Answer

Contrary to popular belief, bright white isn’t always the best choice for a small, windowless bathroom. In fact, it can sometimes make the space feel cold and dingy. I learned this the hard way when my dad’s bathroom initially felt a bit lifeless, despite the fancy fixtures and marble floors.

Instead, I opted for a warmer, mid-tone or dark color to create a cozy and inviting atmosphere. Dark paint colors have the magical ability to absorb light rather than reflect it, which can completely transform the feel of a room. Think of it as wrapping yourself in a cozy, color-drenched embrace.

Complementary Colors: Pairing Your Bathroom Palette

When it came to choosing the perfect paint color for my dad’s bathroom, I knew I wanted it to complement the “Boothbay Gray” shade I had selected for the adjoining guest room. After all, you don’t want your bathroom to feel like a completely separate and disconnected space.

I started by exploring the colors on the same paint swatch as “Boothbay Gray” and quickly fell in love with “Night Train,” a deep, moody blue-gray that I felt would be the perfect fit. But the options didn’t stop there. I also considered “Brewster Gray” and “Puritan Gray” before ultimately settling on “Brewster Gray” as the winner.

Lighting, Lighting, Lighting!

One important factor I had to consider when choosing the paint color was the lack of natural light in the bathroom. Without any windows to bathe the space in that beautiful, mood-setting glow, I knew I needed to compensate with ample artificial lighting.

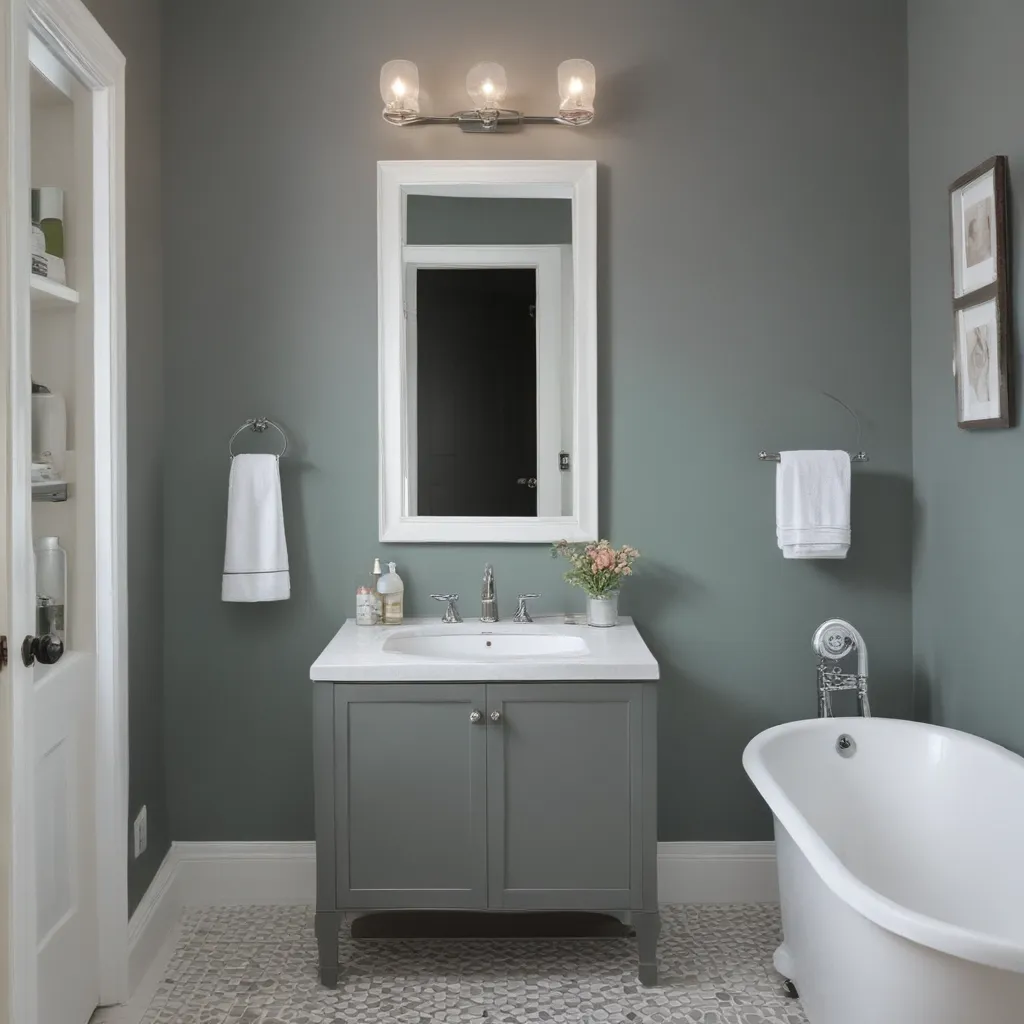
My solution? Incorporating a gold sconce over the mirror, which not only added a touch of warmth and elegance but also helped to brighten up the room. And just like that, the once-dingy bathroom was transformed into a cozy, inviting oasis.

Mixing Metals for Maximum Impact

As a self-proclaimed design enthusiast, I’ve learned that mixing metals is the key to creating a truly dynamic and visually interesting space. And my dad’s bathroom was no exception.

While the existing fixtures were all sleek, silver chrome, I knew a little touch of gold would go a long way in warming up the overall aesthetic. So, in addition to the gold sconce, I opted for a gold towel ring, gold knobs on the vanity, and a smattering of other golden accents throughout the room.

Textural Touches: Elevating the Everyday

With the paint color and lighting sorted, it was time to turn my attention to the finer details – the textural elements that would really bring the space to life.

First up, a cozy, patterned rug to anchor the space and add a touch of warmth to those cold, marble floors. Next, a wooden towel rack to fill the empty wall space and introduce some natural, earthy vibes. And to top it off, a curved wooden shelf over the toilet, complete with rattan accents, for a touch of bohemian charm.

The Finishing Touches: Personalized Perfection

No bathroom transformation is complete without the finishing touches – the art, the accessories, the little details that make the space truly your own.

For my dad’s bathroom, I carefully curated a collection of artwork, ranging from abstract prints to vintage-inspired botanical sketches. I also incorporated a quirky, patterned wastebasket and a selection of luxurious, plush towels to elevate the overall aesthetic.

The Reveal: A Cozy, Sophisticated Sanctuary

And there you have it, folks – the transformation of my dad’s once-bland, windowless bathroom into a cozy, sophisticated sanctuary. Gone are the stark white walls, replaced by the warm, enveloping embrace of “Brewster Gray.” The metallic accents and textural elements add depth and character, while the carefully curated art and accessories bring a personal touch to the space.

The best part? This small-but-mighty bathroom now feels like a true retreat, a place where you can escape the stresses of the day and indulge in a little self-care. And that, my friends, is the power of paint and design.

So, the next time you’re tackling a tiny tub, remember: don’t be afraid to embrace the dark side, mix your metals, and let your personality shine through. With a little creativity and a whole lot of inspiration, you can turn even the smallest of bathrooms into a sanctuary worth savoring.

References

[1] The DIY Playbook. (n.d.). Paint color for bathroom with no windows. https://thediyplaybook.com/paint-color-for-bathroom-with-no-windows/

[2] Reddit. (2022). Tips for picking a color for a small windowless bathroom. https://www.reddit.com/r/InteriorDesign/comments/11uxfr1/tips_for_picking_a_color_for_a_small_windowless/

[3] Martha Stewart. (n.d.). Best paint colors for small bathrooms. https://www.marthastewart.com/8093262/best-paint-colors-small-bathroom

[4] Better Homes & Gardens. (n.d.). Small bathroom paint colors. https://www.bhg.com/small-bathroom-paint-colors-7556441

[5] The Spruce. (n.d.). Paint color ideas for small bathrooms. https://www.thespruce.com/paint-color-ideas-for-small-bathroom-797912

[6] Room for Tuesday. (n.d.). How to make a small bathroom look larger. https://roomfortuesday.com/how-to-make-a-small-bathroom-look-larger/

[7] Hana’s Happy Home. (n.d.). Choosing paint colors for a budget bathroom makeover. https://hanashappyhome.com/diy/paint-colors/choosing-paint-colors-for-a-budget-bathroom-makeover/

[8] The Grit and Polish. (n.d.). I used Rita Konig’s advice for picking a paint color. https://www.thegritandpolish.com/blog/i-used-rita-konigs-advice-for-picking-a-paint-color

Categories
Designs

Unexpected Color Combos For Your Bathroom

Unexpected Color Combos For Your Bathroom

Dare to Be Different: Unexpected Color Combos That Will Transform Your Bathroom

As a bathroom design enthusiast, I’ve always been intrigued by the power of color. Sure, the safe bets of crisp whites and calming neutrals have their place, but sometimes, a girl just wants to shake things up, you know? That’s why I’ve been on the hunt for the most unexpected, head-turning color combinations that can turn your ordinary bathroom into an extraordinary oasis.

Pull up a seat, my design-loving friends, because I’m about to take you on a journey through some of the most delightfully unconventional palettes that will have you rethinking everything you thought you knew about bathroom decor. From bold brights to moody jewel tones, these color combos are anything but boring.

Muted & Mellow: The Power of Desaturated Hues

Let’s start off with something a little more subtle, shall we? Don’t get me wrong, I love a good pop of color, but sometimes, the most sophisticated spaces are the ones that embrace a softer, more muted approach. Take, for example, this gorgeous bathroom [1] that blends a rich, earthy brick red with a soothing olive green. The tones are deep and grounding, yet the overall vibe is wonderfully cozy and inviting.

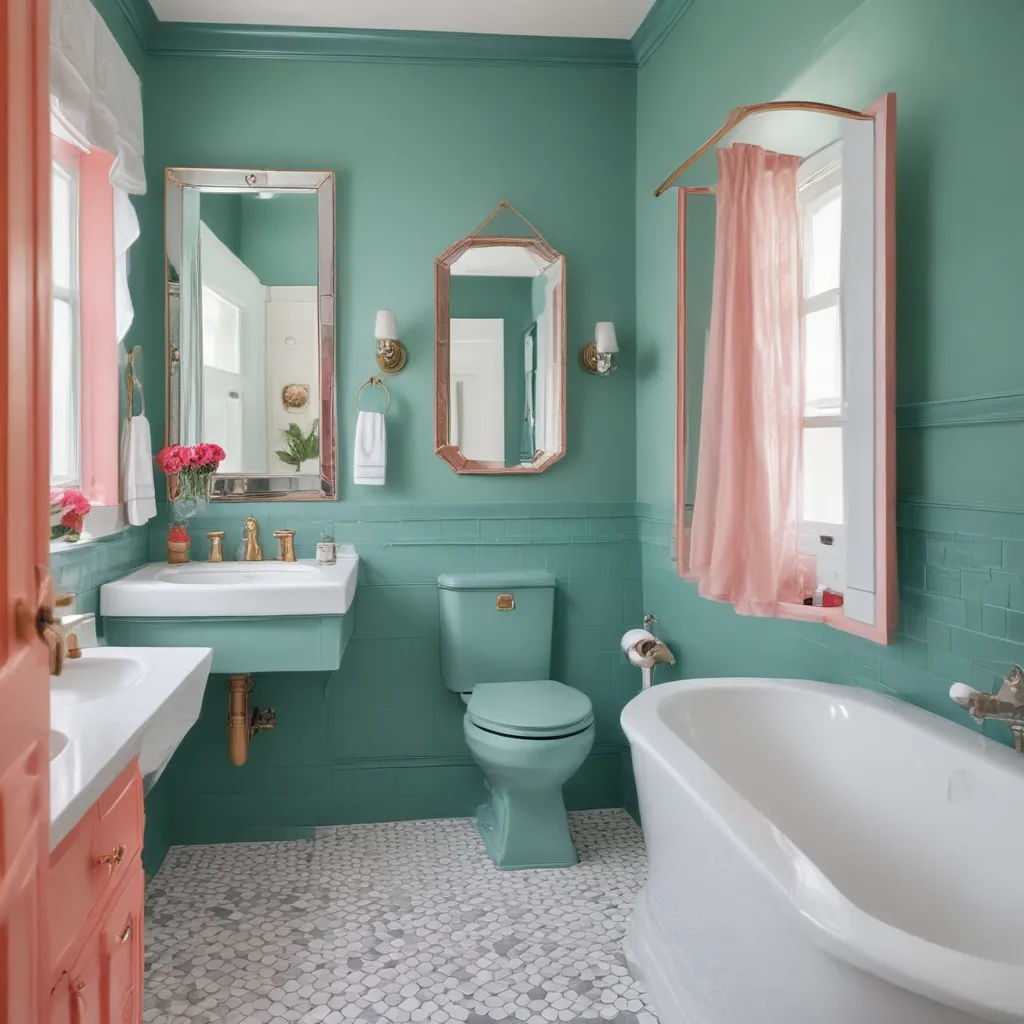
And can we talk about this stunner? [2] The combination of desaturated blue and coral is an unexpected twist on the typical nautical theme, creating a space that feels both calming and fresh. I’m loving how the designers mixed in natural wood accents to really drive home that laidback, beachy feel. It’s the kind of bathroom I’d happily while away an entire afternoon in, getting lost in a good book and the sound of gentle waves.

Punchy & Playful: When Saturated Hues Collide

Okay, now let’s crank things up a notch, shall we? If muted palettes aren’t really your jam, get ready to have your mind blown by some seriously bold color combos. Take this bathroom, for instance [3] – the juxtaposition of that vibrant, almost neon green and the deep, rich red is positively electric. I mean, talk about making a statement! Yet somehow, it all comes together in this cohesive, high-impact way that just screams “look at me!”

And speaking of making a statement, check out this space [4] – talk about an unexpected twist on the classic red and green duo. The designers took those hues and amped them up to their most saturated levels, creating a maximalist dream that’s equal parts playful and sophisticated. I’m especially obsessed with how they balanced all that color with clean, graphic patterns and sleek, modern fixtures. It’s a masterclass in bold, fearless design.

Mixing It Up: When Primary Colors Reign Supreme

But you know what they say – go big or go home, right? If you really want to push the boundaries of conventional bathroom design, it’s time to embrace the power of primary colors. Just take a look at this stunning space [5] – the combination of vibrant blue, sunny yellow, and cherry red is the stuff that design dreams are made of. It’s a little bit retro, a little bit modern, and a whole lot of fun. I can just imagine sinking into that tufted sofa, surrounded by all that eye-popping color, and feeling instantly uplifted.

And speaking of uplifting, how about this bathroom [6] that seamlessly blends punchy primary hues with more muted, earthy tones? The deep teal walls provide the perfect backdrop for the coral headboard and the pops of mint and peach. It’s a masterclass in balancing bold and soft, creating a space that’s equal parts energizing and serene. I’d happily start and end my day in this vibrant, joyful oasis.

Bringing It All Together: The Art of Eclectic Maximalism

Of course, if you really want to take your bathroom to the next level of unexpected, you’ve gotta go all-in on the eclectic maximalist vibe. And let me tell you, these designers really brought their A-game. Just check out this bathroom [7] – the saturated red seating is the undisputed star of the show, but the real magic lies in how it all comes together. From the funky patterned wallpaper to the quirky modern art, every single element in this space works together to create a sense of playful, unapologetic style.

And then there’s this absolute stunner [8] – the entire apartment is drenched in shades of red and green, and the result is nothing short of mesmerizing. I mean, talk about commitment, right? But you know what they say, “go big or go home,” and these homeowners certainly didn’t hold back. The mix of patterns, textures, and finishes is truly a feast for the senses, proving that when it comes to unexpected color combos, more is definitely more.

Embracing the Unexpected: A Whole New World of Bathroom Possibilities

So there you have it, my design-loving friends – a veritable smorgasbord of unexpected color combos that will have you rethinking everything you thought you knew about bathroom decor. From muted and moody to bright and bold, these palettes prove that there’s no limit to the ways you can infuse your personal style into this often-overlooked space.

And you know what the best part is? You don’t have to overhaul your entire bathroom to make a big impact. Just a simple pop of red, a thoughtful pattern clash, or a dash of unexpected green can be the key to unlocking a whole new world of design possibilities. So why not embrace the unexpected and let your bathroom shine in all its colorful glory? After all, who says bathrooms have to be boring?

References

[1] Knowledge from https://stylebyemilyhenderson.com/blog/unexpected-color-combo-in-your-home-red-and-green
[2] Knowledge from https://thewhitebuffalostylingco.com/unexpected-color-combinations/
[3] Knowledge from https://stylebyemilyhenderson.com/blog/unexpected-color-combo-in-your-home-red-and-green
[4] Knowledge from https://stylebyemilyhenderson.com/blog/unexpected-color-combo-in-your-home-red-and-green
[5] Knowledge from https://stylebyemilyhenderson.com/blog/unexpected-color-combo-in-your-home-red-and-green
[6] Knowledge from https://thewhitebuffalostylingco.com/unexpected-color-combinations/
[7] Knowledge from https://stylebyemilyhenderson.com/blog/unexpected-color-combo-in-your-home-red-and-green
[8] Knowledge from https://stylebyemilyhenderson.com/blog/unexpected-color-combo-in-your-home-red-and-green