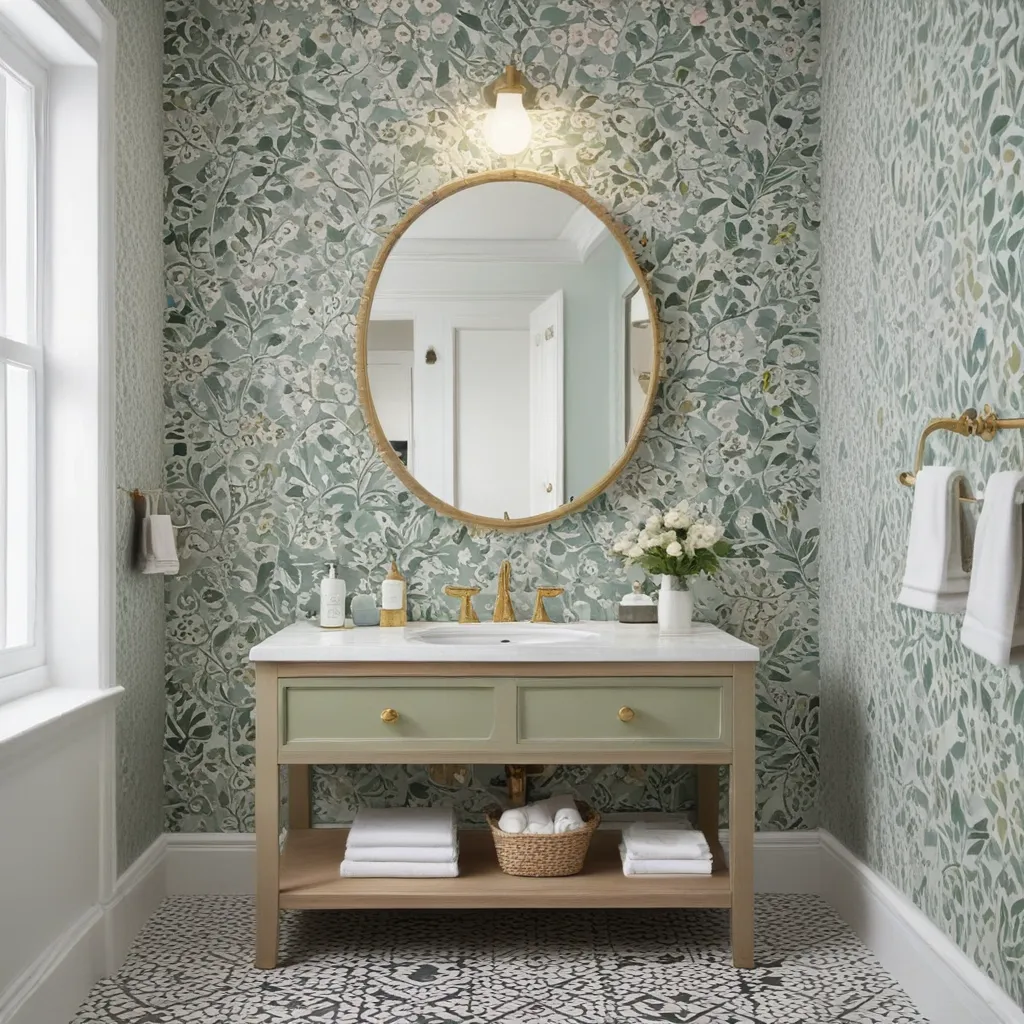
Categories
Designs

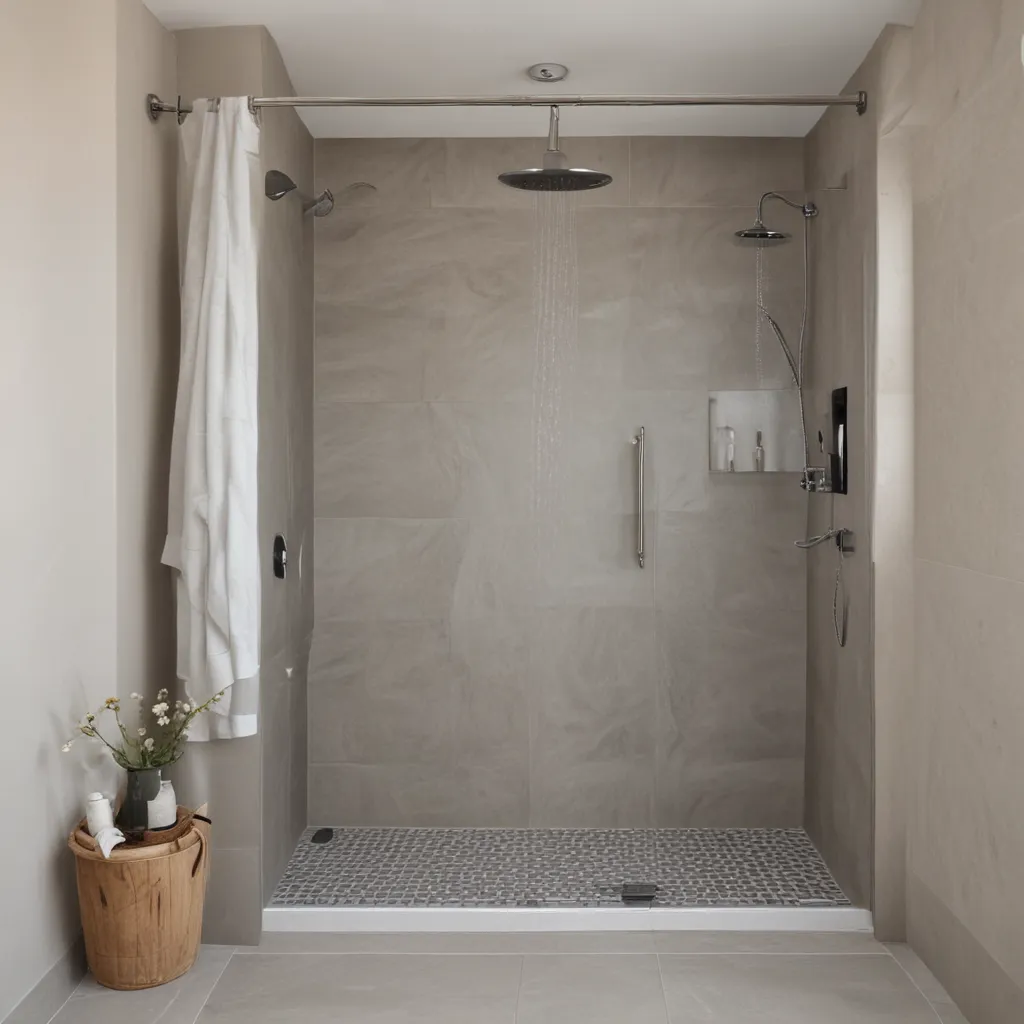
Stylish Showers Without Doors Or Curtains

Stylish Showers Without Doors Or Curtains

A Luxury Bathing Experience Without Walls

Imagine stepping into your bathroom and being met with the soothing patter of water, the steam gently caressing your skin, and an open, airy space that feels more like a high-end spa than your humble abode. Welcome to the world of doorless showers – the latest design trend that’s transforming bathrooms into sanctuaries of tranquility and style.

As a lover of all things design, I’ve always been fascinated by the way a simple change can completely revolutionize a space. And when it comes to bathrooms, the doorless shower has become the star of the show. Gone are the days of cramped stalls and flimsy curtains – these open, seamless showers are redefining the way we experience our daily ablutions.

The Beauty of Boundless Bathing

What is it about doorless showers that has everyone swooning? For starters, the sheer sense of openness and freedom they provide is simply intoxicating. With no barriers to constrain you, you can move about the shower space with a delightful fluidity, almost as if you’re dancing under a gentle rainfall.

And the design possibilities are endless! From sleek, minimalist tiles that create a serene, spa-like atmosphere to vibrant mosaics that add a touch of personality, the options for customizing your doorless shower are truly limitless. [1] Imagine stepping into a shower that’s essentially a work of art, where the lines between functional and aesthetic blur into a harmonious blend.

But it’s not just the visual appeal that makes doorless showers so captivating. These open-concept marvels also offer a level of accessibility that traditional shower stalls simply can’t match. For those with mobility challenges, a curbless, doorless design means easy entry and exit, making the daily ritual of bathing a breeze. [2] And for families with young children, the lack of barriers translates to a safer, more vigilant showering experience – no more worrying about little ones slipping through a gap in the curtain.

The Challenges (And How to Overcome Them)

Of course, with any design choice, there are always a few hurdles to overcome. The primary concern with doorless showers is the potential for water spillage, as the lack of enclosure can lead to splashing and puddles. But fear not, intrepid bathroom renovators – there are ways to address this challenge and ensure your dream shower remains a dry, elegant affair.

One solution is to strategically position the showerhead and tilt the floor towards a central drain, ensuring that any wayward water is efficiently whisked away. [3] Additionally, the use of glass panels or partial walls can help corral the moisture while still maintaining that open, airy feel. And don’t forget about proper ventilation – ensuring your bathroom is well-equipped to handle the steam and humidity will go a long way in keeping things tidy.

Of course, the size of your bathroom space is also a crucial factor to consider. While doorless showers can work wonders in larger, more expansive bathrooms, cramped quarters may not be as forgiving. [4] But even in smaller spaces, savvy design tricks like using reflective tiles or incorporating a glass partition can help create the illusion of spaciousness, allowing you to enjoy the beauty of a doorless shower without sacrificing functionality.

Embrace the Endless Possibilities

As I’ve delved into the world of doorless showers, I’ve been constantly amazed by the sheer creativity and innovation that surrounds this design trend. From the stunning, minimalist elegance of sleek, marble-clad sanctuaries to the bold, vibrant personality of mosaic-tiled wonderlands, the options are truly endless. [5]

And the best part? These open, airy showers aren’t just about form – they’re also about function. By eliminating the need for doors or curtains, you’re not only enhancing the visual appeal of your bathroom but also streamlining the cleaning and maintenance process. [6] Bid farewell to the days of scrubbing down shower enclosures and say hello to a blissfully simple wiping of the walls – your future self will thank you.

So, whether you’re embarking on a full-scale bathroom renovation or simply looking to inject a little bit of spa-like luxury into your daily routine, I encourage you to explore the world of doorless showers. Who knows, you might just discover the bathing experience of your dreams – one where walls and barriers fade away, and the only thing that remains is the soothing embrace of the water and the pure, unadulterated joy of cleansing your body and soul.

References

[1] Knowledge from https://www.thespruce.com/showers-without-doors-ideas-4137742

[2] Knowledge from https://www.pinterest.com/johnangermayer/showers-without-doors/

[3] Knowledge from https://www.reddit.com/r/unpopularopinion/comments/pshuki/i_dont_understand_the_recent_design_trend_of/

[4] Knowledge from https://www.marblesystems.com/22-doorless-walk-in-shower-ideas/

[5] Knowledge from https://www.archdaily.com/924998/walk-in-showers-without-doors-or-curtains-design-tips-and-examples

[6] Knowledge from https://degnandesignbuildremodel.com/blog/2018/6/29/the-pros-and-cons-of-a-doorless-walk-in-shower-design-when-remodeling

[7] Knowledge from https://www.bhg.com/bathroom/shower-bath/doorless-shower/

Categories
Designs

Spa-Like Bathrooms On A Budget

Spa-Like Bathrooms On A Budget

Bringing the Spa Experience Home

Ah, the spa. That blissful oasis where we can escape the stresses of everyday life and emerge feeling refreshed, rejuvenated, and ready to take on the world. But let’s be honest – actually getting to the spa isn’t always practical or affordable, especially for busy parents or those on a tight budget.

Yet, what if I told you that you could recreate that same serene, spa-like atmosphere right in the comfort of your own home? That’s right – with a few savvy tricks and budget-friendly DIY projects, you can transform your ordinary bathroom into a luxurious private sanctuary, no appointment required.

Embrace Natural Elements

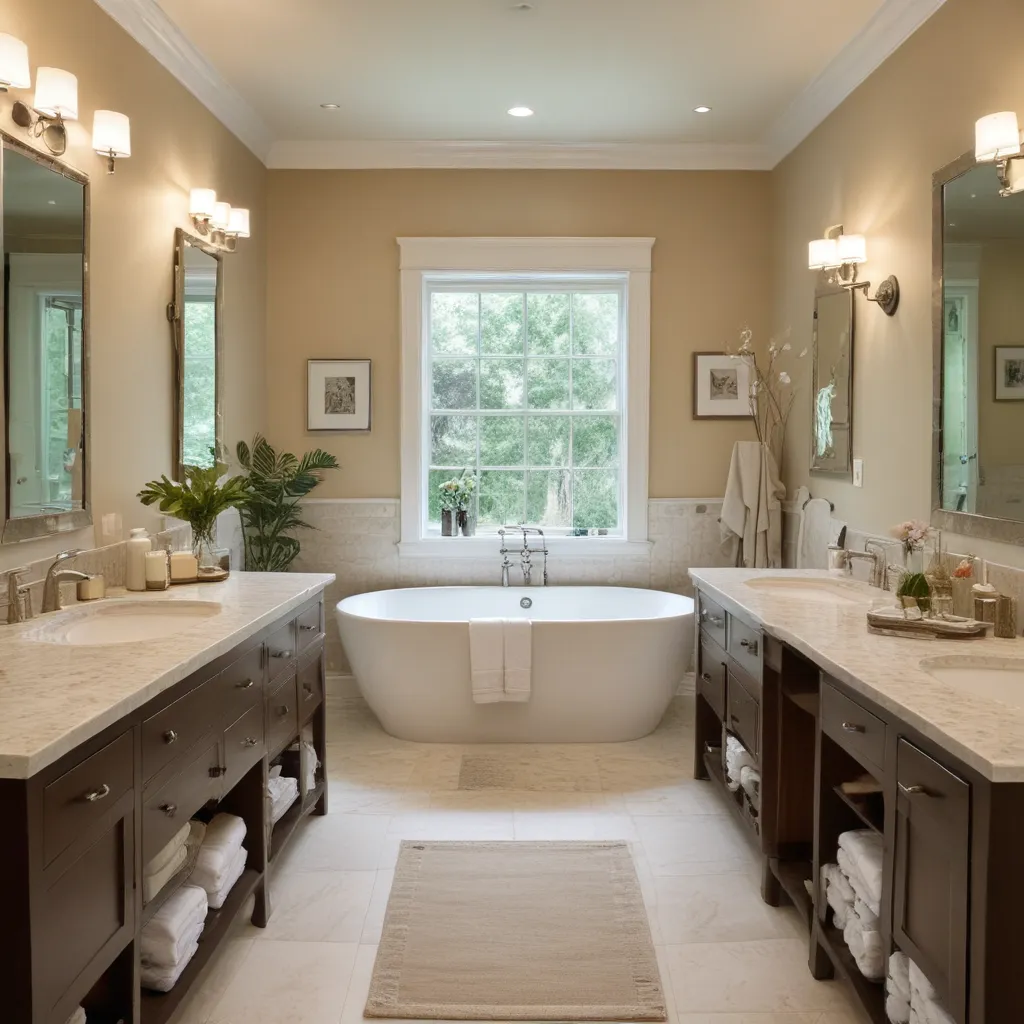
One of the key ingredients in creating a spa-like vibe is bringing the soothing elements of nature indoors. [1] Incorporating plants is an easy way to instantly elevate your bathroom’s ambiance. Whether it’s a potted succulent on the vanity or a hanging fern near the shower, the fresh greenery instantly makes the space feel more calming and restorative.

Don’t have a green thumb? No problem! Faux plants or even a simple vase of fresh-cut flowers can achieve the same effect. And if you really want to double down on that natural, earthy aesthetic, consider lining the walls with bamboo paneling or installing a wooden vanity. [2] The warm, organic tones instantly evoke feelings of relaxation.

Declutter and Streamline

Next, it’s time to tackle the clutter. Spa bathrooms are defined by their serene, uncluttered look – no jumbled assortment of half-used products and random knick-knacks cluttering the countertops. [1] Start by doing a thorough purge, tossing anything that’s expired or hasn’t been used in the last year.

Then, work on neatly organizing the essentials. Corral your daily toiletries on a tray or in decorative jars and baskets, reserving the cabinets and drawers for less-used items. This not only creates a clean, uncluttered look, but also makes your routine feel more zen and intentional.

Upgrade the Textiles

No spa experience is complete without plush, luxurious textiles. [1] Invest in high-quality, absorbent towels – think soft, fluffy cotton or cozy bamboo. Display them neatly folded or rolled on open shelves for a boutique hotel vibe.

Take it a step further by adding a towel warmer rack, so you can wrap yourself in toasty comfort after every shower. And don’t forget the bath mat! Opt for a quick-drying, spa-worthy option that adds that extra touch of coziness.

Choose Calming Colors

When it comes to creating a serene, spa-like atmosphere, color is key. [1] Steer clear of harsh, high-contrast palettes in favor of soothing, nature-inspired hues. Think soft blues, calming greens, and warm, earthy neutrals. These muted tones instinctively make the space feel more tranquil and restorative.

To really drive the point home, consider painting the walls in a tranquil shade or swapping out dated fixtures for sleek, minimalist pieces in matte black or brushed nickel. [3] The goal is to create a cohesive, calming color scheme that envelops you in serenity the moment you step inside.

Incorporate Sensory Elements

Beyond the visual aesthetics, don’t forget to engage the other senses for a truly immersive spa-like experience. [1] Fragrance is a powerful mood-setter, so add some essential oil diffusers or scented candles with calming notes like lavender or eucalyptus.

You can also hang a bundle of fresh eucalyptus in the shower, so the steam releases its soothing aroma. And for the auditory experience, consider installing a rainfall showerhead or adding a tabletop fountain – the gentle sounds of flowing water are incredibly meditative.

Maximize Storage and Organization

Finally, the secret to maintaining that serene, uncluttered look is smart storage and organization. [1] Utilize every inch of your bathroom, whether it’s installing shelves, adding baskets, or bringing in a freestanding cabinet. This not only keeps surfaces clear, but also gives you a place to neatly tuck away all those daily necessities.

For an extra touch of elegance, consider a wooden or wicker storage ladder to display your fluffy towels. And if you have the space, a cozy armchair or settee can instantly transform your bathroom into a luxurious oasis – the perfect spot to curl up with a good book after a soothing soak.

Bringing it all Together

Creating a spa-like bathroom doesn’t have to break the bank. By focusing on natural elements, decluttering, upgrading the textiles, and choosing a calming color palette, you can transform your ordinary bathroom into a tranquil retreat – no reservation required. [4]

So why not treat yourself to a relaxing staycation, right in the comfort of your own home? With these budget-friendly tips, you can enjoy that rejuvenating spa experience anytime, without the hefty price tag. Go ahead, light those candles, pour a glass of wine, and let the stresses of the day melt away. Your personal sanctuary awaits.

References

[1] Bennett, Jessica. “Ways to Create a Calming Bath.” Better Homes & Gardens, www.bhg.com/bathroom/decorating/ways-to-create-a-calming-bath-281474979502776/.

[2] “DIY Spa Bathroom on a Budget.” The Budget Decorator, www.thebudgetdecorator.com/diy-spa-bathroom-on-a-budget/.

[3] “7 Ideas to Create a Spa-Like Bathroom.” Savona Design, savonadesign.com/blog/7-ideas-to-create-a-spa-like-bathroom/.

[4] “How to Turn Your Bathroom Into a Spa-Like Retreat.” The Spruce, www.thespruce.com/perfect-spa-retreat-style-bathrooms-1975792.

[5] Bien, Heather. “How to Turn Your Bathroom Into a Spa.” Heather Bien, 20 July 2020, www.heatherbien.com/2020/07/bathroom-into-a-spa.html.

[6] “31 Simple Ways to Turn Your Bathroom Into a Spa-Like Retreat.” Zona Mom, zonamom.com/spa-like-bathroom-retreat/.

[7] “How to Create a Spa-Like Bathroom on a Budget.” Shabby Fufu, shabbyfufu.com/spa-like-bathroom-renovations-reveal/.

[8] “DIY Spa Bathroom Ideas.” Pinterest, www.pinterest.com/pin/148407750198020227/.

Categories
Designs

Herringbone Tile Patterns For Dimension

Herringbone Tile Patterns For Dimension

Uncovering the Allure of Herringbone Tile

As a self-proclaimed tile enthusiast, I’ve long been captivated by the timeless elegance of herringbone tile patterns. These striking arrangements, inspired by the intricate bone structure of the humble herring fish, have the power to transform any space into a design masterpiece. And when it comes to elevating the aesthetic appeal of bathrooms, herringbone tile patterns reign supreme.

Mastering the Art of Herringbone Tile Layouts

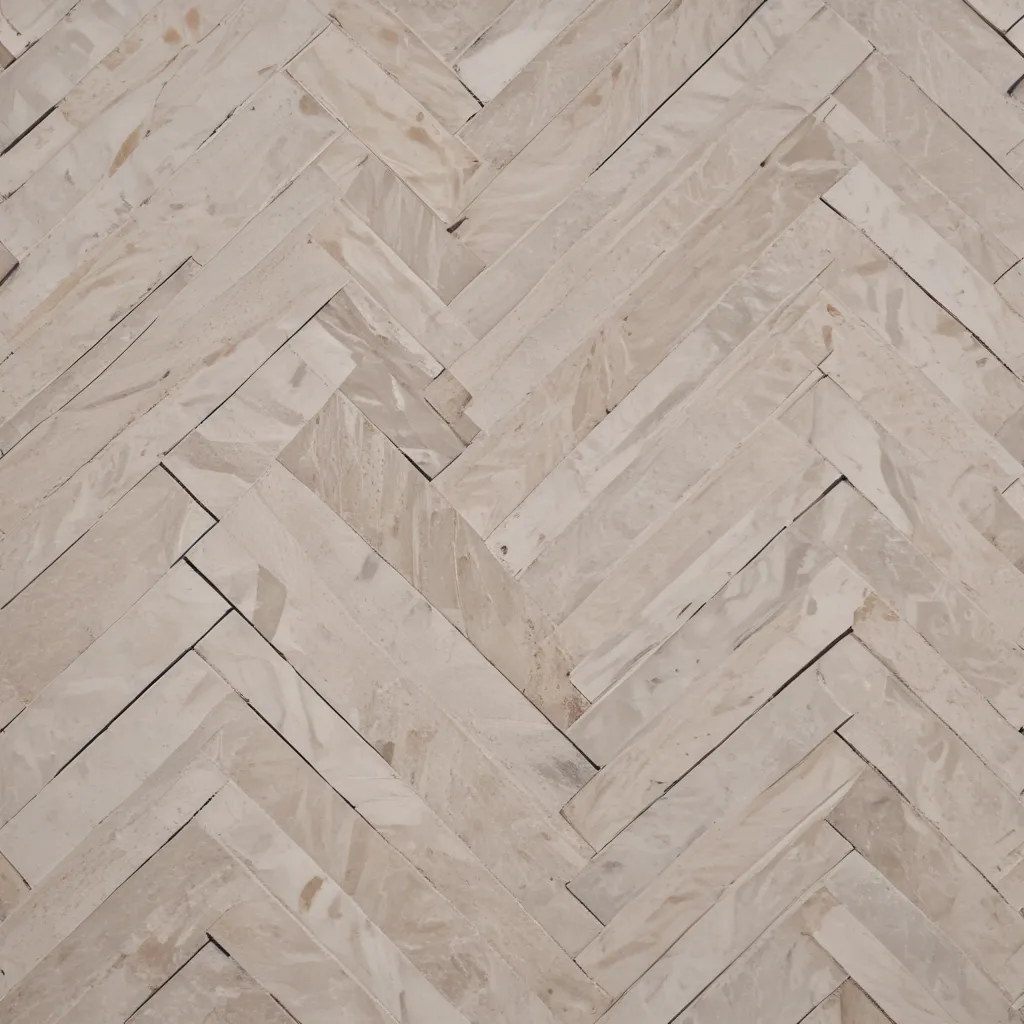
Designing with herringbone tile is an art form in itself, requiring a keen eye for detail and a deep understanding of spatial dynamics. The key is to strike the perfect balance between the pattern’s classic charm and your desired aesthetic. Do you envision a classic white-on-white look that exudes timeless sophistication? Or perhaps a moody charcoal herringbone that lends a contemporary edge to your bathroom oasis? [1]

The beauty of herringbone tile lies in its versatility. Whether you opt for diminutive 1×2-inch wall tiles or opt for the drama of 6×12-inch floor tiles, the herringbone pattern has a way of commanding attention. [2] And the size of your tiles can greatly influence the overall visual impact. Smaller tiles create a more intricate, intricate pattern, while larger tiles offer a bold, statement-making look.

Herringbone Tile Patterns: Elevating Dimension and Texture

One of the primary reasons herringbone tile patterns are so captivating is their ability to add depth and dimension to a space. The intersecting lines and angles create a sense of movement and visual interest that can’t be achieved with a simple grid layout. This dynamic effect is further enhanced by the interplay of light and shadow, which can subtly shift throughout the day, giving your bathroom a mesmerizing, ever-changing appeal. [3]

But the dimension-boosting prowess of herringbone tile doesn’t stop there. The pattern’s inherent texture also plays a crucial role in elevating the sensory experience of your bathroom. Whether you opt for the smooth, glazed finish of ceramic tiles or the rustic, industrial charm of handmade bricks, the herringbone layout will amplify the tactile qualities of your chosen material, making every touch a delight. [4]

Herringbone Tile Patterns: Tailoring to Your Design Style

The beauty of herringbone tile is that it seamlessly adapts to a wide range of design styles, from the warm, inviting atmosphere of a farmhouse-inspired bathroom to the sleek, minimalist elegance of a modern oasis. [5] By carefully selecting the color, size, and finish of your tiles, you can curate a herringbone pattern that perfectly aligns with your unique aesthetic vision.

For a classic, timeless look, consider a crisp white herringbone with a contrasting grout line. This timeless pairing effortlessly complements both traditional and contemporary spaces. If you’re drawn to a more modern vibe, experiment with cool-toned neutrals like soft grays or striking charcoals, which lend an air of sophistication and effortless cool. [6]

And let’s not forget the joyful possibilities of infusing your herringbone tile with a burst of color. Whether it’s a vibrant blue, a earthy terracotta, or a soothing sage green, a colorful herringbone pattern can instantly elevate your bathroom into a serene, personalized sanctuary. [7]

Bringing Your Herringbone Tile Vision to Life

Transforming your bathroom into a captivating oasis with herringbone tile may seem like a daunting task, but with the right planning and execution, it can be an incredibly rewarding project. Start by carefully considering the size, shape, and layout of your space, as these factors will play a crucial role in determining the ideal tile dimensions and pattern orientation. [8]

Once you’ve nailed down the technical details, the real fun begins – curating the perfect color palette and material finish to bring your vision to life. Don’t be afraid to experiment and explore different options; after all, the beauty of herringbone tile lies in its ability to adapt to your unique style.

So, are you ready to embark on a tile-fueled adventure and elevate your bathroom to new heights of design excellence? With the captivating charm of herringbone patterns at your fingertips, the possibilities are truly endless.

References

[1] https://www.fireclaytile.com/blog/full/design-trends-7-ways-to-use-herringbone-in-your-kitchen
[2] https://www.dimensions.com/element/tiles-pavers-rectangular-herringbone-pattern
[3] https://www.pinterest.com/pin/381539399688082206/
[4] https://mercurymosaics.com/blogs/news/10-herringbone-tile-ideas
[5] https://chieftalk.chiefarchitect.com/topic/24949-herringbone-pattern/
[6] https://www.cravingsomecreativity.com/herringbone-pattern-tile-layout-tips/
[7] https://www.thehandcraftedhaven.com/tiling-a-bathroom-wall-in-a-perfect-herringbone-pattern/
[8] https://www.reddit.com/r/HomeImprovement/comments/5wy6cx/bathroom_floor_tile_install_herringbone_pattern/

Categories
Tips

Quick Tricks to Make a Small Bathroom Feel Bigger

Quick Tricks to Make a Small Bathroom Feel Bigger

Space-Savvy Strategies for Square Footage-Challenged Bathrooms

Having a tiny bathroom can feel like a constant challenge. Where do I put all my toiletries? How can I make this closet-sized space feel less…claustrophobic? Well, fear not, my space-starved friends. I’m here to share some of my favorite tricks to make even the most microscopic bathroom feel bigger, brighter, and oh-so-much more inviting.

As someone who’s lived with my fair share of petite powder rooms, I’ve learned a thing or two about making the most of limited square footage. And the best part? These strategies are mostly cosmetic – no need to start knocking down walls or calling in the construction crew. With a few strategic design moves and a healthy dose of creativity, you can transform your cramped bathroom into an oasis of spa-like serenity.

Reach for the Sky (Ceiling)

One of the quickest ways to make a small bathroom feel more spacious? Don’t go for the obvious choice and paint that ceiling bright white. Hear me out on this one. While a crisp white ceiling might seem like the logical move, it can actually make the room feel shorter and more closed-in. Instead, try painting the ceiling the same color as your walls, or even a shade or two darker. This simple trick creates the illusion of a taller, airier space.

I learned this one firsthand when renovating our previous bathroom. The ceiling was nothing special – standard height, no skylights or anything fancy. But by painting it a rich, inky black (Tricorn Black by Sherwin-Williams, to be exact), it instantly made the room feel bigger, brighter, and more intentionally designed. [1] It’s like giving your small bathroom some vertical real estate it didn’t have before.

Lighten the Load (Visually)

Another way to make a tiny bathroom feel more spacious? Opt for lighter, more open fixtures and furnishings. Bulky vanities and clunky tubs can quickly make a cramped space feel even more claustrophobic. Instead, look for visually streamlined alternatives that won’t weigh the room down.

For our recent basement bathroom renovation, I chose a vanity with a partially open bottom – the Silkroad Exclusive 36″ model from Lowe’s. [2] This allowed me to see the floor underneath, creating an airier, less heavy-handed feel. And in the shower, I went for a partial glass enclosure rather than a fully tiled surround. The transparency helps the space flow together seamlessly, making it feel larger than it actually is.

The same principle applies to your shower curtain, too. Rather than letting a short curtain cut the room in half, hang it from floor to ceiling. [3] This elongates the vertical space and gives the illusion of a much taller, more expansive room.

Reflect on This

If you’re blessed with any natural light in your small bathroom, make the most of it by strategically placing mirrors. Reflective surfaces bounce rays around the room, creating the impression of more square footage. But don’t just settle for a basic vanity mirror – take it up a notch.

Consider mirroring an entire wall, like the designers at Architectural Digest did in this stunning space. [4] The mirrored surface reflects the pattern and light, making the room feel infinitely larger. Or, for a more budget-friendly approach, flank your vanity mirror with sconces or even hang a second, smaller mirror nearby. The more reflective surfaces, the better.

And don’t forget about those shower doors! Swapping out a solid enclosure for clear or frosted glass can work wonders, allowing light to flow through and create a more open feel. [5]

Tile Time

When it comes to small bathrooms, your flooring and wall tile choices can make a big difference in how the space is perceived. Steer clear of bulky, oversized tiles – those can make a tiny room feel even tinier. Instead, opt for slim, linear options that draw the eye upward.

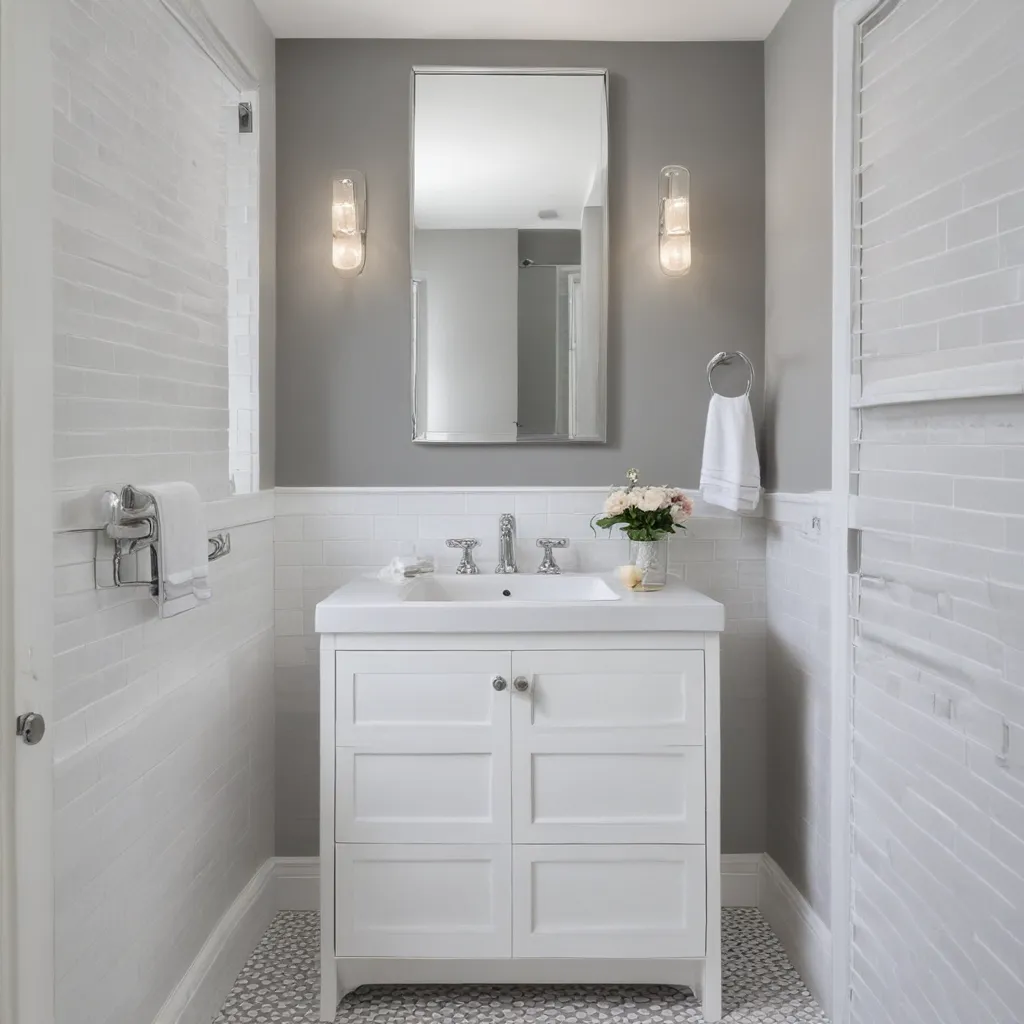
I used a classic Carrara marble subway tile in our basement bathroom, installing it in a vertical pattern to elongate the walls. [6] The long, lean lines create the illusion of height, while the light, reflective quality of the marble bounces brightness around the room.

And don’t be afraid to carry that tile all the way up to the ceiling. Continuous, uninterrupted coverage from floor to ceiling can make the space feel larger and more seamless. [7]

Elevate the Ordinary

Small bathrooms may be short on square footage, but that’s no reason to skimp on style. In fact, I’d argue that these diminutive spaces are the perfect canvas for making a big design statement.

Rather than playing it safe with a plain Jane palette, get creative with bold colors, patterns, and textures. In our previous home, I embraced a moody, high-contrast look with inky black walls and brass fixtures. [8] The drama of it all drew the eye away from the room’s compact dimensions, making it feel like a jewel box of sorts.

And don’t be afraid to have some fun, either. Our current basement bathroom features a vintage-inspired black toilet seat and brass hardware – little details that pack a punch and make the space feel extra special. [9] When you infuse personality into a small bathroom, it automatically feels less like an afterthought and more like a destination.

So there you have it, my friends – a toolkit of tricks to transform your teeny-tiny bathroom into a spacious, spa-worthy retreat. With a little creativity and a whole lot of reflection (literally and figuratively), you can make the most of even the most square footage-challenged powder room. Happy decorating!

References

[1] Knowledge from https://www.thriftydecorchick.com/2019/10/this-simple-trick-will-make-your.html
[2] Knowledge from https://www.forbes.com/home-improvement/bathroom/make-small-bathroom-feel-bigger/
[3] Knowledge from https://www.thriftydecorchick.com/2019/10/this-simple-trick-will-make-your.html
[4] Knowledge from https://www.architecturaldigest.com/story/small-bathroom-ideas-for-a-brighter-breezier-space
[5] Knowledge from https://www.forbes.com/home-improvement/bathroom/make-small-bathroom-feel-bigger/
[6] Knowledge from https://www.bhg.com/bathroom/small/make-a-small-bath-look-larger/
[7] Knowledge from https://www.forbes.com/home-improvement/bathroom/make-small-bathroom-feel-bigger/
[8] Knowledge from https://www.bhg.com/bathroom/small/make-a-small-bath-look-larger/
[9] Knowledge from https://www.bhg.com/bathroom/small/make-a-small-bath-look-larger/

Categories
Tips

Stay Safe With Anti-Slip Bathroom Flooring

Stay Safe With Anti-Slip Bathroom Flooring

Stay Safe With Anti-Slip Bathroom Flooring

Have you ever had that heart-stopping moment when you step out of the shower or tub, only to feel your feet slip out from under you? I know I have, and let me tell you, it’s not an experience I’d wish on my worst enemy. Bathroom floors can be treacherous, especially when they’re slick with water, soap, or other slippery substances. That’s why investing in the right anti-slip flooring solutions is so important – not just for your safety, but for the peace of mind of everyone who uses your bathroom.

As someone who’s had my fair share of bathroom mishaps, I can tell you that a good set of anti-slip tiles or coatings can make all the difference. It’s like having a trusty sidekick to hold your hand (or feet, in this case) and keep you steady, even when things get a little slippery. And let’s be real, who doesn’t want to feel like a superhero when they’re just trying to, you know, take a relaxing soak?

But it’s not just about the thrill of avoiding a potentially painful fall. Anti-slip bathroom flooring is a must-have for anyone who values their wellbeing, especially those with mobility issues or young children who might be more prone to accidents. Imagine the relief of knowing that your bathroom is a safe haven, a place where you can move around with confidence instead of constantly worrying about taking a tumble.

Now, I know what you’re thinking – “But won’t anti-slip tiles ruin the aesthetic of my bathroom?” Fear not, my friend! The days of boring, utilitarian-looking anti-slip surfaces are long gone. Nowadays, you can find a wide range of stylish and sophisticated options that will have your bathroom looking like it belongs in a magazine, all while keeping you safe and secure.

From sleek, textured porcelain tiles to elegant natural stone, the possibilities are endless. And let’s not forget about the fun stuff, like patterned vinyl or even custom-designed mosaic tiles. Your bathroom can be a veritable work of art, with the added bonus of being slip-resistant. It’s like having your cake and eating it too, but without the risk of accidentally face-planting into it.

So, if you’re tired of tiptoeing around your bathroom, always on the lookout for potential hazards, it’s time to take action. Invest in some top-notch anti-slip flooring solutions, and say goodbye to those nerve-wracking moments. Your safety, and the safety of your loved ones, is worth far more than any aesthetic concerns. Plus, think of all the money you’ll save on hospital bills and physical therapy (not to mention the embarrassment of having to explain how you ended up with a broken tailbone).

Ready to take the plunge? Let’s dive in and explore the world of anti-slip bathroom flooring. Together, we’ll find the perfect solution to keep you safe, stylish, and sane. After all, who needs the adrenaline rush of a bathroom acrobatics routine when you can have the peace of mind that comes with a secure, slip-resistant surface?

The Slippery Slope of Bathroom Floors

Bathrooms are notorious for being slippery, and it’s not hard to see why. Between the constant presence of water, soap, and other bathroom products, the floor can quickly turn into a treacherous skating rink, just waiting to trip you up. And let’s not forget about the added factor of condensation, which can turn even the most innocuous-looking tiles into a veritable ice rink.

I’ll never forget the time I stepped out of the shower, feeling like I was on cloud nine after a relaxing soak, only to suddenly find myself airborne, headed for a painful rendezvous with the floor. It was like someone had greased the tiles while I wasn’t looking, and I was the unsuspecting victim of their cruel prank. Luckily, I managed to catch myself before any major damage was done, but the memory of that heart-stopping moment still haunts me to this day.

And it’s not just me, either. Thousands of people every year find themselves in similar predicaments, with many suffering from serious injuries like broken bones, head trauma, or even life-altering consequences. It’s a sobering thought, but it’s the reality we’re facing when it comes to the dangers of slippery bathroom floors.

But here’s the thing – it doesn’t have to be this way. With the right anti-slip solutions, we can turn our bathrooms into sanctuaries of safety, where the only thing we have to worry about is how to best enjoy our soak or shower. It’s all about finding the perfect balance between style and practicality, and that’s where the magic of anti-slip flooring really shines.

Choosing the Right Anti-Slip Flooring

Now, when it comes to anti-slip bathroom flooring, the options can be a bit overwhelming. Do you go with ceramic tiles? Porcelain? Natural stone? Vinyl? The choices seem endless, and it can be tough to know where to start. But fear not, my friends, I’m here to guide you through the process and help you find the perfect solution for your bathroom.

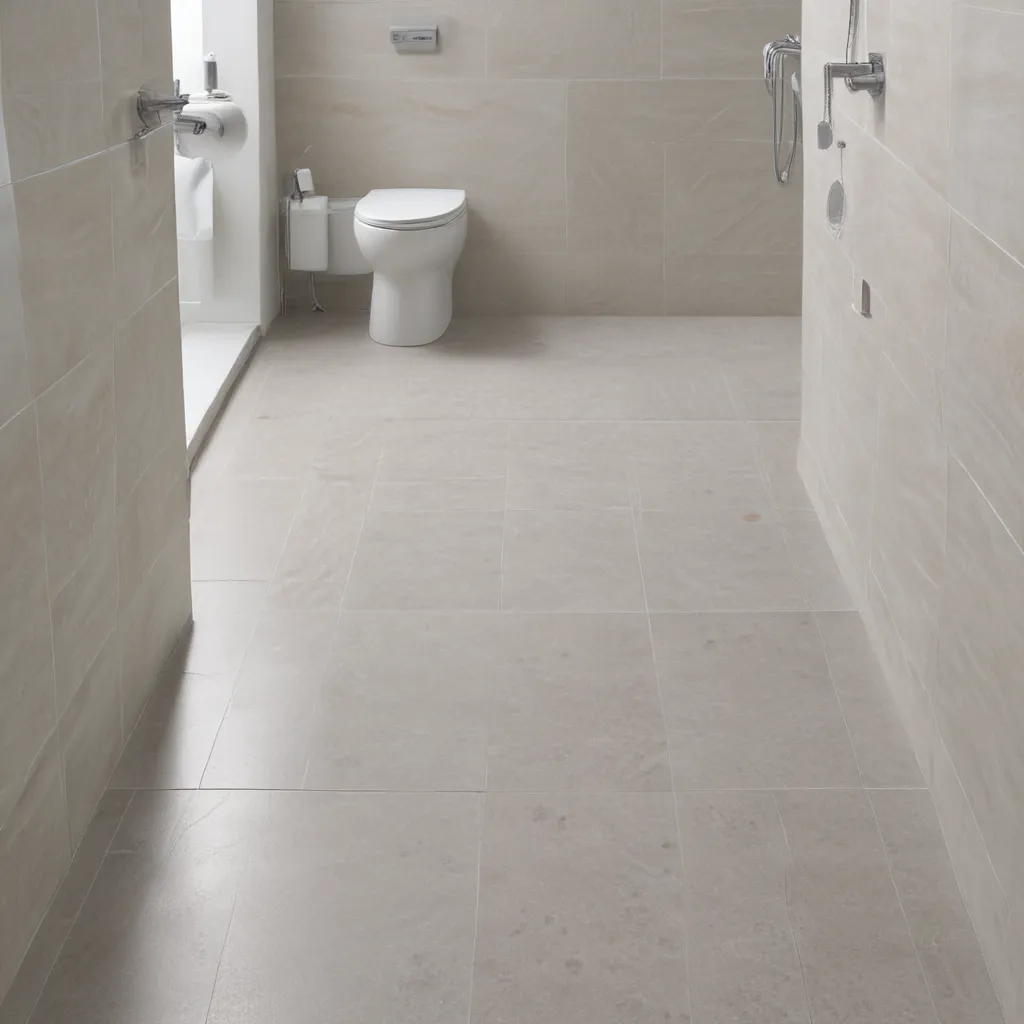
One of the key factors to consider is the slip resistance rating, or the Coefficient of Friction (COF) [1]. This is a measure of how much traction the surface provides, and it’s crucial when it comes to bathroom floors. Ideally, you want to look for tiles with a COF of 0.6 or higher, as this will provide the necessary grip to keep you firmly planted, even when things get a little wet and slippery.

But it’s not just about the COF – the texture of the tiles also plays a big role. Tiles with a more pronounced texture, such as those with raised patterns or embossed designs, tend to offer better traction than smooth, glossy surfaces. [2] It’s like having a built-in anti-slip feature, right at your feet.

And let’s not forget about durability. Bathrooms are high-moisture environments, so you’ll want to make sure your chosen tiles can withstand the constant exposure to water without losing their integrity. [2] Trust me, the last thing you want is to have your fancy new anti-slip tiles start to crumble and crack, leaving you back at square one.

Of course, aesthetics are important too. After all, you want your bathroom to look and feel like a luxurious oasis, not a sterile hospital ward. Luckily, there’s no shortage of stylish, slip-resistant options out there, from classic natural stone to bold, patterned ceramics. [3] It’s all about finding the perfect balance between function and fashion.

Installation and Maintenance

Okay, so you’ve done your research and found the perfect anti-slip tiles for your bathroom. Now comes the fun part – installation! Now, I know what you’re thinking – “But I’m no DIY expert. How am I supposed to tackle this project without ending up with a disaster on my hands?”

Fear not, my friends, because with the right guidance, even the most novice of handypeople can tackle this task with confidence. It all starts with proper preparation – making sure the surface is clean, dry, and free of any debris or imperfections. [4] From there, it’s just a matter of carefully applying the adhesive, laying the tiles, and finishing up with a grouting and sealing process.

And let’s not forget about the maintenance aspect. After all, the best anti-slip tiles in the world won’t do you much good if you don’t keep them in tip-top shape. [5] That means regular sweeping, gentle cleaning, and prompt attention to any spills or buildup. It’s like keeping your car in pristine condition – a little bit of TLC goes a long way.

But don’t worry, it’s not as daunting as it sounds. A few simple steps, like using a soft-bristle brush and avoiding harsh chemicals, can go a long way in preserving the slip-resistant properties of your tiles. [5] And trust me, the peace of mind you’ll feel knowing that your bathroom is a safe haven is more than worth the small investment of time and effort.

Affordable and Accessible Solutions

Now, I know what you’re thinking – “All of this anti-slip flooring sounds great, but it’s probably going to cost me an arm and a leg, right?” Well, my friends, I’m here to tell you that there are plenty of affordable and accessible options out there, no matter your budget or DIY skill level.

For starters, let’s talk about the cost of anti-slip tiles. While the price tag can vary depending on the material, size, and design, you can easily find high-quality options that won’t break the bank. [6] And with a little bit of savvy shopping, you might even be able to score some killer deals at your local home improvement store or online retailer.

But what if you’re not quite ready to tackle a full bathroom renovation? No problem! There are plenty of other anti-slip solutions that you can implement without breaking the bank. [7] From specialized coatings and treatments to non-slip mats and rugs, the options are endless, and they can make a world of difference in terms of keeping your bathroom safe and secure.

And let’s not forget about the accessibility factor. Anti-slip flooring isn’t just about looking good – it’s about ensuring that everyone, regardless of age or ability, can move around your bathroom with confidence and ease. [8] Whether you’re caring for an elderly loved one or have a little one who’s just learning to navigate the world, these safety-focused solutions can be a true game-changer.

So, don’t let the cost or complexity of anti-slip flooring deter you. There are plenty of affordable and user-friendly options out there, just waiting to transform your bathroom into a veritable oasis of safety and style. It’s time to take that first step towards a slip-free future, and trust me, your future self will thank you for it.

Conclusion

As I sit here, reflecting on the importance of anti-slip bathroom flooring, I can’t help but feel a deep sense of gratitude for the innovative solutions that are out there, waiting to keep us safe and secure. Gone are the days of slipping and sliding our way through our daily ablutions, wondering when the other shoe (or, in this case, the entire body) is going to drop.

With the right anti-slip tiles, coatings, and accessories, we can reclaim our bathrooms as the sanctuaries of relaxation and rejuvenation that they were always meant to be. No more white-knuckle moments as we step out of the shower, no more frantic scrambling to regain our balance. Instead, we can move with confidence, knowing that our floors have our backs (and our feet) every step of the way.

So, what are you waiting for? It’s time to take the plunge and invest in some top-notch anti-slip flooring solutions. Your safety, and the safety of your loved ones, is worth far more than any aesthetic concerns or budgetary constraints. Trust me, the peace of mind you’ll gain will be worth its weight in gold (or, in this case, slip-resistant tiles).

Happy (and safe) bathing, my friends! May your floors be as solid as your footing, and may your bathroom adventures be free from the threat of unexpected acrobatics. Here’s to a future filled with worry-free soaks, secure showers, and the knowledge that you’ve taken the necessary steps to keep yourself and your family safe. Cheers to that!

[1] https://slipdoctors.com/collections/anti-slip-coatings-for-floors
[2] https://slipnomore.com/non-slip-floor-tiles-for-bathroom/
[3] https://www.thehandmadehome.net/bathroom-flooring-inspiration/
[4] https://www.justanswer.com/home-improvement/hemim-type-floor-mat-rug-best-lvp-flooring.html
[5] https://www.pinterest.com/ideas/non-slip-bath-mat/927135205990/
[6] https://www.agingcare.com/questions/safe-alternative-for-bath-mats-478901.htm
[7] https://epilepsyfoundation.org.au/managing-epilepsy/health-and-wellbeing/safety-at-home/bathroom/
[8] https://www.affordablewalkinshower.com/blog/non-slip-shower-and-bathroom-floor-options
Categories
Tips

Refresh Tired Bathroom Wall Tile Without Replacing It

Refresh Tired Bathroom Wall Tile Without Replacing It

Reviving Drab Tiles: A Tile-Over-Tile Transformation

As a design enthusiast, I can confidently say that there’s nothing quite as satisfying as refreshing a tired, outdated space. And when it comes to bathrooms, the wall tiles are often the first thing that catch your eye – for better or for worse. If your bathroom is plagued by drab, uninspiring tiles, the thought of ripping them all out and starting from scratch can be overwhelming. But fear not, my fellow tile-weary warriors, for there is a simpler solution that can breathe new life into your bathroom without the hassle and expense of a full-blown renovation.

Tiling Over Tile: A Clever Hack

Believe it or not, you can actually tile right over your existing tiles, saving you the backbreaking (and wallet-emptying) task of demolition. Now, I know what you’re thinking – “Tiling over tile? Isn’t that just asking for trouble?” Well, my friends, it’s not as crazy as it might sound. In fact, with the right preparation and products, it can be a game-changer for your dated bathroom.

Mastering the Tile-Over-Tile Technique

The key to successful tile-over-tile is ensuring that your existing tiles are in good condition and free of any cracks or instability. After all, you don’t want your new tiles to start popping off like popcorn kernels, now do you? [1] Once you’ve verified the integrity of your current tiles, it’s time to get to work.

First up, you’ll need to thoroughly clean the tiles with a degreasing agent like TSP (trisodium phosphate) to remove any grime or residue that could interfere with the new tile adhesion. Next, it’s time to apply a bonding primer, like ECO Prim Grip, to create a rough, gritty surface that’ll help the new mortar and tiles stick like glue. [1]

With the primer dried, you can start laying your new tiles, working from the corners toward the edges. And don’t forget to install a sturdy edge trim, like a Schluter 1/2-inch profile, to provide a clean, finished look. [1] After you’ve grouted and caulked everything, your once-tired bathroom will be transformed into a shiny, refreshed oasis.

Tile-Over-Tile: The Pros and Cons

Now, I know what you’re thinking – it all sounds too good to be true. And you’re not wrong to be a little skeptical. Tiling over tile does come with its own set of pros and cons that you’ll want to weigh before diving in.

On the plus side, it’s a relatively quick and cost-effective way to update your bathroom without the hassle and mess of a full-blown tile removal. And if you happen to change your mind down the line, the new tiles can be easily removed, leaving the original tiles intact. [2]

However, there are a few potential drawbacks to consider. If your existing tiles aren’t perfectly level or stable, the new tiles may not adhere properly, leading to cracking or loosening over time. And the added thickness of the new tiles can also cause issues with door clearances and transitions to adjoining rooms. [1]

Tile-Over-Tile Success Story

But don’t let those potential pitfalls scare you off. I’ve seen firsthand how a tile-over-tile transformation can breathe new life into a tired bathroom. Take my daughter’s tub/shower combo, for example. Almost two years ago, we decided to tackle the outdated tiles, and the results have been nothing short of amazing.

We followed the same process I outlined earlier – thoroughly cleaning the existing tiles, applying the bonding primer, and carefully installing the new penny tiles. And let me tell you, the difference is night and day. The once-drab space is now a bright, modern oasis that puts a smile on my face every time I see it. [1]

Embracing the Tile-Over-Tile Opportunity

So, if you’re staring at your bathroom walls, wishing you could wave a magic wand and make those dated tiles disappear, don’t despair. Tiling over tile might just be the solution you’ve been searching for. Sure, it’s not a perfect fix-all, but with the right preparation and a bit of elbow grease, you can transform your tired bathroom into a space you’re proud to call your own.

And who knows, maybe this tile-over-tile adventure will even unleash your inner rebel – after all, what’s life without a little bathroom tile chaos, am I right? So, what are you waiting for? Grab your roller, your trowel, and let’s get to work on giving your bathroom a much-deserved refresh!

References

[1] Kaleidoscope Living. “Tiling Over Existing Tile: What You NEED To Know.” Accessed April 21, 2023. https://designertrapped.com/tile-over-tile/.

[2] The Decor Formula. “Ideas for Covering Up Tile Floors Without Removing It.” Accessed April 21, 2023. https://www.thedecorformula.com/home/2018/4/15/ideas-for-covering-up-tile-floors-without-removing-it.

[3] Killam, Maria. “How to Fix a Dated Bathroom.” Accessed April 21, 2023. https://mariakillam.com/how-to-fix-dated-bathroom/.

[4] Multipanel. “How to Renovate Bathrooms Without Removing Tiles.” Accessed April 21, 2023. https://www.multipanel.co.uk/inspiration/bathroom-inspiration/how-to-renovate-bathrooms-without-removing-tiles/.

[5] Shiplapandshells. “Laundry Room Refresh.” Accessed April 21, 2023. https://shiplapandshells.com/laundry-room-refresh/.

[6] Gulin Cabinets. “How to Update Kitchen Tiles Without Removing Them.” Accessed April 21, 2023. https://guilincabinets.com/how-to-update-kitchen-tiles-without-removing-them.

[7] Showers To You. “How to Revive Bathroom Tiles.” Accessed April 21, 2023. https://www.showerstoyou.co.uk/latest/2020/09/how-to-revive-bathroom-tiles/.

[8] Centsational Style. “Powder Room Refresh.” Accessed April 21, 2023. https://centsationalstyle.com/2017/09/powder-room-refresh/.

Categories
Tips

Tips for Properly Caulking Your Bathtub and Shower

Tips for Properly Caulking Your Bathtub and Shower

The Ugly Truth About Caulk

Few features can make a bathroom look more dated and unkempt than the caulk around your bathtub. According to the experts at This Old House, when caulk starts to look hard, cracked, and discolored, it’s time to rip it out and start fresh [1]. And let me tell you, that’s not a pretty sight. I learned this the hard way after ignoring the problem in my own bathroom for way too long.

You see, I’m the kind of person who likes to put off home maintenance tasks until they can no longer be ignored. So when I started noticing mildew, residue, and dark spots creeping into the caulk around my tub, I just shrugged it off. “It’s fine, it’s fine,” I told myself. “I’ll get to it eventually.” Big mistake.

Eventually, that “fine” caulk turned into a crusty, peeling mess that made my whole bathroom look like it belonged in a haunted house. Guests would come over and I could see them staring at it, trying to be polite but clearly thinking, “Yikes, when was the last time they updated that?” It was embarrassing, to say the least.

Caulking 101: The Supplies You’ll Need

Once I finally swallowed my pride and tackled the caulk situation, I realized it wasn’t as daunting as I had built it up to be in my head. In fact, with the right tools and a little elbow grease, it’s a pretty straightforward DIY project.

The most important thing is to make sure you have the right kind of caulk. According to the experts, you’ll want to use a caulk that’s specifically formulated for bathrooms or kitchens, as these are designed to withstand moisture and hold up better over time [2]. Acrylic latex or silicone caulks are typically the best options.

In addition to the caulk itself, you’ll also need:

  • A caulking gun
  • Soft cloths
  • A scrub brush
  • Baking soda or bathroom cleaner
  • A scraping tool with a razor blade
  • Painter’s tape

And of course, you’ll need to set aside enough time for the caulk to properly dry and cure, which can take 30 minutes to 24 hours depending on the product [3].

Getting the Area Ready

Before you even think about squeezing that trigger on your caulk gun, you’ll need to do some serious prep work. And I mean serious. This is not the time to cut corners, my friend.

First up, you’ll want to thoroughly clean the area where the tub meets the tile. Scrub and rinse that seam to get rid of any grime, residue, or leftover caulk [4]. If you’re really concerned about mold or mildew, you can even give it a wipe-down with some bleach or white vinegar [5].

Once that area is sparkling clean, you’ll need to remove all the old caulk. This is where that scraping tool with the razor blade comes in handy. Be very careful not to scratch up your tub in the process – you want to slice the caulk out in one continuous motion rather than digging it out [7].

After the old caulk is gone, you may notice a residual film left behind. No problem – just grab a damp cloth and some baking soda and gently scrub it away. Wipe it clean with a fresh, damp cloth and let the area dry completely before moving on [6].

Laying it On Thick (But Not Too Thick)

Alright, now for the fun part – time to start caulking! But before you get trigger-happy, take a moment to think about the caulking gun you’re using. According to the experts at Bob Vila, not all caulking guns are created equal. You’ll want one with a smooth rod, sturdy plunger, and a revolving frame to make those inside corners a breeze [8].

Once you’ve got your gun locked and loaded, it’s time to start squeezing. But be careful not to get overzealous – you want just enough caulk to fill the gap, not a big goopy mess. Smooth it out with a wet finger or a damp cloth as you go, and use painter’s tape to create clean, crisp lines if needed.

And remember, patience is key. That caulk needs time to fully dry and cure, so don’t go splashing water on it right away. Give it at least 30 minutes to set up, and ideally a full 24 hours before you start using the tub or shower again [3].

Caulking Pros and Cons: A Side-by-Side Comparison

Now, as I mentioned earlier, there are a few different caulk options to choose from – acrylic latex and silicone being the two most common. Each has its own set of pros and cons, so let’s take a closer look:

Feature Acrylic Latex Silicone
Durability Less durable, needs to be replaced more often More durable, lasts longer
Application Easier to apply and requires less cleanup More difficult to apply and smooth out
Adhesion Adheres well to a variety of surfaces Picky about what it will stick to
Cleanup Easier to clean up spills and mistakes Messier and more difficult to clean up

As you can see, there’s no clear-cut winner here. It really comes down to your personal preferences and the specific needs of your project. Silicone may be the more long-lasting option, but acrylic latex is definitely the easier choice for DIYers. Weigh the pros and cons, and go with whichever caulk type you feel most comfortable working with.

Caulking with Confidence

I’ll admit, when I first tackled this project in my own bathroom, I was a nervous wreck. But once I got all the prep work done and started squeezing that trigger, it was smooth sailing. Well, mostly smooth – there were a few…ahem…rough patches where I got a little overzealous with the caulk. But with a little cleanup and a lot of patience, I was able to get that tub looking brand new again.

And let me tell you, the sense of pride I felt when I stood back and admired my handiwork was unreal. No more embarrassing, crumbling caulk – just a crisp, clean, and dare I say, professional-looking bathroom. It was a huge boost to my DIY confidence, and I’m sure it’ll be the same for you.

So don’t let that pesky caulk intimidate you. With the right tools, a little elbow grease, and a healthy dose of patience, you can transform your bathroom from dated and dingy to bright and beautiful. Trust me, your guests (and your own sense of pride) will thank you.

References

[1] This Old House. (n.d.). How to Caulk Around a Bathtub. Retrieved from https://www.thisoldhouse.com/bathrooms/21016395/how-to-caulk-around-a-bathtub

[2] House Digest. (2021, August 5). Genius Tips for Caulking the Bathtub. Retrieved from https://www.housedigest.com/655937/genius-tips-for-caulking-the-bathtub/

[3] YouTube. (2020, September 18). How to Caulk a Bathtub – The Right Way. Retrieved from https://www.youtube.com/watch?v=0a92Jz0djGU

[4] Reddit. (2016, February 29). Tips for Caulking a Bathroom. Retrieved from https://www.reddit.com/r/HomeImprovement/comments/498fxw/tips_for_caulking_a_bathroom/

[5] Apartment Therapy. (2021, June 17). The Secret to Caulking Your Bathtub Like a Pro. Retrieved from https://www.apartmenttherapy.com/how-to-caulk-a-bathtub-like-a-pro-36905806

[6] This Old House. (n.d.). How to Remove Caulk from Bathtubs. Retrieved from https://www.thisoldhouse.com/bathrooms/21016415/how-to-remove-caulk-from-bathtubs

[7] YouTube. (2021, August 6). How to Remove Old Caulk. Retrieved from https://www.youtube.com/watch?v=eEsy7luzUTI

[8] Bob Vila. (2021, January 28). How to Caulk a Shower. Retrieved from https://www.bobvila.com/articles/how-to-caulk-a-shower/

Categories
Designs

Minimalist Bathrooms Full Of Hidden Storage

Minimalist Bathrooms Full Of Hidden Storage

The Medicine Cabinet Dilemma

Oh, the medicine cabinet. That humble, unassuming fixture that has divided the design world for decades. Are you team “must-have storage solution” or firmly planted in the “stylish mirror” camp? Well, friends, buckle up because I’m about to take you on a journey through my own personal medicine cabinet woes.

When we were renovating the bathrooms in our mountain house, I found myself in a serious predicament. On one hand, I’m a self-proclaimed minimalist who craves clean, uninterrupted lines and surfaces. That big, bulky medicine cabinet just didn’t fit the vibe I was going for. But on the other hand, I’d be lying if I said I didn’t need the storage. Where else was I going to stash all my potions and lotions, not to mention the kids’ ever-growing collection of toothbrushes and hair accessories?

The Search for a Stylish Solution

I scoured the internet, determined to find a storage solution that wouldn’t compromise my design sensibilities. I stumbled upon all sorts of clever ideas – floating shelves, side vanity cubbies, even barn door-style cabinets. But none of them quite hit the mark. They either looked too cluttered or weren’t practical enough for our daily needs.

And then, like a beacon of hope in the storage-deprived wilderness, I discovered the holy grail: the custom-built, hinged mirror with hidden shelving. [1] Cue the angels singing! This was it – the perfect marriage of form and function. A beautiful, seamless mirror on the outside, with discreet, adjustable shelving tucked neatly behind. Genius!

The Custom Conundrum

Of course, there was a catch. This custom solution wasn’t exactly budget-friendly. We’re talking a cool $1,200, not including the construction costs. Gulp. As much as I loved the idea, I just couldn’t justify that kind of expenditure, especially for a powder room that would only be used occasionally by guests.

So, I had to get creative. I enlisted the help of our contractor and came up with a plan to build shallow, recessed shelves behind a hinged mirror in the kids’ bathroom. Sadly, some crossed wires during the construction process meant that plan never came to fruition. Cue the sad trombone.

The Wall-Mounted Compromise

Defeated but not discouraged, I turned my attention to the more affordable, wall-mounted medicine cabinet options. While they may not have the same wow factor as the custom built-in, I have to admit, some of them are surprisingly chic. [2] From sleek, seamless designs to vintage-inspired frames, there are plenty of stylish choices that won’t break the bank.

In the end, we opted for the Pottery Barn Vintage Medicine Cabinet in our master bath. It checks all the boxes – discreet storage, a beautiful frame that complements the rest of the space, and a price tag that didn’t make me cringe. Sure, it’s not as glamorous as my custom mirror dreams, but it gets the job done without sacrificing style.

Finding the Right Balance

The truth is, there’s no one-size-fits-all solution when it comes to bathroom storage. It’s all about finding the right balance between form and function, and being willing to get a little creative. Maybe that means embracing a sleek, wall-mounted cabinet. Or perhaps it’s carving out some hidden shelving behind a gorgeous mirror.

Whatever route you choose, the key is to resist the temptation of just shoving everything in the nearest cabinet or drawer. Take the time to really evaluate what you need, and find storage solutions that work for your unique space and lifestyle. Because at the end of the day, a beautiful, clutter-free bathroom is truly a sight to behold.

So, are you #TeamMedicineCabinet or firmly planted in the “mirror as artwork” camp? I’d love to hear your thoughts! And if you’re still searching for the perfect storage solution, take heart. With a little bit of creativity and a healthy dose of determination, I have no doubt you’ll find the perfect fit.

[1] Knowledge from https://stylebyemilyhenderson.com/blog/why-designers-hate-most-medicine-cabinets-some-genius-alternative-bathroom-storage-solutions
[2] Knowledge from https://www.extraspace.com/blog/home-organization/room-organization/hidden-bathroom-storage-ideas/

Categories
Designs

Chic Black And White Bathroom Inspiration

Chic Black And White Bathroom Inspiration

Embracing the Elegance of Contrasts

When it comes to bathroom design, the classic color combination of black and white is truly the gift that keeps on giving. This timeless palette offers a blank canvas to play with patterns, textures, and unexpected accents – allowing you to create a space that’s both effortlessly sophisticated and uniquely your own.

I’ll never forget the day I decided to tackle my own bathroom renovation. As I stood surveying the outdated beige tiles and clunky vanity, I knew I had to make some big changes. Sure, the previous owner had put in some decent updates, but it just didn’t feel like “me.” And let’s be honest, when you’re renovating your home, you want it to truly reflect your personal style, right?

So, I took a deep breath, rolled up my sleeves, and got to work transforming that bland bathroom into a chic black and white oasis. And let me tell you, the results were nothing short of stunning. As I walked through the finished space, I couldn’t help but feel a sense of pride and pure joy. It was like stepping into the pages of a high-end design magazine – just with my own quirky twist.

Monochrome Masterpieces

The beauty of a black and white bathroom lies in its sheer versatility. Whether you’re going for a sleek, modern look or something a little more traditional, this classic color combo can be molded to fit any aesthetic.

Take, for instance, the striking contrast of large-format black tiles paired with pristine white subway walls. It’s a match made in heaven, blending industrial edge with timeless elegance. Or consider the drama of an all-black vanity, punctuated by gleaming brass fixtures and a bold geometric floor pattern. The possibilities are truly endless!

And let’s not forget the power of pattern play. By mixing different shapes and scales – think hexagons, herringbone, and beyond – you can infuse your bathroom with a beautifully textured, one-of-a-kind feel. It’s all about finding that perfect balance between cohesion and visual interest.

Of course, no black and white bathroom would be complete without the right accents. A vintage-inspired clawfoot tub, a stunning brass mirror, or a lush potted plant can instantly elevate the space, adding depth and personality. It’s all about curating those special touches that make the room truly shine.

Personalized Perfection

One of the things I love most about black and white bathrooms is how they allow you to truly put your own stamp on the space. Whether you gravitate towards sleek minimalism or romantic vintage vibes, there’s a way to make this classic color scheme work for you.

For instance, in my own bathroom, I opted for a moody, moodier approach. The black hex tiles on the floor lend an edge, while the crisp white subway walls and floating vanity keep things feeling fresh and airy. I then layered in personal touches, like an antique mirror I scored at a flea market and a vibrant piece of abstract art. The result is a space that’s both timelessly chic and undeniably “me.”

On the other hand, maybe you’re drawn to a softer, more serene aesthetic. In that case, consider embracing organic textures and natural accents. Pair your black and white palette with warm wood tones, lush greenery, and plush textiles for a spa-like sanctuary that feels both modern and inviting.

The beauty of this color duo is that it serves as the perfect blank canvas, allowing you to truly customize and personalize your bathroom to suit your unique style and needs. So don’t be afraid to get creative, experiment, and have fun with it. After all, this is your chance to craft a space that makes your heart flutter every time you step inside.

Timeless Treasure

One of the best things about a black and white bathroom is that it’s truly a timeless treasure. Unlike trendy color schemes that come and go, this classic combination has stood the test of time, gracing the pages of design magazines and the walls of luxury hotels for decades.

And the best part? It’s not going anywhere anytime soon. In fact, as we continue to see a shift towards more minimalist, nature-inspired aesthetics, I have a feeling black and white bathrooms are only going to become more and more popular. After all, what could be more clean, calming, and serene than a space that celebrates the beauty of contrasts?

So, whether you’re renovating your primary bathroom or giving your powder room a much-needed facelift, consider embracing the chic allure of black and white. It’s a foolproof way to create a space that feels both elevated and effortless – a true design masterpiece that will stand the test of time.

And who knows, maybe your beautiful black and white bathroom will even inspire others to take the plunge and give this timeless palette a try. After all, there’s nothing quite like a little design envy to get the creative juices flowing, am I right?

Endless Inspiration

As I mentioned earlier, the beauty of a black and white bathroom lies in its sheer versatility. And to prove just how diverse this color combination can be, I’ve scoured the internet for some truly stunning examples that are sure to inspire your next renovation.

For instance, take a look at this [1] sleek and modern space, where the bold contrast of black and white is elevated by clean lines, minimalist fixtures, and a show-stopping geometric floor tile. Or if you’re feeling a bit more adventurous, check out this [2] dramatic bathroom, where inky black walls and cabinetry create an enveloping, moody atmosphere.

Maybe you’re drawn to a more rustic-chic vibe? In that case, you’ll love the way this [3] bathroom blends classic white subway tile with warm wood accents and vintage-inspired details. And let’s not forget about the power of pattern – this [4] space absolutely nails it with its stunning herringbone floor and graphic wallpaper.

The best part? These are just a small sampling of the incredible black and white bathroom inspiration out there. Whether you’re looking for farmhouse charm, industrial edge, or something in between, the options are truly endless. All you have to do is let your creativity run wild and embrace the timeless beauty of this dynamic duo.

So, what are you waiting for? It’s time to dive in and start planning your own chic black and white bathroom transformation. Trust me, the end result will be nothing short of a design masterpiece.

References

[1] Knowledge from https://www.bhg.com/bathroom/color-schemes/colors/black-and-white-bathroom-ideas/
[2] Knowledge from https://livingaftermidnite.com/before-after-black-and-white-bathroom-renovation/
[3] Knowledge from https://www.mydomaine.com/black-and-white-bathroom-4783454
[4] Knowledge from https://www.thespruce.com/bathroom-inspiration-trend-black-and-white-4115519

Categories
Designs

Playful Patterns To Liven Up Your Bathroom

Playful Patterns To Liven Up Your Bathroom

Unleash Your Bathroom’s Personality with Vibrant Patterns

As a self-proclaimed Danish design enthusiast, I’ve always been captivated by the way Scandinavian homes effortlessly blend minimalism with pops of color and playful patterns. And nowhere is this more evident than in the bathrooms of these cozy abodes.

Recently, I had the pleasure of exploring the vibrant home of Ann-Sophie Ulka, the founder and creative director of the online design shop Fabrek. Located in the idyllic town of Ødense on the island of Funen, Denmark, her house is a true feast for the senses – a harmonious blend of bold hues, whimsical prints, and beloved Danish design pieces. [1]

It got me thinking: if a bathroom can feel this alive and joyful, why settle for a bland, cookie-cutter space? That’s why I’m here today to share my insights on how you can infuse your bathroom with the same playful energy, using pattern as your secret weapon.

Embrace the Power of Pattern

When it comes to livening up a bathroom, pattern is your ace in the hole. Unlike expansive living rooms or bedrooms, bathrooms are relatively compact spaces, making them the perfect canvas for experimenting with bold, attention-grabbing designs. [2]

Whether you opt for a striking wallpaper or a captivating tile pattern, the key is to let your personality shine through. After all, your bathroom should be a reflection of your unique style, not a forgettable afterthought.

Wallpaper Wonders

One of my favorite ways to inject personality into a bathroom is with a showstopping wallpaper. Just take a look at the moody floral print that adorns the walls of Ann-Sophie’s powder room. [1] The deep, saturated hues and oversized blooms instantly transform a potentially lackluster space into a vibrant, Instagram-worthy retreat.

Not a fan of florals? No problem! Geometric patterns, whimsical motifs, or even abstract art can all work wonders in a bathroom setting. The key is to choose a design that speaks to your personal style and complements the other elements in the room.

Tile Takeover

If you’re looking for a more permanent solution, patterned tile is another fantastic option. From classic black and white hexagon tiles to modern, multicolored chevrons, the possibilities are truly endless. [3]

By covering the walls, floors, or even a single accent area with a standout tile pattern, you can create a visually striking focal point that instantly elevates the entire space. And the best part? Tile is a durable, water-resistant material that can withstand the demands of a busy bathroom.

Mastering the Art of Mixing Patterns

Now, I know what you’re thinking: “But won’t too many patterns make my bathroom look chaotic?” Fear not, my design-savvy friend! With the right approach, you can skillfully blend multiple patterns to create a cohesive, visually stunning bathroom oasis.

The key is to find a unifying color palette or design theme that ties everything together. Take a cue from Ann-Sophie’s home, where the splashes of vibrant blue hues and whimsical stripes create a sense of harmony, even with the variety of patterns present. [1]

Another trick is to play with scale and contrast. Pair a bold, oversized floral wallpaper with delicate, small-scale tile, or balance a busy geometric floor with a more subdued, solid-colored vanity. [4] This interplay of pattern sizes and intensities helps to create a visually balanced and visually interesting space.

Embrace the Unexpected

Of course, the true beauty of patterns lies in their ability to surprise and delight. Don’t be afraid to step outside your comfort zone and experiment with unexpected combinations or unconventional placements. [5]

Maybe that means adorning your bathroom walls with a vibrant, tropical-inspired palm leaf wallpaper, or covering the floor in a whimsical, star-patterned cement tile. [6] By embracing the unexpected, you can transform your bathroom into a truly one-of-a-kind retreat that reflects your unique personality.

Bringing It All Together

As I reflect on the joyful, pattern-filled bathrooms I’ve encountered, I’m reminded of the power of design to uplift our daily lives. In a world that can often feel monotonous and gray, a bathroom adorned with playful patterns has the ability to instantly brighten our moods and ignite our creativity.

So, why settle for a bland, forgettable bathroom when you can create a space that’s as vibrant and full of life as the rest of your home? Embrace the transformative power of patterns, and watch as your bathroom becomes a personal oasis where you can indulge in a little self-care and escape the stresses of the day. [7]

Who knows, perhaps your new-found love for pattern will even inspire you to tackle other design projects around the house. After all, the possibilities for adding a touch of whimsy and personality are truly endless. [8]

So, what are you waiting for? Let’s dive into the world of playful patterns and transform your bathroom into a truly joyful sanctuary. After all, a little bit of color and pattern can go a long way in bringing life to any space.