Categories
Designs

Geometric Tiles: Adding Personality to Your Bathroom

Geometric Tiles: Adding Personality to Your Bathroom

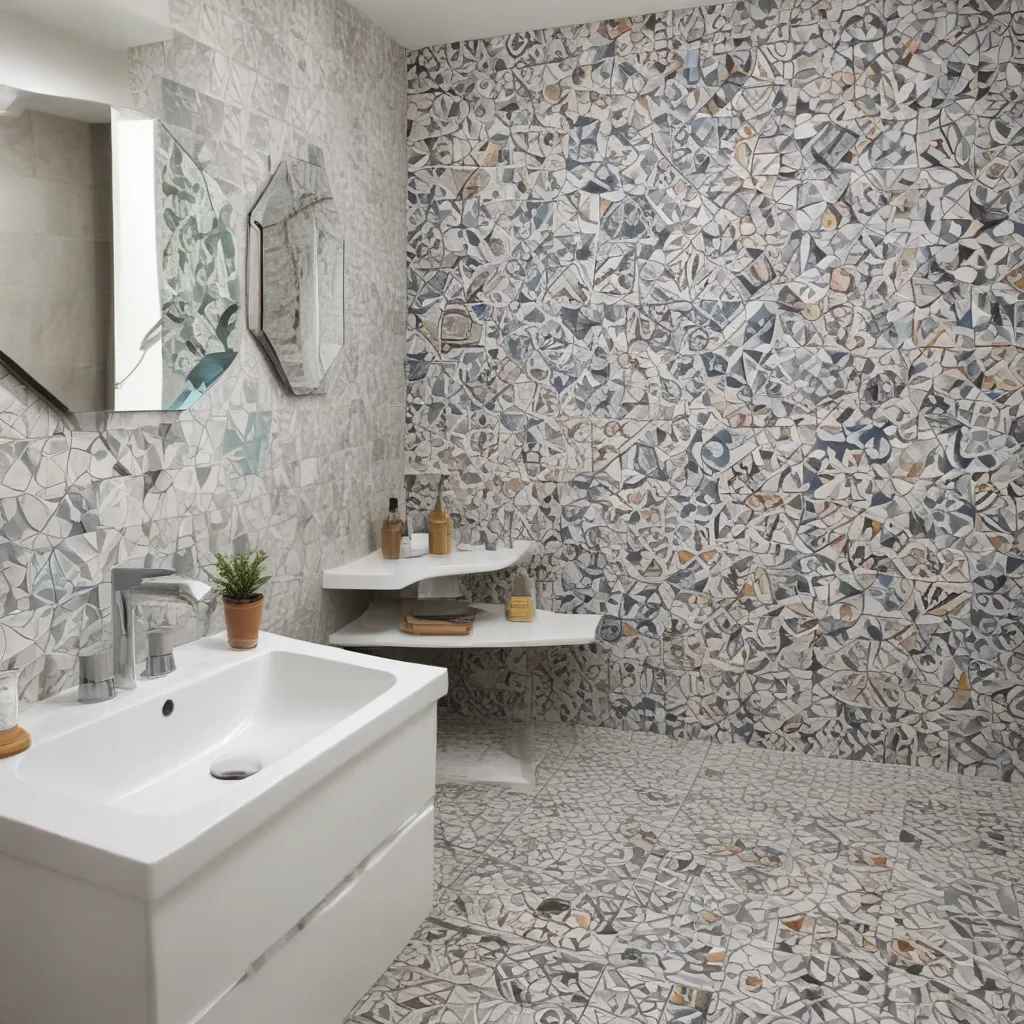
Are you tired of your bathroom looking like every other cookie-cutter space? Do you crave a design that truly reflects your unique style? Look no further, my friends – the key to transforming your bathroom into a one-of-a-kind oasis lies in the captivating world of geometric tiles.

Imagine stepping into a bathroom that instantly sparks joy, with bold shapes and mesmerizing patterns dancing across the walls and floors. Gone are the days of bland, lifeless tiles. In 2024, the design world is embracing a fresh wave of geometric tile trends that are poised to revolutionize the way we think about our bathrooms.

Embrace the Power of Geometric Patterns

Forget about plain old squares and rectangles – the new frontier of bathroom design is all about embracing dynamic, eye-catching shapes. Picture a shower adorned with striking hexagons, a floor laid out in a mesmerizing diamond pattern, or a backsplash that commands attention with a playful array of triangles.

These geometric tile designs don’t just add visual interest – they also have the power to transform the entire mood and atmosphere of your bathroom. By mixing and matching colors, sizes, and arrangements, you can create a space that is uniquely yours, brimming with personality and flair.

The Allure of Black Marble

While geometric patterns are certainly the showstoppers, another tile trend that’s captivating the design world is the luxurious allure of black marble. Imagine the drama and sophistication of deep, veined marble tiles gracing your walls and floors, creating a backdrop that screams elegance and timeless style.

The beauty of black marble lies in its versatility. Whether you’re going for a sleek, modern aesthetic or a more traditional, opulent vibe, these striking tiles can seamlessly blend into any design scheme. Plus, the natural variations in the veining ensure that each tile is a one-of-a-kind masterpiece, adding depth and character to your bathroom.

Statement Backsplashes: The Focal Point of Your Space

If you’re looking to really make a statement in your bathroom, turn your attention to the backsplash. This often-overlooked feature is poised to become the star of the show in 2024, with designers and homeowners alike embracing bold, attention-grabbing tile designs.

Imagine a vibrant, stacked square tile backsplash that adds a touch of eclectic flair to your space, or a botanical-inspired pattern that brings the beauty of nature into your bathroom oasis. These statement backsplashes have the power to transform a plain wall into a captivating focal point, drawing the eye and setting the tone for the entire room.

Connecting with Nature Through Natural Stone

As we continue our journey through the world of bathroom tile trends, we can’t ignore the growing popularity of natural stone. These timeless materials have the power to infuse your space with a serene, spa-like ambiance, connecting you with the beauty of the great outdoors.

Picture stepping onto cool, smooth stone tiles, each one a unique work of art, as you prepare for a luxurious soak in the tub. Or imagine the calming presence of earthy slate, with its subtle textures and muted tones, gracing your walls and floors. Natural stone tiles not only look stunning, but they also offer sustainable, eco-friendly solutions that align with the rising demand for greener living.

High Contrast for a Bold Statement

If you’re the kind of person who loves to make a statement, then the high-contrast tile trend is sure to pique your interest. Imagine the drama and sophistication of black and white tiles, playing off each other in a game of light and shadow, creating a bold and unforgettable look.

These high-contrast tiles have the power to transform a bathroom from ordinary to extraordinary, adding a touch of modern elegance that is sure to turn heads. Whether you opt for a classic checkerboard pattern or a more abstract design, the key is to embrace the contrast and let it shine as the star of the show.

Earthy Tones for a Serene Sanctuary

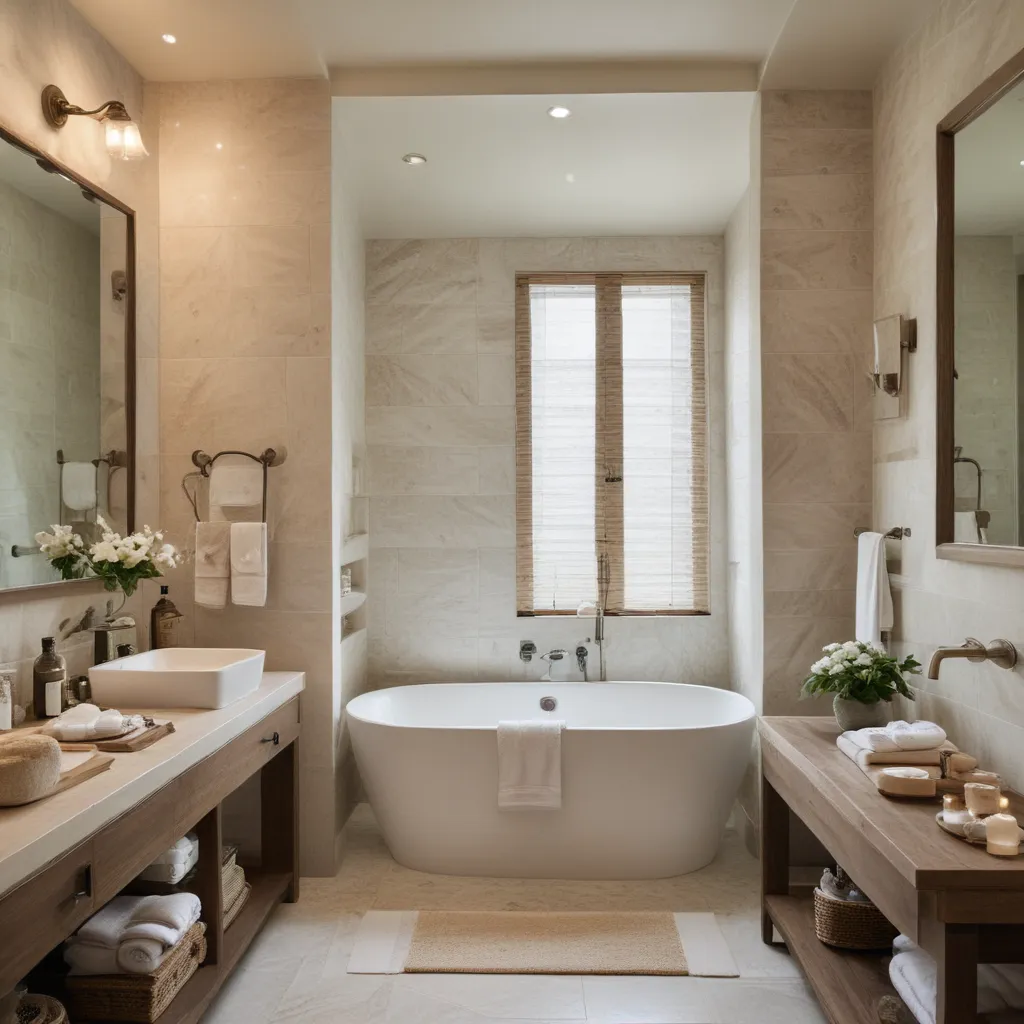
Of course, not everyone is drawn to bold and dramatic designs. If you’re craving a more calming and soothing atmosphere in your bathroom, then the earthy tone trend is right up your alley. Think soft beiges, muted greens, rich browns, and sandy yellows – hues that mimic the beauty of the natural world and create a sense of tranquility and relaxation.

These earthy-toned tiles have the power to transform your bathroom into a true sanctuary, a space where you can unwind and escape the stresses of the day. And the best part? They pair beautifully with other natural elements, like warm wood accents and lush greenery, for a harmonious and cohesive design.

Whimsical and Playful Styles

If you’re the kind of person who loves to inject a bit of playfulness and joy into your spaces, then you’re in for a treat with the whimsical tile trends taking the design world by storm. Imagine tiles adorned with vibrant rainbows, twinkling stars, or charming forest scenes – the possibilities are endless when it comes to adding a touch of whimsy to your bathroom.

These playful tile designs don’t just look stunning – they also have the power to transform your bathroom into a magical oasis, a space where you can let your inner child run free. Whether you opt for a bold, statement-making wall or a more subtle, scattered approach, these whimsical tiles are sure to bring a smile to your face every time you step into your bathroom.

Bringing Tradition and Creativity Together

As we explore the exciting world of bathroom tile trends, we can’t forget about the allure of classic silhouettes with a modern twist. In 2024, designers are taking familiar tile shapes – think squares, hexagons, and the like – and infusing them with a dose of creative flair, resulting in eye-catching patterns and designs that breathe new life into timeless styles.

By blending tradition and innovation, these updated tile designs offer the perfect balance of familiarity and freshness. Imagine a classic hexagonal tile pattern, but with a dynamic, asymmetrical layout that adds a touch of whimsy. Or a square tile backsplash that’s been arranged in a mesmerizing chevron pattern, creating a sense of movement and energy.

The Elegance of Large-Format Tiles

As we round out our exploration of bathroom tile trends, we can’t ignore the growing popularity of large-format tiles. These oversized beauties have the power to transform a space, creating a sleek and seamless look that exudes luxury and sophistication.

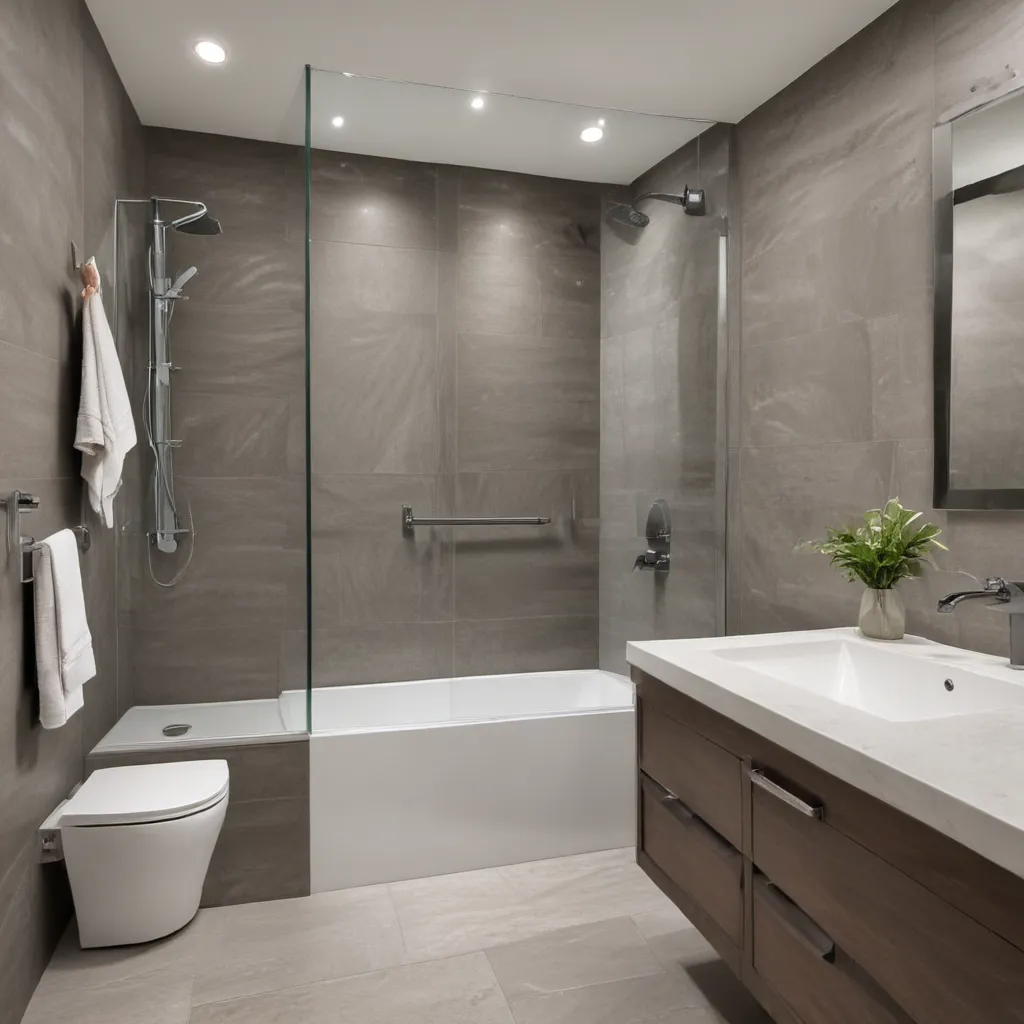
Imagine the drama of floor-to-ceiling marble slabs, or the clean, minimalist appeal of expansive porcelain tiles. Not only do these large-format tiles make a bold visual statement, but they also offer practical benefits, such as fewer grout lines and a more streamlined, easy-to-clean surface.

Whether you opt for a classic neutral palette or a statement-making color, large-format tiles have the ability to elevate your bathroom to new heights of style and elegance. And with the wide array of materials and finishes available, the possibilities are truly endless when it comes to creating a one-of-a-kind design that speaks to your personal aesthetic.

Bringing it All Together

As you embark on your bathroom transformation journey, remember that the key to creating a truly captivating space lies in the tile. From bold geometric patterns and luxurious black marble to earthy tones and whimsical designs, the 2024 bathroom tile trends offer a world of possibilities for expressing your unique style.

So don’t be afraid to get creative, to mix and match, and to have fun with your tile selections. After all, your bathroom should be a reflection of your personality – a space where you can unwind, recharge, and feel truly at home. With the right tile choices, you can turn your ordinary bathroom into an extraordinary oasis that will leave your guests in awe.

So what are you waiting for? Dive into the world of geometric tiles and let your bathroom’s personality shine!

[1] https://www.michaelnashkitchens.com/contemporary-bathroom-tile-trends/
[2] https://www.brooklyntileanddesign.com/News/category/newspage/pager/249015/page/3
[3] https://eastcoastgraniteraleigh.com/articles/tile/bathroom-tile-trends
[4] https://www.goodhousekeeping.com/home/decorating-ideas/g2000/decor-ideas-bathroom/
[5] https://rufusandhenrietta.com/eclectic-master-bathroom-reveal/
[6] https://www.granadatile.com/blog/3-bathroom-tile-trends-were-obsessed-with-for-2023/
[7] https://www.colorker.com/en/blog/small-bathrooms-maximising-space-and-style.html
[8] https://www.msisurfaces.com/blogs/post/2020/02/17/update-your-kitchen-or-bath-with-an-affordable-ceramic-tile-backsplash.aspx
Categories
Tips

Bathroom Refresh Ideas for Renters

Bathroom Refresh Ideas for Renters

Unleash Your Rental Bathroom’s Potential: A Renter’s Guide to a Stylish Oasis

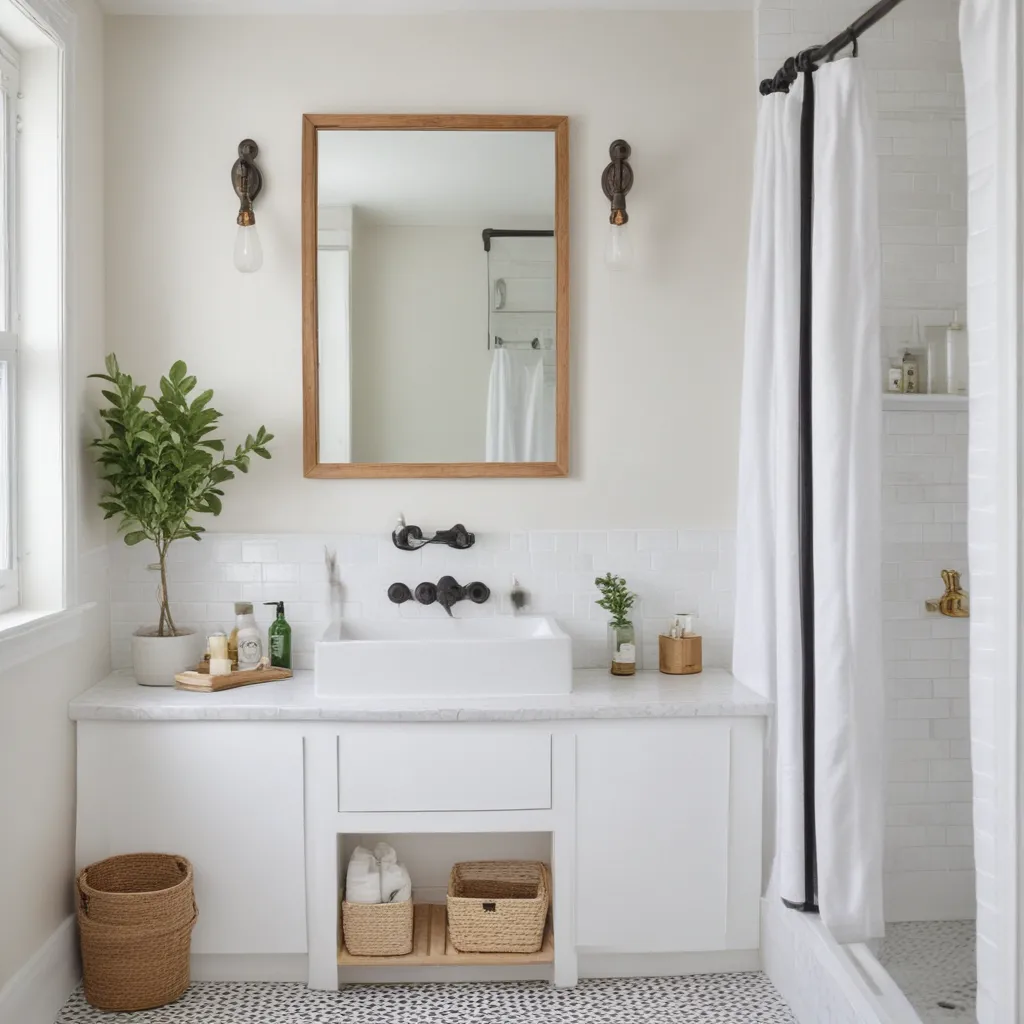
As a renter, you might feel like your bathroom is the unsung hero of your home – often overlooked and underappreciated. But fear not, my fellow renters! I’m here to share a treasure trove of bathroom refresh ideas that will transform your lackluster lavatory into a stylish oasis, all without breaking the bank or your landlord’s rules.

Peel-and-Stick Perfection: Floors and Walls

Let’s start with the foundation of your bathroom – the floors. If your rental bathroom is sporting a less-than-stellar linoleum or tile situation, peel-and-stick tiles can be your saving grace. [1] These babies come in a dizzying array of patterns and colors, and they’re a breeze to install, no special skills required. Simply peel off the backing and stick them down, cutting them to size as needed. And when it’s time to move out, you can peel them right back up, leaving your landlord’s floors none the wiser.

Now, what about those walls? Peel-and-stick wallpaper is another renter’s best friend. [1] With endless design options, from bold botanicals to sleek stripes, you can transform those builder-grade walls into a showstopper. Just be mindful of the humidity in your bathroom, as the wallpaper may start to peel around the edges in high-moisture areas. For a foolproof solution, stick to using it in a powder room or half-bath.

Lighting Up Your Life (and Bathroom)

Outdated lighting can really cast a shadow (pun intended) on your rental bathroom’s vibe. But fret not, my lighting-challenged friends, because swapping out those dated fixtures is easier than you might think. [1] Take note of the existing setup – is it a pendant light, a three-bulb vanity, or something else? Then, simply replace it with a more modern fixture that has the same electrical hookup.

If you’re not feeling confident about your DIY skills, don’t worry. The average electrician charge for a light fixture swap is around $75 per fixture. [1] And as an added bonus, you can take that old fixture with you when you move, ensuring a seamless transition to your next rental.

Mirror, Mirror on the Wall: Framing the Focal Point

The mirror is often the star of the bathroom show, so why not give it the spotlight it deserves? [1] If your rental bathroom is stuck with a builder-grade mirror, you can easily elevate it with a custom frame. Grab some accent tape, dimmable vanity lights, or even build a simple wood frame yourself (if you’re feeling crafty). The options are endless, and the impact can be truly transformative.

A Splash of Color: Painting the Walls

Painting the walls can be a game-changer, but as a renter, you’ll want to tread carefully. [1] First, check the terms of your lease – many landlords are actually cool with you painting, as long as you restore the walls to the original color before moving out. If you get the green light, consider updating the cabinet color too for an added pop of personality.

Decor Delights: Accessorize, Accessorize, Accessorize

Don’t underestimate the power of strategic decor choices. [1] Bathrooms may be small, but they present the perfect opportunity to go bold and make a statement with oversized wall art, luxurious candles, and lush greenery. Or, if you prefer a more understated aesthetic, thoughtful touches like a chic soap dispenser or a fluffy new bath mat can make all the difference.

Bringing It All Together: Your Rental Bathroom Transformation

With these renter-friendly ideas in your back pocket, you’re ready to unleash your inner designer and transform your rental bathroom into a spa-worthy sanctuary. Remember, the key is to work within the parameters of your lease, get any necessary approvals, and have fun with the process. After all, your bathroom deserves to be a reflection of your personal style, even in a rental.

So, what are you waiting for? Grab your peel-and-stick tiles, your favorite wallpaper patterns, and let’s get to work on creating the rental bathroom of your dreams. Trust me, your future self (and your guests) will thank you.

References

[1] Forbes Home. “Renter-Friendly Bathroom Ideas.” Link
[2] Apartment Therapy. “20 Reversible Ideas to Overhaul Your Rental Bathroom ASAP.” Link
[3] Emily Henderson. “Rental Bathroom Refresh Ideas.” Link
[4] Buzzfeed. “17 Rental Bathroom Update Ideas That Are Actually Affordable And Reversible.” Link
[5] Pinterest. “Rental Bathroom Makeover Ideas.” Link
[6] Albie Knows. “Easy Rental Bathroom Refresh: Budget-Friendly, Reversible Upgrades.” Link
[7] Loving Quarters. “My Renter-Friendly Bathroom Makeover.” Link
[8] DIY Darling. “Renter-Friendly Bathroom Renovation.” Link

Categories
Tips

DIY Upgrades for Dated Bathrooms

DIY Upgrades for Dated Bathrooms

Are you tired of looking at that outdated, dingy bathroom every morning? I know the feeling all too well. When my husband and I bought our first home, the bathroom was straight out of the 70s – all beige tiles, brass fixtures, and a vanity that looked like it had survived a nuclear apocalypse. But you know what they say, “one person’s trash is another person’s treasure!” With a little creativity and elbow grease, I was able to transform that dated disaster into a spa-worthy oasis on a budget. And let me tell you, the transformation was nothing short of magical.

Refresh with a Splash of Color

One of the easiest and most impactful ways to breathe new life into a dated bathroom is with a fresh coat of paint. [1] A bold, vibrant color can instantly elevate the space and make it feel modern and inviting. I went with a soft, soothing blue that reminded me of a peaceful ocean breeze, and it instantly made the room feel airy and serene.

Now, I know what you’re thinking – “But Kara, won’t paint just peel and chip in a high-moisture environment like a bathroom?” Fear not, my friends! The key is to use a high-quality, moisture-resistant paint specifically formulated for bathrooms. [2] I opted for a satin finish, which not only looks gorgeous but also holds up beautifully against steam and splashing water.

Swap Out the Vanity

Another game-changing upgrade for a dated bathroom is swapping out the vanity. [2] Now, I know what you’re thinking – “But that’s going to be so expensive!” But hear me out. You’d be surprised at the affordable, off-the-shelf vanity combos available these days that come with the countertop and sink already installed. This is a total time-saver and can save you a ton of money compared to custom cabinetry.

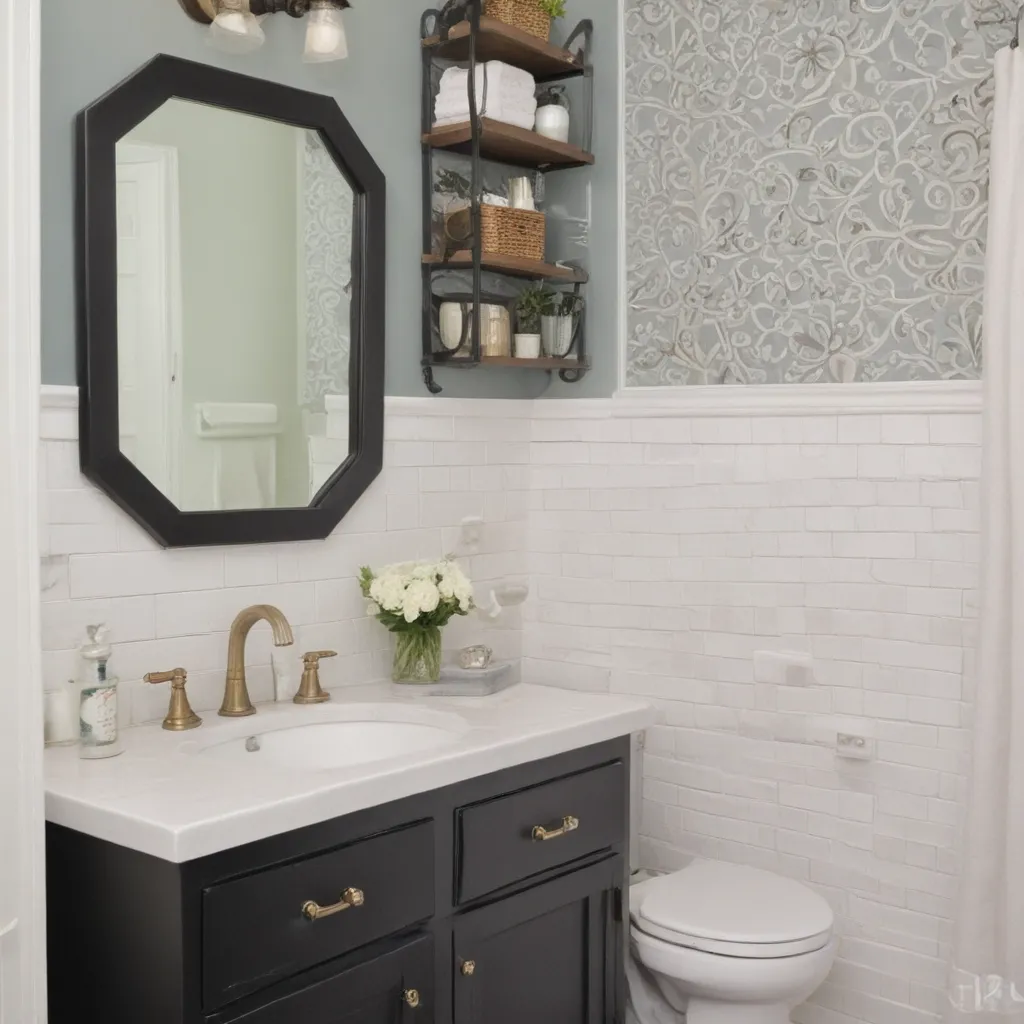
If you’re feeling extra crafty, you can even breathe new life into your existing vanity by simply repainting it in a bold, eye-catching hue. [2] I did this in my own bathroom, and the transformation was nothing short of jaw-dropping. It’s amazing what a fresh coat of paint can do!

Add Some Personality with Tile

Tile is another powerful tool in your DIY bathroom upgrade arsenal. [2] Now, I know what you might be thinking – “Tile? That sounds expensive and complicated.” But hear me out. You don’t have to go all-out with a full bathroom tile makeover to make a big impact.

A simple, budget-friendly solution is to create a statement wall with a dynamic chevron tile pattern. [2] This adds instant architectural interest and visual flair without breaking the bank. And if you’re feeling extra adventurous, you can even incorporate a playful, patterned tile on the floor for an added dose of personality.

Spruce Up the Hardware

Finally, don’t underestimate the power of small upgrades like new hardware and fixtures. [2] Swapping out dated brass or chrome hardware for sleek, modern alternatives can instantly elevate the look and feel of your bathroom. And the best part? It’s a super quick and affordable DIY project.

I decided to go with a gorgeous gold finish for my bathroom, and it totally transformed the space. The warm, luxurious tones perfectly complemented the soothing blue walls and created a cohesive, high-end look. Plus, the new hardware was a cinch to install – no plumber required!

So there you have it, folks – four simple and budget-friendly DIY upgrades that can take your dated bathroom from drab to fab in no time. Remember, with a little creativity and elbow grease, you can turn even the most outdated bathroom into a true oasis. Happy renovating!

References

[1] Knowledge from https://www.bhg.com/bathroom/remodeling/projects/quick-bathroom-updates/
[2] Knowledge from https://www.youtube.com/watch?v=knBsMeDM5Ac
[3] Knowledge from https://www.youtube.com/watch?v=8_enz98N2n0
[4] Knowledge from https://projectdiyourhome.com/smart-bathroom-fan-diy-upgrade/
[5] Knowledge from https://www.youtube.com/watch?v=E9YTlkPwxuA
[6] Knowledge from https://www.forbes.com/home-improvement/bathroom/easy-quick-bathroom-updates/
[7] Knowledge from https://www.youtube.com/watch?v=81hJHT-u_Uo
[8] Knowledge from https://thediyplaybook.com/rookie-mistake-over-the-toilet-storage/

Categories
Tips

Clever Paint Tricks for Small Bathrooms

Clever Paint Tricks for Small Bathrooms

Painting Your Way to Bathroom Bliss

As a self-proclaimed bathroom design enthusiast, I’ve seen my fair share of small spaces that feel cramped and dreary. But let me tell you, with a little bit of strategic painting, you can transform even the tiniest of bathrooms into a serene oasis. It’s amazing what a fresh coat of paint and a few clever tricks can do!

I remember when my husband and I first bought our fixer-upper home. The main bathroom was, well, let’s just say it was a bit…challenging. The dingy tile, the outdated vanity, the inadequate lighting – it was enough to make anyone feel claustrophobic. But I was determined to make it a space we’d actually enjoy spending time in. And you know what they say, “When life gives you a small bathroom, make it look like a palace!”

Embrace the Power of Light-Reflecting Hues

One of the first things I learned about small bathroom design is the importance of paint color. [1] Lighter, more reflective shades can make a world of difference in making a cramped space feel airier and more open. I’m talking about colors like crisp white, soft gray, or even a soothing blue-green.

Now, I know what you’re thinking – “But won’t white just make it feel like a hospital bathroom?” Not to worry, my friend. The key is to find the right white with just a touch of warmth, like Benjamin Moore’s “Cloud White” or Sherwin-Williams’ “Alabaster.” These hues will still bounce light around the room, but they’ll also add a cozy, inviting vibe.

And let’s not forget about those beautiful neutral tones. A light beige or taupe can be the perfect backdrop for adding pops of color through accessories. Plus, they create that serene, spa-like atmosphere we’re all craving. [2] I once transformed a dingy little powder room into a tranquil oasis just by painting the walls a soft, dreamy gray. It was like stepping into a boutique hotel bathroom – minus the hefty price tag.

Embrace the Drama with Bold Hues

Now, I know I just sang the praises of light, reflective colors, but hear me out. Sometimes, the best way to make a small bathroom feel bigger is to go bold. [3] That’s right, I’m talking deep, moody shades that add depth and interest to the space.

“But won’t that make it feel even smaller?” you ask. Not necessarily! The key is to choose your dark hue wisely. Think inky blues, rich charcoals, or even a sultry black. These colors can actually create the illusion of a larger, more luxurious space. It’s all about that big-night-sky effect, you know?

I’ll never forget the time I helped a client transform her teeny-tiny powder room into a showstopper. She was hesitant at first, but I convinced her to go for a bold, high-gloss navy blue. Suddenly, that cramped little space felt like a chic, moody retreat. The dark walls made the white trim and fixtures pop, and the glossy finish bounced light around the room in the most mesmerizing way.

Don’t Forget the Ceiling (and Trim!)

When it comes to making a small bathroom feel bigger, don’t forget about the forgotten spaces – namely, the ceiling and trim. [1] Painting these areas the same color as the walls creates a seamless, uninterrupted look that draws the eye upward, giving the illusion of a larger space.

I remember working on a bathroom renovation for a client who had an awkwardly angled ceiling. Rather than let that tricky architectural element make the space feel cramped, we painted the ceiling the same soft gray as the walls. Suddenly, that slanted ceiling became a beautiful, eye-catching feature rather than an annoyance.

And the trim? Don’t even get me started on the power of coordinating your trim color with your walls. It’s a simple trick, but it can make such a difference. Instead of having that stark, jarring contrast, the room feels cohesive and polished. Plus, it eliminates those pesky visual dividing lines that can make a small space feel even smaller.

Finish with the Perfect Paint Sheen

Alright, we’ve covered color, but let’s not forget the importance of paint finish. [1] When it comes to small bathrooms, you’ll want to steer clear of flat or matte finishes. Instead, opt for a satin or semi-gloss sheen.

Why, you ask? Well, those glossier finishes are not only more durable (a must in moisture-prone bathrooms), but they also have a reflective quality that can make the space feel brighter and more open. Plus, they’re super easy to wipe down, which is a major bonus when you’re dealing with splashes and spills.

I’ll never forget the time I helped a client transform her dated bathroom by simply swapping out the old flat paint for a fresh coat of satin finish. It was like night and day! The walls suddenly felt brighter and more polished, and that tiny space took on a whole new energy.

The Wrap-Up: Painting Your Way to Small Bathroom Bliss

So there you have it, my friends – the secrets to using paint to make your small bathroom feel like a spa-worthy oasis. From light-reflecting hues to bold, dramatic shades, and don’t forget about that all-important paint finish, the power of a fresh coat of paint is truly transformative.

Now, I know tackling a bathroom renovation can feel daunting, but trust me, it’s worth it. With a little bit of creativity and the right paint tricks up your sleeve, you can turn even the tiniest of bathrooms into a serene, stylish retreat. So grab your paintbrush and get ready to make some magic happen!

References

[1] Knowledge from https://wallapainting.com/7-tips-for-painting-a-small-bathroom/

[2] Knowledge from https://www.architecturaldigest.com/story/small-bathroom-ideas-for-a-brighter-breezier-space

[3] Knowledge from https://www.hunker.com/13725575/designer-small-bathroom-paint-tricks

Categories
Tips

Creative Bathroom Storage Solutions

Creative Bathroom Storage Solutions

Transforming Your Bathroom Into an Organized Oasis

Oh, the bathroom – that often-overlooked space that can quickly spiral into a chaotic mess of overflowing toiletries, tangled hair products, and towels in every nook and cranny. But hey, I’m here to tell you that it doesn’t have to be that way. With a little creativity and some clever storage solutions, you can transform your bathroom into a serene, zen-like oasis.

As someone who has struggled with tiny bathrooms and limited storage my entire adult life, I’ve learned a thing or two about making the most of every square inch. And let me tell you, the struggle is real, my friends. But through trial and error (and a healthy dose of Pinterest inspiration), I’ve discovered some brilliant bathroom storage ideas that have been total game-changers.

Maximize Vertical Space

One of the biggest mistakes people make is neglecting their vertical space. I get it, when you’re staring at a teensy vanity or pedestal sink, it’s easy to feel defeated. But that’s where the magic happens, my friends.

Take, for instance, the brilliant idea of using a ladder as a towel rack [1]. Not only does it add a rustic, farmhouse-chic vibe to the space, but it also provides ample storage for all your fluffy towels – without taking up precious floor space. And the best part? You can DIY one for just $10, as the crafty folks over at Twelve on Main have demonstrated.

Another vertical winner? Floating shelves. These bad boys are like the superheroes of bathroom storage. You can tuck them in anywhere – above the toilet, next to the tub, heck, even over the vanity. Use them to display your favorite candles, succulents, and artfully arranged beauty products. Not only do they maximize space, but they also add a touch of style to your sanctuary [2].

Conquer the Countertop Clutter

Ah, the dreaded bathroom countertop. It starts off pristine and sparkling, only to become a veritable battlefield of cotton swabs, half-empty moisturizer bottles, and that lone earring that’s been MIA for weeks. But fear not, my organizational-minded friends, because I’ve got the solutions you need.

First up, trays. These little saviors are like the Marie Kondos of the bathroom world. Corral all your daily essentials – think makeup, perfume, and the like – onto a chic metal or wooden tray, and voila, instant visual order [3]. Bonus points if you can find one that matches your bathroom’s aesthetic.

And if you really want to take your countertop game to the next level, consider a tiered organizer. These bad boys are like the Swiss Army knives of bathroom storage, with multiple levels to keep everything from cotton balls to hair ties neatly in their place [4]. Plus, they take up minimal real estate, leaving you with plenty of space for that stylish soap dispenser you’ve been eyeing.

Get Creative with Unexpected Storage

Sometimes, the key to conquering bathroom chaos lies in thinking outside the, well, bathroom box. Take, for example, the genius idea of repurposing a wine rack as a towel holder [5]. Not only does it add a touch of rustic charm, but it also keeps your fluffy towels within easy reach without taking up valuable floor or cabinet space.

Or how about a good old-fashioned bar cart? Yes, my friends, those versatile rolling wonders that we typically relegate to the living room or home bar can actually be a lifesaver in the bathroom [6]. Load it up with your favorite beauty products, hair tools, and even a few decorative touches, and voila – instant storage and style.

And let’s not forget about that often-overlooked space above the toilet. Instead of letting it collect dust, why not install a sleek, minimalist floating shelf [7]? It’s the perfect spot to stash extra toilet paper, plush towels, or even a few succulents for a touch of greenery.

Embrace the Power of Baskets and Bins

Alright, let’s talk storage containers. These unsung heroes can be the key to transforming your bathroom from a jumbled mess to a serene, well-organized oasis. And the best part? They come in a delightful array of shapes, sizes, and materials to suit any aesthetic.

Woven baskets are a personal favorite of mine – they add a touch of natural warmth to the space while providing a stylish way to corral everything from rolled-up washcloths to spare toiletries [8]. Tuck them under the sink, on open shelves, or even in that awkward corner next to the tub.

And don’t forget about clear storage bins! These little gems are like the organizational fairy godmothers of the bathroom [9]. Not only do they allow you to see exactly what’s inside (goodbye, endless rummaging), but they also stack beautifully, maximizing every inch of available space.

The Art of Decluttering

Now, I know what you’re thinking – “But Melody, where am I supposed to put all my stuff?” Well, my friend, the key to conquering bathroom clutter lies in the art of decluttering. And trust me, it’s a game-changer.

Start by taking a long, hard look at your stash of beauty products, toiletries, and linens. Be honest with yourself – how many half-used bottles of shampoo do you really need? [10] Embrace your inner Marie Kondo and ruthlessly purge anything that doesn’t spark joy (or, you know, serve a practical purpose).

Once you’ve trimmed the fat, it’s time to get creative with your storage solutions. Invest in some sleek, stackable drawers for your most-used items, and relegate the occasional-use products to the back of the cabinet [11]. And don’t be afraid to think outside the box – a repurposed dresser or even a vintage armoire can make for a stunning and functional bathroom vanity [12].

Remember, the key to a serene, organized bathroom is finding the perfect balance between storage and style. With a little creativity and a whole lot of determination, you can transform your once-chaotic sanctuary into a true oasis of calm. Happy organizing, my friends!

References

[1] Twelve On Main. (n.d.). DIY Bathroom Storage Ladder. Retrieved from https://www.twelveonmain.com/diy-bathroom-storage-ladder/

[2] The Merrythought. (n.d.). Mini Bathroom Makeover. Retrieved from https://themerrythought.com/diy-2/mini-bathroom-makeover/

[3] Thistlewood Farms. (n.d.). Bathroom Vanity Tray. Retrieved from https://www.thistlewoodfarms.com/bathroom-vanity-tray/

[4] A Beautiful Mess. (n.d.). Under the Sink Storage Ideas. Retrieved from https://abeautifulmess.com/under-the-sink-storage-ideas/

[5] Lovely Indeed. (n.d.). Bathroom Towel Storage. Retrieved from https://lovelyindeed.com/bathroom-towel-storage/

[6] Sugar & Cloth. (n.d.). Bathroom Vanity Organization. Retrieved from https://sugarandcloth.com/bathroom-vanity-organization/

[7] Almost Makes Perfect. (n.d.). Floating Bathroom Shelves. Retrieved from https://www.almostmakesperfect.com/2016/02/16/diy-floating-bathroom-shelves/

[8] House of Chais. (n.d.). Bathroom Storage Ideas. Retrieved from https://houseofchais.com/bathroom-storage-ideas/

[9] @neatbymeg. (n.d.). Bathroom Organization. Retrieved from https://www.instagram.com/p/CQ6CkPBLDBf/

[10] Olsen, N. (n.d.). Bathroom Storage Solutions. Architectural Digest. Retrieved from https://www.architecturaldigest.com/gallery/bathroom-storage-ideas-to-help-organize-your-space

[11] mDesign. (n.d.). Plastic Stackable Bathroom Storage Organizer. Amazon. Retrieved from https://www.amazon.com/mDesign-Plastic-Stackable-Bathroom-Organizer/dp/B07P9JYV8G

[12] Design by Cathie Hong Interiors. (n.d.). Bathroom Storage Ideas. Architectural Digest. Retrieved from https://www.architecturaldigest.com/gallery/bathroom-storage-ideas-to-help-organize-your-space

Categories
Tips

Storage Solutions for Clutter-Free Bathrooms

Storage Solutions for Clutter-Free Bathrooms

The Bathroom Counter Clutter Struggle is Real

I used to be the queen of bathroom counter clutter. My sink area was a veritable battlefield of hair products, makeup, and assorted toiletries – a messy display that would make even the most organized person cringe. Whenever guests came over, I’d dread them asking to use the master bathroom, because I knew the counter would be an embarrassing sight. “No, no, please use the other one!” I’d want to shout, even though I’d put all my cleaning efforts into the public-facing rooms.

If this sounds all too familiar, take heart – you’re not alone in your struggle against bathroom counter chaos. But the good news is, there are some clever storage solutions that can help you win the war on clutter and reclaim your pristine sink area. All it takes is a bit of strategic planning and a willingness to get a little…shall we say, intimate with what’s lurking under your cabinets.

Decluttering Your Bathroom Vanity

The first step to achieving a clutter-free bathroom counter is to start with a clean slate – and I mean that literally. Set aside a solid 2 hours (or more, depending on the state of your cabinets) and pull absolutely everything out from under your sink. I know, it’s going to be a mess, but trust me, it’ll be worth it in the end.

As you’re emptying those cabinets, be ruthless in your purging. Do you really need that half-used bottle of shampoo from 2 years ago? Or those hotel samples you’ve been saving “just in case”? If it’s expired, unused, or just taking up valuable real estate, it’s gotta go [1].

Make piles for items you want to keep, stuff you can donate or recycle, and trash. Wipe down those freshly-cleared cabinets while you’re at it – feels good to start with a clean slate, doesn’t it? [2]

Now, take a good look at what you’re keeping. Do all those cleaning supplies really need to live in the bathroom, or can you store them elsewhere in the house? Same goes for medication – if you have kids, it’s safer to keep that stash tucked away in a high cabinet or closet [3]. Streamline and consolidate wherever possible.

Clever Bathroom Storage Solutions

With your decluttered cabinets ready to go, it’s time to get strategic about storage. The key is to group like items together and make the most of the available space. Start by designating different drawers for specific needs – one for hair and nail care, another for dental supplies, a third for extra towels, and so on [2].

Invest in some drawer dividers or organizers to keep small items from getting jumbled. A shallow tray on the counter can also be a lifesaver for corralling daily essentials like cotton swabs and makeup [2]. And don’t forget about vertical space – wall-mounted shelves near the sink are perfect for stashing frequently-used products.

For those awkward nooks and crannies, get creative with your storage solutions. A repurposed armoire or set of wooden crates can provide tons of extra space [4,5]. And don’t be afraid to think outside the box – a metal rod with hanging accessories makes for a nifty DIY shower caddy [5].

Maintaining a Clutter-Free Bathroom

Alright, you’ve done the hard work of purging and organizing – now comes the fun part: maintaining that pristine, zen-like bathroom sanctuary. The key is to develop a few simple habits that will keep the clutter at bay.

First and foremost, be ruthless about what makes it back onto your counter. Stick to the “flat surface” rule – no more than 2-4 decorative or functional items, depending on your vanity size [4]. Anything else gets stashed neatly away.

When you’re done with your morning and evening routines, take a moment to tidy up. Put away that hairdryer, tuck your makeup bag into the drawer, wipe down the counter. It only takes a minute, but it’ll save you from having to do a major overhaul down the line.

And remember, storage solutions aren’t just for the cabinets – use them to your advantage on the counter too. Corral your daily essentials in a pretty basket or tray, and you’ll instantly elevate the look of your space.

With a little bit of upkeep, you can say goodbye to bathroom counter chaos for good. No more awkward encounters with guests, no more frantic tidying before company arrives. Just a serene, organized oasis where you can indulge in your self-care rituals in peace. Isn’t that the dream?

References

[1] https://www.happysimplemom.com/bathroom-counter-clutter/
[2] https://www.bhg.com/bathroom/storage/storage-solutions/bathroom-storage-ideas-solutions-for-storing-bath-supplies/
[3] https://www.home-storage-solutions-101.com/declutter-bathroom-sink.html
[4] https://www.happysimplemom.com/bathroom-counter-clutter/
[5] https://www.houzz.com/magazine/12-custom-storage-solutions-for-a-clutter-free-bathroom-stsetivw-vs~170341613

Categories
Tips

Spa-Inspired Touches for Relaxing Bathrooms

Spa-Inspired Touches for Relaxing Bathrooms

Transforming Your Bathroom into a Personal Oasis

Even on a budget, I firmly believe you can create a luxe, spa-like bathroom right in your own home. As someone who cherishes my daily self-care rituals, I’m excited to share my top tips and tricks for achieving a soothing, tranquil sanctuary that will leave you feeling relaxed, rejuvenated, and ready to take on the world.

You see, a trip to the spa is more than just a luxurious experience – it’s about finding that elusive sense of escape, where all your worries melt away the moment you step through the doors. The key is in the carefully curated atmosphere, designed to help you unwind and find your inner peace. And guess what? You can absolutely recreate that same feeling right in your own bathroom, no major renovations required.

Calming Color Palettes

The first step in crafting your perfect spa-like retreat is to focus on your color scheme. Soothing, neutral tones are essential for setting the right mood. Steer clear of bold, high-contrast pairings like black and white or blue and orange – those vibrant hues are better suited for more energizing spaces.

Instead, opt for warm neutrals combined with nature-inspired shades like seafoam green or sky blue. This calming palette will instantly transport you to a serene oasis, like you’ve been whisked away to a chic beachside resort. And the best part? Neutral colors have a magical way of making even the smallest bathrooms feel open and airy.

Bring the Outdoors In

One of the easiest tricks for elevating your bathroom’s spa-like ambiance? Incorporate plenty of lush greenery. Placing potted houseplants around the room – on the countertops, shelves, or even hung from the ceiling – instantly creates a soothing, nature-inspired atmosphere.

Of course, not everyone has a green thumb. No need to worry – faux plants can work just as well, especially if you choose realistic-looking options. And don’t forget about fresh flowers! A simple vase filled with blooms can provide that same calming, organic feel.

Declutter for Serenity

Cluttered countertops and overstuffed cabinets are the antithesis of relaxation. To streamline your space and achieve that serene, spa-like vibe, start by clearing out any products you haven’t used in the past year. As you restock, be mindful about what gets displayed versus tucked away in drawers and cabinets.

Keep only your most essential, daily-use items on the countertop, neatly organizing the rest. Baskets, trays, and other storage solutions can help maintain that clean, uncluttered look. Trust me, there’s nothing quite as soothing as stepping into a bathroom where every item has its proper place.

Indulge in Luxury Linens

When it comes to creating that five-star spa experience, plush, fluffy towels are an absolute must-have. Opt for high-quality cotton or bamboo options that will hold up well to frequent washing. Arrange them in neat, rolled stacks or crisply folded piles for an extra touch of elegance.

And if you really want to elevate the experience, consider investing in a towel warmer rack. There’s nothing quite as heavenly as wrapping yourself in a toasty-warm towel post-shower. It’s those little luxuries that can truly make your bathroom feel like a private oasis.

Upgrade Your Shower Experience

Speaking of shower experiences, upgrading your basic showerhead can work wonders for turning your daily routine into a rejuvenating spa moment. Look for models with special features like massage spray patterns, handheld components, or rain-style overhead soakers. The right showerhead can transform even the most mundane bathing session into a truly relaxing ritual.

And if your budget allows, don’t stop there – take a look at your other bathroom fixtures as well. High-end faucets, sinks, and even a fancy, touchless toilet can all contribute to that upscale, spa-like ambiance. It’s all about curating those special details that elevate the entire experience.

Aromatherapy Oasis

Certain scents have a powerful way of transporting us to a more peaceful state of mind. To create your own aromatherapy oasis, look for calming essential oils like lavender, rosemary, or ylang-ylang. Diffusers and scented candles make it easy to infuse the air with soothing fragrances, while something as simple as a bundle of eucalyptus in the shower can provide a refreshing burst of aroma.

Cozy Creature Comforts

No spa-inspired bathroom is complete without a few plush, cozy touches. Indulge in a luxurious bath mat to warm your toes, or consider adding a chic little chair or settee for a comfy spot to sit and pamper yourself. Just be sure to choose weatherproof fabrics that can withstand the occasional splash or steam.

And speaking of pampering, don’t forget to stock up on some truly decadent bath products. Sure, your everyday soap and shampoo will do the trick, but treating yourself to a few specialty items – like fancy body lotions, therapeutic bath salts, or fizzy, fragrant bath bombs – can elevate the entire experience.

A Touch of Personality

At the end of the day, your bathroom should be a true reflection of your personal style and taste. So while I’ve shared plenty of tips for creating that serene, spa-like atmosphere, don’t be afraid to infuse your space with a bit of your own unique flair.

For me, that meant adding a whimsical, faux-fur covered stool to my bathroom – an unexpected twist that never fails to make me smile. Perhaps for you, it’s a striking piece of artwork, a vintage-inspired light fixture, or even a decorative ladder for hanging those plush towels. Whatever it is, let your personality shine through and transform your bathroom into a truly one-of-a-kind oasis.

So there you have it, my friends – everything you need to turn your ordinary bathroom into an extraordinary, spa-inspired retreat. From calming color palettes to luxurious linens and unexpected personal touches, the possibilities are endless when it comes to crafting your very own private sanctuary.

Now, if you’ll excuse me, I think it’s time for me to enjoy a long, hot soak. Cheers to relaxation!

References

[1] “Ways to Create a Calming Bath” from Better Homes & Gardens: https://www.bhg.com/bathroom/decorating/ways-to-create-a-calming-bath-281474979502776/
[2] “Perfect Spa Retreat-Style Bathrooms” from The Spruce: https://www.thespruce.com/perfect-spa-retreat-style-bathrooms-1975792
[3] “Our Master Bedroom & Bathroom” from Walking in Memphis in High Heels: https://walkinginmemphisinhighheels.com/2020/05/our-master-bedroom-bathroom/
[4] “Decorating Ideas for a Relaxing Spa Bathroom” from The House on Silverado: https://thehouseonsilverado.com/decorating-ideas-for-a-relaxing-spa-bathroom/
[5] “Spa Bathroom Ideas & Designs” from KALLISTA: https://www.kallista.com/articles/spa-bathroom-ideas-designs
[6] “15 Dreamy Spa-Inspired Bathrooms” from HGTV: https://www.hgtv.com/design/rooms/bathrooms/15-dreamy-spa-inspired-bathrooms-pictures
[7] “Even Small Bathrooms Can Evoke Spa Luxury” from Now Then Plumbing: https://www.nowthenplumbing.com/2013/10/even-small-bathrooms-can-evoke-spa-luxury-bathroom-remodeling-plumbing-mn/
[8] “Spa Bathroom Ideas & Designs” from Veranda: https://www.veranda.com/decorating-ideas/g38973343/spa-bathroom-ideas/

Categories
Tips

Tips for Designing an Accessible Bathroom

Tips for Designing an Accessible Bathroom

Designing for Accessibility: A Personal Journey

A few years ago, my dad lost a leg to Vascular disease, and then two short years later, he lost the other one. [2] My dad was actually still working right up until the pain in his feet started to get so severe that he could no longer function, and a few months later, one leg was gone below the knee. My parents live in a bungalow (single-level) home, so there weren’t many modifications needed to their home for them to stay in it. There was one exception to this, and that was the bathroom space. [2]

There were several things in their current bathroom that made it very difficult for my dad to use to shower and maneuver. I did not know how to make a bathroom handicap accessible at the time, but I did a bunch of research and came up with some solutions and a design to help my parents out. [2] The whole family chipped in to get this renovation done for my parents. My brother-in-law and my uncle handled the lion’s share of the renovation work, and my sister’s friend who was a plumber gave up a couple of his weekends helping to get the plumbing done for us. My husband and I helped with the work as much as possible, and I also handled all of the design and ordering of materials for my mom. [2]

We got organized, and we got the whole bathroom done in a span of 4 weeks! (This seems absolutely astounding to me at the moment while my current bathroom renovation is entering its 12th week!) My parents have been using the new bathroom now for a few years, and it works perfectly for my Dad. And I think the best part is that you would never know that this was a bathroom that was designed for wheelchair accessibility. I tried to keep function in mind but still make sure it was beautiful for my mom, something I would be proud to have in my own home. [2]

Considering the Guidelines and User Needs

First of all, there are ADA guidelines that talk about the official rules when it comes to things like clearances, space in front of or beside things, doorway widths, and things of that nature. [2] When we were renovating my parent’s bathrooms, we were not able to meet all of the guidelines for accessible bathroom design exactly because we had limited space to work with. However, I had the benefit of being able to ask my dad just what his specific needs were as far as space and easy access. [2]

For example, in the powder room, ADA requirements require a grab bar on the side of the toilet for bathroom safety and easy transfers from the wheelchair to the toilet. However, my dad had already been using the bathroom without one for quite some time and didn’t feel like he needed a bar there, he uses the side of the sink. If he does require it in the future, it’s an easy addition. Also, the powder room is a small bathroom and not large enough according to the guidelines to allow wheelchairs to turn around for it to be a totally compliant bathroom. However, my dad is not a big guy and his wheelchair is pretty small, so it works okay for him. [2]

Designing for Comfort and Accessibility

In order to make the sinks easy for my dad to use from a sitting position, they needed to be a little bit lower and have some open space below to allow him to get closer to them. The vanities that were in my parent’s house before were all extra tall (36″) and had cabinetry on the bottom, so he really had to stretch to reach it. [2] In the ensuite bathroom, we solved this problem by designing some custom cabinetry. I designed a double sink table-style vanity with legs that were a little lower to allow my dad to roll right up to it. I talked to my mom about the storage that she would be losing with this option, and we decided to add a center countertop tower for storage as well as some drawers between the sinks. [2]

In that bathroom, we really only needed one sink to be accessible. However, we felt that having only one would make it look like a handicap-accessible bathroom, and we wanted it to look a little more designerly. So we opted for symmetry, and my parents say they have plenty of storage in this design. [2] We were careful about the bottom clearance as much as the vanity height. We wanted the vanity to be low enough to use, but also enough clearance below that he could roll right under with his chair. That ended up requiring us to source some extra shallow sinks as well. [2] We also used long pulls as towel bars on the front of the vanity rather than placing a hook or a ring on the wall where they would be difficult to reach. [2]

Maximizing Accessibility in the Shower

The shower was by far the trickiest part. [2] We opted to install a curbless shower stall that had a very slight ramp-up from the bathroom floor. This allows it to be a roll-in shower design. In theory, this accessible shower all drains towards the drain, and water shouldn’t end up going on the other side of the ‘slope’ and running into the bathroom. In reality, however, a little bit that splashes here and there was ending up getting out of the shower. [2] In order to deal with this post-construction, we added this plastic shower dam that is like a collapsible water retainer. If you roll your wheelchair over it, it collapses and then just pops back up. It just sticks right down on top of the tile and it works great for keeping the water in. [2]

I asked my dad if he wanted a built-in shower seat, but ultimately, he preferred to use his portable one. He liked to be able to move it around, and it’s not a permanent fixture, so if they ever sell the house and the new people don’t need an accessible design, they don’t need to have a seat. [2] We also designed a niche for storing shampoo and such lower down within easy reach. When laying out the plumbing, we were sure to put the shower controls within reach of someone in a seated position. We also used an adjustable shower head so they can move it up for my mom or down for my Dad, and he can have the water right where he needs it. [2]

Bringing it All Together

Designing these bathrooms specifically for the needs of my Dad and his physical limitations is going to allow my parents to live in this house a lot longer, which is the ultimate goal. [2] My mom also loves the new bathroom designs, the old ones were quite brown and a little dated, and these updates really made a big difference in their home. My mom especially loves that these bathrooms are like… sneakily accessible, they have all the accessible features my dad needs, but yet they don’t look like a hospital bathroom. Good design does not have to be sacrificed for accessibility! [2]

I am so happy that I was able to help out with my parent’s renovations. My Dad was always doing stuff around the house when I was growing up, renovating, building garages and fences, tiling, you name it. I learned most of what I know by helping him, and let’s just say he rubbed off on me. Working alongside my dad is a memory that I will always cherish and I hope to pass along those kinds of memories to my own kids someday. (I am still waiting for that DIY spirit to rub off on one of them… stay tuned!!) [2]

References

[1] Knowledge from https://www.roomsketcher.com/blog/accessible-bathroom-design/
[2] Knowledge from https://erinzubotdesign.com/how-to-make-a-bathroom-handicap-accessible/
[3] Knowledge from https://www.care.com/c/creating-an-accessible-bathroom-for-seniors/
[4] Knowledge from https://liveinplacedesigns.com/guide-to-remodeling-a-handicap-bathroom/
[5] Knowledge from https://bestbath.com/four-tips-designing-accessible-bathroom
[6] Knowledge from http://www.deslaurier.com/en-us/learning-centre/creating-an-accessible-bathroom-design
[7] Knowledge from https://www.tundraland.com/blog/how-to-make-your-bathroom-handicap-accessible/
[8] Knowledge from https://www.springhills.com/resources/accessible-bathroom-designs

Categories
Tips

Clever DIY Projects for Bathroom Updates

Clever DIY Projects for Bathroom Updates

Upgrading to a Smart Bathroom Fan

As I started planning our bathroom renovation, one of the first things on my mind was upgrading our old, outdated bathroom fan. It was giving off hardly any light and lacked any real functionality. I knew I wanted something that would provide better illumination and add some smart features to the space.

When Homewerks Worldwide reached out about a potential collaboration, I was thrilled to discover their lineup of high-tech bathroom fans. After researching their products, I realized this was exactly what I had been looking for. Not only did it have a sleek, modern look, but it was packed with features that would totally transform our bathroom. [1]

My dad and I got to work installing the new fan, and I have to say, it was a pretty straightforward process, even for a novice DIYer like myself. The key was having a second set of hands and access to the attic space above. Once we got the old fan out, the new one went in without a hitch. And let me tell you, the difference it’s made is unbelievable!

This smart bathroom fan has so many incredible features. The built-in Bluetooth speaker has been a game-changer, allowing me to jam out to the kids’ favorite tunes during bath time. And the adjustable LED lighting provides the perfect ambiance, whether I’m going for a cozy, warm glow or a bright, energizing look.

But the feature I’m most excited about is the humidity sensor. It automatically turns the fan on when the humidity reaches 60% and ramps up to a higher setting at 80%. No more humid, stuffy bathrooms! It keeps the air crisp and comfortable without me having to remember to turn the fan on. [1]

Simple Bathroom Refresh with a DIY Tray

You know, I was watching Trading Spaces the other night, and let me tell you, those designs were downright terrifying. I’m talking about a bedroom that was painted in four different colors – pink, yellow, blue, and green. Even the furniture was painted to match each wild shade. It was like a rainbow had exploded in there. To each their own, I guess, but yikes! [2]

Anyway, let’s move on to more relaxing things, shall we? I wanted to share a simple little bathroom refresh I recently did, including a DIY bathtub tray that I’m absolutely loving.

The tray itself was so easy to make. I just measured the length of the tub, cut a piece of pine to size, and gave it a coat of white chalky spray paint. A little distressing and a clear wax finish, and voila – instant bathroom luxury! I added some cute handles from Hobby Lobby, and it was good to go. [2]

Now I find myself using that tray all the time when I’m soaking in the tub. It’s the perfect spot to set down a book, a candle, or – let’s be real here – a slice of chocolate cake. And a couple drops of Peace & Calming essential oil in the bathwater? Pure bliss. [2]

Beyond the tray, I kept this bathroom refresh pretty simple. Just a few floating shelves for extra towels and a little greenery, plus an old jar to hold some extra soap. My father-in-law actually made those shelves, but you can find similar ones at Target. [2,3]

Affordable Bathroom Updates

If you’ve been around my blog for a while, you might recognize that DIY towel rack I made from an old bed frame. It’s still one of my all-time favorite projects! [3]

This little bathroom nook is definitely my mini at-home spa, especially now that I’ve got my fancy new bathtub tray. I just wish it could stay looking this put-together all the time, but hey, at least it’s cute now, right? [2]

There are so many affordable ways to breathe new life into a bathroom, from bold floral wallpaper to replacing the vanity. [4,5] And let’s not forget the power of a simple paint job or some new soft furnishings. [5]

If you’re feeling really crafty, you could even transform a vintage piece of furniture into a vanity. [5] Or add some architectural interest with beadboard or shiplap. [5] The possibilities are endless!

Of course, you don’t have to tackle a full-blown renovation to make a difference. Something as simple as swapping out your showerhead or adding a statement mirror can go a long way. [5] And don’t forget the little details, like new towel bars or a fresh coat of paint on the cabinets. [5]

The key is to focus on the areas that will give you the biggest bang for your buck. Maybe it’s finally replacing that outdated vanity or adding some floating shelves for extra storage. Whatever it is, there’s bound to be a budget-friendly DIY option that fits your needs and your style. [4,5]

Conclusion

I hope this has given you some inspiration for your own bathroom refresh! Whether it’s a smart fan upgrade or a simple DIY tray, there are so many ways to breathe new life into this hardworking space. [1,2,4,5]

The best part is that you don’t have to break the bank to create a bathroom you’ll truly love. With a little creativity and a willingness to get your hands dirty, you can transform your space into a serene oasis – no Trading Spaces-style meltdowns required. [2]

So what are you waiting for? Grab your power tools, raid the hardware store, and get ready to fall back in love with your bathroom. Trust me, the results will be worth it. Happy DIYing!

[1] Knowledge from https://projectdiyourhome.com/smart-bathroom-fan-diy-upgrade/
[2] Knowledge from https://sarahjoyblog.com/simple-bathroom-refresh-diy-tray/
[3] Knowledge from http://www.thriftyandchic.com/2016/08/diy-floating-shelves-and-bathroom-update.html
[4] Knowledge from https://www.bhg.com/bathroom/remodeling/projects/quick-bathroom-updates/
[5] Knowledge from https://www.idealhome.co.uk/bathroom/bathroom-ideas/diy-bathroom-ideas-on-a-budget-251558

Categories
Tips

Modern Bathroom Design Ideas on a Budget

Modern Bathroom Design Ideas on a Budget

Crafting a High-Impact Bathroom on a Shoestring

When it comes to home improvement projects, the bathroom is often the first room we think about revamping. After all, it’s a space we use multiple times a day – it should look and feel like a relaxing oasis, not an outdated eyesore. But the cost of a full-blown bathroom remodel can quickly spiral out of control, leaving many homeowners feeling defeated before they even start.

Fear not, my budget-conscious friends! I’m here to prove that you don’t need to spend a small fortune to transform your bathroom into a stylish sanctuary. In fact, with a little creativity and some savvy shopping, you can achieve a high-impact, modern look without blowing your entire renovation budget.

Embrace the Power of Paint

One of the easiest and most affordable ways to breathe new life into your bathroom is with a fresh coat of paint. [1] Don’t be afraid to think beyond the standard white or beige – experiment with bold, on-trend colors that will make your space pop. A moody navy or rich emerald green can instantly elevate the look and feel of your bathroom, and the best part is, a gallon of paint typically costs less than $50.

If you really want to get creative, try adding some texture with a limewash or Venetian plaster finish. These specialty paints can mimic the look of high-end materials like marble or limestone, without the hefty price tag. Just be sure to opt for a paint formula that’s designed for bathrooms, as it’ll be better equipped to handle the moisture and humidity.

Work Some Magic with Wallpaper

Speaking of adding visual interest, wallpaper is another budget-friendly way to transform your bathroom from drab to fab. [2] While you’ll want to steer clear of anything that will be directly exposed to water (think: behind the vanity or inside the shower), there are plenty of gorgeous peel-and-stick options that are perfect for the rest of the space.

Embrace bold, geometric patterns or whimsical florals to create a focal point, or go for a more subtle textural treatment like grasscloth. And don’t be afraid to get a little playful – a quirky, retro-inspired wallpaper can instantly infuse your bathroom with personality. Just be sure to seal the edges with a clear caulk to prevent any peeling or curling.

DIY Your Way to a Designer Look

If you’ve got a bit of DIY know-how (or are willing to learn), you can achieve some seriously high-end looks without breaking the bank. [3] One of my favorite budget-friendly projects is transforming a basic IKEA vanity into a custom-looking piece. All it takes is a little sanding, a fresh coat of paint, and some hardware swaps to give it a million-dollar makeover.

Another easy DIY win? Refinishing your existing bathtub or shower. Instead of shelling out for a brand-new tub or tile surround, you can breathe new life into the old one with a refinishing kit. These kits, which typically cost around $100-$300, can cover up scratches, chips, and discoloration, making your tub look good as new.

And don’t forget about the power of tiling – or at least the illusion of tiling. Peel-and-stick tiles or even painted wall panels can give you the look of high-end tile work for a fraction of the cost. Just be sure to seal the edges to prevent any water damage.

Embrace Secondhand Finds

When it comes to bathroom renovations, it’s easy to get sucked into the allure of shiny new fixtures and vanities. But if you’ve got a keen eye and a little patience, you can find some truly unique and budget-friendly pieces at thrift stores, flea markets, and online marketplaces. [4]

Think outside the box when it comes to vanities – an old dresser or console table can make for a striking, one-of-a-kind piece with just a little TLC. And don’t overlook vintage light fixtures, mirrors, and even hardware – these small details can add so much character to your space.

The key is to have a clear vision in mind and be willing to put in a little elbow grease. With a little creativity and a lot of determination, you can transform these secondhand gems into true showstoppers.

Accessorize, Accessorize, Accessorize

Finally, don’t underestimate the power of accessories when it comes to elevating your bathroom on a budget. [5] Towels, rugs, baskets, and even soap dispensers can all make a big impact, and they’re relatively inexpensive compared to larger fixtures and finishes.

Invest in a few high-quality, statement-making pieces – think a plush, oversized towel in a rich jewel tone or a sleek, modern soap dispenser in a bold metal finish. Then, fill in the gaps with more budget-friendly finds from places like Target, IKEA, or even the dollar store.

The key is to mix and match textures, materials, and styles to create a cohesive, visually interesting look. And don’t be afraid to get creative with DIY projects, like customizing a basic shower curtain or repurposing an old frame into a beautiful mirror.

With a little creativity and a lot of determination, you can transform your bathroom into a high-end oasis, all without breaking the bank. So, what are you waiting for? Grab your paint brushes, your bargain-hunting skills, and let’s get to work!

References

[1] Knowledge from https://www.bhg.com/bathroom/small/budget-small-baths/
[2] Knowledge from https://www.goodhousekeeping.com/home/decorating-ideas/g2000/decor-ideas-bathroom/
[3] Knowledge from https://www.pinterest.com/brightgreendoor/bathrooms-modern-affordable/
[4] Knowledge from https://www.realhomes.com/design/cheap-bathroom-ideas
[5] Knowledge from https://robynsfrenchnest.com/home/how-to-decorate-a-farmhouse-bathroom-on-a-budget/