Categories
Tips

Add Character to Your Bathroom

Add Character to Your Bathroom

Unleash Your Bathroom’s Personality

If your bathroom feels like a cold, clinical space that’s devoid of any personality, fear not! You’re about to embark on a journey to transform it into a haven of character and charm. As someone who’s been in your shoes, I can attest that a bathroom doesn’t have to be a boring, utilitarian afterthought. With a little creativity and elbow grease, you can infuse it with warmth, style, and “wow” factor.

Embrace the Power of Accent Walls

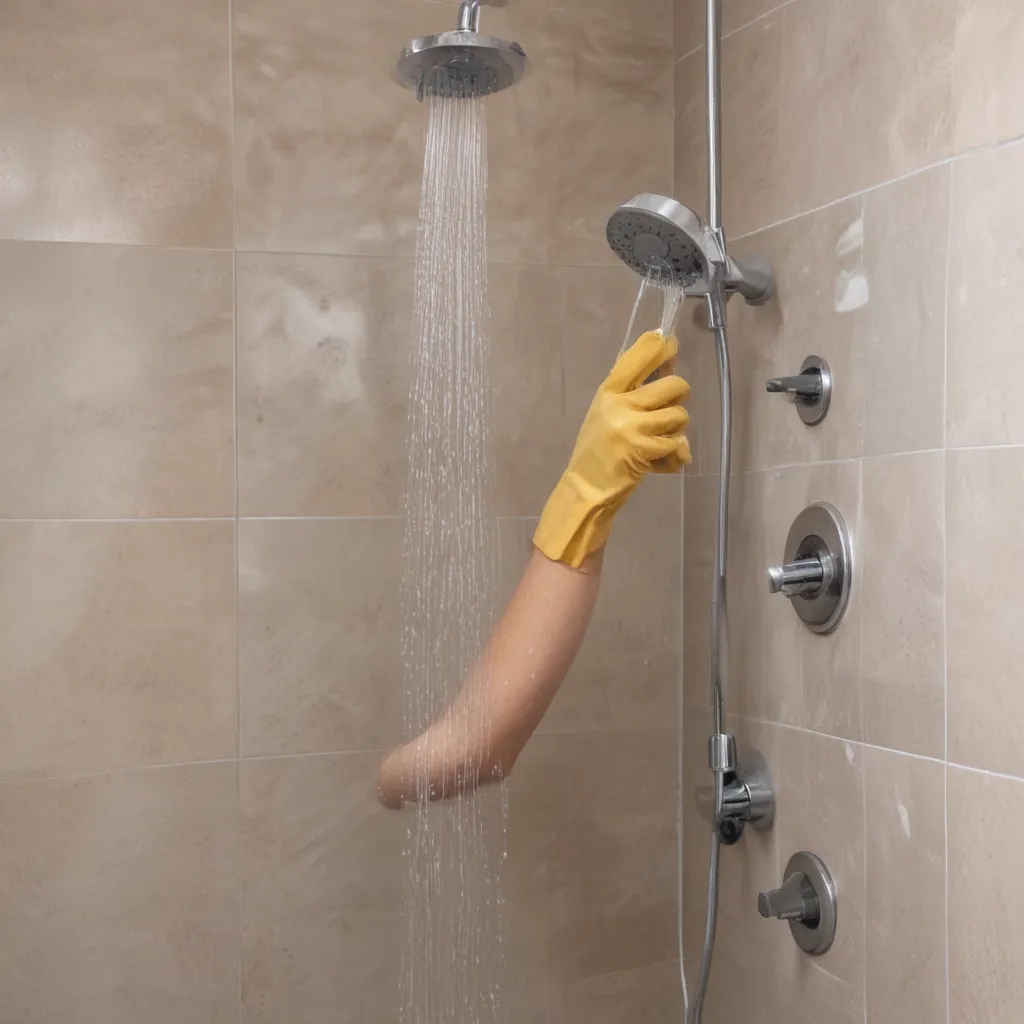
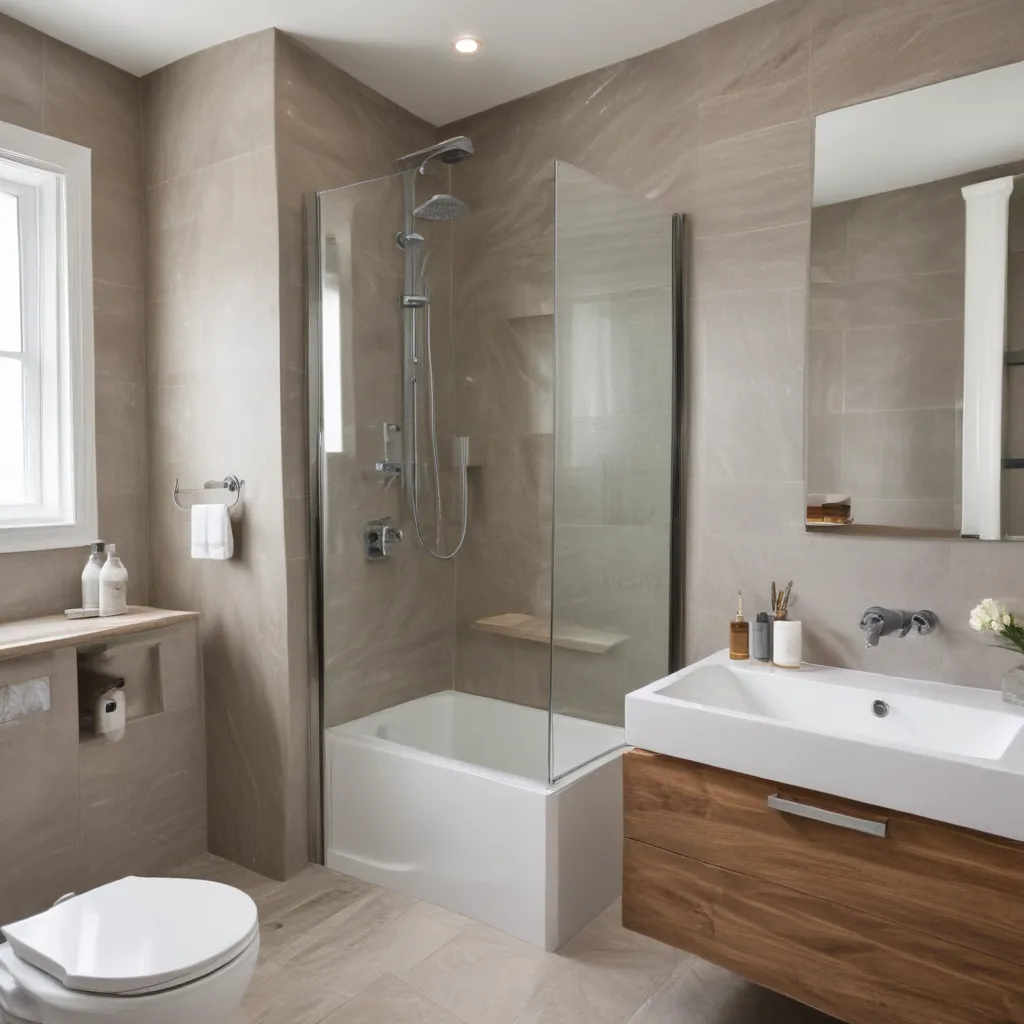
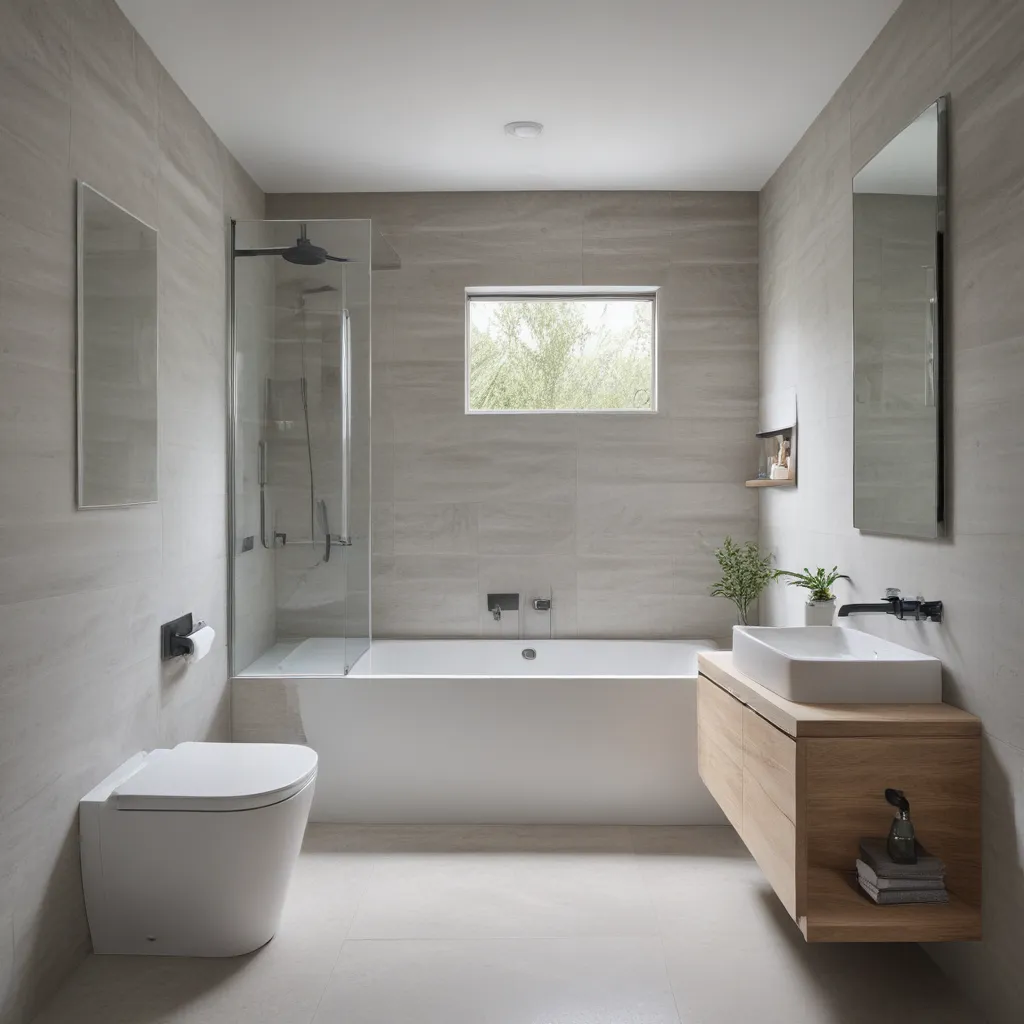
One of the easiest and most impactful ways to add character to your bathroom is by creating an accent wall. [1] An accent wall can act as the focal point of the room, drawing the eye and setting the tone for the entire space. Forget about that builder-grade, one-size-fits-all approach – this is your chance to unleash your inner designer and make a bold statement.

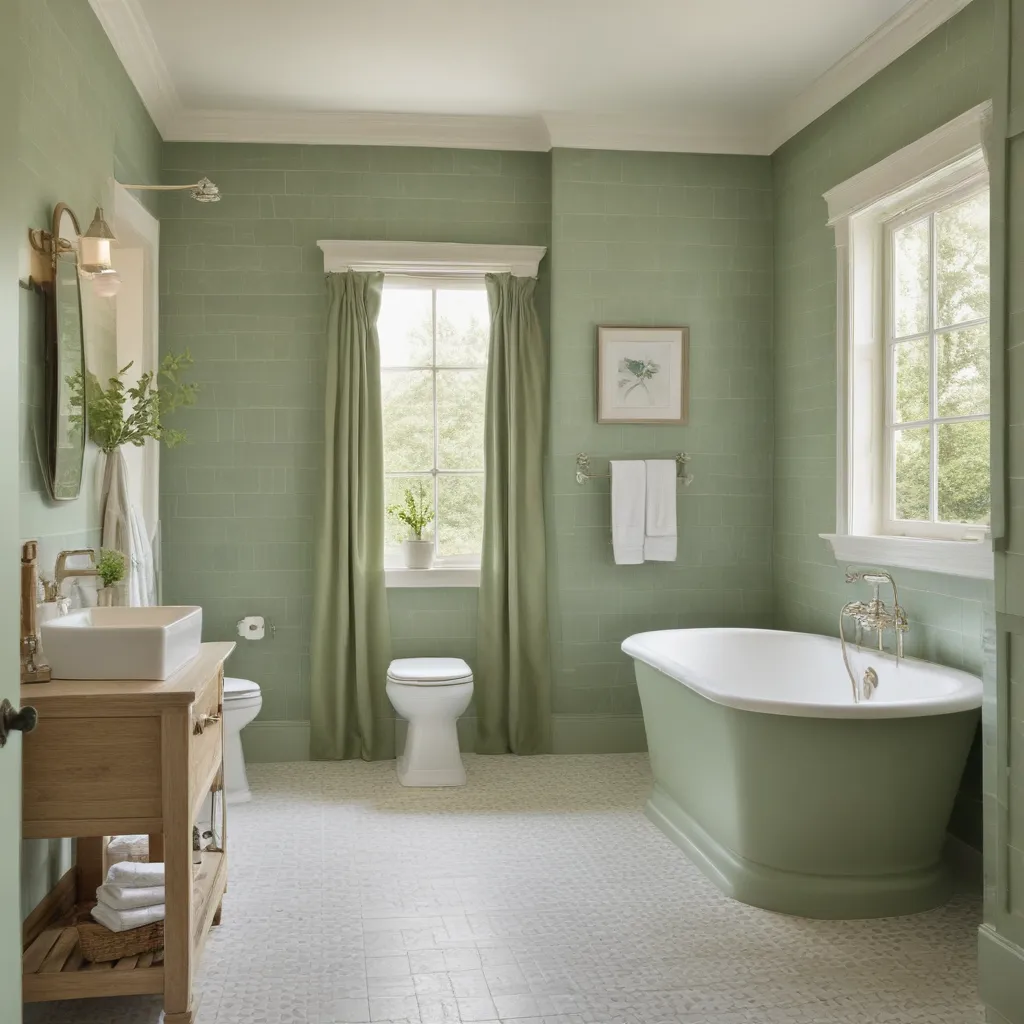
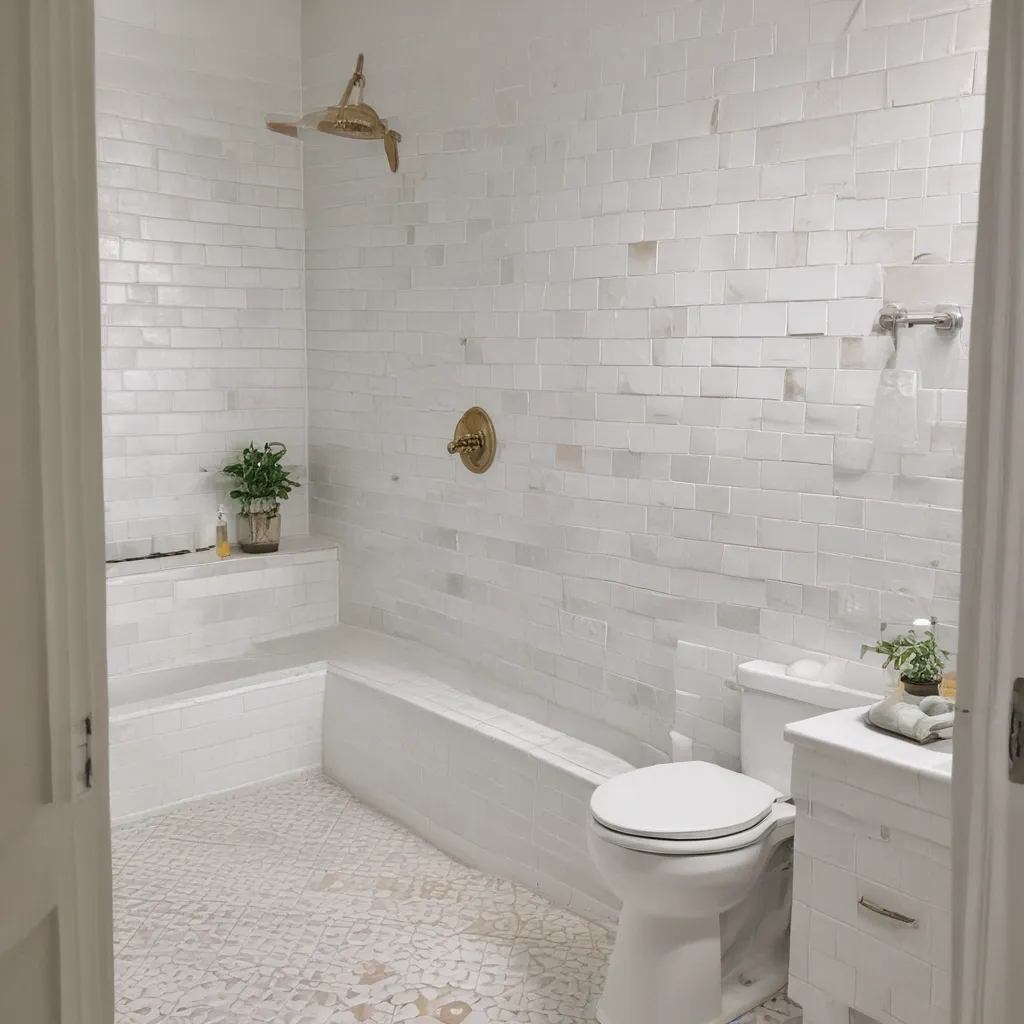
Personally, I’ve had great success with a moody, charcoal-gray accent wall in my own bathroom. The rich hue adds depth and drama, while the matte finish lends an air of sophistication. But the beauty of an accent wall is that the possibilities are endless. Maybe you’re drawn to the timeless elegance of subway tiles, [2] or perhaps you’re feeling adventurous and want to experiment with a funky, geometric pattern. [3] The key is to choose something that speaks to your unique style and personality.

Thrift Store Treasures and Vintage Finds

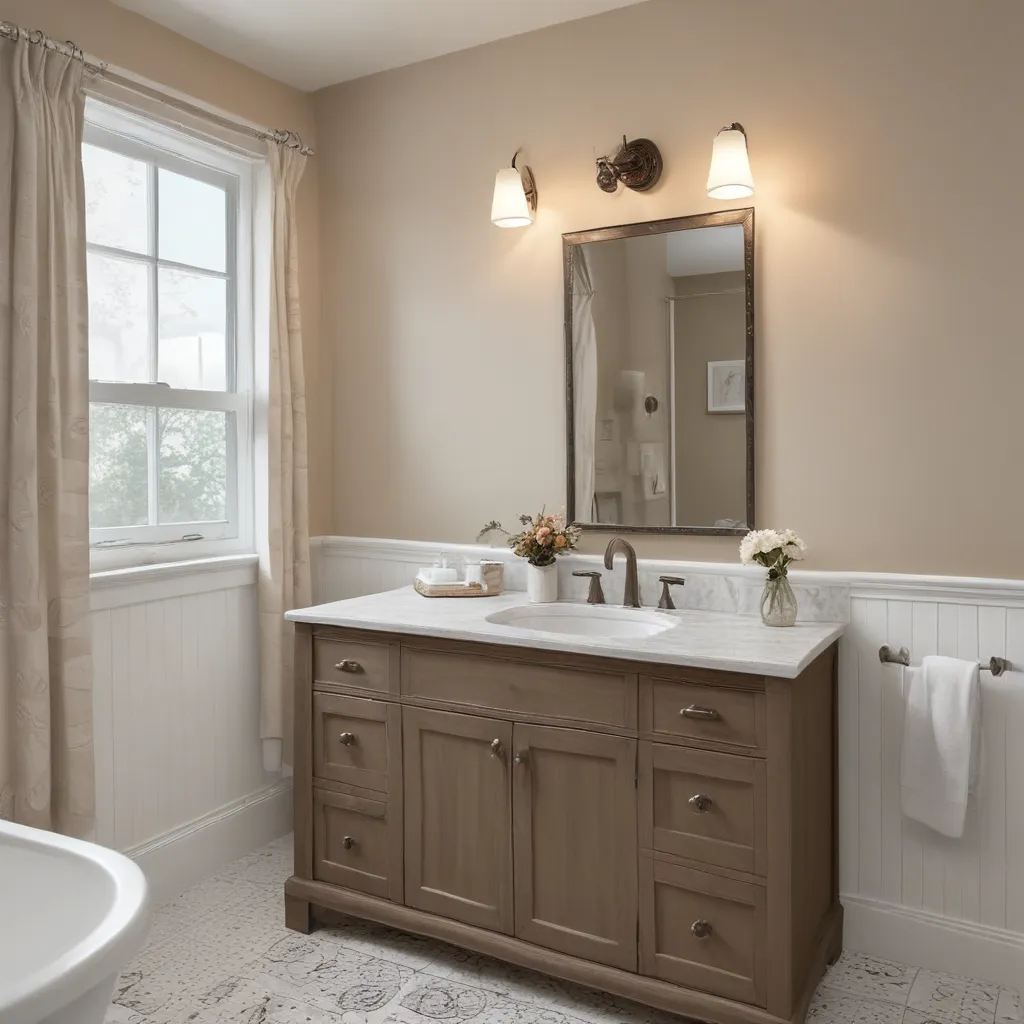
If you’re on a budget (and let’s face it, who isn’t these days?), scouring your local thrift stores and flea markets can yield some truly one-of-a-kind gems. [1] I recently stumbled upon an old, weathered cabinet that I transformed into a stunning vanity. The rustic, worn-in finish added instant character and charm, and the unique shape and size made it a perfect fit for my petite bathroom.

But the thrifting fun doesn’t have to stop there. [4] Keep your eyes peeled for interesting mirrors, light fixtures, or even a vintage clawfoot tub that can serve as the centerpiece of your new bathroom oasis. The joy of these pre-loved finds is that they come with their own stories and histories, adding layers of character that mass-produced pieces simply can’t match.

Textiles and Tactile Touches

While the big-ticket items like walls and vanities can make a significant impact, don’t overlook the power of textiles and other tactile elements. [5] I recently discovered the joy of adding tassels to my shower curtain hooks, and let me tell you, it’s a game-changer. The playful, bohemian touch instantly livened up my space and put a smile on my face every time I stepped into the bathroom.

But the textile fun doesn’t have to stop there. [6] Swap out your basic bath mat for something with a bold pattern or luxurious texture, and consider adding plush, oversized towels in a rich color or print. These small touches can transform your bathroom from a clinical, impersonal space into a cozy, inviting retreat.

Personalize with Playful Accents

One of the best ways to inject character into your bathroom is by incorporating playful, personality-filled accents. [7] I’m absolutely smitten with the idea of a customizable letter board that allows me to change up the “mood” of the space on a whim. Imagine walking in and seeing a cheeky message or a heartfelt affirmation staring back at you – it’s an instant mood-booster!

But the fun doesn’t have to stop there. [8] Scour your local flea markets or art galleries for unique, one-of-a-kind pieces that speak to your personality. Maybe it’s a whimsical sculpture, a colorful painting, or a quirky piece of wall art – the key is to choose something that makes you smile every time you see it.

Mixing Metals and Hardware Upgrades

When it comes to adding character to your bathroom, don’t be afraid to experiment with mixing and matching different metal finishes. [6] I’ve found that pairing sleek, modern chrome hardware with warm, vintage-inspired brass accents can create a dynamic, visually interesting contrast.

And if you’re looking for an easy, budget-friendly way to upgrade your space, swapping out your basic builder-grade hardware can make a world of difference. [9] Instead of settling for those generic, cookie-cutter options, explore unique shapes, textures, and finishes that align with your personal aesthetic. A set of hexagonal drawer pulls or a statement-making faucet can instantly elevate the look and feel of your bathroom.

Conclusion: Embrace the Unexpected

At the end of the day, the key to adding character to your bathroom is to embrace the unexpected and have fun with the process. [10] Remember, this is your personal oasis, so don’t be afraid to step outside of the box and infuse it with your own unique style and personality. Whether it’s a bold accent wall, a thrifted vintage find, or a playful, personality-filled accent, the possibilities are endless. So, what are you waiting for? Let’s get to work on transforming your dull, boring bathroom into a true work of art!

References:
[1] https://www.curbly.com/10-tips-and-tricks-for-adding-character-to-your-bathroom
[2] https://chrissiehomeanddesign.com/blogs/news/how-to-add-character-to-your-white-bathroom
[3] https://www.northernstyling.com/blog/2020/8/5/introducing-character-in-a-bog-standard-bathroom
[4] https://www.houzz.co.uk/magazine/7-designers-ideas-for-adding-character-to-your-bathroom-stsetivw-vs~140840989
[5] https://ca.weiserlock.com/blogs/posts/adding-character-to-your-bathroom-on-a-budget
[6] https://www.pinterest.com/pin/43839796346398838/
[7] https://layered.home.lilysawyer.com/4-ways-i-made-my-new-bathroom-not-look-new-interior-design/
[8] https://stylebyemilyhenderson.com/blog/how-to-add-character-to-a-builder-grade-bathroom
[9] https://www.westelm.com/ideas-and-advice/how-to-add-character-to-a-bathroom/
[10] https://www.remodelista.com/posts/10-ideas-to-add-character-to-a-bathroom/
Categories
Tips

Inexpensive Bathroom Flooring Options

Inexpensive Bathroom Flooring Options

Inexpensive Bathroom Flooring Options

Affordable Bathroom Makeovers Without the Fuss

You know the feeling – that sinking disappointment when you gaze upon the dated, dingy tiles lining your bathroom floor. Visions of a spa-worthy sanctuary get quickly dashed, replaced by the nagging reality that a full bathroom reno is simply not in the budget. But hold up, my friend! Before you resign yourself to a lifetime of drab, builder-grade floors, let me let you in on a little secret – there are plenty of inexpensive bathroom flooring options that can instantly upgrade the look and feel of your space, without breaking the bank.

As a self-proclaimed DIY enthusiast and budget-conscious home renovator, I’ve been down this road before. Back when my husband and I were fixing up our first fixer-upper, our 1980’s ranch had the most god-awful, porous ceramic tiles in the main bathroom. I’m talking the kind that acted like a magnet for dirt and grime, no matter how much scrubbing I did. Something about that dated, builder-grade look just sucked the life right out of the room.

But thanks to some savvy shopping and a little elbow grease, we were able to transform those eyesores into a stylish, wet-area-ready floor for a fraction of the cost of a full gut renovation. And let me tell you, the difference it made in the overall vibe of the space was nothing short of game-changing. So if you’re ready to bid farewell to your boring, blah bathroom floors once and for all, grab a pen and get ready to take some notes. I’m about to share some of my favorite budget-friendly flooring ideas that will have your space looking fresh, modern, and ,most importantly, Pinterest-worthy in no time.

Luxury Vinyl Tile (LVT) and Planks

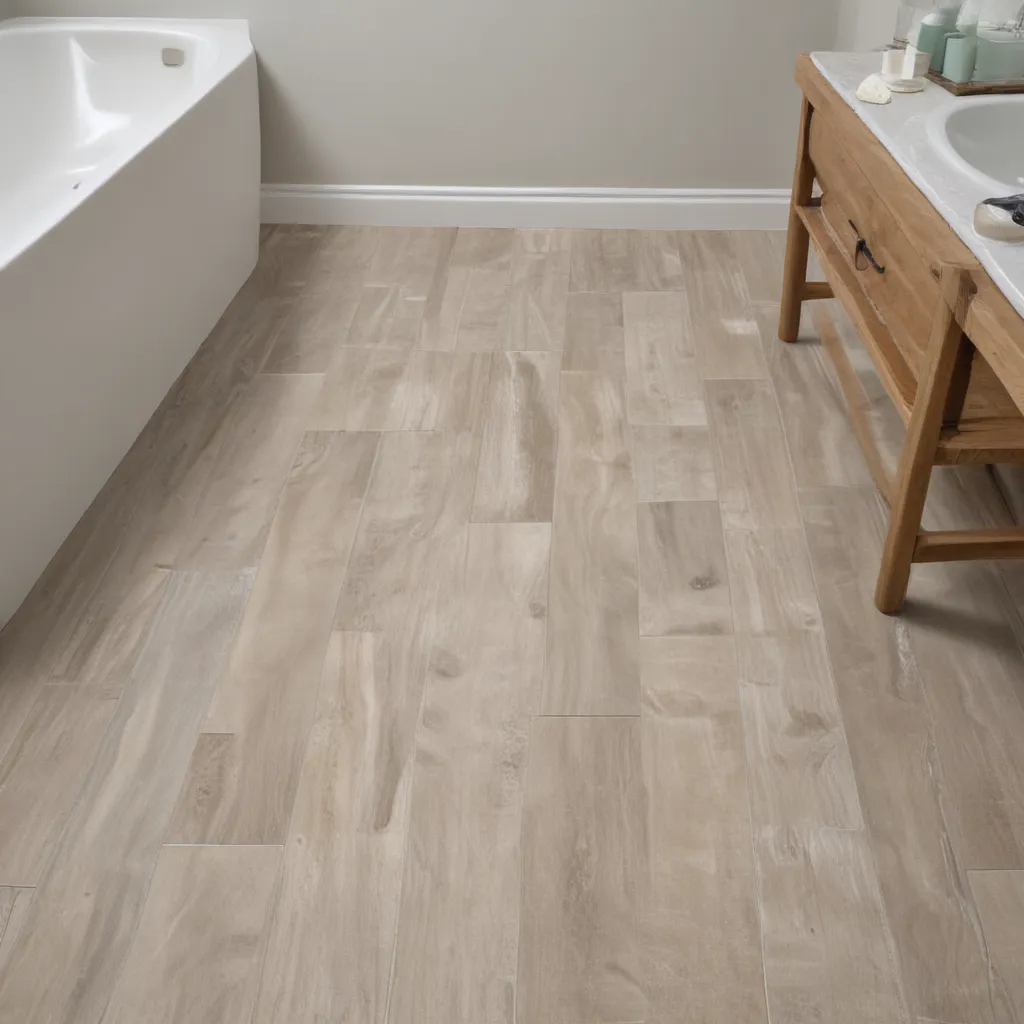
Perhaps one of the most popular inexpensive flooring options for bathrooms these days is luxury vinyl tile, or LVT for short. And let me tell you, this stuff is no longer your grandma’s basic sheet vinyl. Thanks to advancements in manufacturing, today’s LVT is thicker, more rigid, and looks shockingly similar to real hardwood, stone, or even cement. The best part? It’s super easy to install, especially for DIYers.

When my husband and I were redoing our 1980’s bathroom, we opted for an LVT with a waterproof, antimicrobial core that could be installed directly over the existing ceramic tiles. No messy demo required! And let me tell you, those floors looked amazing. The realistic wood-look planks gave the space an entirely new, elevated vibe – you’d never know they weren’t the real deal. And the best part? We did the whole installation ourselves in just a weekend, saving a ton on labor costs. [1]

Waterproof Engineered Hardwood

Now, I know what you’re thinking – hardwood floors in a bathroom? Isn’t that just asking for trouble? Well, fear not, my friend. These days, there are plenty of waterproof engineered wood options that are specifically designed for high-moisture areas like bathrooms.

When we tackled our 1980’s ranch reno, my husband installed some gorgeous oak engineered wood planks right over the old tile floors. And let me tell you, the transformation was stunning. The rich, earthy tones of the wood instantly warmed up the space, giving it a cozy, high-end vibe. And the best part? The waterproof core meant we never had to worry about dreaded water damage, even with all the splashing from our little boys’ bathtime antics. [2]

Affordable Tile Options

Okay, I know I just got done ranting about how much I hate dated, builder-grade tile. But hear me out – when it comes to bathroom floors, tile can actually be an incredibly budget-friendly option, especially if you’re willing to get a little DIY-happy.

Take, for example, the faux wood tile my friend Heathered Nest used in her rustic cabin renovation. At just $2 per square foot, this affordable porcelain option not only looked convincingly like the real thing, but it was also completely impervious to water. And with a little elbow grease and some YouTube tutorials, she was able to install it herself, saving a ton on labor costs. [3]

Another genius tile hack? Using a stencil and some patio floor paint to transform dated ceramic tiles into a stunning Moroccan-inspired pattern. My friend over at Pine + Poplar did this in her bathroom, and the results were nothing short of jaw-dropping. All for under $100! [4]

The Power of Paint

Speaking of budget-friendly DIY solutions, let’s talk about the transformative power of paint. If you’re looking to give your tired bathroom floors a quick facelift without breaking the bank, a good quality porch and floor paint could be the answer to your prayers.

My friend from The Handyman’s Daughter is the perfect example. Her bathroom started out with a busy, dated tile pattern that was really bringing the whole space down. But with a strategic stencil and a few cans of paint, she was able to create the illusion of larger, more modern tiles that completely elevated the look and feel of the room. And the best part? The whole project came in at under $100. [5]

Groutable Vinyl Tiles

Now, I know what you’re thinking – vinyl tiles in the bathroom? Isn’t that just a recipe for disaster? Well, my friend, allow me to introduce you to the magic of groutable vinyl tiles.

These bad boys are essentially luxury vinyl tiles, but with the added benefit of a grout-like seam that gives them the look and feel of real tile – minus the hassle and expense of a traditional tile install. My friend Craving Some Creativity used this genius hack in her bathroom, and the results were nothing short of stunning. Not only did the hexagonal pattern look super high-end, but the fact that she could install them herself without a tile saw saved her a ton of time and money. [6]

DIY Hardwood Floors

Alright, I know I’ve thrown a lot of alternative flooring options your way, but I’d be remiss if I didn’t mention the good old-fashioned power of good ol’ fashioned hardwood. Now, I know what you’re thinking – hardwood in the bathroom? Isn’t that just asking for trouble?

Well, my friend over at The Roots of Home proved that with a little elbow grease and some good old-fashioned ingenuity, you can absolutely rock those wide plank pine floors, even in a high-moisture area like the bathroom. And the best part? She was able to do the whole project for just $1 per square foot. Talk about a steal! [7]

So there you have it, my friends – a veritable treasure trove of budget-friendly bathroom flooring ideas that will have your space looking like a million bucks, without the hefty price tag. Whether you opt for the ease and versatility of luxury vinyl, the rustic charm of engineered wood, or the classic appeal of DIY tile and paint, the options are truly endless when it comes to transforming your tired old floors on a dime.

So what are you waiting for? Grab your measuring tape, cue up those DIY YouTube tutorials, and get ready to say goodbye to those dated, dingy tiles once and for all. Your dream bathroom awaits!

References

[1] Designing Vibes. “10 Cheap and Easy DIY Bathroom Flooring Ideas.” July 11, 2023. https://designingvibes.com/10-cheap-and-easy-diy-bathroom-flooring-ideas/

[2] Designing Vibes. “How To Install Floating Hardwood Directly Over Existing Flooring.” July 11, 2023. https://designingvibes.com/how-to-install-floating-hardwood-directly-over-existing-flooring/

[3] Heathered Nest. “DIY Faux Wood Tile Bathroom Floor.” April 24, 2023. https://www.heatherednest.com/diy-faux-wood-tile-bathroom-floor/

[4] Pine + Poplar. “DIY Painted Bathroom Floor Makeover.” May 18, 2023. https://pineandpoplar.com/diy-painted-bathroom-floor-makeover/

[5] The Handyman’s Daughter. “DIY Stenciled Bathroom Floor Makeover.” August 15, 2022. https://www.thehandymansdaughter.com/diy-stenciled-bathroom-floor-makeover/

[6] Craving Some Creativity. “DIY Groutable Vinyl Tile Bathroom Floor.” September 2, 2022. https://www.cravingsomecreativity.com/diy-groutable-vinyl-tile-bathroom-floor/

[7] The Roots of Home. “DIY Wide Plank Pine Floors in a Rustic Cabin.” June 1, 2023. https://www.therootsofhome.com/diy-wide-plank-pine-floors-rustic-cabin/

Categories
Tips

Tips for Cleaning Your Shower

Tips for Cleaning Your Shower

A Sparkling Clean Shower, Without the Scrub

I have a confession to make – cleaning the shower has always been my least favorite chore. There’s just something about that big, daunting task that fills me with a sense of dread every time it’s on my weekly cleaning schedule. The thought of moving all my shower products around, climbing in, and scrubbing from top to bottom just feels so time-consuming and, well, exhausting.

But you know what they say – the secret to a sparkling clean shower is having the right tools and techniques. And after years of trial and error, I think I’ve finally cracked the code. With a simple DIY shower cleaner and a few smart cleaning habits, I’ve managed to make the dreaded shower scrub a total breeze. In fact, I now actually look forward to getting in there and making everything shine!

The Magic DIY Shower Cleaner

The key to my shower-cleaning success? A homemade spray made with just two simple ingredients: white vinegar and dish soap. I know, it sounds almost too easy, right? But I’m telling you, this dynamic duo is an absolute powerhouse when it comes to cutting through soap scum, hard water stains, and that pesky mildew.

Here’s how I make it:

  1. Pour equal parts white vinegar and regular old Dawn dish soap into a spray bottle. I like to use one of those handy plastic bottles with the trigger sprayer – it makes application a breeze.
  2. Give the bottle a good shake to combine the ingredients.
  3. That’s it! You’re ready to start spritzing.

The vinegar works to dissolve all that built-up grime, while the dish soap cuts through the grease and oil. Together, they create a cleaning solution that’s tough on dirt but gentle on surfaces. And the best part? It’s so much cheaper and more eco-friendly than those store-bought shower cleaners.

Cleaning Hack: Shower While You Clean

Now, I know what you’re thinking – if this DIY cleaner is so easy to make, why does cleaning the shower still feel like such a chore? Well, my friends, I have a little trick up my sleeve that’s been life-changing.

Instead of devoting an entire afternoon to scrubbing the shower from top to bottom, I’ve started incorporating it into my regular shower routine. Yep, you heard that right – I clean my shower while I’m actually in it!

Here’s how it works:

  1. Before I even step into the shower, I spritz the walls, floor, and any glass doors with my trusty vinegar-and-Dawn mixture.
  2. Then, I go about my normal shower routine, letting the cleaning solution do its thing while I lather up and rinse off.
  3. When I’m done washing, I grab a scrub brush (I like to keep one right in the shower for this purpose) and give everything a quick once-over.
  4. Finally, I rinse it all away and voila – a sparkling clean shower, with minimal effort on my part.

The beauty of this method is that I’m already in the shower, so I don’t have to worry about getting wet or dripping water all over the place. Plus, it turns what used to be a dreaded chore into a seamless part of my self-care routine. Win-win!

Tackling Tough Shower Stains

Of course, no matter how diligent you are with regular cleaning, sometimes those stubborn shower stains and grime just refuse to budge. But fear not, my friends – I have a few tricks up my sleeve for tackling even the toughest of shower messes.

For those pesky hard water spots or mineral deposits, I like to use a little baking soda and lemon juice. I’ll make a paste with the two ingredients and let it sit on the affected areas for about 15 minutes before scrubbing. The acidic lemon juice helps break down the mineral buildup, while the abrasive baking soda provides some extra muscle.

And for mold or mildew, I turn to the power of good old-fashioned bleach. I mix a solution of one part bleach to four parts water, spray it on the affected areas, and let it sit for 5-10 minutes before scrubbing and rinsing. Just be sure to have plenty of ventilation and wear gloves when working with bleach.

The key with both of these methods is to let the cleaning solutions do the heavy lifting. Don’t be afraid to let them sit and soak in for a bit before you start scrubbing. That way, you’ll minimize the elbow grease required and get those showers sparkling in no time.

Maintaining a Fresh, Clean Shower

Of course, the best way to keep your shower looking its best is to stay on top of the cleaning. I try to give mine a quick once-over with my DIY spray every time I hop in for a rinse. And I make a point to do a more thorough clean at least once a week, as part of my regular bathroom routine.

But even with regular upkeep, there are a few other things I do to help maintain a clean, fresh-smelling shower:

  • I keep a squeegee hanging right in the shower, and I use it to wipe down the walls and door after each use. This helps prevent water spots and soap scum from building up.
  • I swap out my shower curtain or liner every few months, to keep mold and mildew at bay.
  • I use a drain cover to catch hair and other debris, which can clog the drain and lead to standing water.
  • And of course, I make sure to keep my DIY cleaning spray fully stocked and ready to go at all times!

With these simple maintenance tips and my trusty vinegar-and-Dawn cleaner, I’ve managed to turn what used to be my least favorite chore into a quick, painless part of my weekly routine. And the best part? My shower has never looked (or smelled) better.

So if you’re one of those people who dreads cleaning the shower as much as I used to, take heart – it doesn’t have to be a never-ending battle. With the right tools and a little bit of strategy, you can have a sparkling clean shower in no time. Happy scrubbing!

References

[1] Reddit Discussion on Shower Cleaning Tips: https://www.reddit.com/r/CleaningTips/comments/1308njz/tips_for_someone_who_hates_cleaning_the_shower/
[2] How to Clean a Shower: https://www.bhg.com/homekeeping/house-cleaning/tips/how-to-clean-a-shower/
[3] The Spruce – How to Clean a Shower: https://www.thespruce.com/how-to-clean-a-shower-4580788
[4] Martha Stewart – How to Clean a Shower: https://www.marthastewart.com/how-to-clean-a-shower-7566052
[5] Good Housekeeping – Bathroom Cleaning Tips: https://www.goodhousekeeping.com/uk/house-and-home/household-advice/a657043/bathroom-cleaning-tips-sparkling-bathroom/
[6] Reader’s Digest – How to Clean a Shower: https://www.rd.com/article/how-to-clean-shower/
[7] Waterpik – Top 3 Tips for Cleaning Your Shower Head: https://showers.waterpik.com/product-support/articles/top-3-tips-for-cleaning-your-shower-head/
[8] Back Road Bloom – DIY Shower Cleaner: https://backroadbloom.com/diy-shower-cleaner/

Categories
Designs

Tips For Designing An Accessible Bathroom

Tips For Designing An Accessible Bathroom

Designing for My Dad’s Needs

A few years ago, my dad lost a leg to vascular disease, and then two short years later, he lost the other one. My dad was actually still working right up until the pain in his feet started to get so severe that he could no longer function, and a few months later, one leg was gone below the knee. Fortunately, my parents live in a bungalow (single-level) home, so there weren’t many modifications needed for them to stay in it. There was one exception to this, and that was the bathroom space.

There were several things in their current bathroom that made it very difficult for my dad to use to shower and maneuver. I didn’t know how to make a bathroom handicap accessible at the time, but I did a bunch of research and came up with some solutions and a design to help my parents out. My dad used a prosthetic a lot that first year when he still had one leg, and he managed with their existing bathrooms not too badly. However, he needed to put his shower chair half-in and half-out of the shower to use it, so was unable to close the shower door, resulting in a big mess every time he showered.

The following year, in 2018, he lost the other leg to the same disease, this time above the knee. He walks with two prosthetics still, but when around the house, he uses the wheelchair a lot more. It was time to make his main ensuite bathroom work better. The whole family chipped in to get this renovation done for my parents. My brother-in-law and my uncle handled the lion’s share of the renovation work. My sister’s friend who was a plumber gave up a couple of his weekends helping to get the plumbing done for us. My husband and I helped with the work as much as possible, and I also handled all of the design and ordering of materials for my mom. We got organized, and we got the whole bathroom done in a span of 4 weeks!

Accessible Bathroom Design Considerations

First of all, there are ADA guidelines that talk about the official rules when it comes to things like clearances, space in front of or beside things, doorway widths, and things of that nature. When we were renovating my parent’s bathrooms, we were not able to meet all of the guidelines for accessible bathroom design exactly because we had limited space to work with. However, I had the benefit of being able to ask my dad just what his specific needs were as far as space and easy access.

For example, in the powder room, ADA requirements require a grab bar on the side of the toilet for bathroom safety and easy transfers from the wheelchair to the toilet. However, my dad had already been using the bathroom without one for quite some time and didn’t feel like he needed a bar there – he uses the side of the sink instead. If he does require it in the future, it’s an easy addition. Also, the powder room is a small bathroom and not large enough according to the guidelines to allow wheelchairs to turn around for it to be a totally compliant bathroom. However, my dad is not a big guy, and his wheelchair is pretty small, so it works okay for him.

Accessible Vanity and Sink Design

In order to make the sinks easy for my dad to use from a sitting position, they needed to be a little bit lower and have some open space below to allow him to get closer to them. The vanities that were in my parent’s house before were all extra tall (36″) and had cabinetry on the bottom, so he really had to stretch to reach it.

In the ensuite bathroom, we solved this problem by designing some custom cabinetry. I designed a double sink table-style vanity with legs that were a little lower to allow my dad to roll right up to it. I talked to my mom about the storage that she would be losing with this option, and we decided to add a center countertop tower for storage as well as some drawers between the sinks.

In that bathroom, we really only needed one sink to be accessible. However, we felt that having only one would make it look like a handicap-accessible bathroom, and we wanted it to look a little more designerly. So we opted for symmetry, and my parents say they have plenty of storage in this design.

We were careful about the bottom clearance as much as the vanity height. We wanted the vanity to be low enough to use, but also enough clearance below that he could roll right under with his chair. That ended up requiring us to source some extra shallow sinks as well. We also used long pulls as towel bars on the front of the vanity rather than placing a hook or a ring on the wall where they would be difficult to reach.

In the powder room, I sourced a console sink with a marble top from Wayfair that was the right height and had open space below to allow for the wheelchair to get closer.

Improving Visibility and Comfort

In the ensuite, in order for my dad to see well for shaving (and combing his hair…haha, just kidding, he has none!), I sourced some mirrors that tilted so that they could be angled downward for him and more level for my mom to use standing.

Another thing to consider is the height of the toilet. My parent’s house had standard lower toilets, which made it difficult to transfer from the chair height of a wheelchair to the seat. In both bathrooms, we replaced the toilet with comfort height toilets that sit just a little higher and allow for easier access.

We discussed with my dad the best places to put horizontal grab bars and such in order for him to move around within the bathrooms, and when we were remodeling, we added structural support inside the walls where we could. This made the grab bars a lot more secure, and we were sure to put them right where he needed them.

Designing an Accessible Shower

The door to my parents’ ensuite opened into the room, and the shower was located behind that door. So in order for my dad to shower, he needed to go into the bathroom, turn around and close the door in the limited space that was in there, and close it. Then, he had to open the shower door, and he used a shower chair that he had to place half in and half out of their shower so that he could slide onto it, and the shower door had to remain open. As you can imagine, this was awkward, and water got everywhere.

When we renovated, we were able to open up the wall on the inside of the bathroom and install a pocket door into the room. A pocket door is great in a handicap bathroom because you don’t have to have all the space behind it to maneuver a wheelchair as well as accommodate the door swing. Changing to a pocket bathroom door in here was a game-changer!

When we redesigned the shower, we decided to eliminate a door altogether and go for a shower curtain instead. Not having to work around door swings makes a huge difference. The shower was by far the trickiest part. We opted to install a curbless shower stall that had a very slight ramp-up from the bathroom floor. This allows it to be a roll-in shower design.

In theory, this accessible shower all drains towards the drain, and water shouldn’t end up going on the other side of the ‘slope’ and running into the bathroom. In reality, however, a little bit that splashes here and there was ending up getting out of the shower. In order to deal with this post-construction, we added this plastic shower dam that is like a collapsible water retainer. If you roll your wheelchair over it, it collapses and then just pops back up. It just sticks right down on top of the tile, and it works great for keeping the water in.

I asked my dad if he wanted a built-in shower seat, but ultimately, he preferred to use his portable one. He liked to be able to move it around, and it’s not a permanent fixture, so if they ever sell the house and the new people don’t need an accessible design, they don’t need to have a seat. We also designed a niche for storing shampoo and such lower down within easy reach.

When laying out the plumbing, we were sure to put the shower controls within reach of someone in a seated position. We also used an adjustable shower head so they can move it up for my mom or down for my dad, and he can have the water right where he needs it. We chose small tiles for the whole floor so that there would be a lot more grout lines and therefore, more slip resistance. Large format tiles can be slippery!

The tub they have in here is obviously not a handicap tub. In order to have a tub that my dad could use, they would have needed to have one of those walk-in tubs that are made specifically for accessibility. My dad never really used the tub, and so they opted to just put in a regular tub.

Creating a Beautiful, Accessible Design

Designing these bathrooms specifically for the needs of my dad and his physical limitations is going to allow my parents to live in this house a lot longer, which is the ultimate goal. My mom also loves the new bathroom designs – the old ones were quite brown and a little dated, and these updates really made a big difference in their home. My mom especially loves that these bathrooms are like…sneakily accessible. They have all the accessible features my dad needs, but yet they don’t look like a hospital bathroom. Good design does not have to be sacrificed for accessibility!

I am so happy that I was able to help out with my parent’s renovations. My dad was always doing stuff around the house when I was growing up, renovating, building garages and fences, tiling, you name it. I learned most of what I know by helping him, and let’s just say he rubbed off on me. Working alongside my dad is a memory that I will always cherish, and I hope to pass along those kinds of memories to my own kids someday. (I am still waiting for that DIY spirit to rub off on one of them…stay tuned!!)

References

[1] Knowledge from https://www.roomsketcher.com/blog/accessible-bathroom-design/
[2] Knowledge from https://erinzubotdesign.com/how-to-make-a-bathroom-handicap-accessible/
[3] Knowledge from https://www.care.com/c/creating-an-accessible-bathroom-for-seniors/
[4] Knowledge from https://liveinplacedesigns.com/guide-to-remodeling-a-handicap-bathroom/
[5] Knowledge from https://bestbath.com/four-tips-designing-accessible-bathroom
[6] Knowledge from http://www.deslaurier.com/en-us/learning-centre/creating-an-accessible-bathroom-design
[7] Knowledge from https://www.tundraland.com/blog/how-to-make-your-bathroom-handicap-accessible/
[8] Knowledge from https://www.springhills.com/resources/accessible-bathroom-designs

Categories
Designs

Go Green With Eco-Friendly Bathrooms

Go Green With Eco-Friendly Bathrooms

Go Green With Eco-Friendly Bathrooms

Introduction: The Green Bathroom Revolution

Ahh, the bathroom – the private sanctuary where we go to cleanse our bodies, rejuvenate our minds, and occasionally engage in solo dance parties (don’t worry, I won’t judge!). But what if I told you that your beloved bathroom could also be a haven for Mother Nature? That’s right, folks – the green bathroom revolution is here, and it’s time to ditch those water-guzzling, plastic-producing fixtures in favor of an eco-friendly oasis.

[1] Sustainable living has become a lifestyle choice for many, but it’s also a critical necessity to preserve our environment, manage climate change, and prevent the over-consumption of our natural resources. Luckily, with modern technology and innovative design, creating a sustainable bathroom has never been easier. In this in-depth article, we’ll explore six simple ways you can transform your existing bathroom into an eco-friendly haven or design a brand-new green space from scratch.

Eco-Friendly Bathtubs and Showers

Your cleanliness and relaxation should not come at the expense of the planet’s resources. The good news is you don’t have to give up the joy of a warm, soothing bath or invigorating shower if you opt for eco-friendly alternatives. [2] You can find bathtubs made from recycled or sustainable materials, like the ones from Blu Bathworks that use a mix of quartzite and bio-based resin.

And what about those water-guzzling showers? If your current setup is pumping out 2-8 gallons per minute, that’s a massive waste. [3] By upgrading to a low-flow showerhead, you can enjoy the same great water pressure while reducing your water consumption by up to 3,000 gallons per year in an average-sized household. It’s a win-win situation, as you’ll not only save water but also lower your utility bills.

Touchless Taps and Dual-Flush Toilets

Alright, let’s talk about another notorious water-waster: the humble bathroom sink. [3] On a daily basis, we use a lot of water while washing our hands, brushing our teeth, and carrying out other grooming tasks. All that waste can seriously deplete our water supply and rack up those utility bills.

The solution? Touchless taps with motion sensors. These innovative fixtures only turn on the water when you need it, reducing consumption by up to 60%. [3] And for the throne itself, consider upgrading to a dual-flush toilet. With a simple push of a button, you can choose between a full flush for solid waste or a reduced flush for liquid waste, saving thousands of gallons annually.

Sustainable Materials and Natural Lighting

Now that we’ve tackled the water-saving aspects, let’s turn our attention to the materials and design elements that can make your bathroom truly eco-friendly. [4] Embrace natural and sustainable materials like stone, metal, porcelain, and recycled glass to create a sleek, modern, and functional space. These materials not only showcase their unique textures and patterns but also infuse your bathroom with a refreshing, spa-like ambiance.

And let’s not forget about the importance of natural light. [3] If possible, consider renovating your bathroom to incorporate large windows or a skylight. Not only will this reduce your electricity consumption, but there’s nothing quite like the soothing glow of natural light to transform your bathroom into a serene oasis.

Eco-Friendly Storage and Lighting

Speaking of lighting, let’s talk about another often-overlooked element of the eco-friendly bathroom: storage. [3] Gone are the days of bulky, plastic medicine cabinets. Today, you can find sustainably-constructed mirrored cabinets with energy-efficient LED lighting and even interior mirrored glass walls for a truly streamlined, plastic-free look.

[3] When it comes to lighting, opt for LED fixtures that use up to 90% less energy than traditional incandescent bulbs. You can use task lighting to illuminate specific areas, like your vanity mirror, or add decorative eco-friendly fixtures to enhance the overall ambiance of your bathroom.

Sustainable Habits and Accessories

Of course, transforming your bathroom into a green haven doesn’t stop at the fixtures and materials. [5] It’s also about adopting sustainable habits and embracing eco-friendly accessories. Take shorter showers, turn off the faucet while brushing your teeth, and recycle whenever possible. These small changes can make a big difference in reducing your environmental impact.

[4] And don’t forget about your bathroom essentials, like towels, bath mats, and even your dental floss and toothbrush. Opt for organic cotton towels, biodegradable bath mats, and bamboo toothbrushes to reduce your plastic footprint. You can even try making your own dry shampoo using simple, natural ingredients like cornstarch and cocoa powder.

Conclusion: A Greener, Cleaner Future

Our environment and natural resources are precious, and it’s up to all of us to do our part in preserving them. By incorporating eco-friendly elements into your bathroom design and adopting sustainable habits, you can create a truly green oasis that benefits both your home and the planet.

[6] So, what are you waiting for? It’s time to dive into the world of eco-friendly bathrooms and make your own small, yet impactful, contribution to a greener, cleaner future. Who knows, you might even discover a newfound appreciation for the simple joy of taking a mindful, water-conserving shower under the soft glow of your energy-efficient LED lighting. Get ready to go green and feel good about it!

References:
[1] https://www.sidler-international.com/october-2022-sidler-inside-reflections-go-green-6-ways-to-design-an-eco-friendly-sustainable-bathroom/
[2] https://bathrus.com/bathroom-remodel/going-green-with-your-bathroom-remodel-eco-friendly-ideas/
[3] https://www.sidler-international.com/sustainable-bathroom-design-go-green-by-creating-an-eco-friendly-bathroom-space/
[4] https://www.qualityfirsthome.com/blog/bathrooms/eco-friendly-bathroom-remodel-ideas-go-green-for-earth-week/?amp=1
[5] https://www.nbcnews.com/select/lifestyle/12-practical-ways-make-your-bathroom-eco-friendlier-save-some-ncna1061246
[6] https://www.saniflo.com/us/blog/five-ways-to-go-green-in-your-bathroom-n353

Categories
Designs

How To Refresh Dated Bathroom Tile On A Budget

How To Refresh Dated Bathroom Tile On A Budget

Tile Troubles? I Feel Your Pain!

Ah, the bathroom – the one room in our homes that should be a serene oasis, but so often ends up feeling like a relic from the past. If your dated bathroom tile is bringing you down, don’t worry, I’ve been there! When my husband and I moved into our fixer-upper a few years ago, the 1980s green and peach tile in our master bath had me feeling anything but relaxed. But with a little creativity and elbow grease, I was able to give that tired tile a fresh new look – all on a tight budget. And I’m here to share my tips so you can do the same!

Prep is Key (But Don’t Panic)

Now I know the thought of tackling a tile makeover can be daunting, but trust me, it’s not as hard as it seems. The key is all in the prep work. Yes, it takes some time and effort upfront, but it makes a world of difference in the final result.

First up, you’ll need to remove any existing caulk or grout. This can be a tedious task, but just take it one section at a time. I found that a sharp utility knife and some good old-fashioned elbow grease did the trick. Once that’s done, give the tiles a thorough cleaning with a degreaser like TSP substitute. This ensures the paint will have a pristine surface to adhere to.

Now comes the fun part – sanding! Yep, you’ll want to lightly sand each tile to rough up the surface and help the paint grab on. I used a medium grit wet/dry sandpaper and worked in small sections. Just be sure to vacuum up all that dust when you’re done.

Paint Party Time!

With the prep work out of the way, it’s time to get to the good stuff – painting! For this project, you’ll want to use a special tub and tile paint. I went with the Rust-Oleum Home Floor Coating kit, which comes with a base coat and top coat. The key is taking your time and working in manageable sections.

I started by brushing on the base coat, making sure to get into all those grout lines. Then I followed up quickly with the roller to ensure an even, streak-free finish. After letting the first coat dry for an hour, I applied a second coat for full coverage.

The top coat went on just as easily, using the same brush and roll method. This clear sealer not only protects the paint, but also gives the surface a nice smooth, uniform look. Just be sure to let it cure for the full 24 hours before subjecting it to any foot traffic.

Finishing Touches

With the painting done, all that’s left are the finishing touches. I like to re-caulk all the edges and seams to create a polished look. And don’t forget to replace any hardware, like shower caddies or towel bars, that you may have had to remove during the process.

The final step? Stepping back and admiring your handiwork! I have to say, I was pretty darn proud when I looked at our “new” bathroom. What had been a dated eyesore was now a serene, spa-like retreat. And the best part? The whole project cost us less than $150 – a steal compared to the thousands it would have cost to replace the tile entirely.

Budget-Friendly Bliss

So if you’re tired of staring at that tired old tile, don’t despair! With a little elbow grease and the right products, you can give your bathroom a fresh new look without breaking the bank. Just follow these simple steps and get ready to fall in love with your space all over again.

Of course, if you need any more tips or have questions along the way, you know where to find me. Happy tiling, my friends!

References

[1] Noting Grace. “How We Changed Our Bathroom Tile for $150 Bucks.” Noting Grace, 7 Nov. 2019, notinggrace.com/changed-our-bathroom-tile-for-150-bucks/.

[2] Designer Trapped. “How to Update Your Bathroom Tile Without Replacing It.” Designer Trapped, 12 June 2019, designertrapped.com/update-bathroom-tile-without-replacing-it/.

[3] Plumbworld. “Give Your Bathroom Tiles a Makeover.” Plumbworld, 16 June 2021, www.plumbworld.co.uk/blog/give-bathroom-tiles-makeover.

[4] MyDIYHappyHome. “From Ugly to Wow: How to Paint Bathroom Shower Tile.” MyDIYHappyHome, 20 May 2020, mydiyhappyhome.com/from-ugly-to-wow-how-to-paint-bathroom-shower-tile/.

[5] r/homeimprovementideas. “How Would You Update This Bathroom on a Budget?” Reddit, 16 Jan. 2013, www.reddit.com/r/homeimprovementideas/comments/16g8yfi/how_would_you_update_this_bathroom_on_a_budget/.

[6] Designs by Karan. “Farmhouse Bathroom Update on a Budget.” Designs by Karan, 7 May 2019, designsbykaran.com/farmhouse-bathroom-update-on-budget/.

[7] Little House of Four. “Budget-Friendly Vintage Modern Hall Bathroom Makeover.” Little House of Four, 7 Feb. 2019, www.littlehouseoffour.com/2019/02/budget-friendly-vintage-modern-hall.html.

[8] The DIY Playbook. “Guest Bathroom Refresh.” The DIY Playbook, 18 June 2019, thediyplaybook.com/guest-bathroom-refresh/.

Categories
Designs

Keep It Simple With Minimalist Bathroom Design

Keep It Simple With Minimalist Bathroom Design

Minimalism: The Art of Intentional Living

Nature abhors a vacuum, or so they say. But I, for one, absolutely adore it. There’s just something so refreshing and soothing about a clean, uncluttered space. And nowhere is this more true than in the bathroom – the one room in the house where we go to cleanse our bodies and rejuvenate our minds.

As a self-proclaimed “clean freak,” I’m constantly seeking ways to simplify my bathroom routine. It’s an ongoing experiment, but one that’s truly transformed the way I experience this essential space. From decluttering to mindful cleaning, I’ve picked up a few tricks along the way that have made all the difference.

You see, minimalism isn’t just about having the bare minimum. It’s about intentionally promoting the things you value most, and eliminating the distractions. And when it comes to the bathroom, that approach can work wonders.

Declutter to the Bare Essentials

The first and arguably most crucial step in achieving a minimalist bathroom is to declutter – and I mean really declutter. That means emptying out every nook and cranny, and only putting back the items you use on a daily basis.

I know, I know. It sounds daunting. But trust me, the payoff is immense. Think about it – how many half-used moisturizers, hotel samples, and outdated curling irons are lurking in your cabinets and drawers? Probably more than you realize.

Once you’ve cleared the slate, take a good hard look at your routine. What do you actually use every single day? That’s what gets to stay. Everything else? Well, it’s time to find a new home for it – whether that’s in the garbage, the donation pile, or a box in the linen closet.

Curate Your Countertops

With all the clutter gone, you’re left with a clean, blank canvas. And the key to keeping it that way is to be ruthless about what you allow back onto those pristine countertops.

I’m talking toothbrush, deodorant, maybe a pretty soap dish – that’s it. Anything else, no matter how tempting, needs to find a home behind closed doors. Trust me, your sanity (and your cleaning routine) will thank you.

Now, I know what you’re thinking – “But what about all my hair tools and makeup?” Fear not, my friend. The solution lies in strategic storage.

Invest in some sleek, minimalist cabinets or drawers to tuck away all those beauty essentials. Heck, you could even go the route of a chic vanity with hidden compartments. The key is making sure everything has a designated place, so you can maintain that gloriously clutter-free look.

Embrace the Art of Mindful Cleaning

With your bathroom decluttered and organized, it’s time to tackle the cleaning itself. And let me tell you, this is where the real magic happens.

See, cleaning isn’t just a chore – it can be a form of meditation. As you meticulously wipe down those surfaces or scrub the tile, try to be present in the moment. Imagine yourself as a Zen monk, sweeping the floors of a temple with utter focus and serenity.

It might sound a bit woo-woo, but I promise it works. By approaching your cleaning routine with mindfulness, you’ll not only enjoy the process more, but you’ll also achieve a level of cleanliness that’s truly satisfying.

And the best part? Once you’ve established this minimalist, mindful approach, maintaining it becomes a breeze. A quick daily wipe-down here, a thorough weekly scrub there – and voila, your bathroom stays fresh, clean, and clutter-free.

Minimalist Bathroom Design: The Finishing Touches

Of course, a truly minimalist bathroom isn’t just about decluttering and cleaning – it’s also about the aesthetic. And let me tell you, there’s nothing quite as soothing as a sleek, modern bathroom design.

Start with a neutral color palette – think bright whites, soft grays, and maybe a touch of natural wood. These clean, calming tones create the perfect backdrop for your minimalist oasis.

Next, consider your fixtures and finishes. Opt for simple, streamlined designs that blend seamlessly into the space. Matte black hardware, for example, adds a contemporary edge without overwhelming the room.

And don’t forget about those accents! A single, sculptural candle, a potted succulent, or a minimalist piece of wall art can elevate the entire space, turning your bathroom into a true sanctuary.

The key is to resist the temptation to overdo it. Remember, less is more in the world of minimalist design. Trust your instincts, and let the beauty of simplicity shine through.

Embracing the Minimalist Mindset

At the end of the day, creating a minimalist bathroom is about more than just decluttering and redecorating. It’s about adopting a mindset that celebrates simplicity, intentionality, and the joy of a well-ordered space.

And the best part? The benefits of this approach extend far beyond the bathroom itself. By learning to cultivate a minimalist lifestyle, you’ll find that the positive effects ripple through every aspect of your life – from increased focus and productivity to a greater sense of calm and contentment.

So why not dive in and see for yourself? Start small, with just a few simple changes to your bathroom routine. Before you know it, you’ll be reveling in the beauty of a clean, uncluttered oasis – and wondering how you ever lived any other way.

[1] The Minimalist’s Guide to Simple Housework
[2] How to Create a Minimalist Bathroom
[3] 20 Contemporary Bathroom Ideas to Modernize Your Space
[4] Bathroom Organization Ideas and Minimalist Checklist
[5] Minimalist Bathroom Ideas
[6] How to Design a Modern Bathroom
[7] Minimalist Cleaning
[8] Minimalist Easter Basket Ideas

Categories
Tips

Bathroom Storage Ideas You Havent Thought Of

Bathroom Storage Ideas You Havent Thought Of

Bathroom Storage Ideas You Haven’t Thought Of

Raise your hand if your bathroom is the catch-all for every stray item in your home. Raises hand enthusiastically. Yeah, I’ve been there too. From haircare products to cleaning supplies, it can feel like the smallest room in the house is also the most cluttered.

But fear not, my disorganized friends! I’ve uncovered some ingenious bathroom storage ideas that will have you feeling like a feng shui master in no time.

Maximize Vertical Space

When square footage is at a premium, it’s time to look up. Utilizing vertical space is key for cramped bathrooms. Instead of letting those high shelves gather dust, put them to work!

One of my favorite space-saving tricks is a tiered hanging basket. [1] These nifty organizers let you stack all your essentials – think lotions, hair products, even extra toilet paper – without eating up precious floor space. Just hang them from the shower curtain rod or the back of the door, and voila! Instant storage.

Another clever vertical solution? A towel ladder. [2] This narrow shelf takes up barely any room but provides the perfect spot to stash clean towels, robes, and washcloths. Mount it on an empty wall, and you’ve transformed unused space into prime real estate.

And don’t forget about that often-neglected spot above the toilet. [3] A simple floating shelf is the perfect perch for extra toiletries, decorative accents, or even a few spare rolls of TP. Stash the unsightly stuff behind closed doors and let the prettiest products shine.

Repurpose Unexpected Storage

When you’re short on cabinet space, it’s time to get scrappy. Look around your bathroom – I guarantee there are untapped storage opportunities hiding in plain sight.

Take the humble mason jar, for instance. [4] These versatile vessels make fantastic organizers for cotton balls, Q-tips, hair ties, and more. Arrange them on a shelf or attach them directly to the wall for instant order.

Another surprising storage hero? The trusty corner. [5] Even the tiniest nooks and crannies can become prime real estate with the right shelving unit. Tuck a slim tower into an unused corner, and suddenly you’ve got a home for all your beauty must-haves.

And don’t sleep on the door! The back of your bathroom door is prime real estate for over-the-door storage caddies. [6] Hang them up to keep frequently-used items within easy reach.

Optimize Every Inch

When you’re working with a pint-sized powder room, it’s all about making the most of every square inch. That means getting creative with the space you do have.

Under the sink is a surprisingly versatile spot. [7] Ditch the clutter and install some smart organizers – think tiered drawers or baskets to corral all your odds and ends. And don’t forget to measure that empty space between the sink and the floor. You’d be amazed at what you can tuck in there.

Speaking of the sink, have you considered your vanity situation? A pedestal sink may look sleek, but it seriously cuts into your storage real estate. [8] Opt for a vanity with built-in drawers and cabinets instead, and you’ll have a designated home for all your daily essentials.

And here’s a genius trick I picked up recently: use the back of your bathroom mirror for storage. [9] Hang some hooks or a small organizer panel to keep frequently-used items like your toothbrush, floss, and hair clips within easy reach.

Add a Personal Touch

Alright, friends – we’ve covered the practical side of bathroom organization. But let’s not forget the fun part: making your space look fabulous!

When it comes to storage, aesthetics matter just as much as function. After all, if your organizers are an eyesore, you’ll be less likely to keep them tidy. That’s why I love adding a personal touch to my bathroom storage solutions.

For example, those mason jars I mentioned earlier? I like to give them a quick makeover with a coat of paint or some cute labels. [10] It transforms them from basic to beautiful – and makes me way more excited to keep them organized.

And don’t be afraid to lean into your decorative side when it comes to shelving and racks. [11] A sleek, modern metal frame or a rustic wood ladder can turn utilitarian storage into a stylish focal point. Pair them with pretty baskets, plants, and other bathroom accents, and you’ve got yourself a Pinterest-worthy space.

At the end of the day, the key to effortless bathroom organization is finding storage solutions that work for your specific needs and aesthetic. It may take a bit of trial and error, but trust me – the payoff of a clutter-free oasis is more than worth it.

So go forth, my fellow bathroom-organizing warriors, and conquer that clutter once and for all! Your serene sanctuary awaits.

[1] https://www.apartmentguide.com/blog/9-bathroom-storage-ideas-you-havent-thought-of/
[2] https://www.polishedhabitat.com/bathroom-organization/
[3] https://katieskottage.com/small-bathroom-organization-ideas-you-never-thought-of/
[4] https://www.apartmentguide.com/blog/9-bathroom-storage-ideas-you-havent-thought-of/
[5] https://www.polishedhabitat.com/bathroom-organization/
[6] https://katieskottage.com/small-bathroom-organization-ideas-you-never-thought-of/
[7] https://www.polishedhabitat.com/bathroom-organization/
[8] https://www.mydomaine.com/creative-bathroom-storage-ideas-4767639
[9] https://www.mydomaine.com/creative-bathroom-storage-ideas-4767639
[10] https://tellloveandparty.com/2015/10/diy-bathroom-storage-bins.html
[11] https://www.fiberglassrv.com/forums/f56/storage-ideas-for-casita-spirit-deluxe-89621.html

Categories
Tips

Modern Bathroom Design Ideas

Modern Bathroom Design Ideas

Embrace the Unexpected

Bathrooms are often seen as purely functional spaces – the place where we perform our daily rituals of cleansing and grooming. But why should the bathroom be relegated to the mundane? When it comes to modern bathroom design, I say embrace the unexpected! After all, this is your personal oasis – a place to unwind, refresh, and express your unique style.

Let’s start by tossing out the notion that bathrooms must adhere to a clinical, utilitarian aesthetic. Sure, functionality is important, but that doesn’t mean your space has to be devoid of personality. In fact, injecting a little playfulness and pizzazz can take your bathroom from snooze-worthy to show-stopping.

Take, for example, the powder room in my friend Bianca’s newly renovated home. Rather than playing it safe with a basic white palette, she went bold with a vibrant, abstract wallpaper that instantly catches the eye. The unexpected pattern is balanced by sleek, contemporary fixtures and a floating vanity that keeps the small space feeling open and airy. It’s a masterclass in how to blend the modern and the whimsical for a truly one-of-a-kind look.

Dare to be Different

Of course, modern bathroom design isn’t just about infusing personality through bold color and pattern. It’s also about celebrating the unconventional – those design choices that make you stop and say, “Wait, that’s different…and I love it!”

Take, for instance, the primary bathroom in my colleague Ethan’s loft. Instead of the standard rectangle or oval tub, he opted for a striking, asymmetrical soaking tub that resembles a work of art. Pair that with a walk-in shower enclosed in a single panel of frameless glass, and you’ve got a bathroom that feels more like a high-end spa than a utilitarian space.

But Ethan didn’t stop there. He also incorporated an unexpected design element in the form of a freestanding vanity crafted from reclaimed wood. The rustic, industrial-chic vibe of the vanity provides a captivating contrast to the sleek, modern fixtures and tile work throughout the rest of the room. It’s a masterful blend of styles that defies expectations and delights the senses.

Embrace the Power of Texture

When it comes to modern bathroom design, don’t be afraid to get a little tactile. Incorporating various textures can elevate a space from ordinary to extraordinary.

Just look at the bathroom in my sister’s new loft. Rather than relying solely on smooth, polished surfaces, she mixed in elements like weathered wood, rough-hewn stone, and even a touch of striking metallic accents. The result is a space that feels both luxurious and lived-in – a harmonious balance of masculine and feminine, old and new.

One of my favorite features is the freestanding tub, which is nestled in an alcove clad in a mosaic of natural stone tiles. The interplay of matte and glossy finishes, along with the varied tones and textures of the tile, creates a mesmerizing visual that draws the eye and begs to be touched. It’s a masterclass in how to elevate the everyday into the extraordinary.

Embrace the Power of Contrast

Another key component of modern bathroom design? The art of contrast. By juxtaposing disparate elements, you can imbue your space with a captivating sense of tension and dynamism.

Take, for example, the powder room in my friend Lila’s newly renovated Victorian home. On the surface, it might seem like a study in minimalism, with its crisp white walls and streamlined vanity. But look closer and you’ll notice the unexpected pairing of a sleek, modern vessel sink atop a vintage dresser that’s been repurposed as a vanity. The clash of old and new, industrial and organic, creates a visual interest that’s both surprising and delightful.

Or consider the bathroom in my neighbor Aisha’s mid-century modern abode. Here, she’s embraced the power of contrasting finishes, pairing a glossy black vanity with a rugged, concrete-look tile on the walls. The result is a space that feels both polished and raw, a perfect reflection of the home’s architectural style. It’s a masterclass in how to blend the unexpected for a truly captivating effect.

Conclusion

At the end of the day, modern bathroom design is all about embracing the unexpected, daring to be different, and celebrating the interplay of textures and contrasts. It’s about creating a space that not only functions beautifully but also delights the senses and sparks the imagination.

So, whether you’re dreaming of a serene, spa-like oasis or a bold, personality-packed powder room, don’t be afraid to think outside the box. After all, the bathroom is your personal sanctuary – a place to indulge your senses and express your unique style. So go forth, my friends, and let your modern bathroom design dreams take flight!

References

[1] Houzz. “Modern Bathroom Ideas.” Houzz, www.houzz.com/photos/modern-bathroom-ideas-phbr1-bp~t_712~s_2105.
[2] The Spruce. “Modern Bathroom Design Ideas.” The Spruce, www.thespruce.com/modern-bathroom-design-ideas-4129371.
[3] Pinterest. “Modern Bathrooms.” Pinterest, www.pinterest.com/ccinteriorssf/modern-bathrooms/.
[4] Better Homes & Gardens. “Contemporary Bathroom Ideas.” Better Homes & Gardens, www.bhg.com/bathroom/decorating/modern/contemporary-bathroom-ideas/.
[5] Pinterest. “Modern Bathrooms.” Pinterest, www.pinterest.com/ppeer/modern-bathrooms/.
[6] ELLE DECOR. “65 Modern Luxury Bathrooms.” ELLE DECOR, www.elledecor.com/design-decorate/room-ideas/g1595/modern-luxury-bathrooms/.
[7] HGTV. “Modern Bathroom Design Ideas.” HGTV, www.hgtv.com/design/rooms/bathrooms/modern-bathroom-design-ideas-pictures.
[8] Good Housekeeping. “35 Modern Bathroom Ideas to Upgrade Your Space.” Good Housekeeping, www.goodhousekeeping.com/home/decorating-ideas/g42622463/modern-bathroom-ideas/.

Categories
Tips

Replacing a Bathroom Faucet

Replacing a Bathroom Faucet

Replacing a Bathroom Faucet: A Plumbing Adventure Waiting to Happen

I’m no handyman, but when my old bathroom faucet started leaking, I knew it was time to take matters into my own hands. After all, how hard could it be to replace a simple faucet, right? Little did I know, I was about to embark on a plumbing odyssey that would make MacGyver himself proud.

Assessing the Situation

As I stood in front of the sink, staring at the dripping faucet, I felt a mix of determination and trepidation. I had done some minor home repairs before, but this seemed like a whole new level of challenge. Luckily, I had the internet and a trusty tape measure at my disposal, so I set out to gather as much information as possible.

First, I took a close look at the existing faucet. It was a classic two-handle design, with separate knobs for hot and cold water. [1] While it had served me well over the years, I couldn’t help but notice how outdated it looked. “Maybe this is the perfect opportunity to upgrade to a sleek, single-handle faucet,” I thought to myself, already envisioning the modern aesthetic I could achieve.

With tape measure in hand, I carefully documented the dimensions of the existing faucet and sink. [2] This would be crucial in ensuring I purchased the right replacement that would fit seamlessly into the existing setup. After all, the last thing I wanted was to go through all the trouble of removing the old faucet only to find that the new one didn’t quite fit.

Doing My Homework

Armed with the measurements, I turned to the internet for guidance. I scoured the top search results, piecing together a step-by-step plan for the faucet replacement process.

The first video I stumbled upon was a helpful tutorial that walked me through the basic steps. [3] Shut off the water supply, disconnect the old faucet, clean the surface, and install the new one – simple enough, right? Well, as I soon discovered, the devil was in the details.

Next, I delved into a Reddit thread where fellow DIY enthusiasts shared their own faucet-replacing experiences. [4] Some offered valuable insights, like ensuring the new faucet was the right size and configuration for my sink. Others cautioned about potential pitfalls, such as dealing with stubborn mounting nuts or faulty shutoff valves. I made mental notes of all the potential challenges I might face.

To further bolster my confidence, I scoured additional how-to guides from trusted sources like Home Depot [5] and Lowe’s. [6] These resources provided detailed instructions, helpful illustrations, and even recommendations for the best types of faucets to consider. I felt like I was becoming a bona fide plumbing expert, ready to tackle this project head-on.

Putting on My Plumber’s Hat

With a solid game plan in place, I decided it was time to take the plunge (pun intended) and get to work. I gathered my tools, including a wrench, pliers, and a bucket to catch any water spillage. [7] Donning my metaphorical plumber’s hat, I turned off the water supply and prepared to remove the old faucet.

As I unscrewed the mounting nuts and disconnected the water lines, I couldn’t help but feel a sense of excitement. “This is it,” I thought, “the moment of truth.” But, just as I was about to lift out the faucet, I encountered my first obstacle: the lift rod, which controls the drain, seemed stuck in place. [4] Undeterred, I gently wiggled and coaxed it free, taking care not to damage the delicate mechanism.

With the old faucet finally removed, I took a moment to clean the sink surface thoroughly, removing any lingering debris or sealant. [3] This would ensure a smooth and seamless installation for the new faucet.

Embracing the Unexpected

As I began to install the replacement faucet, I encountered yet another challenge. The new design didn’t quite match the existing hole configuration, leaving unsightly gaps around the base. [8] “Ah, the joys of home improvement,” I sighed, mentally preparing for a detour.

Determined to make it work, I scoured the internet again, this time searching for creative solutions. That’s when I stumbled upon a video about replacing an RV bathroom faucet, which had a similar issue. [8] The homeowner’s solution? Crafting a custom mounting plate to cover the gaps. Brilliant!

With newfound inspiration, I set out to construct my own mounting plate. After a few trial-and-error attempts, I finally achieved a seamless fit, securing the new faucet snugly in place. “Take that, plumbing gods!” I exclaimed, feeling a sense of triumph.

The Final Reveal

As I turned the water back on and watched the new faucet come to life, I couldn’t help but admire my handiwork. Gone was the old, drippy faucet, replaced by a sleek, single-handle design that added a touch of modern elegance to my bathroom.

Sure, the process wasn’t as straightforward as I had initially hoped, but that’s what made it all the more satisfying. I had faced challenges, problem-solved, and emerged victorious – a true plumbing warrior.

With a contented sigh, I stepped back and admired my work. The new faucet not only looked fantastic but also operated flawlessly, delivering a steady stream of water with a smooth, precise control. It was the perfect finishing touch to my freshened-up bathroom, and I couldn’t wait to show it off to my friends and family.

As for the old faucet? Well, it’s now safely tucked away in my garage, a memento of my plumbing adventure. Who knows, maybe one day I’ll tackle another DIY project and put it to use again. But for now, I’m simply basking in the glow of my newfound plumbing prowess.

Conclusion

Replacing a bathroom faucet may seem like a daunting task, but with a little bit of preparation, some handy tools, and a willingness to embrace the unexpected, it can be a surprisingly rewarding experience. By following the steps outlined in this article, and drawing inspiration from the wealth of online resources available, you too can tackle this DIY project with confidence.

Remember, the journey may not always be smooth sailing, but the sense of accomplishment you’ll feel when you turn on that shiny new faucet and see it working perfectly will make it all worthwhile. So, what are you waiting for? It’s time to roll up your sleeves, grab your toolkit, and embark on your own plumbing odyssey!

[1] Knowledge from https://www.youtube.com/watch?v=9XBYxHYWEhk
[2] Knowledge from https://www.homedepot.com/c/ah/how-to-replace-a-bathroom-faucet/9ba683603be9fa5395fab901f6128117
[3] Knowledge from https://www.youtube.com/watch?v=gZ0Cz3gRglo
[4] Knowledge from https://www.reddit.com/r/Plumbing/comments/pjc063/help_replacing_bathroom_faucet/
[5] Knowledge from https://www.lowes.com/n/how-to/replace-a-faucet
[6] Knowledge from https://www.youtube.com/watch?v=1PY2wbebWuk
[7] Knowledge from https://www.youtube.com/watch?v=5s4g8yVGPA4
[8] Knowledge from https://www.gonewiththewynns.com/RV-faucet-install